Last Updated September 17, 2026
Queen rearing comes down to three controllable things: very young larvae, a dense population of well-fed nurse bees to flood those larvae with royal jelly, and a calendar you actually follow — a queen goes from egg to emergence in about 16 days, and every method below is just a different way of arranging bees around that timeline. Whether you keep three hives or thirty, you can raise a handful of good queens with a nuc box and a few dollars of equipment, or scale to dozens with a cell builder and a grafting tool.
This guide is written for U.S. beekeepers. It covers the biology that decides success, the season when cell builders produce their best output, and every practical route: walk-away splits, double-screen setups, grafting, cell builders (starter/finisher, Cloake board, Ben Harden), and the graft-free Hopkins method. It then works through mating nucs, judging queen quality, troubleshooting, and how U.S. geography changes the timing.
Key Takeaways
- Match method to scale: walk-away splits for one or two queens with no special gear; grafting into a cell builder when you want ten or more at once.
- The queen’s development runs about 16 days from the egg (capped around day 8–9); counted from grafting a day-old larva, cells cap around day 4 and queens emerge on day 11–12.
- Cell builders do their best work in a spring flow: Penn State Extension’s figure is 100+ queens per builder in a May flow versus 15–20 in a September dearth.
- Nurse bees and their royal jelly, not genetics alone, set queen quality — concentrate young nurses, pollen, and stores around the cells.
- Read the colony’s signals — supersedure, swarm, or emergency cells — to know which pathway it is on before you intervene.
- Watch mating weather, keep spare cells, and rear only from healthy, stable colonies so you are not spreading mites along with genetics.
Table of Contents
- Why rear your own queens
- Why and when colonies raise new queens
- Queen biology, development days, and timing
- Season and timing in the United States
- Tools and setup
- Walk-away splits
- Double-screen setups
- Step-by-step grafting
- Cell builders: starters, finishers, Cloake board, and Ben Harden
- No-graft option: the Hopkins method
- Handling ripe queen cells and mating nucs
- Assessing queen quality
- A practical calendar from egg to laying queen
- Troubleshooting
- U.S. conditions: geography and swarming
- Frequently Asked Questions
Why rear your own queens
Producing queens at home lets you match your hives to local nectar flows, weather, and disease pressure. Queens raised from a colony that overwintered well in your county carry the traits you actually want more of — temperament, honey yield, mite tolerance — and you avoid the shipping delays and sold-out spring lists that plague purchased queens.
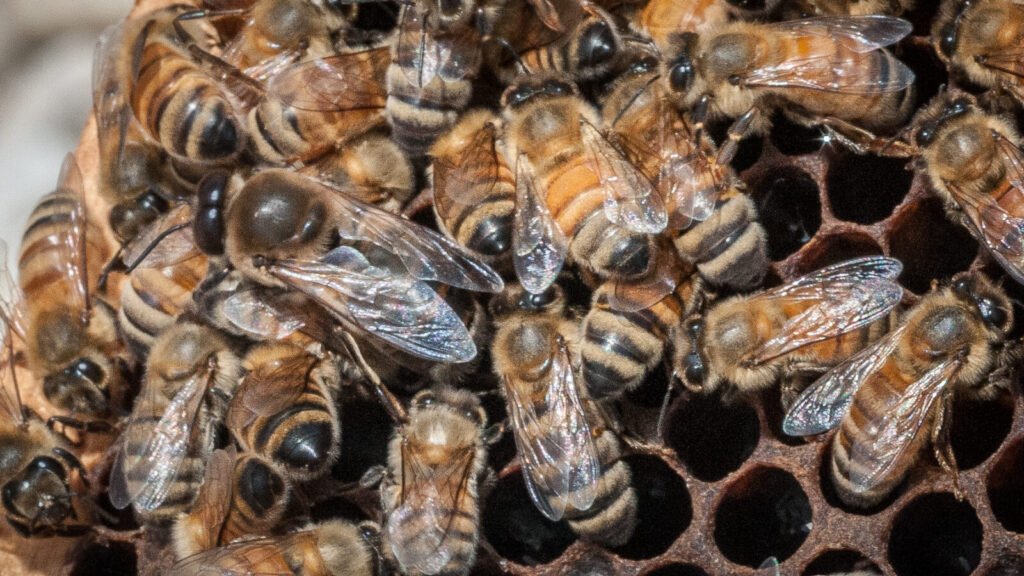
The practical benefits are a dependable supply of replacements timed to splits, requeening, or recovery after a loss, and a large drop in long-term cost. A few tools and one cell builder replace years of repeat purchases.
| Benefit | Why it helps | Practical result |
|---|---|---|
| Local genetics | Matches regional flows and winters | Better overwinter survival |
| Supply control | No dependence on vendor timing | Queens ready when a split or requeen is due |
| Cost savings | Fewer repeat purchases | Improved apiary economics |
| Risk reduction | Spare cells on hand | Fast recovery from queen loss or swarming |
Treat this as a core skill, not an elite one. Start with a handful of cells and scale as confidence grows. If you eventually want to select for specific traits over several generations, our guide to starting a queen breeding program picks up where this article ends.
Why and when colonies raise new queens
Colony decisions to produce a replacement hinge on a few triggers you can spot. Supersedure, swarming, and sudden loss each produce different signals in brood, cups, and worker behavior.
Brandon’s Bees walks through practical steps for raising strong queens this season — a hands-on companion to the triggers and methods covered below.
Supersedure and gradual replacement
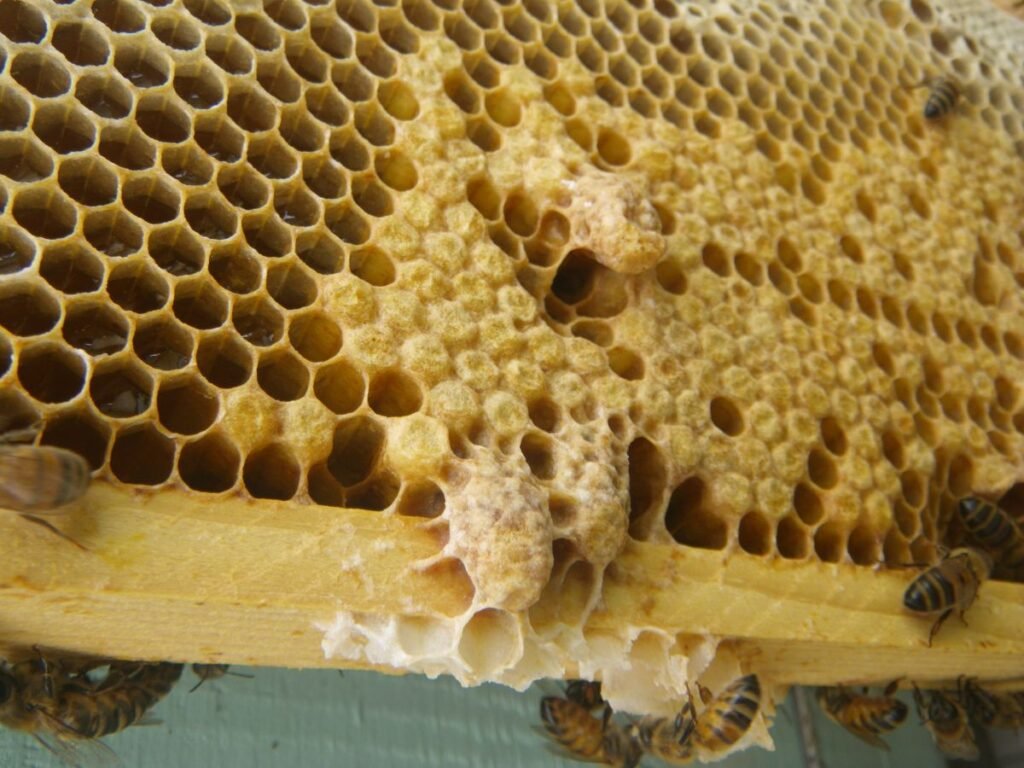
A failing queen shows spotty brood and a drop in pheromone spread. Workers then build supersedure cells, usually on the face of the comb rather than along the bottom bars. This lets the colony raise a new queen without losing foragers or interrupting the brood cycle.
Swarm triggers and early signs
Overcrowding and brood-nest congestion lower pheromone distribution. Watch for a surge in queen cups and the start of swarm cells near the bottom bars. A cluster of capped swarm cells usually means a swarm is imminent, and the parent colony will have left before the first virgin emerges. Space management ahead of the flow is the fix — see how to prevent swarming.
Emergency rearing after queen loss
When a hive loses its queen, pheromones fall fast and workers become agitated. They select very young larvae and feed them exclusively royal jelly. Most emergency cells appear within two days; a queenless colony may start around 20 and rear 12–15 to adulthood.
Tip: remove capped swarm cells with caution — doing so can cut off the colony’s only path to a replacement queen.
Read the brood pattern, check for eggs in cups, and note worker behavior to tell which pathway the colony is on. Keep inspections every 7–14 days during spring buildup and log dates and cell counts to predict emergence days. Also verify brood health — diseases can mimic queen failure and change your approach. For a practical inspection schedule and seasonal task list, see the seasonal inspection cadence.
Queen biology, development days, and timing
Precise timing of the egg, larval, and pupal stages determines when to graft, move cells, or stock mating nucs. Queens reach adulthood in about 16 days from the egg, while workers take about 21 and drones about 24.
Egg-to-emergence timeline
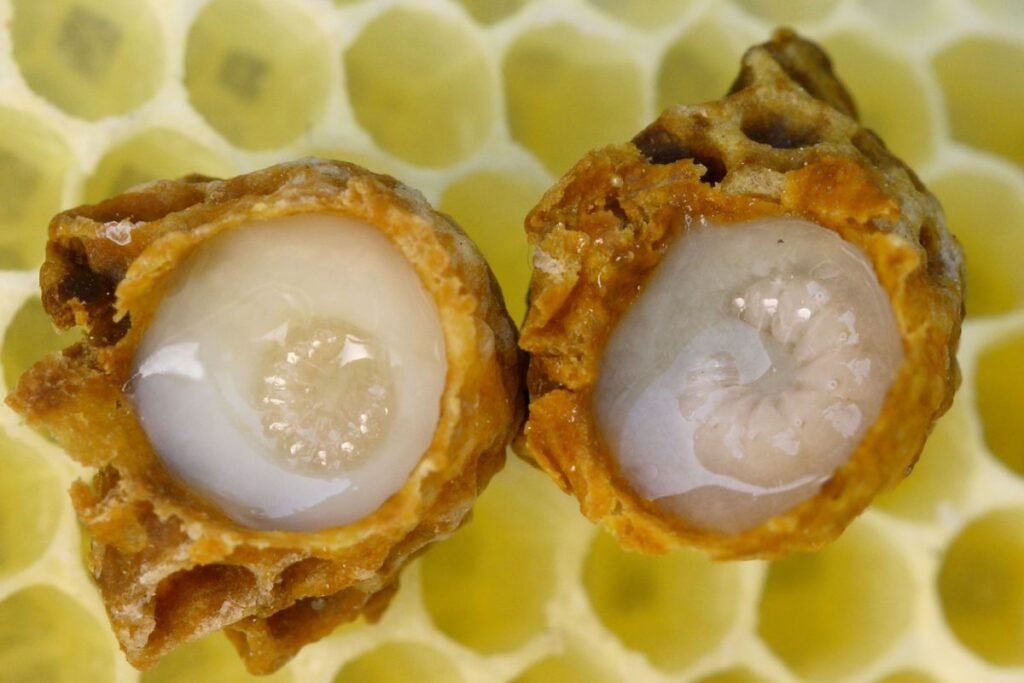
Eggs incubate about 3 days. Larvae destined to be queens receive royal jelly exclusively, cells are capped around day 8–9, and adults emerge on day 16. Those markers set the grafting day, the finisher checks, and the day cells go into mating nucs so virgins emerge with nurses and drones available.
Nurse bees and the first 72 hours
Any young fertilized larva can become a queen; what decides caste is diet. Exclusive royal jelly raises juvenile hormone by the third larval day and fixes queen development. Most of that provisioning happens in the first two to three days after grafting, so grafts must sit where nurse bees are densest. That is why every method in this article is really a way of concentrating young nurses, pollen, and stores around a small number of larvae.
- Choose the youngest larvae you can see — the younger the larva, the more of its development happens on a queen diet.
- Arrange frames so nurse traffic funnels to your target cells and remove competing open brood nearby.
- Keep continuous resources — light syrup and fresh pollen — so the colony does not throttle royal jelly production during the critical window.
Mating window, drones, and weather
Most new queens begin mating flights 5–6 days after emergence. Expect 1–5 flights over 2–4 days on calm afternoons. Typical mating involves roughly 7–17 drones over multiple flights; research on colony-level effects of mating number (polyandry) has found real benefits to higher drone counts, including better disease resistance and more efficient brood rearing, so more effective matings is generally better rather than tapering off after a fixed number. The full sequence is laid out in our guide to the virgin queen mating-flight timeline.
- Weather matters: cold, wind, or rain can delay mating; keep reserve cells or spare queens ready.
- Success signs: eggs and concentric brood patterns appear within 7–10 days after mating; otherwise re-evaluate.
For a deeper primer on bee biology and larval nutrition, the University of Arkansas Extension’s Basic Beekeeping: Bee Biology module is a good free reference.
Season and timing in the United States: when bees build the best queen cells
In most U.S. climates the late-spring to early-summer window gives the highest output of quality queen cells, because that is when nurse bees are physiologically best equipped to produce royal jelly and when pollen and nectar are both abundant. Penn State Extension’s cell-builder guidance puts numbers on the difference:
“During a May nectar flow, it is possible to rear 100 or more queens in a single cell builder. In a September dearth, it is challenging to rear more than 15 or 20 queens.”
The same source notes that the hypopharyngeal glands of spring nurse bees are larger and more productive than those of fall bees. In practice that means grafting in May and early June, staggering batches to cover poor-weather weeks, and lowering your targets sharply if you rear in a dearth.
| Season | Typical output per builder | Key constraint | Management tip |
|---|---|---|---|
| Late spring (May) | High (50–100+) | Requires peak nurse physiology and a flow | Use a strong builder and fresh frames of young brood |
| Early summer | Moderate (30–60) | Variable by regional flow | Time grafts to local flows; feed if nectar stalls |
| Fall (September) | Low (15–20) | Worker physiology shifting toward winter | Limit targets; avoid over-ambitious batches |
Tools and setup: frames, cell cups, grafting tools, nucs, and a brood box
A compact, well-organized kit makes the difference between a fumbled graft and a high take rate. Stage everything before you open a hive: a brood box with bottom board and cover for the cell builder, a syrup feeder if nectar is light, and nucs ready for mating.
Essential kit for grafting and non-grafting methods
Use dark, older frames when working with larvae; the rounded cell bottoms make it far easier to scoop a young larva with its jelly intact. Have a Chinese grafting tool, plastic cell cups on a cell bar, a lighted magnifying headband, and a damp towel to keep larvae moist during transfers. Randy Oliver’s low-cost method is explicit about the comb:
“Do not try to graft from a frame that is not darkened from several generations of brood—otherwise the bottoms of the cells will not be rounded enough for the use of a Chinese grafting tool.”
- Kit checklist: brood box, bottom board, cover, cell cups and bar, grafting tool, magnifier, damp towel, cell protectors, and queenless nucs ready for mating.
- For no-graft methods, add a frame support or eke for the Hopkins method, or a cell-punch tool.
- Stage items to reduce time with open brood — move quickly from donor frame to cups to the cell builder.
Feeding strategy: syrup, pollen, and managing a dearth
When there is no flow, offer small daily amounts of 1:1 syrup and fresh pollen or patties. Keep quantities modest to avoid burr comb between cell cups while still sustaining the nurses’ gland activity. Prepare nucs in advance so they are queenless and ready when cells are ripe.
| Item | Purpose | Practical tip |
|---|---|---|
| Dark brood frame | Easier grafting, protects larvae | Choose older comb with rounded cell bottoms |
| Cell cups and grafting tool | Transfer larvae safely | Work quickly; keep transfers moist with a damp towel |
| Brood box and bottom board | Stand-alone cell builder | Set frame positions for open brood and pollen |
| Nucs | Mate-out units | Four frames in a five-frame box, queenless in advance |
Walk-away splits as a how-to method to raise a new queen
A walk-away split shifts brood, stores, and nurses into a fresh box so the colony raises its own replacement with minimal intervention. This low-input approach works well during strong spring flows and when you want one or two queens without grafting.
Building the split: brood, pollen, honey, and nurse bees
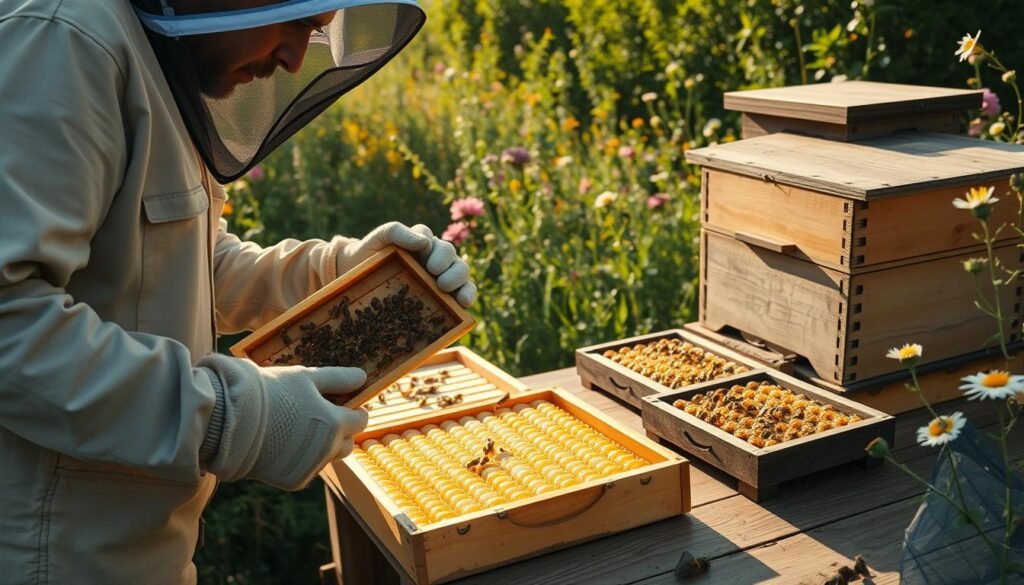
Assemble a robust split with at least one frame of eggs and very young larvae, plus frames of open and capped brood, pollen, and honey. Back these with abundant nurse bees to keep brood temperature and feed developing cells.
Handling swarm cells vs. supersedure cells
Read cells carefully. Move the largest, most stippled swarm cell into the split and cull or redistribute extra cells to prevent multiple virgins fighting. Bottom-bar cells typically indicate swarm intent; cells higher on the face of the comb usually mean replacement.
Banking extra queen cells for later use
If extra cells exist, place them in small cages inside a queenless, nurse-rich, open-brood “bank” box. That bank holds cells until you need more splits.
- Add a frame of fresh eggs when no cell is available so workers can raise a queen from larvae 4–20 hours old; expect eggs from her roughly day 23 from the egg.
- Seed the split with open brood periodically to prevent laying workers and keep pheromones active.
- Close entrances before transport, ventilate, and consider relocating splits 2+ miles to reduce drifting back to the parent hive.
Inspect promptly to confirm eggs; if the new queen fails, recover by adding eggs, recombining by the newspaper method, or introducing a mated replacement. Any split also resets your mite math — see varroa management for splits and requeened colonies.
Double-screen setups for swarm control and queen rearing
A double screen creates a semi-isolated upper unit that encourages care for developing cells while limiting conflict with the original colony below. The screen blocks pheromone exchange but lets warmth rise, so the upper box works as a test unit without a full separation.
Entrance orientation, nurse support, and recombining
Face the top entrance opposite the lower hive. This orientation encourages nurse bees to drift into the upper box to feed brood and tend a virgin during mating flights. Build checklist for the upper box: one frame with fresh eggs, one or two with capped brood, one with honey, nurse-heavy frames, and supplemental feed if nectar is light.
Decision flow: if eggs appear after the expected mating window, move the upper box off as a new colony. If not, remove the screen to recombine and keep foragers and honey production intact.
| Goal | Top box setup | Inspection cue |
|---|---|---|
| Test a virgin | Brood, honey, nurse frames, opposite entrance | Eggs appear within 7–10 days after mating |
| Reduce swarm pressure | Small split on the double screen, fewer swarm cells below | Calm brood care vs. agitated, noisy workers |
| Quick recombine | Remove screen, reunite frames by newspaper method | Restored pheromone balance and resumed honey flow |
Step-by-step grafting method for raising multiple queens

Grafting offers a predictable, scalable route to many viable queens when timing and nurse support align.
Selecting larvae and preparing cups
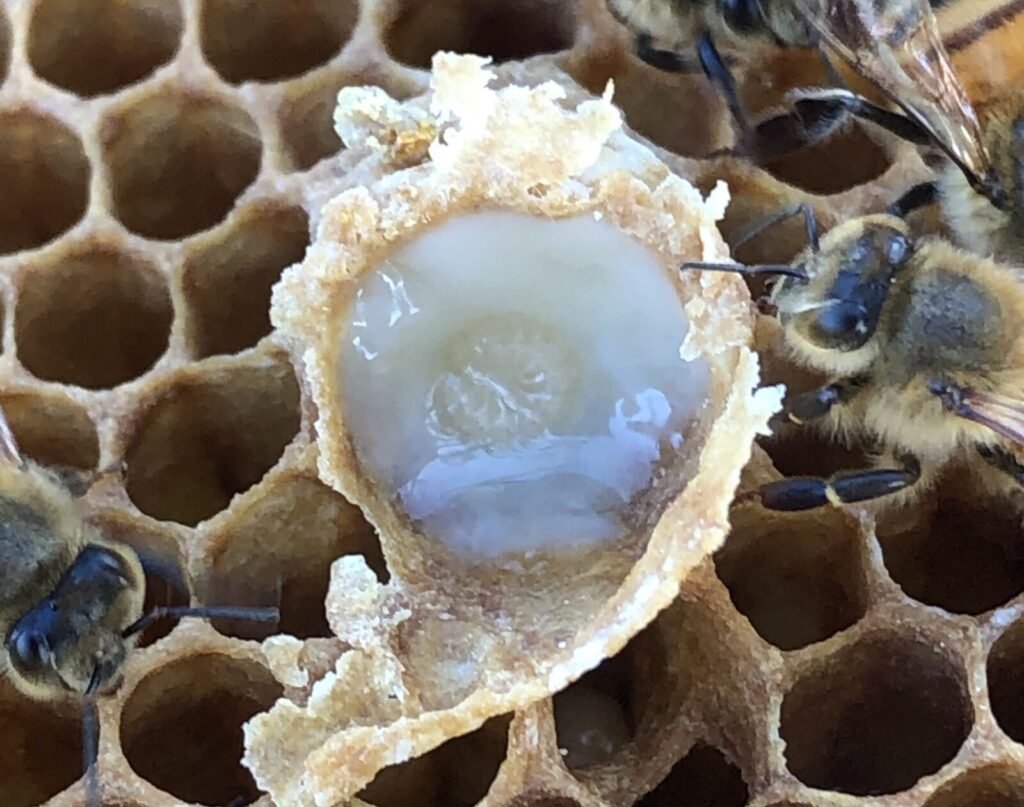
Confine the breeder queen to one dark frame on day 1 to concentrate eggs. On day 4 (three days later), graft larvae that are 4–20 hours old and barely curved. Use a lighted magnifier and a Chinese grafting tool to lift each larva with its small spoon of royal jelly into a cell cup spaced about ¾ inch apart on the bar.
Keep the process quick and gentle
Work in a shaded or darkened space, keep the donor frame wrapped in a damp towel, and handle cups gently. Load cups face-down onto the damp towel between grafts and return the bar to a warm cell builder within minutes. Check acceptance a day later by looking into the clear cup base for a pool of jelly — that shows nurses have started heavy feeding.
- Inspect builders for rogue cells and remove any older started cells before grafting.
- Keep graft bars warm, shaded, and covered; return donor frames promptly.
- Rear more cells than you need — acceptance and mating success vary, so extras protect your numbers.
Penn State’s step-by-step page on queen cell production by grafting and graft-free methods is the best free illustrated reference for the hand technique.
Cell builders: starters, finishers, Cloake board, and Ben Harden
A cell builder is simply a colony arranged to do one job: initiate and provision queen cells. The two jobs — starting cells and finishing them — happen best in different states, so most systems separate them.
A simple queenless cell builder for a first batch
The lowest-cost route is a single queenless builder. Select a robust donor colony and set its queen aside on a frame in another box. Shake bees from several brood frames into a separate brood box a few feet away so older foragers return home and the young nurse bees stay. Arrange a center frame of open brood and very young larvae, flank it with pollen and honey frames, and leave a channel for the cell bar. After a few hours of queenlessness, insert the grafted cups. Feed light 1:1 syrup if there is no flow, reduce the entrance, and keep smoke to a minimum so the nurses stay clustered on the cells.
Randy Oliver’s “Queens for Pennies” workflow is built around exactly this setup, and its timing is the one most small-scale U.S. beekeepers use: cells are capped by about day 4 after grafting, queenless mating nucs are made up on day 9, and queens emerge on day 11 or 12. Starting with a batch of around ten cells lets you learn the handling before scaling.
Queenless starter: initiating many cells on demand
A queenless starter triggers the emergency response that makes nurses provision grafts heavily. Remove competing young larvae so grafts get the full feeding effort. Penn State’s rule of thumb is that four frames of nurse bees will generally start about 30 cells — more nurses start more cells, but match numbers to what your finisher and nucs can handle.
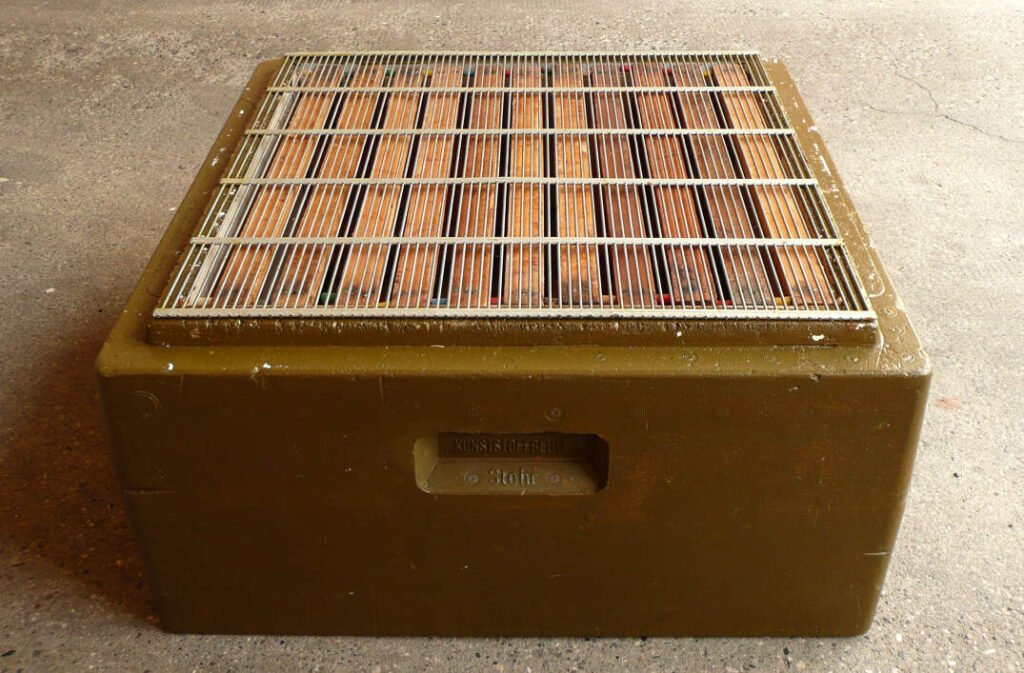
Queenright finisher with a queen excluder
After about 24 hours, move well-started cups to a queenright finisher. A queen excluder confines the laying queen below while foragers and nurses above sustain abundant jelly production. Under a strong flow a finisher can provision 100+ cells. Inspect above the excluder regularly and destroy any rogue cells so an early-emerging queen cannot harm the grafts.
Cloake board and Ben Harden: combination systems
Hybrid setups let you create a controlled emergency above while keeping steady resources below, without carrying fragile cups between boxes. The Cloake board is the classic:
“The Cloake Board system relies on a division board that acts as a queen excluder and entrance. A metal slide is used to divide two hive bodies, trapping the queen in the lower portion and creating a perceived state of queenlessness in the hive body above.”
- Install the slide 4–24 hours before grafting to induce emergency behavior, then pull it to convert the top box to a queenright finisher.
- The Ben Harden method is lighter: the queen stays below an excluder the whole time, and the cell bar sits in a small upper box packed with nurses and pollen.
- Mark cell bars by date and keep frames dedicated to cells so warmth and coverage stay consistent.
- Manage space during a flow to reduce swarm pressure in a strong finisher, and rotate builder roles across hives — finishers lose efficiency over successive rounds unless requeened or split.
| Unit | State | Key action | Practical result |
|---|---|---|---|
| Starter (queenless) | Emergency | Remove competing larvae; ~4 frames of nurse bees | ~30 started cells per batch |
| Finisher (queenright) | Abundance | Queen excluder; sustain feed and foragers | Can finish 100+ cells in a strong flow |
| Cloake board | Switchable | Slide in for starting, out for finishing | No cup handling between units |
No-graft option: the Hopkins method
Letting the bees select larvae on a flat frame removes grafting skill from the equation. A frame of eggs and very young larvae from your breeder queen is laid horizontally above the brood nest of a queenless builder on a modified eke, and nurses draw long queen cells downward from the comb face. It suits anyone who cannot or will not graft, and the results can match cup-based systems.
- Choose older, dark frames with uniform eggs and young larvae to encourage even starts.
- Control excess starts early by removing unwanted larvae or dusting them with a little powdered sugar, leaving well-spaced targets.
- Excise ripe cells with a generous collar of comb and secure them into nuc frames; move them promptly into prepared nucs near brood warmth.
The full walkthrough is in our dedicated guide to the Hopkins method.
Handling ripe queen cells and mating nucs
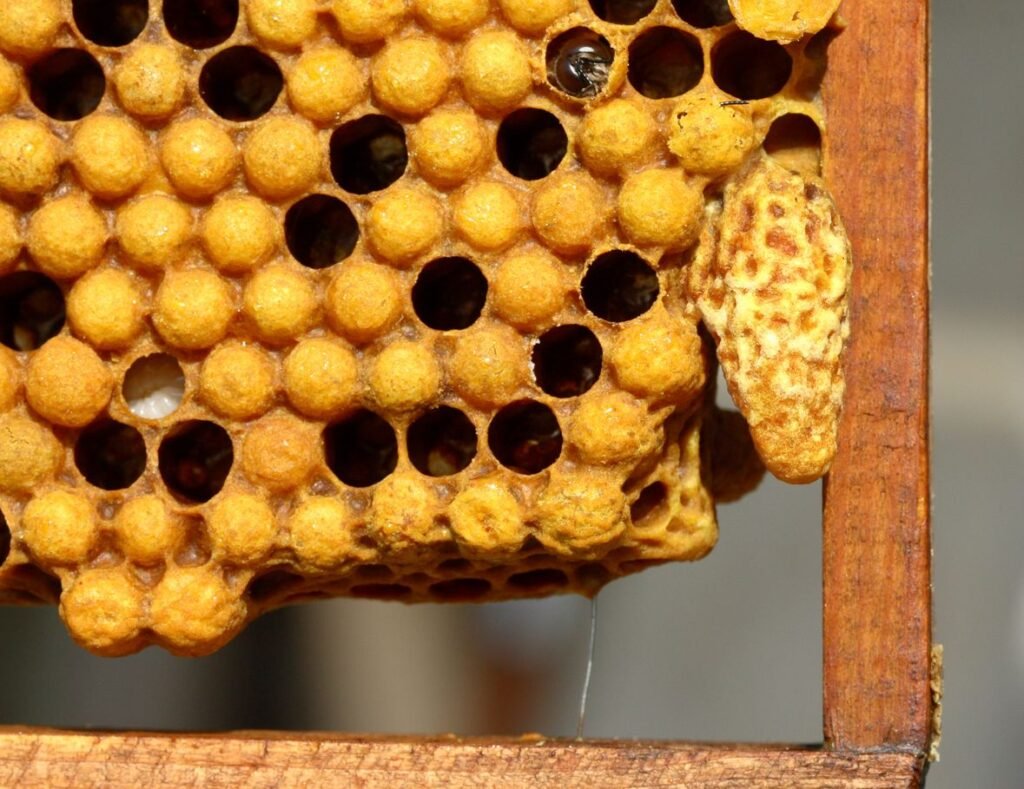
Handle ripe cells slowly and deliberately. Capped cells are fragile, and one early virgin loose in a builder will destroy every other cell. Mark dates and move cells to nucs before the emergence window.
Recognizing ripe cells and the early-emergence risk
Ripe cells show a firm, darkened cap with the tip thinned by the bees. Limit time in the builder after capping. If you need to hold capped cells — for weather, or because nucs are not ready — a portable incubator near 34–35°C (93–95°F) with humidity keeps them on schedule, and nursery cages in a queenless bank protect emerging virgins from each other.
Building mating nucs, inserting cells, and frame spacing
Make up queenless mating nucs about four frames in a five-frame box, with brood or warm drawn comb for heat and orientation, and stock them a day or two before cells are ripe. Paint the exteriors different colors and add landmarks so virgins learn their own box; stuff grass in the entrances until cells are placed, and site nucs at least 2 miles from donor hives to cut drifting.
Insert only one ripe cell per nuc, hung between frames so it sits over warm brood, and pinch the frames gently to secure it without crushing. Keep frame spacing true — too tight presses the cell, too loose chills it.
Acceptance, flight windows, and checking for eggs
Time insertions so emergence and orientation flights match good weather. Expect roughly four in five nucs to mate out under fair conditions. Check for first eggs 8–12 days after placement; in poor weather allow up to three weeks. Reduce entrances, position nucs for sun and shelter, and avoid opening them during the first critical days. If several nucs fail, consolidate their frames and bees into successful units, and record each nuc’s cell origin, insertion day, emergence, first eggs, and brood pattern.
Transferring new queens with cages
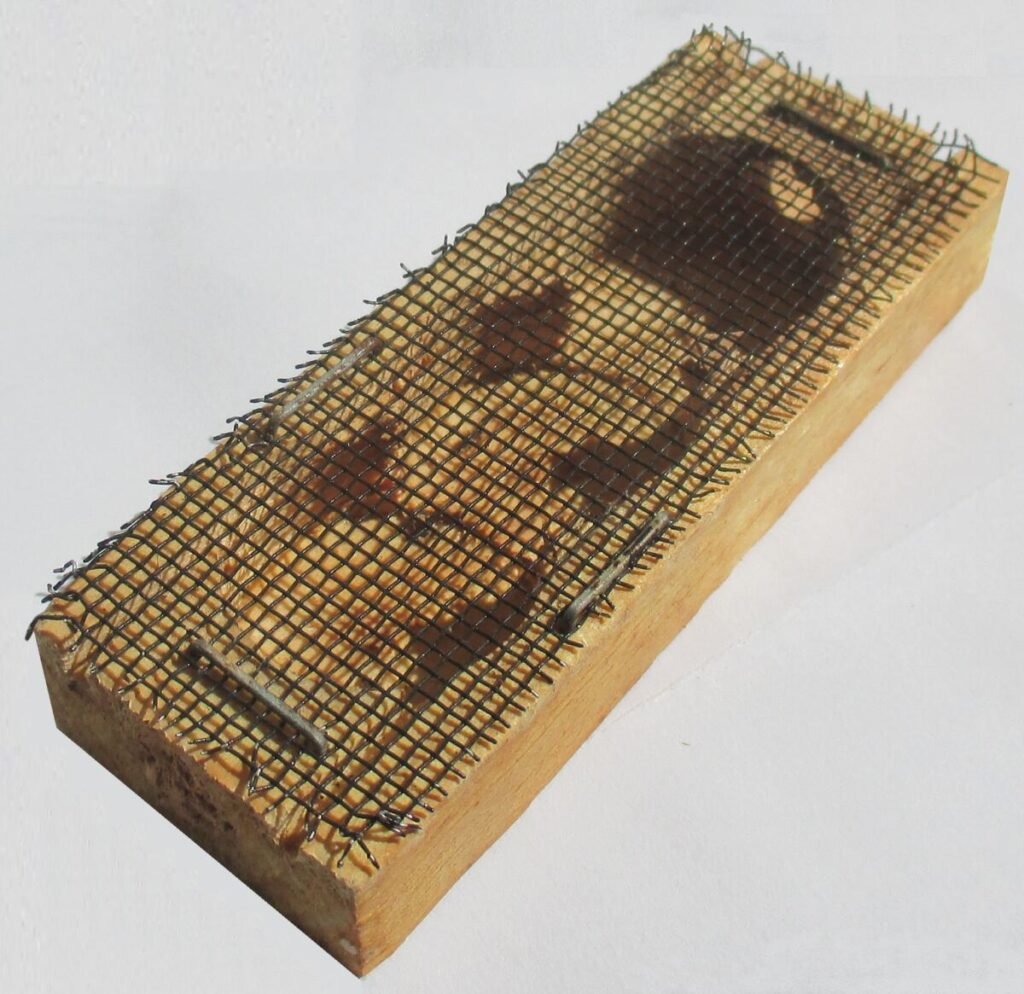
Move a proven laying queen into a queenless split by caging her, leaving the recipient queenless about 24 hours first, and releasing over two or three days. Use cell protectors, marking pens, and gentle handling to avoid damage. The introduction step is its own skill; see how to requeen a hive successfully and our comparison of queen cages for introduction.
Assessing queen quality: brood pattern, eggs, and colony behavior
A brief, well-timed check of eggs and capped cells gives an early read on a new queen. Inspect when bees are flying, typically at or above 55°F, to avoid chilling brood.
Spotting a strong laying pattern
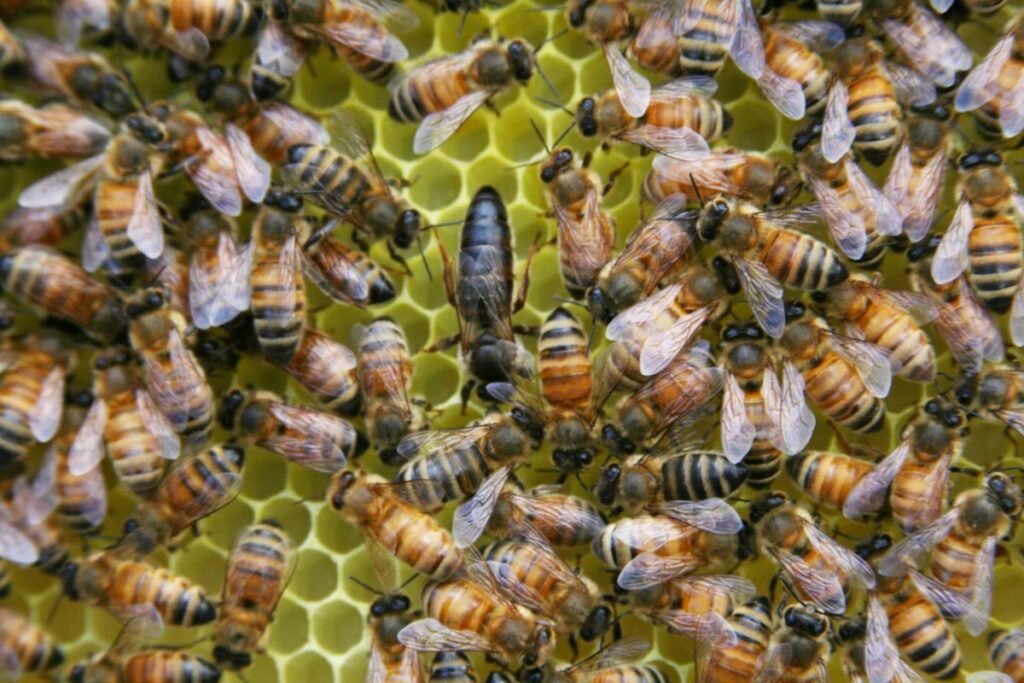
A strong pattern shows dense, concentric rings of brood with few empty cells. In season, capped brood may fill frames edge to edge; in winter, expect low brood and smaller coverage. Our guide to what a healthy brood pattern looks like has side-by-side examples.
Using adult population and nectar flow to gauge production
Match adult numbers to brood volume and local flows. A large nurse population with expanding brood signals honey potential and tells you when to add supers.
- Inspection cue: find eggs by tilting frames with the sun at your back to confirm she is laying daily.
- Disease signs: discolored larvae or punctured cappings point to disease pressure, not just a poor queen.
- Temporary dips: short dearths or cold days reduce brood for a few days — confirm over multiple inspections before requeening.
| Assessment | What to look for | Action |
|---|---|---|
| Laying pattern | Dense concentric brood, minimal empty cells | Leave queen; monitor next 10–14 days |
| Low brood in season | Sparse frames despite warm weather | Check pollen/honey stores; feed or add nurse frames |
| Discolored or punctured brood | Off-color larvae, sunken or chewed cappings | Test for disease before blaming the queen |
| Adult–brood mismatch | High adults, low open brood during a flow | Super for honey, rebalance frames, or raise extra cells cautiously |
A practical calendar from egg to laying queen
Start with a dated plan that ties each action to the queen’s biology. Two counting conventions are in common use — days from the egg, and days after grafting — and mixing them is the most common scheduling mistake. Both are shown below.
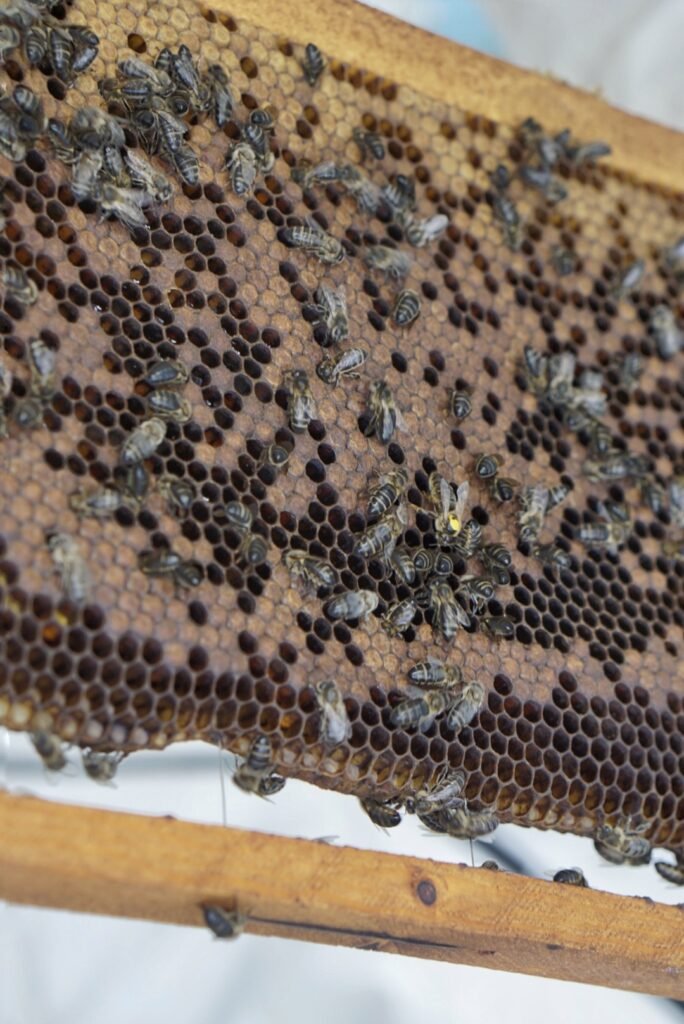
| Day from egg | Day after grafting | Event | Your action |
|---|---|---|---|
| 0 | — | Egg laid on the confined breeder frame | Confine queen to one dark frame |
| 3 | — | Egg hatches | Prepare starter; make it queenless |
| 4 | 0 | Larva 4–20 hours old | Graft (or set the Hopkins frame) |
| 5–6 | 1–2 | Heaviest royal jelly provisioning | Check acceptance; move to finisher after ~24 h |
| 8–9 | 4–5 | Cells capped | Stop handling bars; count capped cells |
| 13–14 | 9–10 | Cells ripe | Make up nucs (day 9); install one cell per nuc |
| 16 | 11–12 | Virgin emerges | Leave nucs closed and calm |
| 21–23 | 17–19 | Mating flights (weather permitting) | Do not inspect; watch the forecast |
| 23–28 | 19–24 | First eggs, then a forming pattern | Confirm laying; cage and move queens as needed |
Resource checklist before you start: frames of honey and pollen, abundant nurse bees, drawn comb or cell cups, mature drones flying in the area, cell protectors and cages, and labeled bars and boxes. Set an acceptance threshold in advance (for example, a percentage of capped cells) to decide go or no-go, and rear slightly more than you need, banking extras. The day-by-day biology is expanded in our queen cell lifecycle guide, and the seasonal beekeeping calendar helps align these dates with your local flow and drone readiness.
Troubleshooting: low acceptance, queen loss, and laying workers
When cell acceptance lags, a quick checklist of larval age, warmth, and handling usually reveals the problem.
Low take rates and thin nurse coverage
If acceptance is low, confirm you used very young larvae and avoided drying during transfers. Keep grafts warm and return frames quickly. Check that enough nurse bees cover the cups — if nurses are thin, move extra brood bees in or reduce the number of targets. In a dearth, lower your targets, feed light 1:1 syrup, and offer fresh pollen.
Diagnosing queen loss quickly
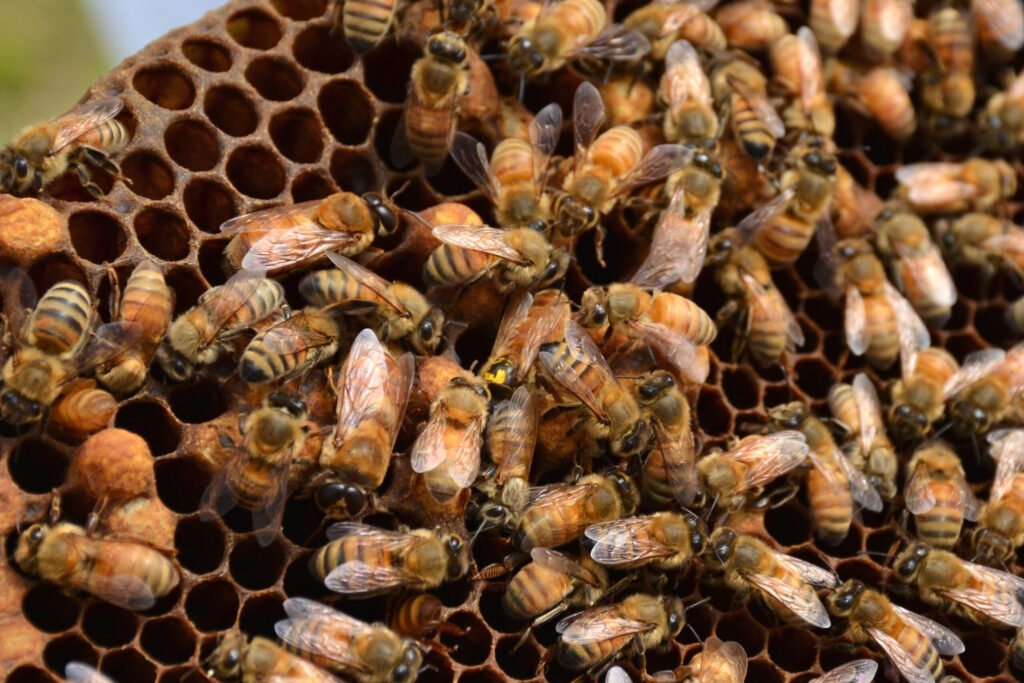
Check frames for eggs first, listen for a low roaring buzz, and scan for emergency cells. If you find zero eggs over two inspections, treat the colony as queenless and act: introduce a frame of eggs or very young larvae, recombine with a strong colony by the newspaper method, or install a purchased mated queen in an introduction cage after keeping the box queenless about 24 hours. Track the number of days since you last saw eggs — that number, more than anything else, determines the fastest safe remedy.
Recognizing laying workers and salvaging the colony
Laying workers show multiple eggs per cell, drone-only brood, and eggs on cell walls. Such colonies rarely accept a new mated queen. Salvage combs by shaking adults into a queenright hive and reuse frames after disease checks; do not destroy capped cells if they are the colony’s best short-term recovery option. The signs and the salvage options are detailed in signs of laying workers in a queenless hive, and if a new queen is being refused, why bees reject a queen covers the usual causes.
Rear only from healthy stock
Do not propagate from collapsing colonies. A colony crashing under varroa is not “survivor stock,” and when it collapses it seeds every neighboring hive with mites. Test and treat before grafting cycles, isolate new nucs briefly, and keep treatment records.
| Problem | Quick fix | Why it works | When to act |
|---|---|---|---|
| Low acceptance | Check larval age and warmth; add nurses | Young larvae + nurse coverage = higher take | As soon as a low cap count is seen |
| Too many starts (Hopkins) | Remove larvae or dust with powdered sugar | Reduces crowding; yields handleable cells | Within 24–48 hours of excess starts |
| Swarm pressure in the builder | Harvest brood frames, add space | Relieves congestion and the swarm impulse | At the first sign of congestion or queen cups |
| Rogue cells above the excluder | Inspect and remove weekly | Prevents an early virgin killing the batch | Every finisher check |
U.S. conditions: geography, swarming behavior, and honey production
Geography drives practical choices: timing, hive setup, and methods change from coast to mountains. Tailor queen work and inspections to local bloom calendars so new queens arrive before major nectar events.
Temperate, tropical, and mountainous considerations
In temperate zones, plan rearing ahead of spring flows and watch for late frosts that delay mating flights. In the Gulf states and Florida, heat and humidity call for ventilation and moisture control in nucs. In mountain regions, protect against cold snaps and short flying windows; insulate nucs and time work around warm afternoons.
Swarm prevention: space management, cell checks, and timing
Prevent swarming by adding supers ahead of heavy flows. Tip the top brood box to scan bottom bars quickly for swarm cells, use walk-away splits or double screens when weather windows are short, and scale to grafting in stable periods. Monitor drones seasonally — numbers rise before queen production and affect mating success.
Scaling up while staying small
Run predictable rounds that match your calendar and capacity so capping and emergence fall on known days. Rotate starter and finisher roles across hives to avoid wearing down any single builder, label frames and bars by date and source colony, and keep a short log of graft day, cap counts, emergence, and mate-out results. If your numbers outgrow one yard, how to expand an apiary safely covers the logistics.
Conclusion
Practical queen work blends biology, timing, and local weather. Choose the method that fits your goals — walk-away splits, a double screen, a simple queenless builder, a starter/finisher or Cloake system, or the Hopkins frame — and keep records tight enough that cells move on schedule and nucs are stocked at the right moment. Start with ten cells, learn from one cycle, and scale what works.
Frequently Asked Questions
What signals tell a colony to produce a new queen?
Colonies start raising a replacement when workers detect weak or absent queen pheromone, overcrowding, or queen injury. Look for queen cups, scattered brood, and reduced egg laying. Swarming and supersedure both trigger queen cells, but the timing and placement of the cells differ.
How long does it take from egg to a laying queen?
About 16 days from egg to emergence, with the cell capped around day 8–9. Counted from grafting a day-old larva, cells cap around day 4 and queens emerge on day 11–12. Mating and the start of laying add roughly one to two weeks, so a full cycle is close to four weeks in good conditions.
How many queens can one cell builder raise?
It depends on the season more than the equipment. Penn State Extension’s figure is 100 or more queens from a single builder in a May nectar flow, but only 15–20 in a September dearth, because spring nurse bees have larger, more productive royal-jelly glands.
What is a walk-away split and when should I use it?
A walk-away split moves frames of brood, bees, honey, and pollen into a new box and lets the colony raise a queen from its own young larvae. Use it to prevent swarming or make an increase when you have plenty of nurse bees but do not want to graft.
Do I have to graft to raise queens?
No. The Hopkins method presents a frame of eggs and young larvae horizontally above a queenless builder so the bees select and draw cells themselves, and a walk-away split needs no cell work at all. Grafting is simply the most scalable route.
What indicates a good laying pattern and queen quality?
A strong queen lays compact, solid brood patches with few gaps and consistent egg placement. Expect larger patterns during nectar flows and smaller ones in a dearth. A poor pattern can suggest poor mating, disease, or age, but colony conditions can also drive a spotty pattern independent of the queen, so rule those out before requeening.
What are my options if a colony develops laying workers?
Laying workers produce only unfertilized drone eggs and are genuinely hard to correct. Options include requeening with a mated queen after disrupting the laying workers, combining the colony with a strong queenright hive using the newspaper method, or repeatedly adding frames of young open brood to suppress laying-worker development, though none is guaranteed.
If you want to dig deeper, we cover this in our article on magnifier picks for inspecting eggs in bee frames.
For a related deep dive, check out our article on how queen age affects colony performance.