Replacing a leader in a busy queen hive is often stressful for both the bees and the beekeeper. Foxhound Bee Company notes this tension, and careful steps cut risks and boost acceptance.
This short guide explains a proven way to introduce a new queen into a crowded colony when locating the previous queen is impractical.
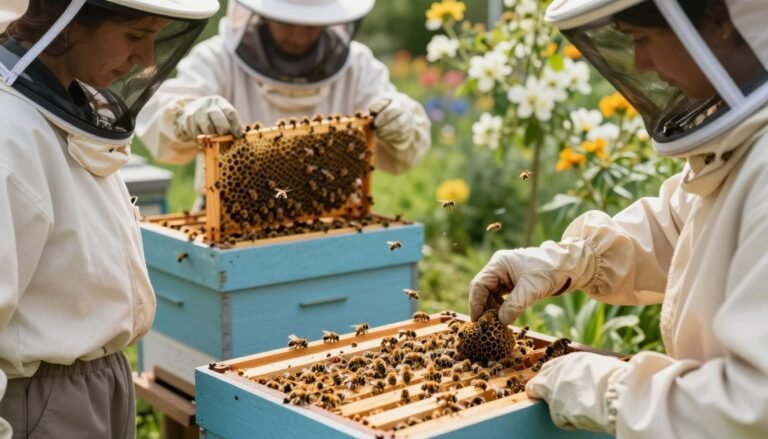
Order a quality replacement and stage her cage between frames of brood. Install the cage with the candy end accessible and avoid crushing honey comb. Smaller colonies often accept new queens more readily, which increases the chance the new ruler will be adopted.
Follow professional timing and gentle handling to manage colony dynamics. If you want a practical walkthrough, see this clear requeening primer at requeening made easy, and for staging and installation tips check beehive installation advice.
Key Takeaways
- Replacing the queen can save a struggling colony and reduce chaos.
- Use a caged queen placed in the brood nest for best acceptance odds.
- Timing and gentle handling improve the chance workers accept the newcomer.
- Smaller colonies accept introductions more easily than very large ones.
- Feed and limit inspections during the acceptance period to support the new queen.
Understanding the Necessity of Requeening
Queens deliver their best for about one to two years, and colonies suffer when that productivity drops. A planned replacement schedule keeps brood patterns steady and colony behavior predictable over the year.
Signs of a Failing Queen
Watch for patchy or inconsistent egg laying and a sudden drop in pheromone-driven cohesion. These are common things beekeepers monitor in their hives.
If workers start building unexpected queen cells, the colony may be preparing its own replacement. That behavior often follows reduced brood and weakened worker performance.
Benefits of Annual Replacement
Many beekeepers find annual replacement pays off. Regular renewal reduces losses, boosts honey output, and keeps queens at peak fertility across the year.
“Yearly requeening would have saved most of the hives lost by experienced beekeepers over the years.”
- Predictable genetics and vigor in queens.
- Stronger colonies and improved honey production in hives.
- Fewer emergency interventions later in the season.
How to Requeen a Hive Without Finding the Old Queen
Use a protected placement in the brood nest to introduce a new queen. This indirect method gives workers time to meet her scent through a cage. It reduces aggression and raises acceptance odds in a queenless hive.
Most introductions involve either a queen cell or a mated new queen. For immediate stabilization, place a mated queen in a small queen cage between resource-rich frames so the bees can inspect without harm.
Ensure the colony has enough honey and pollen stores so the newcomer can begin laying eggs once free. Watch worker behavior and limit inspections while the cage candy is consumed.
Many beekeepers prefer the indirect release way because it is gentle and reliable. For equipment choices, see the best queen cages for introduction and secure placement.
“A staged, caged introduction is the safest path for introducing queens into crowded colonies.”

Optimal Timing for Queen Replacement
Late-summer introductions give a new queen room and time to build a stable brood pattern ahead of winter. Aim for July through September so she can lay during warm weeks and the hive can store resources for colder months.
During peak season, acceptance rates rise because the bees are busy and well-fed. A fresh queen introduced while nectar flows are strong has a much better chance of settling in and starting steady laying.
Be careful about waiting too long. A colony left without a laying female in September has little chance of surviving winter unless the beekeeper intervenes quickly.
- Best window: July–September for establishment before winter.
- Last week of September: acceptance rates drop and risk increases.
- Replace during heavy nectar flow when possible for higher success.
“Timing matters—give the new queen enough weeks of warm weather to lay and the colony time to build stores.”
For signs the colony may be preparing to swarm, consult this guide on preparing to swarm.
Preparing the Colony for a New Queen
A clean slate on the brood frames improves acceptance; remove all queen cells before introducing a new queen.
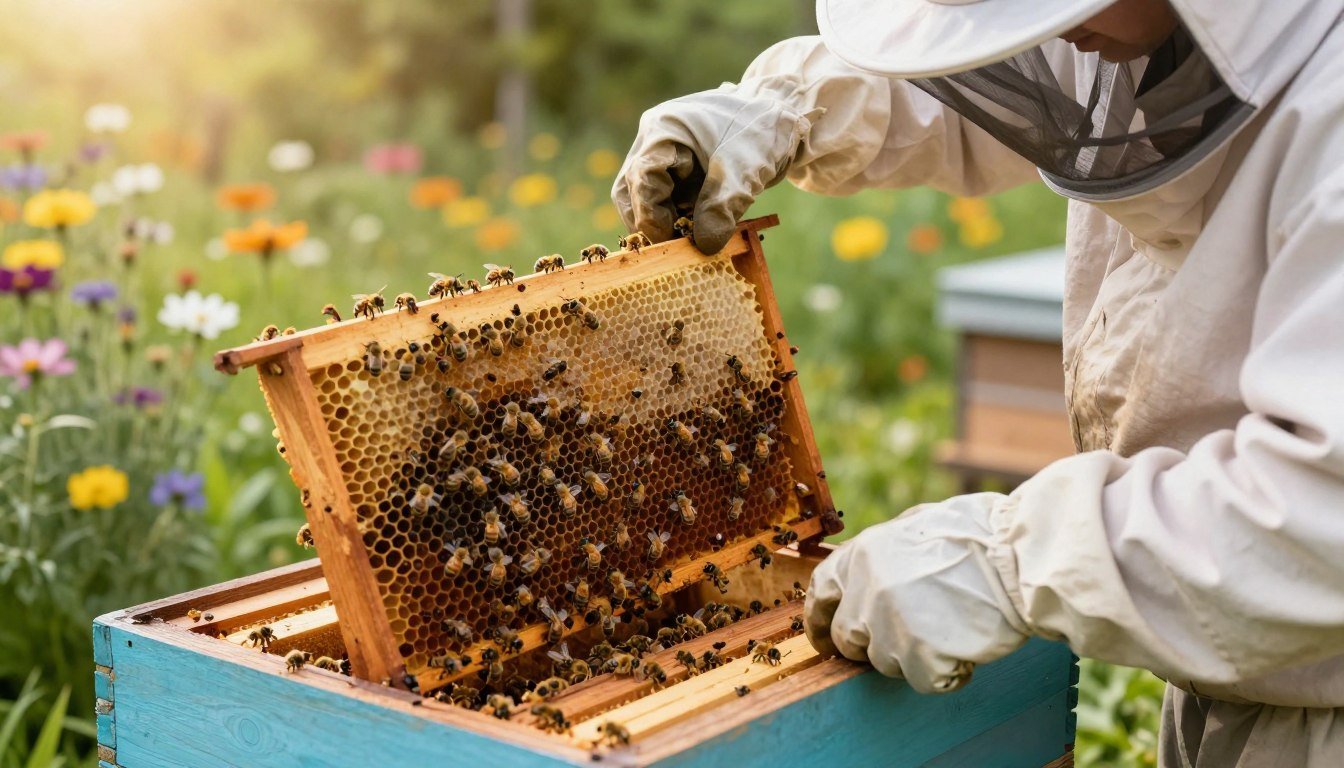
Inspect frames methodically. Check each frame for developing cells and open brood.
Remove any queen cell you find. A queenless colony will try to raise its own and that can confuse workers during an introduction.
Removing Existing Queen Cells
Work calmly and pull frames into a clean, well-lit area of the hive stand. Gently clip or scrape out every emergency cell so attention stays on the newcomer.
- Look for capped and uncapped queen cells along frame bottoms and edges.
- Confirm presence of eggs and open brood before you finish work.
- Expect the full transition to take several weeks; remove all competing cells now for best results.
| Check | Why it matters | Action |
|---|---|---|
| Queen cells | Compete with new queen’s acceptance | Remove or destroy every cell |
| Open brood & eggs | Shows colony is not orphaned | Note frames with brood; leave intact |
| Emergency cells | Distracts workers from introduced queen | Clear comb so bees focus on new queen |

For a concise step-by-step guide on introductions after cleanup, see our practical primer on requeening made easy.
Utilizing Queen Introduction Cages
The queen cage protects a new queen during the tense first days inside busy frames. This gives workers and attendants time to learn her scent through the mesh and reduces fighting.
Use standard designs such as the JZBZ or the three-hole cage. Both types keep the queen and her escorts separate while pheromones spread. That scent sharing is the main reason cages work.
The cage also offers a safe place for eggs when the queen is ready to lay. Many beekeepers find this method the most reliable way to introduce queen bees and avoid immediate rejection.
- Physical protection: prevents worker bites and stings.
- Pheromone exchange: mesh allows scent movement without direct contact.
- Gradual release: attendants chew a candy plug for timed access.
| Feature | Benefit | Common Types |
|---|---|---|
| Mesh screen | Permits pheromone diffusion | JZBZ, 3-hole |
| Space for attendants | Supports queen care and acceptance | Caged with escorts |
| Candy plug | Timed release and calmer workers | Solid or sugar-based plugs |
For an extended primer on introductions and acceptance, see this helpful queen introduction guide, and for common rejection reasons consult why bees reject a queen.
The Role of the Candy Plug in Successful Introductions
A slow-melting sugar plug at the cage’s tip is often the difference between acceptance and rejection. The candy plug is usually fondant or sugar paste. It acts as a simple, reliable time-release element in a queen cage.
As workers eat through the candy, they meet the newcomer’s scent without direct contact. This pheromone exchange calms the bees and stops early aggression. The process protects the queen and her attendants until full release.
Practical notes:
- The candy at the end of the cage gives a queenless hive time to accept the new queens without shock.
- Most colonies take about three days to chew through the candy plug and free the queen.
- Slow release prevents the cage and attendants from being overwhelmed on first contact.
- Always confirm the candy is not blocked by a cork or plastic cap before placing the cage in the hive.

Using proper candy plugs raises acceptance odds and gives the colony a predictable, gentle transition. Inspect briefly after release and limit disturbance during the critical first days.
Managing Queen Pheromones for Acceptance
A deliberate scent‑transfer window helps a introduced queen gain recognition before full contact. Pheromones are the primary signal bees use. Managing those scents is one of the simplest, most effective ways to get a new queen accepted.
Keep the queen in a cage for several days so her pheromones can spread through nearby frames. During that time, workers sample the scent and adjust colony behavior without direct aggression.
Quick release often fails because a queenless social group can kill an unfamiliar reproductive female. Give the bees enough days to learn the new profile and avoid sudden confrontations.
- Slow exposure: cage placement lets scent diffuse while attendants care for her.
- Behavioral stabilizer: a laying female inside a cage calms worker activity as scent spreads.
- Check timing: most beekeepers wait two to five days before full release for best odds of queen accepted.
For practical rearing tips and background on pheromone timing, see this primer on queen rearing basics.
Techniques for Suspending the Queen Cage
Positioning a queen cage matters. Place it near mid-comb and toward top of frames so nurse bees surround it and warmth stays steady.
Securing the cage
Securing the Cage
Fasten the queen cage to a frame with a rubber band or wedge it gently between two drawn frames. This keeps the cage steady during inspections and strong wind.
Protecting from drafts
Protecting from Drafts
Lift the cage toward the top of the brood nest. That placement blocks cold air that can enter via a screened bottom board.
- Hang the cage in the middle of brood so the most nurse bees can reach it.
- Make sure candy plug faces outward and is clear for workers to chew through.
- Keep the cage free of dead bees or debris that might block attendants or a released cell.
“A steady, well-placed cage helps scent spread and lowers risk during release.”

Avoiding Common Mistakes During the Release Process
Patience at the release phase is the single best defense against rejection. Rushing the final step often provokes worker aggression and can kill the new queen.
Before you open the cage, check frames carefully. Any remaining queen cells may cause the colony to ignore or attack the newcomer. Remove competing cells so focus stays on the introduced queen.
Respect the candy plug at the end of the cage. It is a simple time-release and should not be forced unless the colony is at real risk. Forcing an early release bypasses scent diffusion and raises rejection odds.
If workers act aggressively toward the cage, that behavior signals poor acceptance. Back away, close inspections, and give bees more days. Good beekeeping practice asks patience; most colonies free the queen in their own way over several days.
- Do not rush release; wait for natural candy consumption.
- Clear any queen cells before introduction.
- Watch worker behavior; aggression means delay inspections.
| Issue | Why it matters | Corrective action |
|---|---|---|
| Rushed release | Leads to fighting and death | Allow candy plug to dissolve naturally |
| Remaining queen cells | Compete with the newcomer | Remove cells before placing cage |
| Aggressive bees | Show lack of acceptance | Limit checks; wait several days |

“Patience during release prevents many common mistakes made by new beekeepers.”
For a practical guide that covers this way of introductions, see our trusted reference on replacing queens.
Orienting the Queen Cage Within the Hive
Place the queen cage with its candy tip pointing upward so attendants cannot seal the exit by accident. This orientation helps keep the end clear if an attendant dies near the opening.
Secure the cage firmly between frames so it does not shift during inspections. A steady position gives nurses full access to the screen and candy while keeping the new queen warm in the center of the hive.
Check that the screen is free of debris and dead bees before closing the boxes. A clear screen lets workers sample pheromones without harming the queen and prevents accidental blockage of the candy plug.
- Position the cage mid-comb where nurse bees gather.
- Face the candy up to reduce end blockage.
- Fasten the cage so it does not tilt or fall between frames.

For further practical tips on staged introductions, see this concise queen introduction guide.
Verifying the Presence of a Laying Queen
Ten to fourteen days after the queen’s release, inspect the brood area for clear signs that the new female is laying. This waiting period gives eggs time to appear and nurse bees time to care for early larvae.
Inspecting for Brood Patterns
A beekeeper should wait 10–14 days after the release before pulling frames. Early checks can miss tiny eggs and give a false negative.
- Look for fresh eggs in the center of brood frames. These small white pins are a sure queen indicator.
- If you find white larvae, the colony has accepted the new queen and she is actively laying eggs.
- Capped brood confirms ongoing, consistent laying over several days.
- Once you are sure queen activity is present and bees are calm, the queen cage and any temporary cage fittings can be removed.
- Using black foundation in your frames can make spotting eggs much easier for quick checks.

“Wait the proper days; brood patterns reveal success more reliably than immediate reactions.”
Alternative Strategies for Queenless Colonies
A practical fall strategy for a queenless colony is joining it with a stronger unit to boost survival chances. Combining units preserves stores and gives weak workers shelter through cold months.
If a colony remains without a laying female after several weeks, combine it with another hive. This is often the fastest way to save bees when numbers and brood are low.
Another option is moving a healthy frame of eggs into the queenless hive. Workers can raise a new queen from those eggs, but this process takes about three to five weeks.

- Combine weak colonies in fall for better winter survival.
- Introduce a frame of eggs from a healthy colony and monitor brood for signs of success.
- Ensure enough drones exist locally; mating often determines the new queen’s fate.
Watch brood patterns closely during the weeks after any change. Consistent eggs and even brood show the colony is producing or accepting a new female. If you want a detailed reference for staged introductions, see this queen introduction guide.
“When numbers are thin, combining with a stronger unit often gives the best chance for winter survival.”
Conclusion
Good timing, proper cages, and gentle handling make this process reliable for most colonies. Follow a calm, staged path and give workers time to accept the newcomer. Patience prevents common errors and protects brood.
Keep extra cages on hand and monitor frames for signs of laying in the weeks after release. Regular checks help the beekeeper confirm a successful replacement and spot issues early.
These techniques sustain strong hives and steady production. For a practical refresher and step‑by‑step notes, see our detailed guide on requeening a hive.
FAQ
What are the first signs that a colony needs a new queen?
Look for spotty brood patterns, many drone cells, low brood volume, and drifting or aggressive behavior. Workers may start building emergency cells. These signals often mean the colony lacks strong egg-laying and needs replacement.
Why replace a poor queen each year?
Annual replacement keeps genetics fresh, improves disease resistance, and sustains honey production. Younger queens lay more consistently and can reduce swarming and brood irregularities.
What safe method lets you introduce a new breeder when the prior monarch is not located?
Use a standard introduction cage with attendants and a slow-release plug of food. Place the cage inside the brood nest so workers can inspect and gradually accept the new breeder before full release.
When is the best season for making this change?
Mid-spring to early summer works best, when brood rearing and nectar flow are ramping up. Avoid heavy nectar flows, late fall, and deep winter to minimize brood disruption and rejection risk.
How should a keeper prepare the colony before introducing a new breeder?
Reduce stress by feeding if resources are low, remove any emergency queen cells, and calm stray bees. Inspect for disease and ensure adequate worker population to support acceptance.
Is it necessary to remove natural queen cells before placing a caged replacement?
Yes. Remove or destroy competing cells so workers focus on the introduced breeder. Leaving viable cells can prompt rejection or supersedure attempts.
What role does an introduction cage play in acceptance?
The cage protects the newcomer while workers grow accustomed to her pheromones. A gradual release prevents aggression and gives attendants time to integrate her into colony routines.
Why is a slow-release food plug recommended in many cages?
A soft candy or fondant plug delays release and forces workers to feed the newcomer through the barrier. This interaction spreads her scent and lowers the chance of immediate attack.
How can pheromone management improve acceptance rates?
Minimize disruption, avoid strong scents on hands or tools, and keep attendants with the cage. Introducing brood or frames with young larvae nearby can mask unfamiliar pheromones and help acceptance.
What are secure ways to suspend an introduction cage within the nest?
Tuck the cage between two frames in the brood area, aligning it with nurse bee traffic. Use clips or staples if needed to prevent movement during inspections and insure stable contact with workers.
How do keepers protect the cage from drafts and cold?
Place the cage deep in the brood nest and avoid outer frame gaps. Close hive entrances as needed and schedule introductions during calm, warm days to keep bees active around the cage.
What common mistakes reduce the chance of a successful release?
Rushing removal of the plug, introducing on cold or rainy days, leaving competing cells, and rough handling of the newcomer all lower success. Also avoid introducing into extremely weak colonies lacking nurse bees.
How should the cage be oriented for best results?
Position the cage so attendants face the center of the brood nest and workers can easily contact the cage through comb gaps. Horizontal placement with exposure to nurse traffic boosts social interaction.
How can a keeper confirm a new laying monarch is present?
Inspect frames after two to three weeks for fresh eggs and a developing, consistent brood pattern. A steady progression from eggs to capped brood in contiguous areas indicates successful laying.
What should I look for when checking brood patterns?
Seek even, compact patches of all brood stages. Spotty or patchy brood suggests poor laying or brood disease. Healthy patterns show few empty cells and regular capping.
What alternatives exist for colonies that are already queenless and weak?
Consider combining with a stronger colony using a newspaper method, shaking in nurse bees, or installing frames of brood with attendants. These tactics provide brood pheromones and worker support while introducing a new breeder.