I hold the BBKA Basic qualification and I’ve done many queen introductions through the beekeeping season. My goal here is simple: share the practical methods that work in my apiary and explain why success varies.
Every colony is unique. Acceptance of a new queen depends on the hive state and timing. There are reliable techniques, but no absolute guarantee.
In my experience, a small nuc often accepts a new queen faster than a larger hive. I use methods like the candy-plugged JzBz cage and the Nicot frame cage, chosen based on brood status and colony temperament. For more detail on technique choices, see this practical guide on queen introductions.
Knowing when a hive is queenless and minimizing disturbance improves outcomes. For choices between starter units and established packs, this comparison of nucs and packages is useful.
Key Takeaways
- Practical skill: Repeated attempts during the season build confidence.
- Colony state matters: Queenless hives accept new queens more readily.
- Method selection: Use JzBz or Nicot cages based on brood and hive size.
- No guarantees: Even with care, some introductions will fail.
- Minimize stress: Calm handling and correct timing raise success rates.
Understanding the Importance of Queen Introduction
A healthy queen is the heart of the hive. Her pheromones keep worker bees organized, regulate brood care, and suppress rival egg layers. Without that chemical signal, the social order unravels quickly.
Replacing a queen effectively resets the biological clock of the colony. Workers change roles, the brood pattern can shift, and foraging behavior adapts. Successful replacement keeps productivity steady and minimizes disruption.
Failure to accept a new queen can lead to disorganization, a drop in population, and weakened hive health. That loss can also mean valuable genetic stock is gone unless managed carefully.
- Key point: The queen’s presence is the single most important factor for survival.
- Watch closely: Minimal disturbance and proper timing improve acceptance.
- Plan for genetics: Good management protects breeding lines.
For a practical primer on rearing and handling, see this guide on raising queens.
Assessing Colony Status Before Requeening
A thorough scan of frames and comb will reveal whether the hive truly needs a replacement queen. Start with a calm approach and inspect every frame for eggs, brood pattern, and signs of a laying queen.
Identifying Queenless States
Look for classic indicators: fresh eggs in a neat pattern, capped brood, or, conversely, the presence of queen cells on a frame of eggs. A single well-built queen cell often signals the workers are rearing a replacement.
Detecting Laying Workers
Multiple eggs in one cell and scattered, spotty brood mean laying workers are likely present. Laying workers will not accept a new queen and must be corrected before any introduction attempt.
Practical checks:
- Inspect each frame for a laying queen or consistent brood pattern.
- If unsure, add a frame of eggs and watch whether the bees draw queen cells.
- Be aware a virgin queen may already be active and will lead to rejection of an added female.

Tip: If you confirm the hive is queenless and free of laying workers, prepare your new queen carefully. For cage options and handling techniques, see this guide on best queen cages.
The Reality of Queen Introduction Success Rates
Even side-by-side hives in the same apiary can react very differently when a new queen is added.
David Cushman and Roger Patterson noted this exact unpredictability: two colonies on the same day may have opposite outcomes.
No single method guarantees success. Many beekeepers feel the process is part science and part luck. I have followed identical steps and seen one colony accept a queen while another rejects her for no clear reason.
Accept that a percentage of attempts will fail. Success can vary with season, weather, colony strength, and subtle shifts in behavior among the bees.
| Factor | Typical Effect | Practical Tip |
|---|---|---|
| Colony state | High impact | Confirm queenless status before adding |
| Season & weather | Variable | Choose calm, warm days |
| Introducer method | Moderate | Use a tried and tested cage or frame |
| Human handling | Often decisive | Work calmly and consistently |
Plan backups and expect setbacks. Even experts face failed attempts, so keep records and learn from each day in the apiary.
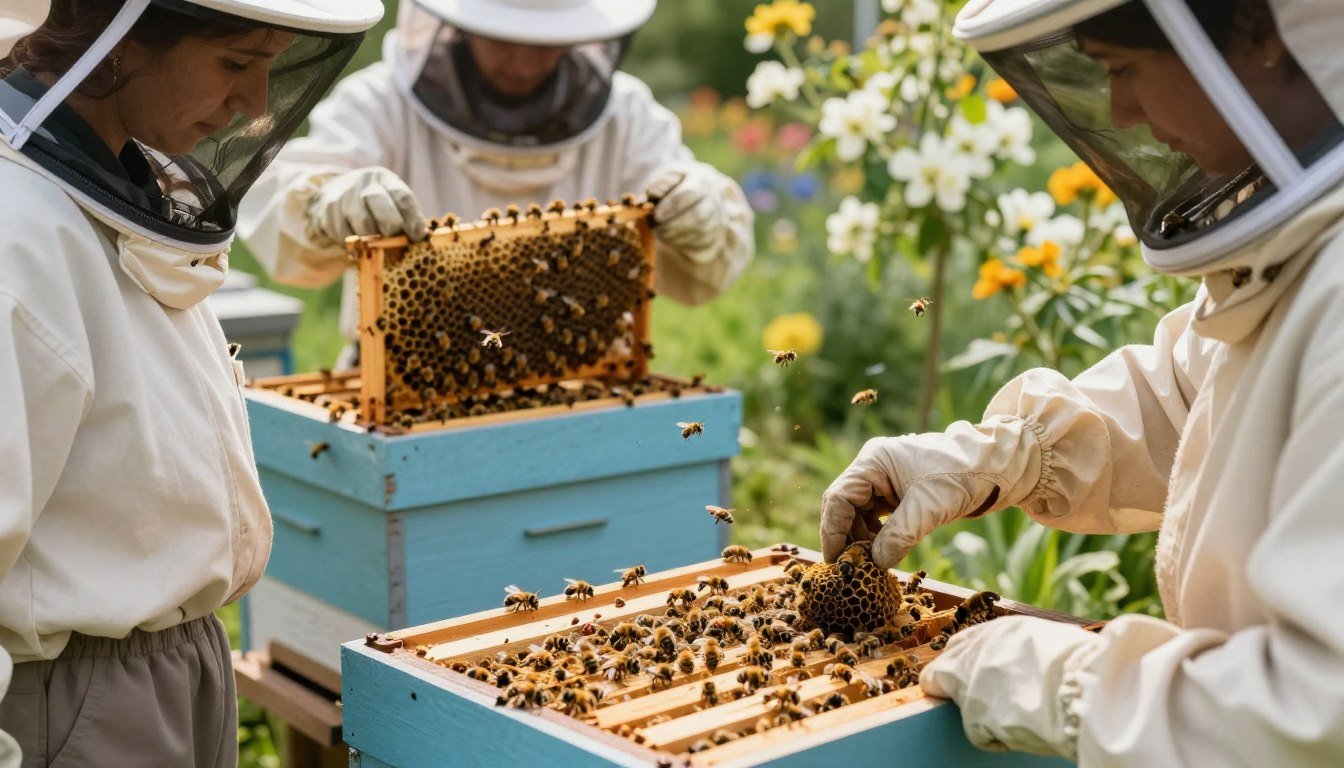
Best Practices for Introducing Queens to Nucs vs Full Colonies
Working with a reduced population gives the new queen a better chance at a calm introduction.
Start with preparation. Ensure the recipient colony is queenless and free of laying workers. Provide a stable brood frame and minimal disturbance on the day of transfer.
Use a gentle method that limits stress on the queen and the workers. In small units, you can monitor acceptance quickly and adjust if nurse bees show aggression.
Large hives need extra protection for the new female. Place her in a secure cage or frame insert and allow a slow release so guards learn her scent.
- Control the environment in a nuc for steady temperature and fewer drifters.
- Be consistent with your chosen method; track results each season.
- Patience matters—give the bees time to accept the newcomer.

Preparing the Recipient Colony for a New Queen
A successful swap often comes down to choosing the right moment and keeping disturbance to a minimum. Plan the introduction on a warm, calm day during a nectar flow when workers are busiest foraging.
Check the hive carefully. Confirm the colony has been queenless a few days and inspect frames for healthy brood and regular eggs. Look for any sign of a virgin or laying workers and remove problem frames first.
Before you place the cage, I always check the top of the frame to ensure there is enough space and no burr comb. Handle frames slowly and deliberately; sudden moves alarm the bees and raise rejection risk.
Give priority to a mated new queen when possible—mating status affects acceptance. Record the exact time and date you place her. This helps track progress over the next weeks.
- Create a calm environment by limiting hive inspections for a few days around the event.
- Ensure brood is healthy and free from laying workers before introducing the female.
- For discussion on timing and late-season additions see adding a mated queen late in the.
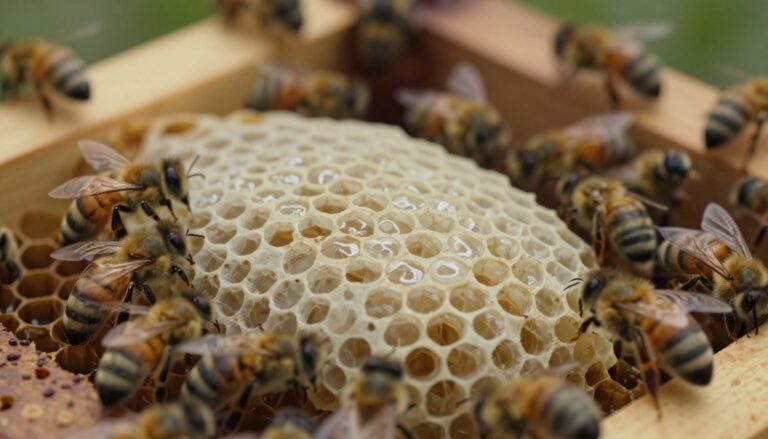
Utilizing Sealed Queen Cells for Natural Introduction
Using sealed queen cells offers a natural, low-stress path for replacing a missing reproductive. This hands-off approach lets the new queen emerge inside the broodnest and gain the hive scent before full contact with worker bees.
Selecting Robust Cells
Success rates are high: a sealed queen cell has about an 85% acceptance rate when placed into a queenless colony.
Choose a queen cell that is roughly 24–48 hours from emergence. This window gives the pupa strength while keeping emergence predictable.
Carefully cut the cell from the comb with some surrounding comb and comb edges intact. Keep the cell vertical at all times so the developing female is not damaged.
Securing Cells in the Broodnest
Make a small indentation in a frame and press the comb firmly so the cell sits in the center of the broodnest. This placement gives the emerging queen immediate access to nurse bees and stable brood heat.
Monitor the hive after about 48 hours for emergence, but avoid disturbance during the critical mating period that follows. Using cells from your own stock also preserves genetic lines and increases acceptance chances.

Working with Candy Plugged Queen Cages
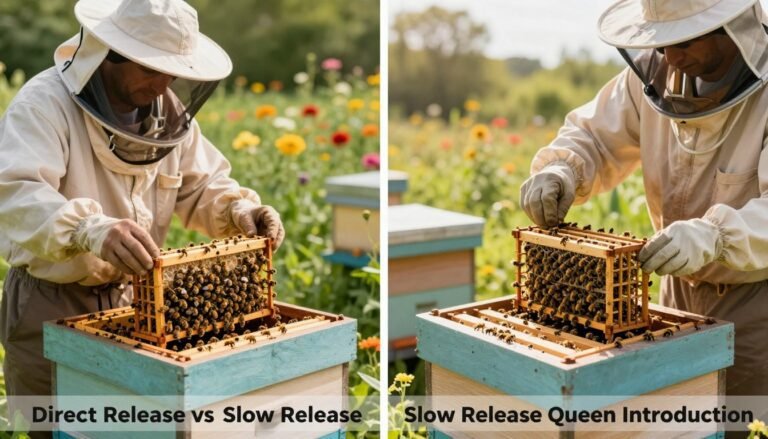
A JzBz-style candy-plugged cage offers a controlled, low-stress way to add a new queen into a hive. The central refuge protects her from aggressive bees while guards inspect the plug.
Plug the entrance with candy or fondant. This creates a slow-release over several days. Hang the cage between two frames in the brood nest with the tube pointing down. That position uses warmth and nurse activity to speed scent transfer.
Check the cage after 24 hours for worker behavior. If the workers seem hostile, leave the cage in place another day. Avoid cages made entirely of perforated mesh; they give no real shelter and can expose the queen to damage.
| Feature | Benefit | Practical tip |
|---|---|---|
| Central refuge | Protects queen from attacks | Use JzBz or similar design |
| Candy plug | Gradual release over days | Point tube downwards in brood nest |
| Reusable cage | Cost effective over years | Store a lot in the shed for the season |
By the end the workers will have eaten through the candy and the queen can walk free. For tips on strengthening a weak hive after a swap, see this guide on boost colony population naturally.
Implementing the Nicot Introduction Cage Method
A Nicot cage lets a new queen enter directly over emerging brood with minimal disturbance. This places her where nurse bees congregate, so she is fed and scented fast.
Set the cage carefully. Use the plastic legs to anchor it into the comb and secure with elastic bands. Check there are no gaps where the queen might slip out.
Make sure the comb is level so the cage sits flush. If the surface tilts, the queen can fall or get trapped under a gap.
The cage can stay in the hive for a few days. Workers will often burrow under the edge and release her when ready.
“I have used this method for many years and find it one of the most reliable ways to ensure acceptance.”
- Best for: difficult reintroductions after failed attempts.
- Advantage: immediate access to nurse bees and honey stores.
- Note: place the cage over a patch of emerging brood or a suitable cell area.

| Step | Action | Why it helps |
|---|---|---|
| Anchor cage | Use plastic legs + elastic bands | Prevents escapes and keeps contact with comb |
| Place over brood | Select emerging brood or nearby cell | Nurse bees feed and transfer scent quickly |
| Leave for days | Check after 48–72 hours | Slow release reduces aggression |
| Ensure level comb | Adjust frame or support | Prevents gaps and accidental escape |
Managing Attendant Bees During the Introduction Process
Attendant workers can change the dynamic of a queen transfer more than most beekeepers expect. Small groups riding in a box may delay acceptance and risk spreading viruses like Deformed wing virus.
Safe Removal Techniques
Evidence: Wyatt Mangum reported in the 2020 American Bee Journal that attendants increase the time it takes for a colony to accept a queen.
My routine: I remove attendants before placing a new queen in a cage. That reduces irritation from strange workers and lowers disease risk.
- Open the cage in a dim room and let the bees fly toward one light source, such as a window.
- The queen is less likely to fly than the workers, so re‑cage her once attendants have left.
- If you work at the apiary, handle the queen with calm hands and be ready to catch her; confidence and dexterity matter.
Some beekeepers disagree, but I prefer caution. Removing attendants keeps the focus on the queen and shortens the acceptance time in the hive.

Handling Virgin Queens Versus Mated Queens
Timing and hive state matter. Match the state of the female with the needs of the colony for the best acceptance rate.
For a new queen that is virgin, wait 24–48 hours after the loss of a mated egg layer. This pause reduces the chance that the workers will immediately rear rival queen cells and reject the newcomer.
When you place a mated queen, remove any mature queen cells first. That prevents a young female from emerging later and creating conflict.
Handle virgins extra carefully. They are more active and can fly well, so work in a calm, sheltered box and use a secure cage when moving them.
Mated females are steadier and usually return egg-laying quickly, restoring brood and helping the hive recover faster.
I use a cage for both types, adjusting handling and placement based on the frame layout and available honey stores.

| Female type | Best timing | Key handling tip |
|---|---|---|
| Virgin | Wait 24–48 hours after loss | Use a secure cage; avoid windy transfers |
| Mated | Place when hive is calm | Remove mature queen cells before entry |
| Both | Match to colony needs | Use frames near brood and honey for scent transfer |
For a field study on best practices with virgins, see this practical review. It helps explain acceptance patterns and handling nuances.
Recognizing Signs of Colony Aggression
Early behavior at the cage often predicts whether the new queen will survive the introduction.
Aggressive bees bite at the mesh and try to sting through it. These actions mean hostility and risk for the queen. Watch closely during the first few hours for repeated attacks.
If this happens, leave the cage in place for another 24 hours. A slow release gives workers time to learn the female’s scent. Often the agitation will drop after a day.
Persistent aggression after several days suggests a problem. A hidden queen or laying workers can trigger refusal. Inspect the brood frames and check for multiple eggs in single cells.

“Careful observation and patience can save a valuable queen from needless loss.”
- If workers feed the queen through the cage, that is a positive sign of acceptance.
- Remain vigilant; intervene if attacks escalate or the queen is harmed.
- For practical protocols on managing a queen swap, see Purdue Extension requeening advice.
| Sign | Action | Why it matters |
|---|---|---|
| Biting at cage | Leave in place 24–48 hrs | Allows scent transfer, reduces immediate aggression |
| Stinging attempts | Monitor; delay checks | Prevents queen exposure and injury |
| Calm feeding | Check after 48 hrs | Indicates likely acceptance |
Troubleshooting Failed Queen Introductions
A failed swap often leaves clear clues if you inspect frames calmly and methodically.
First, review the basics. Check for eggs or queen cells and look for signs of laying workers. Szabo T.I. (1977) showed that worker behavior around a cage predicts many outcomes.
McCutcheon D. (2001) outlines external factors such as season, hive strength, and handling that change success rates. If you find eggs, the colony may not be truly queenless.

Do not rush another placement. Wait a few days and watch for natural queen rearing. Record the method, time, and result. Over years, those notes reveal patterns that improve your approach.
| Common Cause | What to Check | Quick Fix |
|---|---|---|
| Hidden queen or eggs | Inspect frames and brood carefully | Remove competing eggs or wait and reassess |
| Laying workers | Look for multiple eggs per cell | Requeen using a strong nuc or shake method |
| High aggression | Behavior at cage, biting or stinging | Delay release, use slower cage method |
| Wrong timing | Weather, nectar flow, mating window | Try during calm warm days in season |
“Treat each failure as data; careful records and calm follow-up beat haste.”
The Benefits of Using Nucleus Colonies for Requeening
A dedicated nucleus provides a controlled setting where a queen can begin laying reliably. The smaller unit gives workers a chance to focus on brood and the new female without the distractions of a large hive.
Protection matters for valuable breeder stock. Introducing a new queen into a nucleus first reduces the chance of immediate loss. If anything goes wrong, you still have the main hive intact.
Once the queen is laying well and the brood pattern looks strong, you can unite the nucleus with the original colony. This staged method often saves time and preserves genetics over the years.

| Advantage | Why it helps | Practical tip |
|---|---|---|
| Controlled environment | Less drift and fewer hostile workers | Use a small box near the apiary |
| Better thermoregulation | Stable brood temperature helps early laying | Keep frames with honey and brood together |
| Lower risk for valuable stock | Protects expensive breeder queens | Establish in nucleus for several days before uniting |
| Easy monitoring | Quick checks show egg pattern and acceptance | Transfer frames when laying is consistent |
Tip: For moving or housing a nucleus, consider a recommended nuc box. This small step often improves success and saves time during the season.
Advanced Techniques for Valuable Breeder Queens
For high-value breeder stock I start every introduction in a small, managed nuc. A compact box reduces drift and lets me control food and worker numbers while the new queen settles.
Always provision the nuc with plenty of honey and young bees. Healthy brood and two well-populated frames often mean the queen finds nurse care and laying conditions quickly.
Use a dedicated nuc box and a secure cage when moving the breeder. The box gives precise environmental control and makes inspection easy without disturbing a large hive.
Monitor progress closely. Check egg pattern and brood on short visits. If anything looks weak, intervene early—swap frames or add feed rather than risking genetic loss.
- Keep brood and frames tight for warmth and fast scent transfer.
- Use high‑quality honey reserves in the box for immediate energy.
- Record dates and results for future breeding decisions.
“Isolating a breeder in a small unit is the hallmark of professional stock management.”

For practical basics on setting up a small unit see beekeeping for beginners.
Conclusion
Consistent habits and calm handling are the foundation of repeatable success in queen work. I’ve done this over many seasons and still rely on careful observation as my most useful tool.
Every hive behaves differently. Watch your bees closely, adapt your method when you need to, and accept that some attempts will fail.
Following the techniques in this guide will help protect the health of your colony and improve your beekeeping results through the season. For more practical guidance and resources, see this practical beekeeping resources.
Prioritize the needs of your bees and be patient. With steady care you can manage queens effectively and enjoy a thriving apiary.
FAQ
What are the main differences between introducing a new queen into a nucleus colony and a full hive?
A nucleus colony (nuc) is smaller, making introductions easier because fewer workers need to accept the new queen. A full hive has more established pheromone patterns and a larger worker population, which can increase rejection risk. Nucs allow faster acceptance and lower stress on the queen, while full hives may require stronger preparation like queen cages, candy plugs, or temporary isolation to improve acceptance.
How do I tell if a colony is truly queenless before requeening?
Inspect frames for a consistent pattern of eggs and brood. A queenless colony often shows irregular brood patterns, lots of drone brood, and no fresh eggs on worker cells. Look for small emergency queen cells on comb edges and foraging behavior changes. If you find no eggs and only capped brood that will emerge in days, treat the colony as queenless and proceed with requeening steps.
What signs indicate laying workers and how does that affect queen introduction?
Laying workers produce many eggs per cell, often multiple eggs in a single worker cell, and you’ll see mostly drone brood in worker-sized cells. The colony smell and behavior can be difficult; acceptance of a new mated queen is unlikely unless you first re-establish normal worker demographics. Replace frames with brood, combine with a queenright hive using a newspaper method, or create new nucs to remedy laying-worker issues before introducing a new queen.
What acceptance rates should be expected when introducing a new queen?
Acceptance varies by season, colony temperament, and method. Typical success ranges from 60% to 90% with proper preparation. Nucs generally show higher acceptance rates than full colonies. Using sealed queen cells or proven mated queens in protective cages raises success; virgin queens have lower immediate success because they must mate and begin laying.
What are best practices when introducing a queen into a nuc versus a full colony?
For nucs: place the queen cage between two brood frames, provide sufficient food and brood, and minimize disturbance. For full colonies: reduce queen pheromone conflict by temporarily removing the old queen or most brood, use candy-plugged or Nicot cages, and introduce during calm weather with nectar flow. Always ensure adequate nurse bees and keep the introduction frames in the broodnest to help acceptance.
How should I prepare a recipient colony immediately before placing a new queen?
Remove the old queen if present, reduce brood if necessary, and provide fresh frames of honey and pollen. Create a calm environment by working midday in warm conditions. If the colony recently swarmed or is strongly queenless, wait a few days to allow workers to recognize queen absence. Reduce robbing risk and avoid heavy smoke; gentle handling improves acceptance.
When is the best time to introduce a new queen during the season?
Introduce queens in spring through early summer during active nectar flow when workers are busy and brood rearing is high. Avoid late fall and cold, rainy periods. Midday on a warm, calm day increases the odds of acceptance. Seasonal timing helps mating success for virgins and reduces stress on mated queens.
Can sealed queen cells be used instead of a caged queen, and how do I select good cells?
Yes. Sealed queen cells allow natural emergence and immediate acceptance if workers raise the emerging queen. Select robust cells that are well-formed, on worker-sized cells, and located in clean broodnest comb with nearby nurse bees. Avoid overly large or damaged cells. Secure them in the broodnest so the colony can care for the pupa and adopt the new queen.
How do I secure a queen cell safely in the broodnest?
Gently move the frame containing the sealed cell into the recipient broodnest, ideally between two frames of nurse brood. Ensure the cell sits vertically and is not cracked. Minimize handling of surrounding comb. Keep inspections brief until the queen has emerged and begun mating or laying to prevent accidental damage or predation by workers.
What is a candy-plugged queen cage and when should I use it?
A candy-plugged queen cage holds the queen behind a soft candy barrier. Workers gradually eat through the candy to free her, giving time for colony acceptance. Use it in full colonies or when there’s risk of rejection. Pair with a frame of brood and release in the broodnest. The candy also provides a short-term energy source for attendants.
How does the Nicot introduction cage method work and why use it?
The Nicot method fixes the queen cage between two brood frames with a small wooden support so workers can feed and attend the queen while she remains separated. It reduces direct confrontation and lets worker bees get used to the queen’s pheromones. Use it in strong hives or when introducing a valuable breeder queen to reduce stress and improve acceptance.
Should I remove attendant bees from a new queen cage before introduction?
Generally, leave a few attendant workers with the queen in the cage; they help maintain her pheromones and provide warmth. Removing excessive attendants can stress the queen. However, if the attendant bees are from a foreign colony with aggressive traits, carefully replace them with a couple of workers from the recipient hive to improve acceptance.
How do I safely remove aggressive attendant bees during introduction?
Use a smoker sparingly and work calmly. Transfer the queen in her cage to a queenless nuc or onto a frame away from the main cluster then remove the cage briefly to replace attendants. Alternatively, use a soft brush to move unwanted attendants out before sealing the cage. Minimize queen exposure and complete the switch quickly to avoid overheating or chilling.
What adjustments are needed when introducing a virgin queen compared with a mated queen?
Virgin queens must mate and begin to lay, so place them in a nuc or mating box with ample young workers. Expect a longer timeline and higher failure risk due to weather or predators during mating flights. A mated queen can start laying sooner and often benefits from a cage-style introduction in full hives to avoid worker conflict.
What are early signs that a colony is rejecting a newly introduced queen?
Watch for persistent aggression at the cage, dead or wounded attendants, removal of the queen cage, or the queen found dead outside. Delayed egg-laying beyond a week for a mated queen or lack of brood buildup also signals trouble. Immediate action can include re-caging, moving the queen to a nuc, or using a Nicot cage method.
What steps can I take if an introduction fails?
If rejection occurs, retrieve the queen and assess for injury. Try introducing a proven mated queen instead of a virgin, use a different introduction method like sealed queen cells, or split the colony to create a nuc and reintroduce there. Address underlying colony issues such as disease, poor nutrition, or laying workers before retrying.
Why are nucleus colonies often recommended for requeening?
Nucleus colonies are smaller and less likely to reject a new queen. They provide concentrated nursebee support and a controllable environment for mating and initial laying. Using nucs allows beekeepers to protect valuable breeder queens, reduce stress, and create backup colonies while maintaining productive apiaries with minimal disruption.
What advanced techniques help introduce valuable breeder or instrumental inseminated queens?
For high-value queens, use Nicot cages, minimize handling, and introduce into a small, well-prepared nuc with ample nurse bees. Limit exposure to robbing and predators, maintain ideal feed and brood ratios, and consider temporary partitioning to control pheromone integration. Coordinate timing with peak forage to encourage rapid colony establishment and strong brood rearing.