Reviewed by Daniel M. · Last Updated September 23, 2026 · How we review
To avoid air bubbles when bottling honey, keep air out during extraction and straining, let the honey settle warm (about 90 to 100°F) for 24 to 48 hours, skim the foam, and fill jars from a bottom gate with the stream running down the side of a tilted jar. Temperature matters most. Warm honey is several times thinner than cool honey, so bubbles rise out of it several times faster.
Bubbles do not harm honey, but a cloudy band or a collar of foam makes a jar look poorly processed, and in fast-setting honey trapped air can speed up crystallization. Below are seven steps that work at hobby and sideline scale, the physics behind them, and a troubleshooting table for jars that still come out cloudy.
Key Takeaways
- Most air gets into honey where it falls: off the extractor wall, out of the extractor gate, and through the strainer into the bucket. Shortening those drops prevents more bubbles than any later fix.
- Bubble rise speed depends on honey thickness. Warming honey from room temperature to about 100°F can cut its viscosity roughly four to ten times.
- Rise time also scales with depth. A tall bucket takes longer to clear than a shallow tank at the same temperature.
- A bottom honey gate draws the clearest honey first, because bubbles leave the bottom layer first. Stop before the foam layer reaches the gate.
- Bubbles that appear weeks after bottling, with a sour smell or a domed lid, are fermentation, not trapped air.
Table of Contents
- Where the Air Gets In
- Why Warm Settling Works: The Numbers
- Seven Steps to Bubble-Free Jars
- Settling Fast-Setting Northern Plains Honey
- Troubleshooting Cloudy or Foamy Jars
- Frequently Asked Questions
Where the Air Gets In
Honey is thick enough that once air is folded in, it cannot escape quickly. Every point where honey falls, splashes, or is churned adds bubbles:
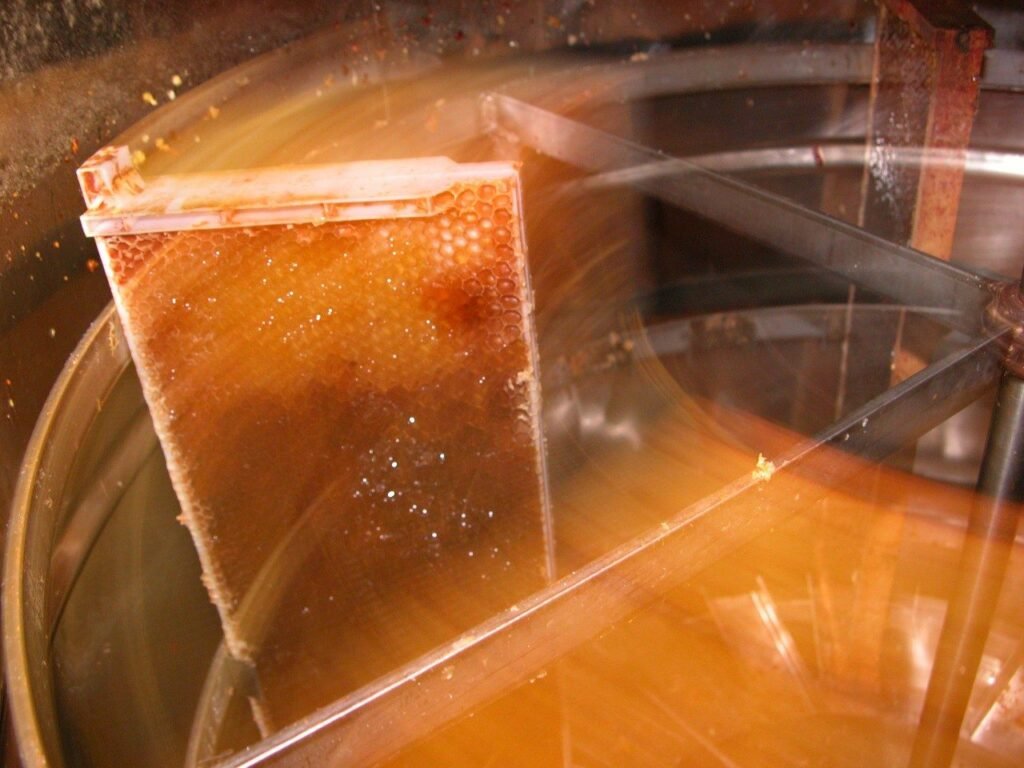
- The extractor. Honey flung from the combs hits the drum wall and sheets down it. A pool of honey left under a spinning reel gets whipped by the basket.
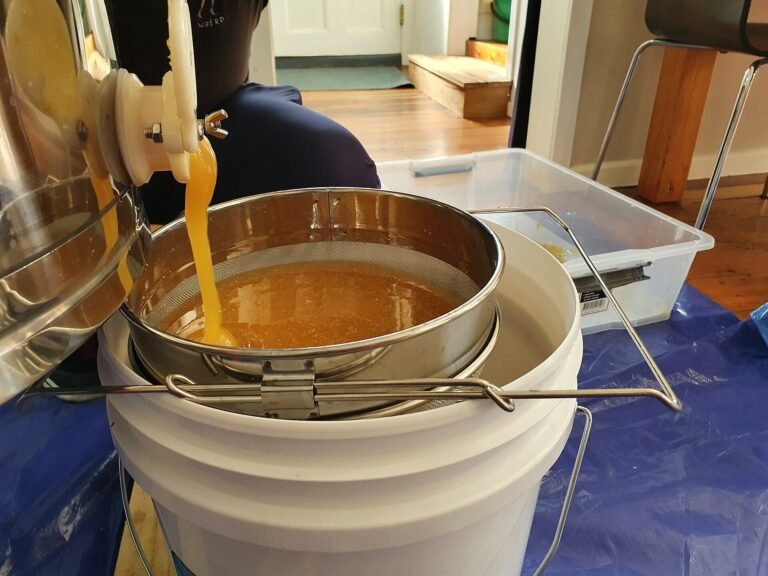
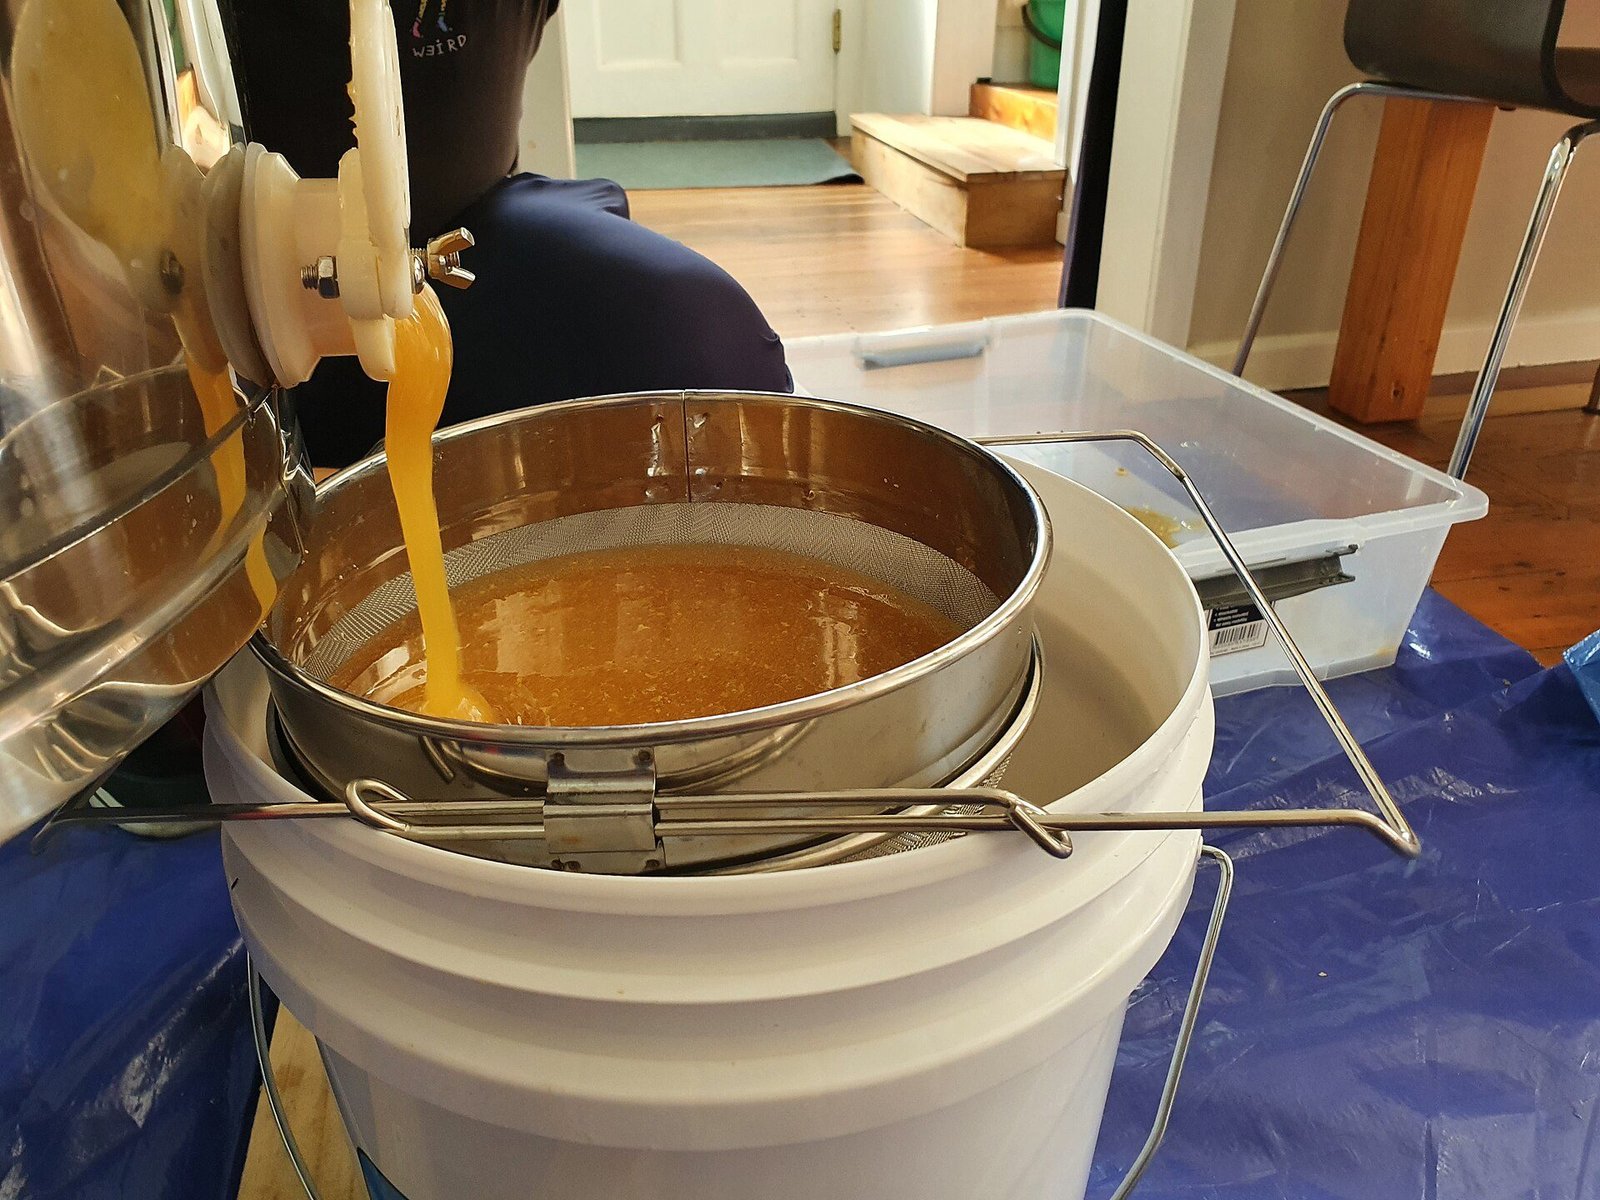
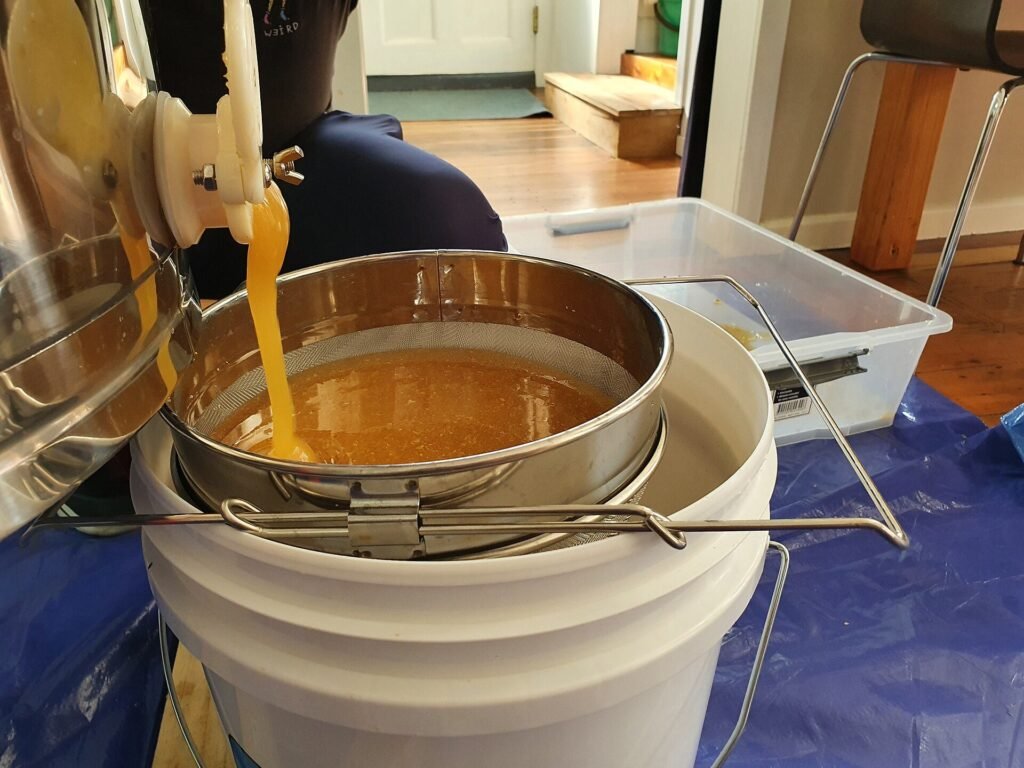
- The extractor gate. A stream falling 12 inches or more into a bucket folds in air, especially when it lands on the strainer mesh.
- Straining. Fine mesh splits the stream into many small threads, each dragging air through the screen.
- Pumping. Pumps that spin fast or suck air at the inlet make fine, persistent foam. Gentle, slow positive-displacement pumps cause far less.
- Stirring and moving containers. Stirring to blend batches or sloshing a full pail across the honey house adds more.
- Filling. Honey dropped straight down into the center of a jar folds over itself and traps air as it piles up.
The practical rule is to shorten every drop and keep honey sliding down surfaces instead of falling through air. For the steps before bottling, see our guide on whether you can bottle honey straight from the extractor.
Why Warm Settling Works: The Numbers
A bubble in honey rises at a speed set by three things: bubble size, honey viscosity, and the distance it has to travel. The rise speed of a small sphere in a thick liquid follows Stokes’ law. It rises faster the larger it is (speed goes with the square of the radius) and slower the thicker the liquid.
Honey viscosity changes a lot with temperature and moisture. A study of seven honeys published in the International Journal of Food Science (Saxena and colleagues, 2014) measured viscosities from about 2.3 to 16 Pa·s at 25°C (77°F), with the steepest changes below 30°C (86°F). Using the temperature sensitivity reported in that study, warming honey from 68°F to about 104°F makes it roughly four to ten times thinner, depending on the honey.
Here is what that means in a standard 5-gallon pail, where 60 pounds of honey stands about 13 inches deep. These are our own Stokes’ law estimates, assuming a fairly thick honey of 10 Pa·s at 68°F and about 1.5 Pa·s at 104°F:
| Bubble diameter | Rise speed at 68°F | Time to clear 13 in at 68°F | Time to clear 13 in at about 104°F |
|---|---|---|---|
| 0.2 mm (visible speck) | About 10 in per day | About 1.3 days | Under 5 hours |
| 0.1 mm (fine haze) | About 2.6 in per day | About 5 days | Under 1 day |
| 0.05 mm (cloudiness) | Under 1 in per day | About 20 days | About 3 days |
Treat the figures as orders of magnitude, since real honeys vary. Still, three lessons hold up in practice:
- The familiar “24 to 48 hours” advice only works when honey is warm. In a cool garage the finest bubbles can take weeks to clear.
- Depth matters as much as time. Halving the depth halves the clearing time, which is why wide, shallow settling tanks clear faster than tall pails.
- The bottom clears first. Bubbles leave the lowest layer first and collect in the top inches, so a bottom gate delivers the clearest honey first.
There is a limit to useful heat. Keep settling honey at or below about 105°F; hotter honey darkens and loses quality over time. Our guide to honey bottling temperatures covers the trade-offs, and how to avoid overheating honey during extraction explains what too much heat does.
Seven Steps to Bubble-Free Jars
Step 1: Cut the drops during extraction
Open the extractor gate early so honey does not pool under the reel and get churned. Set the bucket so the gate is only an inch or two above the strainer, or tilt the pail so the stream lands on the inside wall instead of the mesh. Spin up gradually; fast starts break combs and throw more spray.
Step 2: Strain so honey slides, not falls
Use a double sieve or nylon strainer that sits down inside the bucket, not one perched high on the rim. Coarse-then-fine straining is fine, but skip ultra-fine cloth at the extraction stage; it slows flow and whips in air as honey forces through. A honey gate strainer at bottling time is a gentler place to catch the last specks.
Step 3: Settle warm, in the shallowest vessel you have
Move the strained honey into a settling tank or pail and hold it at about 90 to 100°F for 24 to 48 hours. A honey warming cabinet, a heated room, or an insulated box with a thermostat all work. Do not stir or move the container during this time. If you can choose between a tall pail and a wider tank, pick the wider one; our settling tank size guide helps match tank to batch.
Step 4: Skim the foam
After settling you will see a layer of foam with bits of wax. Lift it with a flat spoon or skimmer. A common small-scale trick is to lay a sheet of food-grade plastic film on the surface, press it lightly, and peel it off with the foam attached. See how to skim wax and foam after extraction for more methods.
Step 5: Bottle from the bottom gate
Fill from a honey gate at the bottom of the tank, never by pouring from the top. The first honey out is the clearest. Stop when about 1 to 2 inches remain above the gate, since that last layer carries most of the leftover foam. Put it in a “kitchen jar” for yourself or add it to the next batch.
Step 6: Fill down the side of a warm, tilted jar
Hold the jar at an angle so the stream runs down the inside wall, then level it as it fills. Keep the gate close to the jar and fill in one steady stream; stopping and starting folds air into the surface. Room-temperature or slightly warmed jars help, because honey that hits cold glass thickens against the wall. The LSU AgCenter’s guidance on air bubbles in honey, based on a commercial beekeeper’s practice, recommends the same bottom-spout, tilted-jar approach.
Step 7: Let filled jars rest before capping or labeling
Leave filled jars upright for a few hours in a warm room. The small bubbles introduced by filling rise to the surface, where you can lift any collar of foam with a spoon before capping. Leave proper headspace; our headspace guidelines for bottled honey explain how much.
Settling Fast-Setting Northern Plains Honey
We extract in eastern North Dakota and the Red River Valley, where much of the summer crop comes from canola, sweet clover, and alfalfa. These are high-glucose honeys that can begin to granulate within days of extraction. That changes the bubble problem in two ways.
First, air bubbles act as seeds for crystals. The National Honey Board’s crystallization fact sheet lists air bubbles alongside pollen and wax as starting points for crystallization. Air left in fast-setting honey speeds granulation and can leave white flecks that look like a processing fault.
Second, you cannot settle this honey slowly at cool temperatures. By late August, nights in an unheated garage or honey house in the valley can drop into the 50s°F, close to the temperature where honey crystallizes fastest. Honey left there to “settle for a week” may start setting before it clears, locking the bubbles in place. For these honeys we settle warm, bottle within two days of extraction, and sell the fastest-setting batches as creamed honey instead of fighting granulation. Our comparison of honey granulation vs fermentation explains how to tell setting honey from spoiling honey.
Troubleshooting Cloudy or Foamy Jars
| What you see | Likely cause | Fix |
|---|---|---|
| Foam collar on top right after filling | Air from the fill stream | Tilt jars, fill closer to the gate, let jars rest, and spoon off foam before capping |
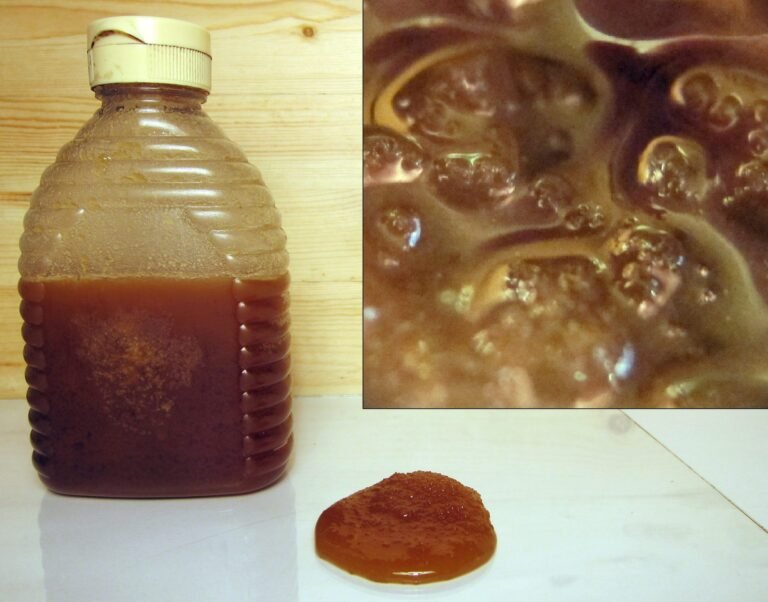
| Fine haze through the whole jar | Micro-bubbles that never cleared; honey was settled cool | Warm the jars gently in a water bath (about 100°F) and let them stand upright |
| Foam in the last few jars of every batch | Bottling too far down the tank | Stop 1 to 2 inches above the gate |
| White feathery streaks on the glass | “Frosting” as honey begins to crystallize | Cosmetic; warm to re-liquefy, or bottle as creamed honey |
| Bubbles appear weeks later, sour smell, domed lid | Fermentation from high moisture | Not an air problem; see what causes honey to ferment after bottling |
| Wax specks mixed with bubbles | Skipped or rushed skimming | Settle longer and skim, or add a gate strainer |
If jars go out with a thin band of foam anyway, it is harmless. Many buyers of raw honey read it as a sign of minimal processing. Moisture is worth checking before any bottling day, because wet honey both ferments and holds more foam; see our fermentation risk checklist before bottling honey.
Bubbles are a cosmetic issue; for real safety risks, see how to avoid honey contamination from hive to jar.
Frequently Asked Questions
How long should honey settle before bottling to remove air bubbles?
About 24 to 48 hours at 90 to 100°F clears most bubbles in a typical pail. Honey settled at cool room temperature can take a week or longer for fine haze to clear, and the deeper the container, the longer it takes.
Why does my honey look cloudy after bottling?
Usually it is micro-bubbles that were too small to rise before bottling, often because the honey was cool. Early crystallization can also cause cloudiness. Warming the jars gently and letting them stand usually clears bubbles; granulation needs re-liquefying.
Are air bubbles in honey bad?
No. Air bubbles are cosmetic and do not affect safety or flavor. The exception is bubbles that appear later with a sour or alcoholic smell, which indicates fermentation rather than trapped air.
Can I heat honey to get rid of bubbles?
Yes, gently. Warming honey to around 100°F thins it so bubbles rise faster. Avoid going much above 105°F for long periods, which darkens honey and degrades quality. Commercial packers use higher flash-heating, but that is a different process.
How do I get foam off the top of bottled honey?
Let the jar stand upright in a warm room so the foam gathers at the surface, then lift it with a spoon before capping. For a whole tank, skim with a flat skimmer or a sheet of food-grade plastic film pressed onto the surface and peeled away.
Does a honey gate cause air bubbles?
No. A bottom honey gate is the best way to avoid them, because it draws from the clearest layer. Bubbles come from filling technique: dropping honey from a height or starting and stopping the stream.
Conclusion
Bubble-free jars come from three habits: keep honey sliding rather than falling, settle it warm in as shallow a vessel as you can, and bottle from the bottom while stopping short of the foam. Do those consistently and the only foam you will see is in the kitchen jar you keep for yourself.