Reviewed by Thomas B. · How we review
Preventing fermentation comes down to one goal: keep a premium product by managing moisture and controlling the environment from harvest through storage so fermentation never starts.
Fermentation risk hinges on three factors: moisture level, temperature, and yeast spore load. Practical stability for most jars sits at or below 17–18% moisture. Cold storage at about 52°F or lower will halt activity, while warmer conditions raise risk.
Producers face a common problem in humid regions where bees delay capping. That delays harvest into the hottest months of the year and forces trade-offs with mite control cycles. Timing frames pulled and post-harvest controls like airflow and cool storage are both vital.
Plan for worst-case yeast pressure: a given moisture value can mean different outcomes depending on spore counts. This guide links practical steps with industry context and even grading guidance such as the grading standards used by professionals.
Key Takeaways
- Keep moisture low; ≤17–18% is the practical target for stability.
- Temperature control (≈52°F or below) is a strong safeguard.
- Monitor yeast spore risk and assume worst-case loads when planning.
- Balance harvest timing with mite management and seasonal constraints.
- Storage and airflow are critical control points after extraction.
Table of Contents
- The Quick Path to Preventing Honey Fermentation
- The science of honey ferment: moisture, yeast, temperature, and crystallization dynamics
- How to measure and verify moisture content with a refractometer
- Harvest timing, frame selection, and weather-aware practices
- Environmental controls to dry down high-moisture honey safely
- Fermentation Risk Checklist Before Bottling
- How to Prevent Honey Fermentation in Storage and Post-harvest Handling
- Conclusion
- FAQ
The Quick Path to Preventing Honey Fermentation
The goal is simple: keep extracted honey stable in the jar without harming its flavor or nutritional quality.
Core takeaway: keep moisture content below 18% and control humidity, temperature, and yeast exposure.
Start by testing moisture content the same day. If readings are above the target, decide whether to dry, blend, freeze, or store under controlled conditions.
The fastest interruption of active ferments is immediate cooling and airtight sealing. Move product to a cool room (≤52°F) and use food-grade seals the same day to stop further moisture uptake.
Lower risk in one day by placing supers or jars in a tight, low-humidity room with moderate warm air and directional flow. That dries surfaces safely without overheating quality.
- Test moisture first.
- Cool and seal on the same day.
- Avoid handling during high humidity or right after rain.
Routine checks for temperature and humidity matter. Small drifts can push levels past the point where yeast resumes activity and product ferments later.
The science of honey ferment: moisture, yeast, temperature, and crystallization dynamics
Small shifts in water levels can flip stable honey into an active ferment. Moisture is the primary switch: at ≤17% moisture content jars are usually stable, while 18–20% raises risk depending on yeast load.

Moisture thresholds that drive risk
When moisture rises, osmophilic yeast such as Zygosaccharomyces gain the ability to metabolize sugars into ethanol and CO2. That biochemical switch is the core of jar-level spoilage.
Spore counts and microbial variability
Spore pressure varies by floral source and environment. Some nectars carry low yeast counts; others bring high loads. The same moisture content can produce different outcomes.
Temperature and activity
Temperatures near 77–86°F accelerate yeast growth. At or below 52°F most yeasts go dormant, which is why cool storage works as a dependable safety net.
Crystallization, air and local wet spots
When jars partially crystallize, a wetter liquid phase can form above crystals. Air, micro-particles and sugars ratio (glucose/fructose) create nucleation sites that concentrate water and let ferments start locally. Our guide to honey granulation vs fermentation works through the numbers for a half-set jar.
- Manage water and temperature together — that keeps yeasts dormant despite spore variability.
- Use environmental controls and routine testing as a professional safeguard; a single wet spot should not tip a batch.
Further reading on osmophilic yeast and spoilage is available in a detailed research review. For the practical ways honey ends up too wet after harvest, see what causes honey to ferment after bottling.
How to measure and verify moisture content with a refractometer
A handheld refractometer gives quick, reliable readings that guide bottling decisions. Use it as your first line of quality control when assessing moisture levels in combs and jars.
Target levels and practical benchmark
Target: honey typically remains stable at ≤17–18% moisture content. Aim for that range before packing or long storage.
Setup and calibration
Clean the prism, place a thin sample, and read the Brix at the same temperature as the sample for best accuracy.
Calibration tip: use extra virgin olive oil set to 71.5 Brix at the instrument temperature. This practical EVOO method keeps readings consistent without specialty fluids.
Sampling and spot-checks
Test multiple spots and multiple jars; pockets of higher water content occur. Spot-check capped versus uncapped frames by sampling surface wax and deeper cells separately.
- Retest suspicious readings with fresh samples.
- Record batch readings to track quality and guide control decisions.
- A handheld unit typically measures across ~12–27% reliably, covering common ranges.
Control of measurement routines keeps product quality grounded in data and reduces risk when packing or storing jars.
Harvest timing, frame selection, and weather-aware practices
Choose frames and schedule pulls with moisture control in mind. Prioritize fully capped frames first; they usually show lower moisture. Isolate uncapped or partly capped frames for separate handling.
Avoid harvesting within a few days after rain or during high humidity. Wax is hygroscopic and will absorb moisture quickly. If regional humidity spikes, delay extraction until a dry window.
Practical handling steps
- Test representative frames from each hive before extraction.
- Return partially capped frames to hives during dry weeks or hold them in a controlled room until moisture tests safe.
- Pull supers promptly in dry weather to limit moisture rebound.
| Frame condition | Action | Risk |
|---|---|---|
| Fully capped | Extract first | Low moisture |
| Partially capped | Return or dry-room | Moderate |
| Uncapped | Isolate & test | Higher moisture |
Balance harvest timing each year with varroa treatments. Many producers begin oxalic acid vaporization by late July or early August, using six treatments spaced four days apart. Plan extraction windows around those treatments and avoid treating hives with supers installed.
For a concise checklist, see the harvesting checklist.
Environmental controls to dry down high-moisture honey safely
Keeping a tight, low-humidity space around your supers speeds drying while protecting flavor and enzymes. A sealed processing room held near 30% relative humidity will shift water out of comb and jars without aggressive handling.
Humidity management and room setup
Use a quality dehumidifier and seal gaps. Maintain ~30% RH and verify with a calibrated hygrometer. That low humidity drives steady reduction in moisture across the lot.
Temperature and safe warming
Keep temperatures in the mid-80s to low-90s °F with an AC and a small heater on a thermostat. Warm, stable air increases evaporation but preserves delicate aromas and enzymes.
Air movement and stacking technique
Direct airflow down column-stacked supers with fans. Stacks of 5–7 boxes per fan work well.
- Elevate stacks for a bottom gap.
- Cap the top with a box fan facing down.
- Avoid overly tall stacks that starve lower frames of flow.
Maximize surface area: comb vs. bucket
Drying in the comb is faster because of greater surface area. Buckets dry slowly unless stirred often. Monitor levels daily and rotate frames if readings show uneven removal.
Note: wax and wood can buffer water, so sustain low humidity long enough to reach targets. For additional practical steps, see this processing guide.
Fermentation Risk Checklist Before Bottling
Run these checks on bottling day, on the finished batch in the bucket or tank, not just on a few frames in the yard. Any “no” is a reason to hold the batch back until you have fixed it.
- Is the batch below about 18% moisture? Take one refractometer reading from the top inch and another from the middle of the bucket, because wetter honey is lighter and collects at the top of an unmixed container. The National Honey Board’s reference guide states that honey below 17.1% moisture will not ferment, and the USDA extracted honey grade standard caps Grade A at about 18.6%. For what to do with borderline numbers, see refractometer readings that mean do not bottle yet.
- Do you know where every frame came from? A few uncapped or partly capped frames, or supers that sat overnight in a humid garage or shed, can push a whole batch over the line. Extract and test those lots separately.
- Will it granulate fast? Canola, alfalfa, sweet clover and other high-glucose honeys leave a wetter liquid layer behind as they partly set. Bottle them drier, at about 17.5% or below, or turn them into creamed honey. The mechanism is explained in honey granulation vs fermentation.
- Does it smell and look right? Smell the tank before you open the gate. A yeasty, winey or sour note, or foam that re-forms after you skim it, means stop and check the batch against the signs of fermented honey. Air foam that rises after straining and smells like normal honey is harmless; see foam on honey after bottling.
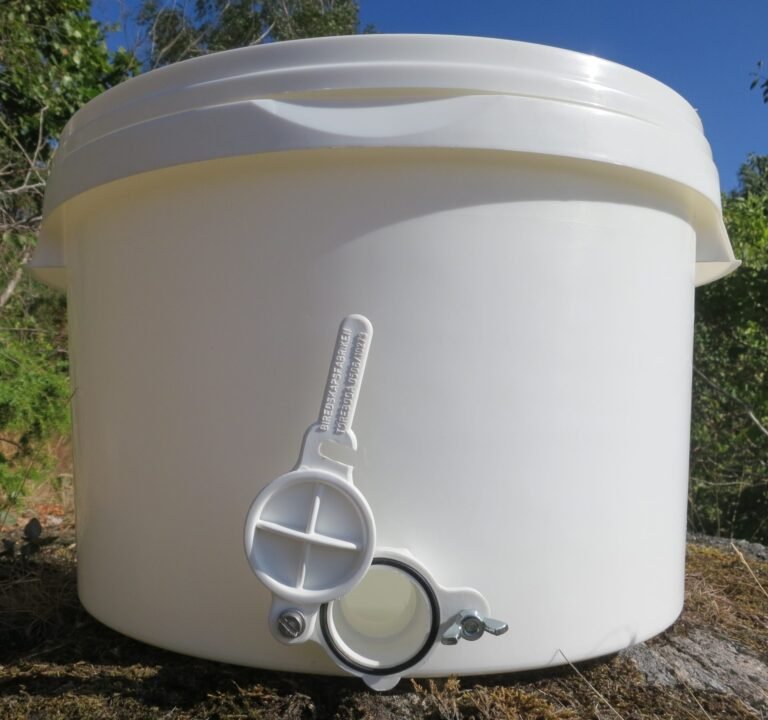
- Is everything dry? Buckets, honey gates, jars and lids should be completely dry. A rinsed container that is still damp adds water exactly where fermentation starts, and lids should seal properly.
- Are you keeping suspect honey separate? Never blend a wet or fermenting lot into a good one to dilute it. Blending spreads live yeast through honey that was stable.
- Do you have a storage plan? Honey kept below 52°F (11°C) will not ferment while it stays that cold, but cool storage speeds granulation. Dry honey keeps best at a steady room temperature, and borderline lots can be frozen as a temporary hold.
- Is the batch recorded? Write the moisture reading and a lot code on each bucket and case of jars, so a problem jar can be traced back to its batch. See lot tracking for honey sales.
Once the jars are filled, the honey quality checklist before labeling for sale covers the label-side checks.
How to Prevent Honey Fermentation in Storage and Post-harvest Handling
A clean transfer into airtight jars and prompt cooling gives you the best chance at long-term stability. Seal product in food-grade containers immediately after processing. That blocks humid air and limits yeast exposure during the critical first hours after packing.
Airtight, food-grade containers and cool, dry environments
Use certified food containers and tight lids. Store sealed jars in a cool room with low relative humidity.
Minimize transfers and work quickly to reduce air pickup. Keep records of post readings by container and jar for traceability.
Freezing as a fail-safe
Freezing stops yeast activity instantly. Whether in a jar or a bucket, seal and freeze high-moisture lots as a temporary hold.
Label frozen containers and thaw only what you need for sale or processing.
Gentle heat and bucket heaters: safe ranges
Short, low warming can help lower moisture content. Aim for about 85–95°F and avoid prolonged high heat that harms flavor and enzymes.
Dehumidify-and-stir methods
Place stacked supers or buckets in a low-RH room and stir periodically. Increased surface exposure speeds water loss without harsh handling.
Maintain steady air flow and log readings so the process stays data-driven.
If a batch ferments: signs and options
Watch for sour or alcoholic aromas, bubbles or foam that keep coming back after skimming, and a thinner-than-usual pour. Foam that appears within a day or two of bottling and smells normal is usually just air (see foam on honey after bottling). For the full set of signs and lookalikes, see how to identify fermented honey. Slightly affected lots may be used in mead or cooking.
Discard heavily fermented product when off-flavors or safety are concerns. Keep workflow clean and cut air exposure during transfers to limit new spore loads. Heat treatment, rescue steps by container and the best uses for salvaged honey are covered in can fermented honey be saved.
| Post-harvest option | Best use | Limitations |
|---|---|---|
| Airtight jars in cool room | Long-term retail storage | Requires stable environment |
| Freezing sealed buckets | Temporary hold for high moisture lots | Space and thaw management |
| Low-RH drying + stirring | Gradual moisture reduction for combs/buckets | Labor and monitoring required |
| Gentle warming (85–95°F) | Speed small reductions without flavor loss | Risk if temperature rises above range |
For a deeper look at water and storage practice, see moisture in honey and practical storage best practices.
Conclusion
A reliable finish for every batch comes from steady measurement, controlled drying, and careful storage.
Set a clear moisture content target (≈17–18%) and verify each lot with a refractometer. Manage the process in the dry room: aim near 30% RH, steady temperature, and directed airflow so capped honey and comb dry quickly without harming sugars or aroma.
Move sealed jars and containers into a cool room (≤52°F) and freeze any lots that remain high in water as a temporary hold. Watch crystallization — a wet layer at the top can fuel fermentation early — and limit temperature swings to reduce that risk.
Daily testing, rotating frames, and a short checklist for harvest, drying, sealing, and storage keep product at the top quality standard across the season.
FAQ
What is the quickest way to prevent honey fermentation?
Fermentation is yeast-driven spoilage after harvest. The quickest prevention is keeping moisture below about 18% and controlling hive and storage humidity, temperature, and yeast exposure. Measure with a refractometer, harvest capped frames, and store sealed jars in a cool, dry place.
What moisture level increases the risk of fermentation?
Ferment risk rises sharply above roughly 18% water content. Most honey is stable at 17–18% or lower. Above that, osmophilic yeast can metabolize sugars and produce CO2 and alcohol, causing bubbling, sour smell, or visible foaming.
How do osmophilic yeasts cause spoilage and why does spore count matter?
Osmophilic yeasts survive high-sugar environments and activate when water allows metabolic activity. Spore count and contamination during extraction affect how fast fermentation starts; more spores mean faster onset when moisture and temperature permit growth.
What role does temperature play in whether honey ferments?
Cooler storage slows or halts yeast activity; temperatures at or below about 52°F (11°C) greatly reduce fermentation risk. Warm ranges (above ~60°F/16°C) speed yeast metabolism and the fermentation process, especially with high moisture.
How can uneven crystallization trigger localized ferments?
When part of a jar crystallizes, liquid sugar concentrates in other zones, raising local water activity. Those wetter pockets feed yeast, so uneven crystallization can create hotspots that start fermentation even if average moisture seems acceptable.
How do I measure moisture with a refractometer and what should I aim for?
Clean and calibrate the refractometer, place a few drops of warmed, well-mixed honey on the prism, and read Brix converting to moisture. Aim for ≤17–18% moisture. Test multiple samples and capped vs. uncapped frames to detect variability.
Any practical calibration tips for consistent refractometer readings?
Calibrate with distilled water first, then use a small amount of extra-virgin olive oil (EVOO) or manufacturer-recommended standard for field checks. Keep the instrument clean, warm samples to remove air bubbles, and repeat tests for reliability.
When should I harvest frames to minimize fermentation risk?
Prioritize fully capped frames—bees cap honey when moisture is low. Avoid extracting within days of rain or during high ambient humidity. If weather is unpredictable, delay harvest until moisture checks show safe levels.