Beekeepers need clear rules to manage a healthy hive today. Early spring kicks off the season when flowers bloom and the colony plans its future.
One group of queen structures signals that the workers are preparing to split and create more colonies. Another set of structures tells you the colony plans to replace a failing queen to keep the hive strong.
Knowing the intent behind these queen cell types helps you act at the right time. You can stop an unwanted departure or ease a smooth transition when a new queen takes over.
This page explains the biological triggers, typical locations on the comb, and practical management tips. For detailed identification guidance, see this helpful resource on how to identify queen cells from a trusted source: identify queen cells.
Key Takeaways
- Two main queen cell types serve different goals: expansion or replacement.
- Location and number often indicate intent — margin cells suggest a split; comb-face cells suggest replacement.
- Timely checks let beekeepers prevent unwanted departures or support a new queen.
- Short spring inspections are vital when nectar and activity rise.
- Understanding worker behavior is the best tool for practical hive management.
Understanding Queen Cells in Your Hive
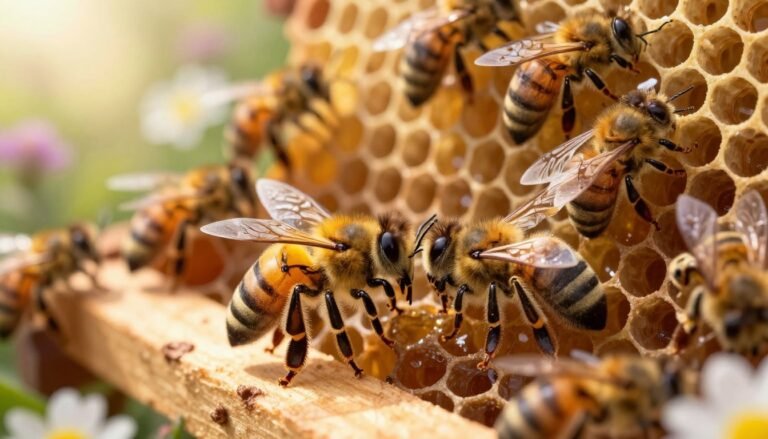
On a brood frame you’ll sometimes spot large, peanut-shaped structures that signal queen development.
What is a queen cell
A queen cell is a specialized wax structure about an inch long. It hangs vertically from the comb and cradles a larva destined to become a queen.
The finished form looks like a peanut in size, shape, texture, and color. It stands out because it is much larger than regular worker or honey cells.
Why identification matters
Accurate ID tells a beekeeper whether the colony plans replacement or other action. If you find one today, check nearby frames for brood pattern, food stores, and worker behavior.
- Size and vertical placement give the quickest clues.
- Count and location on frames help infer intent.
- Distinguish these from odd wax bumps to avoid unnecessary interference.
| Feature | Typical Look | Where to Check |
|---|---|---|
| Length | About 1 inch | Brood frame margins and comb face |
| Shape | Peanut-like, elongated | Vertical attachment to comb |
| Size vs worker cells | Significantly larger | Compare adjacent frames |
| Action | Assess colony health | Inspect surrounding frames and stores |
For practical queen rearing tips and deeper guidance on types queen cells, review this short guide on queen rearing basics.
The Biological Purpose of Swarm Cells

When a hive prepares to reproduce, workers build special queen cells so the part that remains can keep functioning after the old queen leaves.
These structures are started in spring, when population growth and honey flow give the colony resources to split. Workers rear several potential queens at once so one will survive to lead the parent hive.
- Construction usually happens at the bottom or edges of brood frames in tight clusters.
- The number of cells is a key indicator: several suggests a major departure is likely.
- If a structure appears in the middle of a frame, count how many are present before making a decision.
This coordinated process lets workers produce new queen candidates and protect the parent colony’s future. Quick, regular inspections today help beekeepers read intent and act to manage the hive.
| Feature | What to look for | Implication |
|---|---|---|
| Placement | Bottom or frame edges | Likely preparing to reproduce and leave |
| Timing | Spring during rapid growth | Plenty of food and population for a split |
| Number | One vs many | Multiple indicates strong intent to depart |
| Outcome | New queen ready | Parent hive retains leadership after leaving |
Why Colonies Initiate Supersedure Cells
When a hive senses its leader is failing, workers act quickly to rear a replacement. Supersedure cells form because the current queen is weak, injured, or no longer laying enough eggs for the brood. This is a deliberate, low-disruption response to preserve the colony.
Why identification matters
Spotting a single supersedure cell usually means the bees aim to replace queen without leaving the hive. These charged chambers are often built on the face of the comb, typically in the middle rather than the frame edge.
Workers pick a young larva of the right age and feed it royal jelly until a new queen emerges. If you find a marked replacement chamber, monitor it closely today to make sure the new queen emerges and begins laying.
- Single, scattered supersedure cells often signal internal replacement.
- Multiple grouped cells more often indicate preparation for a split or swarm event.
- Regular checks help beekeepers confirm a successful new queen and stable brood.
For practical steps on handling these situations, see this supersedure guidance.
Comparing Swarm Cells vs Supersedure Cells
Placement and count of queen cells reveal the colony’s intent more than shape alone.

Location gives the first clue. Groups at frame margins usually point to reproduction, while a lone structure on the comb face often signals replacement.
Number matters next. Multiple queen cells commonly indicate the hive plans to split. A single, charged chamber usually means workers aim to raise a new queen for the existing colony.
“Observing where and how many queen chambers appear is the simplest way to read hive intent.”
Workers manage both processes efficiently. They build what the hive needs to survive, whether that means division or internal repair.
| Feature | Typical Sign | Management Tip |
|---|---|---|
| Location | Frame edges vs comb face | Inspect surrounding frames |
| Number | Many vs one | Consider a split or monitor replacement |
| Purpose | Colony division vs queen replacement | Act to prevent loss or support emergence |
By checking today, you can decide whether to split the hive or let bees complete their plan. Clear observation keeps colonies healthy and productive.
Identifying Queen Cups and Their Role
Queen cups are thimble-sized, open-ended structures bees add to comb as a standby. They look like small bowls and often sit along the bottom or edges of a frame. Finding them is normal and does not always signal immediate action.
Distinguishing empty cups from charged cells
Empty cups are simply play or reserve cups. If no royal jelly or egg is present, a beekeeper need not remove or disturb them.
Charged cups contain royal jelly or a tiny egg. When workers feed and enlarge a cup it becomes a full queen cell and requires monitoring. A charged cup can lead to either a reproductive event or a replacement.
- Check cups along the frame bottom and sometimes in the middle of the comb.
- Empty cups found are normal — record and check again on the next short inspection.
- If you find a charged cup treat it as a potential swarm or replacement and follow guidance from this supersedure guidance.
The Importance of Hive Location
A well-chosen apiary spot helps colonies keep steady temperatures and stable humidity, which supports healthy brood development.

Placement impacts productivity. Sun exposure, wind protection, and nearby forage all influence how fast a colony grows and how reliably it produces honey.
Good placement also makes inspections easier. If frames are accessible, you can check brood patterns and spot developing issues without long delays.
- Choose a sheltered, sunny site that still offers morning shade when summers get hot.
- Keep hive fronts facing flight paths and away from strong prevailing winds.
- Maintain easy access for routine checks and timely interventions.
The internal location of developing chambers on a frame gives clues about the colony’s intent. Regular checks of the hive location and its surroundings let you see behavioral changes early.
For quick guidance on handling emergency queen situations, review this short note on emergency queen guidance.
Seasonal Timing for Queen Cell Development
Local nectar flows and brood expansion set the clock for when a colony raises a new queen.
In the UK, the main swarming season runs from late April through July, though overcrowding can trigger activity later in the year.
Spring resource surges prompt workers to build reproductive structures. That surge often coincides with rising population and available forage.
Beekeepers should track regional timing. Frequent inspections during peak months let you spot developing queen chambers early and act before the colony splits.
- New queen development is time-sensitive and demands ample stores and nurse care.
- Replacement of a failing queen can happen any time the queen’s performance drops.
- Monitoring timing helps you decide whether to perform a split to avoid loss.
| Season | Common Trigger | Beekeeper Action |
|---|---|---|
| Early spring | Rising nectar and brood expansion | Increase inspection frequency |
| Peak season (Apr–Jul) | High population and forage | Watch for multiple developments; consider prevention |
| Late season | Overcrowding or late nectar | Manage space and monitor for late activity |
Track patterns in your apiary and use resources like how to tell if your hive is preparing to to refine timing and inspections.
Visual Differences in Cell Texture and Shape
Look closely at the comb and you can spot subtle surface differences that reveal purpose.

Queen cells have a rough, peanut-like texture and an elongated shape. They hang vertically from the frame and stand out from the flat worker areas.
The texture is often coarse and ridged. That rough finish contrasts with drone structures, which appear pebbly or cobblestone-like.
- The elongated cell that protrudes from the frame is a clear visual clue.
- A smooth, flat area usually indicates worker brood or empty comb.
- Look along the bottom and edges of a frame for vertically oriented development.
Reading these details helps you assess colony intent quickly during an inspection. Noticing texture, position, and shape gives immediate insight into whether bees plan replacement or reproduction.
| Feature | Queen cells | Worker/Drone |
|---|---|---|
| Texture | Rough, peanut-like | Pebbly or smooth |
| Orientation | Vertical, hangs from frame | Flat or slightly rounded on comb |
| Inspection tip | Check bottom/edges for protruding forms | Flat surfaces likely contain worker brood or honey |
Managing Swarm Cells During Inspections
During routine checks, discovering reproductive chambers can signal an urgent need to change how you manage a hive. Act quickly when you see enlarged structures low on a frame, since placement and number reveal intent.

Preventative measures
Inspect frames often in spring. Look along the bottom and edges for charged queen cells and any queen cups with royal jelly. Early removal or redistribution of frames gives the colony space and reduces the urge to leave.
When to perform a split
If you find multiple charged structures or a fully capped cell, a split is often the best option. Moving the old queen to a new hive and leaving developing brood behind can save both colonies and protect honey stores.
- Regular inspections help catch issues before a flight event.
- When capped structures appear, act fast; prevention may no longer be possible.
- Use splits to control apiary growth and support a healthy colony.
For beekeepers today, timely checks and clear action keep queens productive and reduce unexpected losses.
Handling Supersedure Cells in the Apiary
Finding a replacement chamber near the middle of a frame usually means the colony plans to replace a failing queen. Supersedure cells tend to sit on the comb face rather than the bottom edge.

If you discover one charged queen cell, the best action for most beekeepers is to leave it alone. Workers will feed the larva and rear a new queen with minimal disruption.
Monitor the progress on your inspection page. Check that the emerging queen mates and begins laying a good brood pattern within a few weeks. Documenting the date and location helps track performance over time.
If you find several replacement chambers, treat this as an emergency. Multiple central cells may indicate the current queen is failing badly and the colony needs help. In that case, inspect brood pattern and stores, and consider intervention.
“Careful observation and clear notes let the hive make the change while you watch for success.”
For further identification tips, see is it a swarm cell or a supersedure.
Distinguishing Drone Cells from Queen Cells
A quick look at texture and orientation will tell you whether you’re seeing male brood or queen structures.

Drone brood forms broad, pebbly patches along the edges of frames. The surface looks cobblestone-like and sits flush with the comb.
By contrast, queen structures hang vertically and have a smooth, elongated, peanut-like shape. That vertical orientation is the clearest visual cue.
- Drone areas can number in the hundreds; queen examples usually appear in small groups or singly.
- Drone texture is rough and raised; queen chambers are smoother and protrude from the comb.
- Always check the bottom and edges of a frame for hidden queen development among drone brood.
Remember: finding lots of male brood is normal and not a sign the hive will split. If you want to reduce likelihood of a flight event, review techniques to prevent swarming with this short guide on prevent swarming.
“Clear texture and orientation checks remove doubt during inspections.”
| Feature | Drone | Queen |
|---|---|---|
| Texture | Pebbly, cobblestone | Smoother, elongated |
| Position | Edges of frame | Hangs vertically from comb |
| Typical count | Many | Few |
The Role of Emergency Queen Cells
When a queen disappears unexpectedly, workers race to convert ordinary larvae into a replacement. This rapid response prevents the hive from becoming queenless.

Emergency queen cells appear irregular in shape and placement. A common sign is a sharp 90-degree bend where workers remodel an existing larva into a queen. This bend helps identify an urgent build.
- Workers feed royal jelly to selected larvae to produce a new queen.
- These emergency constructions differ from normal reproductive or supersedure cells in appearance and timing.
- If you find them after an inspection, check for accidental queen loss or damage.
Acting quickly matters. Beekeepers should be ready to introduce a mated queen if the colony cannot successfully raise new queens on its own. Keeping records of incidents helps improve future hive care.
| Trigger | Shape | Action |
|---|---|---|
| Sudden queen loss | Irregular, often 90° bend | Monitor; consider introducing a mated queen |
| Planned replacement | Central, neat | Leave and monitor brood |
| Reproductive build | Clustered at frame edge | Manage space to prevent loss |
Understanding the different types queen cells helps keep your honey operations stable. For guidance on queen breeding and genetic resilience, review queen breeding practices.
Best Practices for Hive Splits
A timely split helps balance brood rearing and reduces pressure that leads to flights. When a colony grows fast, dividing frames and providing a leader prevents loss of foragers and honey.

Move enough frames of brood, nurse bees, and stores so the new hive can rear young and build comb. Place frames with open brood near the center, and include a few frames of honey for immediate food.
Put the new hive in a different location so returning field bees do not drift back. Provide a new queen or a mature queen cell to jump‑start laying and reduce stress on the split.
- Inspect frames for existing queen activity before assigning a queen.
- Time the split in spring when nectar and bees are abundant.
- Monitor both hives for acceptance, brood pattern, and queen laying over the following weeks.
“A careful split can double your apiary while keeping both hives healthy.”
For signs that suggest you need more space before splitting, review signs your hive is overcrowded.
Using Attractants for Swarm Traps
Lemongrass-scented traps often catch scout bees looking for a new home.

Using attractants in your traps is a proven method to capture stray clusters and expand your apiary during spring. Lemongrass oil mimics honeybee pheromones and draws scouts quickly.
Include small pieces of old comb or a smear of propolis to make the box feel familiar. Place traps high on a post or in a sheltered tree near flight paths to raise the chance a group inspects it.
Check traps often during peak time. Regular visits let you act the moment bees move in and avoid losing the find to pests or weather.
When a cluster settles, transfer them to a prepared hive and give steady care until the colony stabilizes. Clean traps and refresh lures each season to keep appeal high.
| Step | Why it helps | Action |
|---|---|---|
| Use lemongrass oil | Mimics pheromones | Apply 2–3 drops to cotton or wood |
| Add old comb/propolis | Signals a trusted home | Place piece inside trap |
| Location | Improves visibility to scouts | Mount on a tree/post 6–15 ft high |
| Regular checks | Increase capture success | Inspect weekly during swarming |
Common Mistakes During Colony Inspections
Missed checks at the frame bottom are a top reason beekeepers misread colony intent.

Don’t skip the bottom of the frames. Many developing queen structures hide there. If swarm cells found low on a frame go unnoticed, you can lose a hive to an unexpected departure.
Also check the middle of the comb. Failing to inspect the center often means you miss a supersedure cell and a failing queen.
Document every visit on an inspection page. Notes on eggs, brood, and frame placement make trends clear and speed decisions later.
Move slowly and handle frames gently. Rushed inspections can harm the queen or squash young brood, forcing emergency rearing and stress for the colony.
- Learn to tell drone brood from queen forms to avoid unnecessary intervention.
- Confirm presence of eggs and young larvae to verify the queen is laying today.
- Keep a calm routine in spring and beyond to reduce mistakes.
For expansion and practical setup tips, review beekeeping expansion tips.
“Slow, consistent checks and clear notes make you a more confident beekeeper.”
Conclusion
Spotting the right queen structures early helps you protect hive health and make sound decisions. Learn the signs that signal replacement or reproduction so you can act with confidence.
Mastering identification of swarm cells and supersedure cells is a core beekeeping skill. It lets you prevent unwanted departures or support a smooth transition to a new queen.
Prioritize short, regular inspections. They reveal brood patterns, stores, and the presence of developing queens. With clear notes and timely steps, you keep colonies productive and resilient.
Thank you for improving your practice. A well-timed intervention or patient watch can ensure every hive gains a strong new queen this season.