Preparing a hive for a long cold stretch is about timing, evidence, and careful setup. In many U.S. regions a single warm November day is the window to finish work and then leave the colony undisturbed.
Moisture control and proper ventilation are more important than extra insulation alone. Iowa data showed colonies on solid bottoms fared better than those on screened bottoms during hard winters.
University of Minnesota guidance and Michigan practitioners stress assessing the queen, honey stores, and mite levels in September. Beekeepers should add wind protection, place feed near the cluster, install a moisture board, and provide an upper entrance for airflow and emergency access.
Key Takeaways
- Complete critical tasks on one warm day, then minimize disturbance for the year.
- Prioritize moisture management to reduce deadly condensation inside the hive.
- Solid bottom boards can help colony survival in cold weather, per Iowa study.
- Set up ventilation, wind blocks, and an upper entrance to keep air moving.
- Assess queen strength, honey stores, and mites by September.
- For regional adjustments and climate tips, consult a practical guide like beekeeping in different climates.
What “winterizing” means for honey bees in cold northern climates
When fall temps drop to the low 50s°F, worker bees form a tight thermoregulating cluster to preserve heat. The cluster holds about 85°F when no brood is present and roughly 93°F with brood. This shift is central to any winter plan.
Warm, moist air rises from the cluster and condenses on cold surfaces. Droplets can fall and chill the bees or damage brood. Managing moisture is as important as reducing heat loss.
Bees slowly move upward through honey; if stores are not above the cluster they can face isolation starvation. An upper entrance lets bees take cleansing flights on warm days and prevents suffocation if snow blocks the lower opening.
- Definition: Preparing the hive’s internal environment so the cluster stays warm and dry all winter.
- Cluster mechanics: Outer bees shiver to make heat and rotate inward to avoid chilling.
- Biology: Winter bees store fat and vitellogenin to survive months and feed early brood without fresh pollen.
| Cluster Need | Common Hazard | Hive Measure |
|---|---|---|
| Stable temperature ~85–93°F | Cold drafts | Block wind, use entrance reducer |
| Dry air space above bees | Condensation drip | Moisture board or quilt box |
| Accessible food stores | Isolation starvation | Place honey directly above cluster |
| Ventilation without chill | CO2 buildup or suffocation | Small upper entrance for air exchange |
When to start: fall assessment and timing before the deep freeze
Begin assessments in September so you can correct queen, stores, or pest issues well before cold weather sets in.
Evaluate queen quality, brood pattern, and colony population by checking for a young, prolific queen, solid brood frames, and at least ten frames of bees. Record mite counts and start a varroa mites control plan in late summer or early fall.
Target honey stores and frame configuration for winter
Aim for about 75–95 pounds of honey and arrange frames so most stores sit above the cluster. Configure three deep boxes with honey concentrated toward the top. Close lower-box entrance holes and leave the top box upper entrance open for airflow and emergency egress.
Plan box setup and yard location ahead of harsh weather
Swap screened bottom boards for a solid bottom board to cut convective heat loss. Pre-drill a 1/2-inch upper hole if needed and place a moisture board on the inner cover in early November so airflow can cross it.
- Set wind protection and choose sheltered yard sites before freezes start.
- Feed heavy syrup in fall if stores are low and plan internal feeding options once outside feeders freeze.
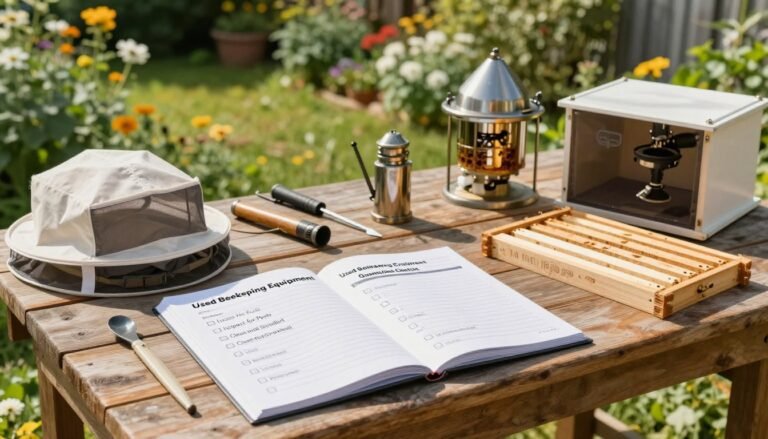
- Create a checklist with dates to finish critical hive tasks on warm days and avoid rushed work at the end of the year.
Varroa mites and winter bees: preparing your colony’s “fat bees”
Protecting fat, long-lived bees begins by cutting mite loads before winter brood peaks. Winter bees develop enlarged fat bodies and store vitellogenin. That reserve lets nurse bees feed brood without fresh pollen and sustain the cluster for months.
Varroa mites that feed during pupation reduce fat body development. Affected bees emerge weak and shorten the hive’s stamina during cold spells.

Time treatments to the brood cycle
Treat before the winter-bee rearing window when brood still exists but activity falls. Late summer often brings fewer worker bees while mite counts rise, increasing the mite-to-bee ratio. If untreated, even strong colonies can fail by mid-winter.
| Goal | Action | Why it matters |
|---|---|---|
| Reduce varroa mites | Monitor and treat pre-winter | Protect fat bee development |
| Confirm drops | Check affected frames | Verify treatment success |
| Match method to climate | Use temperature-safe options | Avoid stressing queen or brood |
Track frames of brood and log mite checks each year. A hive with low mites and robust winter bees will hold a tight cluster and use less food. Good mite control choices lead to a stronger spring buildup.
Hardware setup that helps bees: boxes, entrances, and airflow
Small hardware changes deliver big winter protection. Choose parts that control drafts, channel moisture, and let bees reach food without long cold walks.
Solid bottom boards are the first upgrade. A USDA Iowa study found about a 20% higher winter loss when colonies used screened bottoms in harsh cold. Swap to a solid bottom board to limit cold air intrusion and help colonies retain population.
Entrance geometry and reducers
Install an entrance reducer with the 3-inch space facing up to blunt wind-driven rain and limit drafts. Smaller openings cut chill while still allowing bees to fly on thaw days.
Top box upper entrance
Drill the upper hole below the handle cut-out in the top box. That placement follows University of Minnesota guidance and helps bees exit during warm breaks even when the lower entrance is blocked by snow.
“Controlled air movement removes moisture without chilling the brood or cluster.”
- Close auxiliary holes in lower boxes and keep the top entrance open to guide airflow.
- Leave a slight gap under the outer cover so air moves across a moisture board.
- Check seams, square boxes, and tight fits so drafts don’t undermine your plan.
- Arrange frames so food sits above the cluster and is reachable on short forays.
| Hardware | Action | Benefit |
|---|---|---|
| Solid bottom board | Replace screened bottoms | Reduces cold-air intrusion; improves survival |
| Entrance reducer | Install 3-inch gap up | Blocks wind and rain while allowing exit |
| Top box hole | Drill under handle | Provides ventilation and emergency egress |
| Tight equipment fit | Square boxes, seated boards | Prevents drafts and keeps airflow predictable |
Ventilation and moisture control that prevent condensation kill
A layered approach to moisture and airflow keeps warm, humid air moving out before it can condense and fall. The first step is a purpose-built moisture board over the inner cover placed soon after November 1.
Use porous materials: a 3/4-inch Bild Rite sheet works well to absorb vapor and let it evaporate outside. Do not use Styrofoam or any board with a moisture barrier. If needed, a 1-inch stack of newspapers will substitute.

- Set the outer cover slightly offset so air passes across the moisture board; weigh it down with a rock to hold position during snow and wind.
- Add dry sugar or a thin hygroscopic layer above top frames for extra moisture buffering and emergency feed.
- Consider quilt boxes or dry fillers (wood shavings, burlap) for very damp sites; avoid materials that trap water.
- Ventilate deliberately: balance airflow so warm, moist air exits without creating drafts that chill the cluster.
Confirm clean contact between inner cover and board and check for unintended gaps that route cold air onto bees. Periodically inspect after storms for ice damming or blocked vents.
See a beehive ventilation guide for detailed setups and variations by colony size.
Insulation, wrapping, and wind protection that actually work
A well-wrapped hive can cut wind loss dramatically while still letting bees breathe through a top opening. Wrap to block prevailing gusts but keep the entrance side open so bees can fly and air can move.
Wrap three sides with tar paper or heavy cardboard. Cut a clean opening that aligns with the top entrance hole so bees exit freely and warm air vents without obstruction.
Build simple wind blocks
Use straw bales, plywood panels, or stacked pallets in a U-shape to break wind and divert snow away from the hive face. These barriers reduce radiant heat loss and lower wind pressure on the box walls.
- Leave the entrance side open to preserve flight access and ventilation.
- Keep the outer cover slightly ajar so air moves across the moisture board and does not trap damp air under impermeable insulation.
- Match wrap seams across boxes so edges do not press cold against cluster positions.
- Inspect wraps after storms so flapping material does not stress bees or block openings.
| Measure | How to do it | Benefit |
|---|---|---|
| Three-side wrap | Tar paper/cardboard, cut for top hole | Blocks drafts; preserves top ventilation |
| Wind block | Straw bales or panels in U-shape | Diverts snow and reduces heat loss |
| Cover offset | Leave slight gap over moisture board | Allows moisture to exit; prevents condensation |
Good site choice reduces the need for heavy wrap. For alternate hive layouts, see the horizontal hive guide for related shelter ideas.
9. winterizing beehives in northern states: feeding strategy and honey stores
A clear fall feeding plan prevents isolation starvation and keeps energy where the cluster can reach it. Set a target of about 75–95 pounds of honey per colony so bees can generate heat and support intermittent brood rearing.
Use heavy syrup in early fall when temps allow evaporation and capping. If stores look short, feed until frames show capped or firm stores above the cluster.
When sustained cold arrives, switch to internal options: sugar bricks, dry sugar, fondant, or grease patties. External feeders freeze and force risky flights.
Place emergency food directly above the cluster in the top box or over the inner cover so bees don’t break the cluster to reach stores.
Avoid raw or brown sugars—molasses content can harm gut health in winter. Choose pure white granulated sugar for bricks or dry feed. Dry sugar also helps absorb excess moisture while serving as backup energy.
- Organize frames so capped honey sits over the cluster along a continuous arc.
- Monitor consumption on warm days and replenish on schedule.
- For detailed timing and methods, consult this overwintering success guide.
Protecting the hive from pests and intruders in winter
Field mice and other small animals seek warm cavities as temperatures fall. They can slip into a hive when bees are clustered and the face is unprotected.
Install a mouse guard made of #8 hardware cloth at the entrance before cold weather drives rodents to shelter. Staple the mesh to the hive face and the bottom board so animals cannot widen gaps by chewing.
Keep an upper hole clear for ventilation and emergency egress. If snow or drift blocks the lower opening, the top hole lets bees exit and exchange air without exposing the cluster to direct drafts.
Fit a small wind deflector over the upper entrance to reduce direct wind while preserving about a 1/2-inch clearance for bee traffic. After storms, check for chew marks or shifted guards and re-secure them quickly.
“A firmly attached mesh guard protects stores, reduces debris, and lowers stress on the colony.”
- Staple guards to face and bottom so rodents cannot enlarge the hole.
- Pair rodent proofing with ventilation so airflow is not blocked.
- Include guard installation on your pre-winter checklist with wrapping and feed placement.
| Risk | Action | Result |
|---|---|---|
| Field mice entry | Attach #8 hardware cloth at entrance | Protects comb and stores |
| Lower opening blocked by snow | Keep upper hole clear; add wind deflector | Maintains airflow and emergency exit |
| Shifted guard after storms | Inspect and re-staple to hive and bottom | Prevents chew enlargement and intrusion |
Midwinter management on warm days without breaking propolis seals
On rare mild days, beekeepers can perform essential, minimal inspections without breaking the hive seals. Plan these visits for calm, sunny days that reach about 40–50°F so bees stay clustered and heat loss is limited.
Quick heft and a cautious peek
Start with a heft test from the back of the hive to judge stores. A light box signals the need to add sugar or bricks via the top without removing frames.
Open the cover only long enough to glance under the inner cover. Look for sugar consumption and cluster position. Close up fast to preserve warmth and propolis seals.
Keep entrances clear and ventilation working
Clear the lower entrance of dead bees so airflow and egress remain open. Confirm the upper hole in the top box is unobstructed for emergency exits and moisture exchange.
“Minimal, well-timed actions prevent starvation without forcing the colony to relearn lost seals.”
- Schedule checks only on suitable warm days to reduce heat loss.
- Prepare feed and tools in advance to limit inspection time.
- Avoid prying propolis seals; they conserve heat and humidity.
| Action | How | Benefit |
|---|---|---|
| Heft test | Lift rear of hive briefly | Fast estimate of remaining stores |
| Top feeding | Place dry sugar or bricks above frames | Feeds cluster without frame removal |
| Entrance clearing | Remove dead bees at lower opening | Restores airflow and flight access |
| Quick peek | Lift inner cover for a few seconds | Confirms cluster position and consumption |
Common northern-state pitfalls: condensation, starvation, and isolation
Top-drip condensation is one of the fastest ways a colony fails. Moist, warm air from the cluster rises and can form water on cold surfaces above. Use layered ventilation and absorbent materials so vapor leaves the hive before it becomes liquid.
Prevent top-drip condensation with proper ventilation layers
Install a moisture board or a newspaper layer under an offset outer cover. That stack soaks and vents vapor while letting air pass slowly across the inner cover.
Avoid isolation starvation by keeping food directly above the cluster
Stocks of honey to the side or below the cluster can leave bees stranded. Place emergency food and sugar above the cluster or in the top frames so minimal movement is needed on frigid days.
“Balanced ventilation removes vapor without chilling the cluster or creating drafts.”
- Watch midwinter consumption on frames and add top sugar when needed.
- Remember late-season mites and a failing queen lower resilience; treat and evaluate in the fall.
- Use the upper entrance for controlled exchange and emergency flights.
| Issue | Action | Benefit |
|---|---|---|
| Top-drip condensation | Moisture board + offset cover | Prevents water from falling on bees |
| Isolation starvation | Place food directly above cluster | Reduces travel; preserves energy |
| Over/under ventilation | Balance vents; use small upper hole | Moves vapor without chilling cluster |
| Low stores or misplaced honey | Monitor frames; follow a stores target | Timely top feeding; fewer winter losses |
For guidance on how much reserve honey to leave and placing stores, see how much honey to leave.
Conclusion
Sound preparation blends biology and proven methods to protect colonies through cold months. Protect winter bees’ fat bodies by securing dry air flow from bottom to top, placing honey and emergency stores above the cluster, and installing a moisture board and offset cover. Small steps done the right way limit risk from wind and weather.
Beekeepers should follow a yearly checklist: fall assessment, mite work, hardware setup, feed placement, and careful wrapping with the upper entrance clear. Use wind blocks and solid bottom boards thoughtfully so the hive breathes while staying warm.
Combine university-backed methods with local observation. Strong hives with a healthy queen, well-positioned frames of honey, and controlled airflow emerge in spring ready to build. For detailed wrapping guidance see wrapping a colony.
FAQ
What does “winterizing” mean for honey bees in cold northern climates?
Winterizing means preparing colonies to survive long, cold periods by ensuring strong winter bee populations, adequate food stores, proper hive configuration, and defenses against moisture, pests, and wind. It focuses on creating a dry, draft-controlled space where the cluster can move to access honey without exposure or excess condensation.
When should I start fall assessment and preparations before the deep freeze?
Begin inspections in late summer to early fall. Evaluate queen performance, brood pattern, and colony size before bees rear winter workers. Treat for varroa in late summer if needed, and plan feeding so colonies reach target stores well before consistent subfreezing weather arrives.
How do I evaluate queen quality, brood pattern, and colony population?
Look for a continuous brood pattern, ample capped brood, and a laying queen. Count frames of bees: aim for a strong cluster size for your region. Replace failing queens or combine weak colonies in early fall to avoid last-minute interventions when temperatures drop.
What are target honey stores and frame configuration for winter?
Aim for roughly 75–95 pounds of honey for northern climates per colony, depending on local conditions. Arrange frames so stores are directly above and adjacent to the cluster. Reserve a top box or two with honey near the cluster to prevent long, cold walks for bees.
How should I plan box setup and yard location ahead of harsh weather?
Position hives on a slight slope or raised stand to shed water and snow. Face entrances away from prevailing winds and toward midday sun where possible. Stack boxes tightly, eliminate gaps, and ensure the cluster has room to move upward into stored honey.
When should I treat for Varroa mites to protect winter bees?
Treat in late summer to early fall, before colonies begin producing long-lived winter bees. Effective mite control during this window reduces viral loads in winter bees and improves winter survival. Choose products and timing that Minimizes brood disruption and fits your local regulations.
Which mite control methods work best before winter bee rearing peaks?
Use integrated methods: monitored alcohol or sugar rolls to assess levels, and approved chemical or nonchemical treatments like oxalic acid dribble/vapor in broodless periods, formic acid pads for brood-containing colonies, or drone brood removal earlier in the season. Match treatment to colony status and label instructions.
Should I use a solid bottom board or screened bottom board for winter?
In northern cold, a solid bottom board reduces drafts and heat loss. If you used a screened bottom for mite control in summer, install a solid board or block the screen before freezing weather while maintaining clean ventilation elsewhere to control moisture.
How does an entrance reducer help during winter?
An entrance reducer minimizes wind-driven chilling and limits space for mice and robbers. Reduce the opening to allow bees to guard and to retain warmth, but keep it large enough for traffic and ventilation on warmer winter days.
Why add an upper entrance in the top box?
An upper entrance gives bees an escape route for warm, moist air and allows for easy egress on mild days. It also helps convective flow when paired with a designed moisture management layer, reducing condensation over the cluster.
How can I prevent condensation that can kill bees during winter?
Control moisture with an absorbent moisture board or quilt box above the inner cover, allow slow venting at the top, and avoid sealing hives so tightly that warm air condenses and drips. Provide a small, consistent airflow without creating direct drafts on the cluster.
What are simple moisture-management options like quilt boxes or dry fillers?
Use a quilt box filled with wood shavings or straw, a moisture board with an absorbent layer, or dry paper fillers such as corrugated cardboard to trap moisture. These materials hold water vapor away from the cluster and release it slowly through the top vent.
How should I set the outer cover for proper airflow?
Set the outer cover slightly raised on one side or use a telescoping cover aligned with the moisture board’s vent to allow gentle airflow. The goal is to vent moist air upward without creating a cold draft across the cluster.
What insulation and wrapping practices actually help without overheating or trapping moisture?
Insulate three sides and the top using breathable wraps like corrugated vented panels or insulation boards, leaving a small upper vent aligned with the top entrance. Avoid impermeable plastic that traps moisture; aim for windproofing while permitting upward vapor escape.
How do wind blocks reduce drifting snow and heat loss?
Erect fences, hay bales, or shrub shields on the windward side of apiaries to reduce wind speed at hive level. Lower wind reduces convective heat loss and snow drift, helping bees conserve energy and maintain cluster temperature.
What feeding strategy ensures adequate honey stores going into winter?
Feed heavy sugar syrup (2:1 sugar to water) in early fall to bulk stores, then transition to dry sugar or fondant when temperatures routinely fall below freezing. Ensure most stores sit directly above the expected winter cluster location.
When should I switch from syrup to sugar bricks or dry sugar?
Switch once nighttime temperatures stay below freezing to avoid fermentation and robbing. Provide solid feed like sugar bricks, fondant, or dry granulated sugar placed above the cluster so bees can access it during cold snaps.
Why place food above the cluster in the top box?
Bees move upward in winter as the cluster consumes stores. Placing food above the cluster reduces the distance bees must travel in cold weather, lowering energy use and the risk of becoming chilled or isolated from supplies.
What sugars should I avoid when winter feeding?
Avoid raw, brown, or unrefined sugars that can contain impurities and promote fermentation or hard crusts. Use pure white granulated sugar, beekeeper-grade fondant, or specially made winter patties to ensure reliable nutrition.
How do I protect the hive from pests and intruders during winter?
Install #8 hardware cloth mouse guards at the entrance and reduce entrance size to deter mice. Keep grass and debris cleared near hives and inspect in mild weather for signs of skunks, raccoons, or other predators.
What is a safe midwinter management routine on warm days?
On warm, calm days above freezing, perform a quick heft to estimate remaining stores and clear entrance blockages from dead bees. Avoid opening the hive fully or breaking propolis seals unless absolutely necessary, and replace covers promptly.
How do I perform a quick “heft test” to check sugar consumption?
From behind the hive, lift the back slightly and gauge weight. Compare to a known full-weight hive. A light feel indicates reduced stores and may signal the need for supplementary feeding as winter progresses.
What causes top-drip condensation and how can I prevent it?
Top-drip happens when warm, moist air rises, condenses under the roof, and drips onto frames. Prevent it with an absorbent moisture board, a small top vent, and breathable insulation. Ensure warm air can escape without reaching freezing surfaces above the cluster.
How can I avoid isolation starvation in tight-wintering colonies?
Avoid leaving honey only in lower boxes or far from the cluster. Keep emergency fondant or dry sugar directly above the cluster, and check stores on warm days. Consider adding a shallow top feeder near the cluster before deep freeze sets in.
What common northern pitfalls should be watched for to improve winter survival?
Watch for condensation, starvation, and inadequate population size. Treat varroa well before winter, provide accessible stores above the cluster, manage moisture, and protect hives from wind and predators to reduce these risks.