Capture free colonies during the active spring season with simple, cost-effective plans that suit small and large yards alike.
Dr. Leo Sharashkin notes you can build a working trap for under $15 in materials, a major savings compared to buying a package of bees.
The book Keeping Bees With a Smile reports up to an 80% success rate when following proven swarm traps and construction methods. That shows how reliable these traps can be when set up correctly.
This short guide offers a clear materials list and step-by-step plans to prepare your traps before the season. Proper preparation raises your odds of attracting a healthy colony and expanding your apiary naturally.
Key Takeaways
- Homemade traps save money and can match the value of purchased bees.
- Proven plans yield high capture rates when followed closely.
- Prepare equipment ahead of the spring season for best results.
- Use a clear materials list to build effective traps quickly.
- These methods support sustainable, natural apiary growth.
Why You Should Use a Swarm Trap
Using traps early in the season gives you a cost-effective way to add genetically local colonies. Dr. Leo Sharashkin reported a 50% capture rate in his first year after placing ten traps across his property.
Captured bees often bring hardy genetics and local resistance traits that purchased packages lack. This can boost long-term apiary health and lower replacement costs.
Many beekeepers choose to keep bees by deploying multiple swarm traps. These boxes let you increase hive count while observing a new colony through the season before full integration.
- Traps offer a low-cost way to attract local swarms adapted to your area.
- A motivated colony often builds out a hive faster than purchased stock.
- Setting traps early in the year improves your odds during peak season.
| Benefit | Why it matters | Typical result |
|---|---|---|
| Local genetics | Better adaptation to climate and forage | Stronger colonies |
| Cost savings | Fewer purchases of bees | Lower yearly expenses |
| Colony evaluation | Observe health before adding to apiary | Informed decisions |
For guidance on handling found colonies in structures, see a safe way to remove bees from a.
Selecting the Best Swarm Trap Box Design
Choosing the right internal volume and materials sets the stage for reliable colony captures during spring.
Volume Requirements
Volume matters most. Dr. Leo Sharashkin recommends about 53 liters (14 gallons) as his favorite size. That amount gives scouts space like a natural cavity while keeping the unit light enough to move.
“About 14 gallons provides a comfortable cavity for scouts and fits standard frames cleanly.”
Material Durability
Use a 4′ x 8′ sheet of 19/32” plywood to cut front, back, and bottom pieces for several boxes. This thickness holds six extra-deep frames or standard Langstroth frames without sagging.
- Tightly fitting top: keeps the internal volume steady and attractive to scouts.
- Weatherproofing: build to last a season or more against wind and rain.
- Efficient cuts: one sheet yields parts for multiple traps, lowering cost and waste.
Assemble each piece with care so the bottom, sides, and top remain sound once a swarm moves in. For step-by-step plans and a helpful guide, see the swarm trapbox guide.

Essential Materials and Tools for Construction
A single 4′ x 8′ sheet of 19/32” untreated pine plywood and the right hardware let you build multiple traps efficiently.
Use untreated wood to avoid chemicals that can harm bees. One sheet yields front and back walls for about 7-1/2 traps and bottoms for ten traps, so buy extra if you plan several boxes.
For joints, choose Titebond III or similar waterproof glue and 1-5/8” deck screws. Small nails add extra hold at corners and for internal battens.
- Table saw and circular saw for accurate cuts.
- Drill and countersink for screws.
- Tape measure, square, and pencil for marking.
| Material | Typical Qty per 10 | Purpose |
|---|---|---|
| 19/32” plywood sheet | 1–2 sheets | Front, back, and bottom panels |
| 1-5/8” deck screws | 100–150 | Structural fastening |
| Wood glue (Titebond III) | 1 bottle | Sealed, strong joints |
| Small nails | 1 box | Corner and trim fastening |
Follow simple plans and place every screw where it adds strength. Careful assembly reduces repairs and keeps the hive secure once occupied.
Preparing the Interior for Bee Attraction
Scents and familiar wax cues inside the cavity dramatically raise the chance that scout bees will investigate and settle.
Using Old Comb and Lures
Place at least one frame of old comb inside the trap. The smell of wax and stored honey tells scouts this site was used before and feels safe.
Rubbing the inner walls with propolis helps, and adding a few drops of lemongrass oil on a cotton swab boosts allure further. If old comb is not available, lemongrass works as a good substitute.
Avoid black or degraded comb that may carry pests or disease. Check traps often during peak season so you catch incoming bees before they move on.
- Put traps in place by late March or early April to let scents settle.
- Use one clean, well-preserved comb frame to signal an established cavity.
- Inspect regularly during the season and remove degraded combs between uses.
For step-by-step setup and safe handling guidance, see a short guide on how to build a swarm box and practical tips on catching a swarm safely.

Assembling the Main Body and Frame
Begin by dry-fitting the front, back, and bottom panels to check alignment. Use a flat workbench so corners are square and clearances match.
Glue the front and back to the bottom with waterproof glue and secure them with 1-5/8” deck screws for a rigid, long-lasting joint. Cut the frame rests into the top inner edge of the front and back so standard frames hang level and steady.
Attach the side walls and end pieces with small nails and glue. Center the hanging board on one side so the assembled unit lifts straight when hoisted into a tree.
Measure each piece precisely so the top fits snugly and keeps drafts and water out. Use a consistent assembly way to build uniform traps and to make swapping frames between boxes simple.
“Careful joints and correct rests are the difference between a temporary shelter and a hive-ready home.”
Note: A full trap can weigh 30 to 40 pounds once occupied. Reinforce corners and double-check screws before placing traps in the field.
| Step | Action | Key fastener |
|---|---|---|
| Core assembly | Front/back to bottom | Glue + 1-5/8” deck screws |
| Frame support | Cut rests into top inner edge | No fastener (integral cut) |
| Sides & ends | Attach and reinforce | Small nails + glue |
| Hanging | Center hanging board on side | Deck screws |
For full plans and cut lists, see these detailed plans.
Installing the Entrance and Ventilation
A narrow front opening paired with screened vents prevents pests while letting the colony breathe.
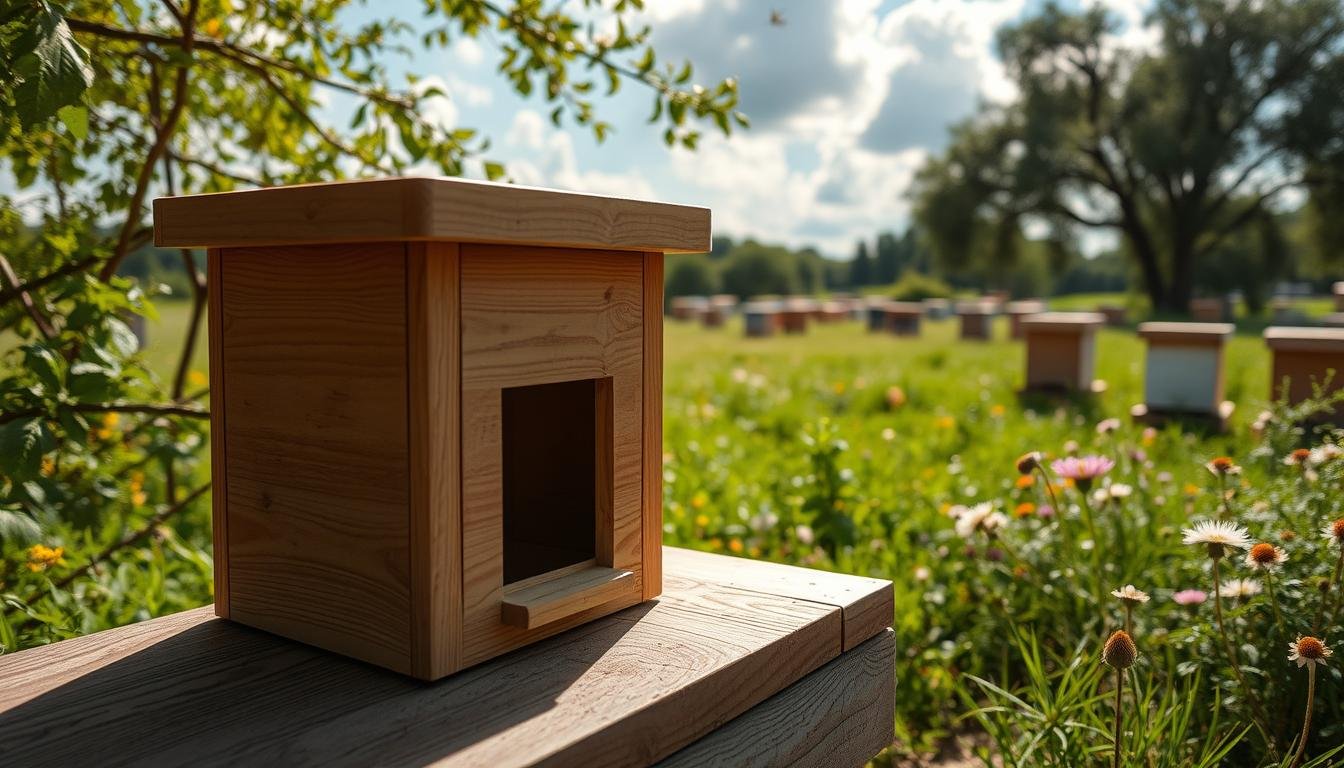
Cut a horizontal entrance slit about 1/2 inch high by 4 inches long on the front of the unit. This size lets scouts enter easily but stops birds from nesting inside. Do not make the opening larger than one inch.
Place the entrance in the bottom half of the front panel. That positioning gives the bees a secure landing area and mimics a natural cavity. Fit a small sliding piece or board so the entrance can be closed when you move the trap later.
Drill several ventilation holes near the top and sides. Angle each hole slightly downward so rain runs out rather than pooling on the inside of the box. Vent placement helps colonies regulate temperature during transit and when they first move in.
Cover every vent with fine screen wire to keep ants, roaches, and small predators out. Attach the wire over the hole from the inside so it sits flush and cannot be pushed through.
- Entrance size: 1/2″ x 4″ recommended; never larger than 1″.
- Vent angle: drill downward at a slight slope to shed water.
- Wire protection: screen wire over vents keeps pests away.

| Feature | Recommendation | Why it matters |
|---|---|---|
| Entrance slit | 1/2″ x 4″ | Allows entry; blocks birds |
| Vent holes | Top/side, angled down | Prevents water; aids airflow |
| Screen | Fine wire mesh | Keeps ants and pests out |
For detailed placement guidance and official diagrams consult the detailed trap details and this note on beehive placement.
Weatherproofing and Finishing Touches
A light-colored cap and a sealed finish protect the top and keep the interior dry. Cover the roof with aluminum flashing to create a durable, waterproof barrier. This prevents rain from soaking the plywood and helps the unit last through multiple seasons.
Paint the exterior with an exterior acrylic to protect the wood and reflect sunlight. A light tone reduces heat buildup and lowers stress on a new colony during hot days.
Before you deploy traps, allow the paint to cure fully so fresh odors do not deter scouts. Check that all screws and joints are sealed with caulk or glue to stop water from reaching the layers of plywood.
- Coat the exterior with exterior acrylic paint to slow rot and UV damage.
- Install aluminum flashing on the top as a long-lasting waterproof roof.
- Seal screw heads and seams to prevent delamination of the wood.
- Inspect and repair weather damage yearly to keep traps inviting.
For tips on keeping hives secure during storms, see a short guide to secure your hive in extreme weather.
Strategic Placement for Maximum Success
Choosing where to hang a unit matters as much as how you build it. A well placed trap draws the attention of scout bees and gives a colony a clear landing approach.
Ideal Tree Selection
Pick large trees at least 10 inches in diameter. Trees on the edge of woods or in fence rows offer clear flight paths and nearby forage.
Look for limbs that face open sky and receive morning sun. These spots are easy for scouts to spot during the spring scouting time.
Height and Visibility
Hang the trap 12 to 15 feet off the ground. This height keeps it safe from ground predators and places the entrance where scouts naturally look.
Use local flight observations. If bees fly low along hedgerows, try a lower branch next season and move the unit about 30 feet if you see no activity after a week.
Securing the Trap
Use 15-foot light-duty ratchet straps to fasten the unit to the limb or trunk. Straps stop swaying and reduce stress on a newly arrived colony during wind.

| Factor | Recommendation | Reason |
|---|---|---|
| Tree size | ≥ 10 inches diameter | Stable support; common scout preference |
| Height | 12–15 feet | Visible to scouts; predator protection |
| Location | Edge of woods / fence row | Natural flight lanes and forage nearby |
| Secure method | 15-ft ratchet straps | Prevents sway during wind |
- Check traps each week during peak spring for drones or pollen at the entrance.
- If no activity after a week, consider moving the unit 30 feet the next season.
- Observe local flight patterns to choose the best place over time.
Managing and Retrieving Your Swarm
Retrieve occupied units after dark.
Use a headlamp so your hands stay free while you close the entrance and secure the top and bottom for transport. Nighttime work keeps most bees clustered and reduces escapes.
If the captured colony is within six miles of your apiary, move the unit at least ten miles away for a week before bringing it home. This prevents bees from returning to the original location.
Always wear protective attire when handling boxes or moving frames. If you must relocate less than a mile, place a branch in front of the entrance so workers can reset their bearings.
- Remove the lure and store it in the freezer, or refill the container with lemongrass oil for next spring.
- After the first frost, take down traps, clean debris, and store boxes in a dry place to deter mice.
- Inspect frames for healthy comb as soon as the colony is settled in the hive.

| Action | When | Why |
|---|---|---|
| Retrieve after dark | Night | Most bees inside; easier closure |
| Relocate >10 miles | If within 6 miles | Prevents homing back |
| Store lure | After removal | Preserve scent for next season |
Conclusion
Making simple capture units gives small-scale beekeepers a low-cost way to grow colony numbers. Building your own traps is both practical and rewarding when you follow clear plans and a proper materials list.
Strategic placement and routine maintenance are the real keys to success during the peak season. Prioritize safety, wear protection, and handle any captured bees with care so the new colony thrives.
Ready to start? For step-by-step instructions and a helpful reference, see this complete guide. Use patience and the checklists here to improve your odds and enjoy a productive beekeeping season.
FAQ
What size should a swarm trap box be to attract a honey bee colony?
Aim for a volume roughly the size of a standard Langstroth 10-frame deep, about 40–50 liters. That gives enough room for a queen and workers to cluster and begin comb building. Keep internal dimensions simple: two or three frames spaced at standard inch widths will work if you want removable frames.
Which materials hold up best for a long-lasting trap?
Use exterior-grade plywood or cedar for sides and top. These woods resist rot and shed water well. Join with weatherproof glue and stainless screws or galvanized nails. Paint the exterior with exterior acrylic paint and add a sloped roof to shed rain.
How many frames should I include and what frame type works?
Include at least two frames to guide comb building, but three to five frames offer more natural spacing. use standard deep or medium frames depending on your hive system. Old drawn comb frames from a healthy colony attract scouts fastest.
What entrance size and placement are most effective?
Make a 1 to 1.5 inch high by 3 to 4 inch wide entrance near the bottom front. Place it low so bees can enter and hang beneath the cluster. Provide a small landing board or perch in front to assist incoming bees.
Should I install screening or ventilation in the trap?
Yes. Add screened ventilation near the top back to reduce moisture and overheating. Use 1/8-inch hardware cloth or stainless steel screen. Ensure vents are covered to keep predators out while allowing airflow.
Is it better to use old comb, lure, or both inside?
Both. Old comb from a disease-free colony is the top attractant. Supplement with commercial lures like Dr. Adam or lemongrass oil applied sparingly to a cotton wick. Avoid overusing scents that can repel bees.
Where should I place a trap for the best capture rate?
Hang or mount traps in a quiet, sheltered spot with morning sun and afternoon shade. Position at 10–20 feet high on a sturdy branch or pole, facing open flight paths. Place near existing forage and water but away from heavy human traffic.
How long should I leave traps out and how often check them?
Deploy traps in early spring through late spring when swarming peaks. Check every 7–10 days for activity and to refresh lures or comb. Leave traps in place all season to catch late swarms and scout activity.
What weatherproofing steps prevent rot and extend life?
Seal joints with exterior wood glue and a bead of silicone where needed. Paint all exterior surfaces, including undersides, and fit a sloped roof with an overhang. Add small feet or mounting cleats to keep the base off wet surfaces.
How do I secure a trap so it won’t fall or be stolen?
Use stainless steel straps, ratchet straps, or galvanized lag bolts into a mounting post or tree bracket. Anchor with corrosion-resistant hardware and place out of easy reach. Camouflage with natural colors to reduce theft risk.
What safety or legal considerations apply when removing a colony?
Check local ordinances and state regulations on hive relocations. Wear proper protective gear and have tools ready. If unsure, contact a local beekeeper association or a licensed beekeeper to remove and relocate the colony responsibly.
How do I transfer a captured colony into a permanent hive?
Wait until most bees are inside, usually at dusk. Close the trap entrance, then move the box near your apiary. Open into a prepared hive with frames in similar positions. Gently shake or brush remaining bees into the hive and monitor for acceptance.
Can predators or pests enter the trap and how do I prevent that?
Small mammals and ants can invade. Fit entrance reducers and predator guards, and use ant moats where appropriate. Ensure screens cover vents and that all openings are tight. Regular inspections catch issues early.
What tools and fasteners do I need to build a durable trap?
Basic tools include a circular saw, drill, screwdriver, and tape measure. Use exterior plywood, cedar, stainless or galvanized screws, exterior glue, and 1/8-inch hardware cloth for screening. Keep pencil, square, and clamps on hand for accurate assembly.
How does placement height affect capture chances?
Height matters. Many colonies prefer 10–20 feet above ground, often near the height of natural tree cavities. Too low reduces visibility to scouts; too high makes access harder for retrieval. Match nearby cavity heights you observe in the area.
Can painted colors or finishing touches influence attraction?
Use muted earth tones—olive, brown, or gray—to blend with trees. Bright yellows or whites can startle bees or attract wasps. A lightly scented wood finish like linseed oil is fine, but avoid strong chemical odors near entrances.