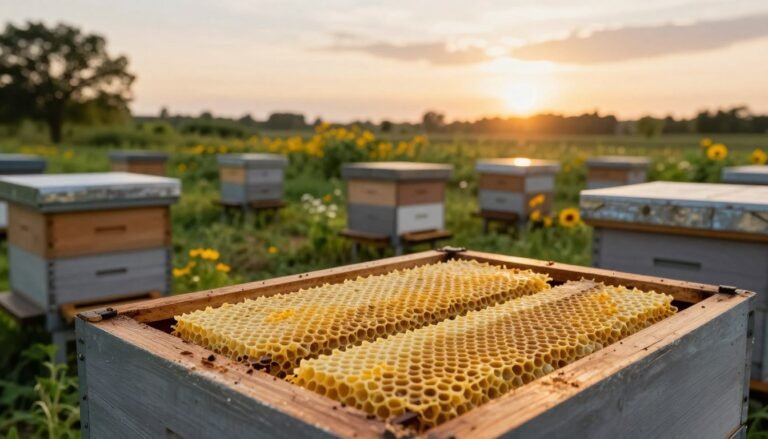
Deciding when to place a brood barrier is a key choice in modern beekeeping. Timing ties directly to the nectar season and the strength of each colony. Install too soon and you risk restricting growth. Wait too long and comb in the supers may contain brood, which reduces product quality.
During a strong nectar period, many operations install the barrier to keep the laying female in the brood chamber while worker bees fill the supers. This preserves clean frames for harvest and supports higher production without brood contamination.
Assess hive strength, monitor nectar arrival, and plan installation to match peak collection. For a detailed guide on placement and timing, see the practical instructions at queen excluder before or after first honey.
Key Takeaways
- Install when nectar arrival and colony strength match for best results.
- Proper placement keeps brood out of supers and improves harvest quality.
- Weak colonies may need more time before restriction is applied.
- Monitor the nectar flow closely to time installation precisely.
- Remove the barrier after harvest to avoid trapping the laying female above brood in cold months.
Understanding the Role of Queen Excluders
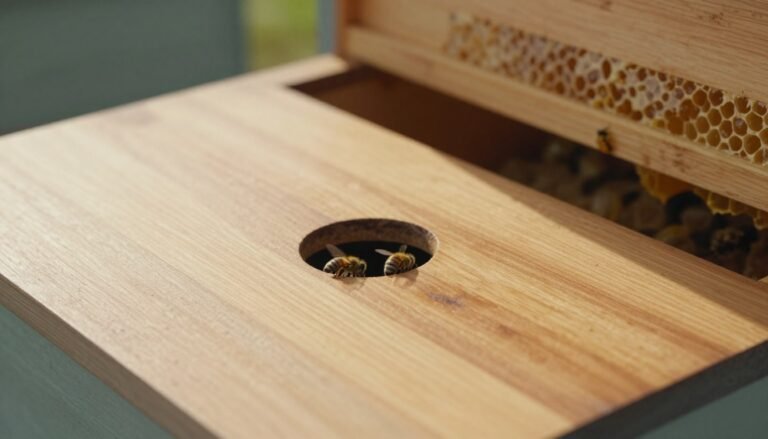
A mechanical barrier guides the colony’s organization so supers fill with capped comb rather than brood. This tool is a grid placed between the brood area and storage boxes in a bee hive. It lets worker bee traffic pass while keeping the laying female confined below.
Basic Function and Design
The screen is calibrated so workers fit through the gaps but the larger laying individual cannot. This simple design preserves clean frames in the upper boxes and reduces brood contamination during harvest.
Primary Management Purposes
Installations help beekeepers direct storage into designated supers, which makes extraction easier and improves product quality.
“A clear separation between nest and storage simplifies seasonal management and boosts harvest consistency.”
| Purpose | Benefit | When Useful |
|---|---|---|
| Restrict laying area | Cleaner frames in supers | During strong nectar periods |
| Guide bee movement | Simpler extraction | When adding storage boxes |
| Maintain brood separation | Better brood hygiene | While managing colony growth |
For practical placement tips and timing, see this placement and timing guide.
Determining When to Use a Queen Excluder Before or After First Honey Flow
Decide on installation by watching colony strength and nectar intake, not by a calendar date. A simple rule is to wait until the brood box is well populated and workers are actively bringing in nectar.
A standard plastic queen excluder has 4.2mm openings that let workers pass while blocking the laying individual. During a sustained nectar period, strong bees will push through those gaps to fill the frames in the honey supers.
Place the barrier firmly at the top of the brood box so it seals against gaps. Confirm the laying female is below the grid before closing the hive to avoid trapping her above the storage boxes.
Note that some designs, such as Primal Bee hives, often do not need a metal queen excluder because the structure maintains uniform temperature. In such cases, forcing a barrier can harm colony dynamics.
“Base installation on colony vigor and nectar movement, not on a calendar.”
- Ensure brood boxes are established before adding equipment.
- Verify the location of the queen each time you add an excluder hive piece.
- For practical timing tips, see a guide at when to use a queen excluder and seasonal checks at beekeepers seasonal checklist.
Assessing Hive Population Strength
Start by counting the number of frames with bees to judge whether the colony can tolerate a barrier.
Check frame coverage across the brood boxes and note how evenly workers occupy the nest. This quick metric tells you if the hive has the workforce to keep raising brood while filling storage.

Risks of Restricting Weak Colonies
Do not place an excluder on a small colony. A weak unit needs unrestricted access to brood boxes so it can expand and recover from stress.
Restricting a fragile hive can bottleneck production and make the laying female cut back on eggs. That slows population growth and harms seasonal build-up.
- Assessing population strength is mandatory before installing excluders to avoid damage.
- Monitor frames covered by bees as a reliable readiness indicator.
- Ensure brood boxes are full of workers before adding any restriction.
| Assessment | Healthy Threshold | Action |
|---|---|---|
| Frames covered by bees | 6+ frames in brood boxes | Consider adding an excluder |
| Brood pattern | Solid, even brood | Safe to restrict |
| Foraging activity | Consistent worker returns | Confirm timing for placement |
For tips on preparing colonies for tough conditions, see preparing bees for unpredictable seasons. Good checks now prevent setbacks later in the season.
Monitoring the Nectar Flow
Entrance traffic and forager returns give the clearest signal that surplus stores are building.
The nectar flow provides the main reason workers will push through an excluder into the supers. Watch for steady, loaded returns at the hive entrance. Those trips mean the colony can convert forage to capped comb.
When activity drops, bees may stall at the barrier and congestion can form in the brood nest. That situation risks reduced brood rearing and wasted foraging effort.
- Observe entrance traffic hourly during warm daylight.
- Count returning bees carrying pollen or nectar to judge intensity.
- If activity is weak, delay adding excluders to avoid crowding the brood area.
- During strong runs, the excluder lets workers move surplus into the upper boxes for later harvest.
“Successful honey production depends on timing the colony’s access to storage with the peak nectar flow.”
| Indicator | What to Watch | Action |
|---|---|---|
| High entrance traffic | Many loaded returns per minute | Add excluder and supers |
| Low activity | Few or no pollen loads | Hold off on restrictive gear |
| Uneven returns | Intermittent foraging with dips | Monitor daily; add equipment as consistency improves |
For local cues and practical signs, review this guide on honey flow indicators. Regular checks keep beekeeping decisions aligned with real-time colony needs.
Temperature Requirements for Installation
Cold nights can undo careful management—confirm stable nighttime temps before modifying the hive.
Nighttime lows must consistently stay above 50°F before adding a barrier or extra box. This threshold helps the cluster keep the brood chamber warm enough for developing bee larvae.
Installing gear when nights dip below 50°F can force workers to concentrate on heat, not storage. That shift stalls growth and weakens the colony.
Professional beekeeping practice stresses thermal regulation. Monitor local forecasts and the microclimate at each apiary. Proper timing prevents brood chill and supports steady spring build-up.

- Too-early additions can break cluster cohesion and reduce brood survival.
- Watch nightly lows for several days before acting.
- Good temperature management keeps hives strong for the upcoming season.
Proper Placement Within the Hive
Place the grid directly on the top of the uppermost brood box so brood and storage stay separated.
Set the queen excluder flat and flush against the brood box rim. Check for gaps where the laying individual might slip through. A snug fit prevents unwanted movement into the honey supers and protects frame quality.
Confirm the orientation matches the manufacturer’s markings. A rotated piece can leave openings that defeat the barrier’s purpose. Regular inspections ensure the device has not shifted during wind or bee activity.
Watch worker traffic to verify bees pass upward into the supers as expected. If bees avoid the grid, a brief repositioning or adding a single bait frame helps encourage movement.
“Proper seating of the barrier keeps storage free of brood and makes extraction cleaner.”
| Check | Why it matters | Action |
|---|---|---|
| Flat, flush fit | Blocks queen access to supers | Re-seat and clamp if needed |
| Orientation | Prevents gaps at corners | Align manufacturer marks |
| Worker movement | Ensures frames in supers fill | Use bait frame or shift slightly |
| Inspection frequency | Detects shifts quickly | Check weekly during strong honey runs |
Locating the Queen Before Installation
Confirming the laying female’s location is the single most important step before seating any barrier. A quick but thorough check prevents eggs from appearing in upper boxes and preserves clean frames for harvest.
Physically inspect the brood boxes by easing frames one at a time and scanning comb for the laying individual or fresh eggs. Focus on frames near the center of the cluster where she prefers to work.
If you cannot spot the laying female, look for freshly laid eggs and solid brood patterns as a reliable proxy. These signs tell you she remains in the lower nest and you may proceed.
- Search method: lift each frame slowly and watch worker behavior for clues.
- Avoid rushing; careful handling reduces stress and keeps the colony calm.
- Marking a frame or using a small cage helps beekeepers who struggle to find the laying individual during inspections.
Only add the barrier once you confirm she is below it. If the laying individual ends up above the grid, she will lay in the storage boxes and defeat the device’s purpose. Proceed with adding the supers with confidence after confirmation.

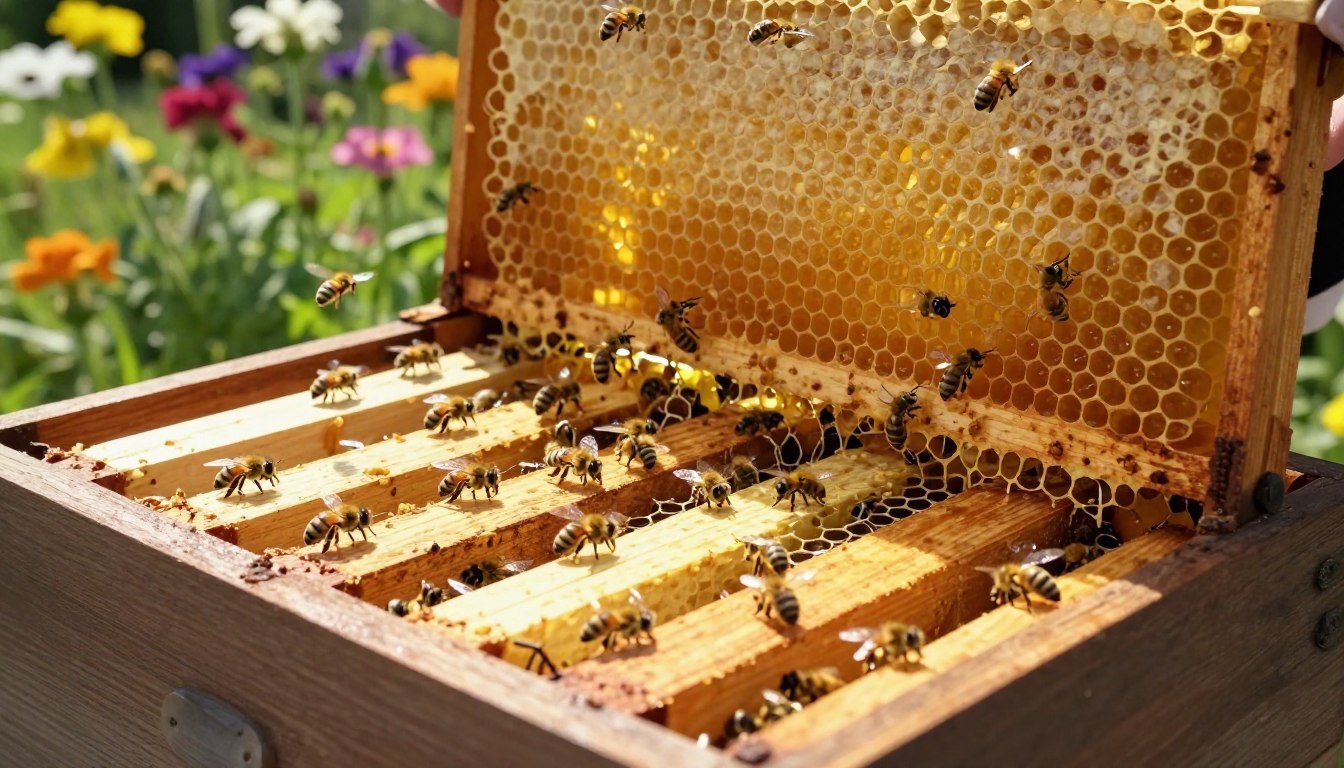
Techniques for Encouraging Worker Movement
Getting workers to move upward often starts with a deliberate incentive in the upper boxes. Small, targeted nudges help the colony accept new space and make the most of a strong nectar run.
Baiting supers with sealed brood frames is a reliable tactic. Move a single sealed brood frame into the honey supers to draw care-taking workers upward through the excluder.
Baiting Supers with Brood Frames
The presence of brood in the supers acts as a strong attractant. Workers will cross the barrier to tend larvae, which encourages traffic into the storage area.
Utilizing Queen Pheromone Lures
Placing a small pheromone lure in the upper boxes can add another incentive. This mimics colony scent cues and guides activity where you want it.
- Use one sealed frame at a time so brood can hatch and workers then backfill cells with honey.
- Monitor the supers weekly to confirm backfilling after brood emergence.
- These subtle manipulations help overcome initial reluctance when installing an excluder.
“Small incentives in the upper boxes often produce steady worker movement and cleaner harvests.”
| Technique | Benefit | Monitoring |
|---|---|---|
| Sealed brood frame in supers | Encourages upward care behavior | Check for backfilling after brood hatched |
| Queen pheromone lure | Directs worker attention to supers | Replace lure per manufacturer guidance |
| Bait plus single bait frame | Reduces resistance to new barrier | Inspect weekly during strong nectar periods |
For an operational perspective on using barriers and lures, review this guide on should you use a queen excluder.
Managing Existing Brood in Supers
When larvae exist in the honey supers, a strict waiting period is needed before those frames become harvestable. If an excluder is added while brood occupies the upper boxes, do not extract immediately.
You must wait at least 24 days so all worker and drone brood can hatch. After emergence, the colony will naturally backfill empty cells with honey. That process makes the frames suitable for processing.

Good record-keeping matters. Note the date the barrier was installed and mark when the 24-day period ends. This protects product quality and avoids including larvae in the final harvest.
- If brood is present, delay harvest until the full cycle completes.
- Check that the bees have backfilled comb before removing supers.
- Patience during this interval ensures clean, brood-free frames for extraction.
“A measured pause after sealing the supers preserves the integrity of the crop.”
For broader apiary timing and prevention tips, see prevent swarming best practices.
Potential Downsides of Using Excluders
Narrow gateway tools may discourage worker traffic and lead to storage congestion in the hive.
The “honey barrier” effect occurs when nectar intake is weak and workers hesitate to cross the grid. This can leave upper boxes underused while the brood nest becomes crowded. Over time the colony may slow its storage behavior, which can reduce overall honey production and make harvesting more difficult.
The Honey Barrier Effect
Signs to watch for: slowed backfilling of frames, buildup of unprocessed nectar in the brood area, and increased congestion at the entrance.
- Weak nectar periods raise the risk of a barrier creating a bottleneck.
- Congestion can stress workers and reduce foraging efficiency.
- Consider removing the grid temporarily if the colony becomes honeybound.
Drone Entrapment Hazards
Drones are larger than workers and may be unable to pass through the grid. If brood frames are moved up, newly hatched drones can become trapped in the supers and die.
Management steps: avoid moving frames with many drone cells into storage boxes, inspect supers after brood emergence, and keep equipment clean so wax and propolis do not worsen blockages.

Practical note: good maintenance and timely removal of the device limit these downsides. For guidance on removal timing, see when to remove a queen excluder.
Maintenance and Cleaning Requirements
Keep metal grids free of sticky buildup so worker traffic stays steady through the season.
Propolis and wax can seal gaps quickly. Remove deposits so the excluder openings remain clear. Blocked holes force workers to crowd the brood nest and slow storage use.
Inspect the hive at least once a month during active months. Professional beekeeping operations set a cleaning schedule to reduce lost foraging time and avoid chokepoints.

When buildup is heavy, scrub frames with warm water and a stiff brush, or freeze the grid to make propolis brittle. Replace units that show corrosion or warped bars.
“A clean barrier keeps workers moving and preserves colony productivity.”
- Monthly checks prevent severe blockages.
- Proper off-season storage stops rust and damage.
- Timely cleaning protects developing bees and simplifies spring setup.
| Task | Method | Frequency |
|---|---|---|
| Remove propolis | Warm water + brush or scrape | Monthly during season |
| Clear wax | Freeze unit, chip off softened wax | As needed |
| Inspect fit | Check for gaps, re-seat on hive | Every inspection |
| Store off-season | Dry, ventilated area; keep spare parts | Annually |
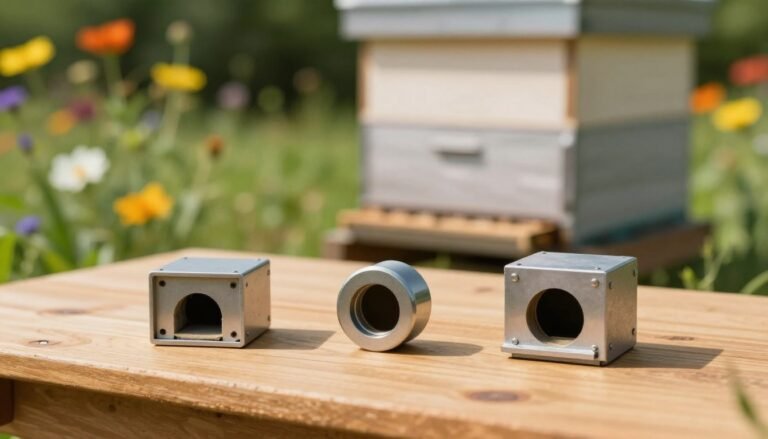
Choosing Between Plastic and Metal Equipment
Equipment choice shapes daily inspections and long-term hive health. Match material to climate and your handling style to get the best results.
Plastic excluders are lightweight, inexpensive, and simple to handle. They reduce the risk of sharp edges during frame checks and speed routine work. Plastic can warp in extreme heat, which may create gaps the laying female could use.
Metal options last longer and resist wear. In cold regions metal can affect thermal regulation, so monitor cluster warmth when using metal pieces in early spring.

- Choose plastic for easy handling and low cost.
- Pick metal for durability in heavy-use operations.
- Consider climate: thermal effects matter for brood survival.
- Prioritize colony health and efficient harvest when selecting gear.
| Feature | Plastic | Metal |
|---|---|---|
| Weight | Light | Heavy |
| Durability | Moderate | High |
| Thermal impact | Low | Higher |
When to Avoid Using an Excluder
Do not add a barrier to a weak or newly formed colony. Small teams of workers need open access to every box so the nest can expand. Restricting movement too early slows comb building and reduces production.
New packages and recently split hives require freedom to organize. Let bees focus on brood rearing and storing in the brood box without a grid in place. This helps the unit reach a resilient size before adding equipment.
If a colony shows stress after storms, pesticide exposure, or poor forage, avoid installing restrictive gear. Extra pressure from a barrier can hinder recovery and lower honey yields.
Some professional beekeeping approaches favor natural organization. Removing restrictive tools during rebuilding phases often supports colony health. Trusting bee behavior can be the best management choice.

- Avoid use on weak colonies that need full access to brood box space.
- Delay placement when establishing new packages or splits.
- Skip restrictive equipment during recovery from stress to support rebuilding.
| Situation | Risk | Recommended Action |
|---|---|---|
| New package or split | Slowed comb building | Wait until colony reaches strong workforce |
| Stressed by weather or chemicals | Hindered recovery | Avoid restrictive gear; focus on feeding and shelter |
| Small frames covered by bees | Insufficient workforce for supers | Delay adding upper boxes and barriers |
“Recognizing when not to use a grid is as important as knowing when to install one.”
Troubleshooting Common Installation Issues
Quickly resolving installation issues keeps frames clean and preserves the quality of your crop. A calm, methodical approach prevents brood from appearing in storage boxes and saves work at harvest.
Addressing a queen found above the excluder
If the laying female is located in the honey supers, move her gently back into the brood chamber immediately. Inspect every frame above the grid for recent eggs so you can judge whether laying has occurred.
Immediate steps:
- Find and transfer the individual down into the lower hive box with minimal disturbance.
- Check frames in supers for eggs and mark any that need to age out before extraction.
- Provide a frame of open brood in the brood box to encourage the queen to remain below the barrier.
Repeated escapes signal a problem with the device. Examine the unit for gaps, warping, or loose fit. Replace damaged pieces — especially if using a plastic queen excluder that has warped — to stop repeats.

“Respond fast and inspect frames; prevention protects the harvest.”
For a practical installation and care reference, review this queen excluder usage guide.
Economic Considerations for Apiary Success
Calculating costs per pound of crop helps beekeepers decide when specialized gear pays for itself. A simple cost model compares equipment investment, labor savings, and the premium price of brood-free product.
Commercial operations often choose durable equipment to reduce downtime and protect consistent production across many hives.
High-quality tools can cut extraction time and limit contamination in supers, which raises value at market. For research on economic impacts, review this cost-benefit analysis.
Even when an initial purchase seems large, labor savings and improved harvesting consistency usually justify the expense for large apiaries. HONESTBEE supplies professional-grade options that support scale and reliability.
Balance is key: weigh any small reduction in total yield against higher returns for premium, brood-free jars. Use durable metal or stable plastic choices to limit replacement costs and protect colony health.
“Invest in reliable equipment when it reduces time and protects product quality.”
- Run a simple per-hive profit sheet before buying new tool sets.
- Factor in labor saved during harvesting and cleaning.
- Consider market premiums for brood-free jars when planning purchases.
- Scale equipment choices to match the number of bee hives under management.
For practical product guidance for hobby and commercial setups, see this buyer’s overview of pollen and gear at best pollen trap options. Use those insights to refine timing and equipment selections for sustained apiary success.
Conclusion
Let the colony’s signals guide your choices. Use a queen excluder when the hive shows strength and nectar intake supports added storage. Proper timing keeps brood out of upper boxes and improves overall honey production.
Install gear with care, keep units clean, and inspect often. Good maintenance and correct placement are the backbone of reliable production and a brood-free harvest.
Stay observant of worker activity and weather. Small tweaks to management, including whether to use plastic parts, can protect the colony and boost yields. For seasonal tasks and checks, see the spring beekeeping checklist.
When used wisely, a queen excluder is a versatile tool that helps commercial and hobby operations optimize harvests while safeguarding colony health.