Planning a new beekeeping project requires clear steps, realistic time estimates, and local research. This guide walks people through the legal groundwork, site choices, first hive setup, and seasonal care. It highlights how honey bees link to farm productivity and why early choices about site, equipment, and colonies shape results after the first year.
You will learn which tasks to prioritize and what equipment and hive setups work best for beginners. Local extension offices and USDA resources offer technical help and rule guidance. Tools like Beescape help assess pollinator habitat so you pick the right property and protect neighbors while you grow colonies.
The page also points to trusted beginner material, such as a practical primer on beekeeping, so new beekeepers can save time on research and follow a clear roadmap from planning to the first hive.
Key Takeaways
- Follow local laws and consult extension services before installing hives.
- Choose a site with good forage; use tools like Beescape for assessment.
- Start with appropriate equipment and one or two colonies to learn seasonal care.
- Plan for costs, inspections, and simple record-keeping to track colony health.
- Use trusted resources — see a helpful beginner guide here.
Why start beekeeping in rural America: goals, benefits, and what success looks like
Keeping colonies connects land stewardship to tangible rewards like pollination, wax, and honey. Clarify your main goal—pollination for gardens and pasture, family honey, or modest extra income. Your aim sets how many hives you need and how much time you will invest.
Success in year one often means stable colonies, routine inspections, and safe handling rather than a large surplus of honey. Use USDA guides and local extension advice to set realistic targets and avoid disappointment.
- Measurable targets: overwinter one colony, harvest 10–30 pounds of honey if conditions allow, complete monthly checks.
- Start slowly—many beekeepers begin with one or two colonies and expand as confidence grows.
- Account for time: spring needs frequent checks; late winter needs little work.
Learn the basics of honey bee biology through vetted books and courses. For training options, see beekeeping courses and training. Well-managed bees benefit local food crops and support biodiversity for your family and neighbors.
Know the rules before you buy bees: zoning, state laws, and agricultural valuation
Confirm regulations early so your plan aligns with county and state requirements before you acquire colonies.

State and county registration typically requires apiary registration, routine inspections, and disease reporting. Contact your State Department of Agriculture and local county office to learn placement rules, pesticide limitations, and inspection windows.
State and county apiary regulations, registration, and inspections
Most jurisdictions require registration and allow inspectors to check hives for pests and disease. Keep contact details for your inspector and ask any questions about local limits on hive counts and setbacks.
Texas “Open Space” land valuation via honey bees: acreage, hive counts, and timelines
In Texas, parcels between five and twenty acres may qualify for 1‑d‑1 Open Space valuation by raising bees for pollination or honey production. Qualification normally needs five qualifying years (or five of seven), with the reduced valuation applying in year six.
- Ask your Central Appraisal District about minimum hives — many counties require six hives for the first five acres.
- Qualification ties to the property, not the owner, and can follow a sale.
Documentation you’ll need for compliance and qualification
Maintain dated photos, receipts for equipment and bees, inspection notes, service logs, and any lease agreements for bee colonies. These items support applications and answer CAD questions about stocking rates and honey production.
- Consider hiring registered, insured providers who use certified beekeepers to manage risk and paperwork.
- Weigh potential tax savings against your time and management costs; for more on ag exemptions, see open-space valuation details.
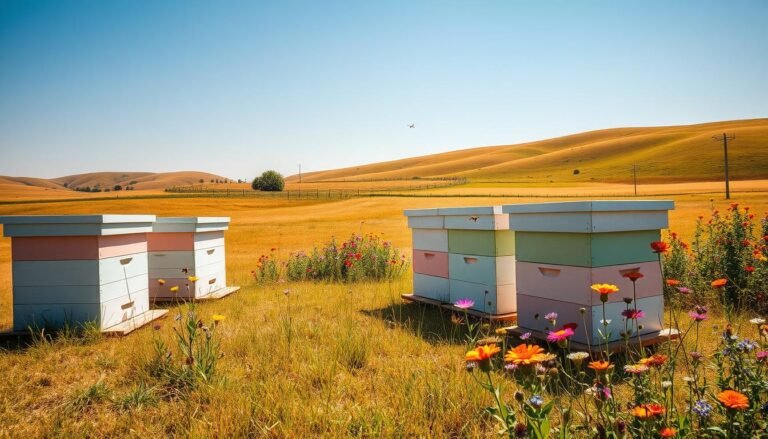
33. starting an apiary in rural America: choosing and preparing the right site
Good site selection starts with mapping floral resources, water, and spray risk before you place any hives.
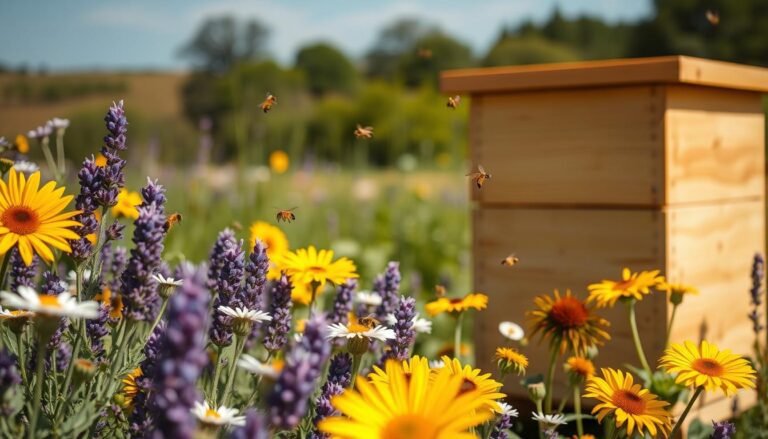
Forage, water, and landscape quality
Use tools like Beescape to score habitat and find continuous bloom and mixed cover across the area. Target spots with nectar flows in spring and summer so colonies build stores for winter.
Provide a reliable water source close to the apiary. Add pebbles or floats so foragers can drink without drowning.
Neighbors, setbacks, and flight paths
Place hives with morning sun and afternoon shade, and point the entrance away from high-traffic paths. This keeps people and pets out of the main flight path and eases neighbor concerns.
Discuss placement with neighbors and share contact details. Small fences or hedges can raise flight paths above head level and improve neighbor relations.
Access, security, and site layout
On multi-acre property, leave space between hives for safe handling and equipment staging. Grade and level stands to avoid moisture pooling after rain.
Consider gates, signage, or cameras for security; some sites use low electric fencing against wildlife.
Reducing pesticide exposure
Map local spray schedules and avoid fields with routine applications. Communicate with nearby farms to limit spray during bloom and reduce stress on your honey bee colonies.
- Tip: For a practical checklist and local guidance, see the beekeepers guide.
- Pre-mark truck turning and staging zones so operations run smoothly during peak activity.
Essential equipment and hive setup for your first colonies
Getting the right hive parts and core tools first saves time and protects colonies later.

Hive styles and box sizes
Choose Langstroth to match local suppliers and mentors. Use one or two box sizes and be consistent across your hives.
Many beekeepers use two deep boxes for brood and add mediums or shallows above for honey. Decide 8‑frame vs 10‑frame by how much weight you can lift; 8‑frame boxes are lighter but may need more boxes.
Protective gear and core tools
Buy a veiled jacket or suit, sting‑resistant gloves, a smoker, and 1–3 hive tools. Keep spare frames, a feeder, entrance reducers, and a nuc box on hand.
Winterizing and site protections
Right‑size the space to colony strength before winter. Add insulation, an upper entrance for ventilation, and moisture‑absorbing material above the brood.
Install mouse guards, elevate stands, and consider low electric fencing if wildlife threatens your lot.
- Prep woodenware: assemble and paint early so wax and wood cure before bees arrive.
- Label and inventory: track boxes, frames, and spare equipment to avoid shortages during honey flow.
- Feeding: choose food‑safe feeders that match your hive configuration for spring build‑up and fall backup.
Getting bees the right way: timing, sourcing, and installation
Choose your bees with purpose: timing, source, and how you install them shape early success.
Nuc versus package: the key difference
A nuc arrives on drawn comb with brood, workers, and stored food. It grows faster and needs less feeding.
A package is a screened cage of workers, a caged queen, and syrup. It costs less but takes longer to build comb and stores.
Local sourcing, transport safety, and queen options
Source locally to match regional genetics and reduce stress. Avoid shipping; pickup lowers the dead‑on‑arrival risk.
Transport bees in a well‑ventilated vehicle, secure the box to stop tipping, and keep them shaded. Bring a smoker, veil, tape, and water for pickup day.
Ask for a marked queen to speed inspections and spot her among workers. Record supplier details, queen lineage if given, and pickup dates for future reference.
| Option | Lead time | Startup growth | Cost |
|---|---|---|---|
| Nuc | Short (may sell out) | Fast (brood present, drawn comb) | Higher |
| Package | Available widely | Slower (build comb) | Lower |
| Local pickup tips | Reserve early | Bring toolkit | Supports local beekeeper |
- Plan installation for your spring build‑up so each colony can expand before dearth or winter.
- Prepare clean syrup or frames of food if nectar is scarce; avoid spills that trigger robbing.
- Start with two to three colonies to compare performance and share frames if one struggles.
Seasonal management plan for rural hives
Follow a seasonal routine so tasks match bee needs and the local bloom calendar.
Spring build‑up: space, feeding, and brood checks
Expand space in step with population growth. In early spring add a box when bees show consistent activity and stores run low.
Inspect every 1-2 weeks to confirm brood in all stages and assess the queen. Do quick feeding if food is scarce to avoid a stall before major bloom.
Summer dearth and robbing: entrances and hygiene
During dearth reduce the entrance to help defenders and limit robbing. Keep strict apiary hygiene—no spilled syrup or exposed honey—and remove wax scraps promptly.
Provide shade or wind breaks to control temperature and ventilation so the hive does not overheat.
Fall prep and winter care: consolidation and moisture control
Late summer and fall focus on food and population. Treat for mites before winter and consolidate boxes to match colony strength.
Add an upper entrance for moisture venting and provide emergency feed if needed. Coordinate with people who share the property about harvest and heavy flight days, and keep notes on each hive to guide splits, requeening, or culling.
| Season | Key task | Frequency |
|---|---|---|
| Spring | Add box, feed if low, brood checks | Every 1–2 weeks |
| Summer | Entrance reduction, hygiene, ventilation | Weekly as needed |
| Fall/Winter prep | Consolidate boxes, add upper entrance, emergency food | Before cold sets in |
Keeping colonies healthy: pests, pathogens, and nutrition
A proactive health plan keeps colonies resilient against mites, beetles, and nutrition shortfalls. Routine monitoring and simple habitat choices make a big difference for bee survival and honey production.
Varroa mite monitoring and treatment strategies
Test regularly. Use sugar rolls or alcohol washes on a schedule and record results for each hive. Act when counts exceed local thresholds and choose treatments approved for your area.
Rotate modes of action to slow resistance. Consider stock selected for varroa tolerance; ARS research and breeding advances can improve long‑term resilience. See peer research here: varroa management research.
Small hive beetle and wax moth prevention and control
Keep colonies strong and avoid excess empty frames that invite pests. Remove honey supers promptly after harvest and use traps where beetle pressure is high.
Store drawn comb safely—freeze or seal unused frames—to deter wax moths. Timely sanitation and tight stores protect wax and food resources.
Forage diversity, supplemental feed, and water management
Match apiary placement to diverse bloom and provide clean, shallow water with landing points. This prevents bees from using unsafe sources.
Supplement with syrup or pollen substitutes during dearths to sustain brood and honey stores. Balance space to colony strength so pests have less room to establish.
- Keep concise records of tests, treatments, and outcomes for each hive to refine your strategy.
- Follow USDA and extension guidance for diagnostics and local compliance to protect your neighbors’ bees and your investment.
Economics, records, and risk management for rural beekeepers
A clear cost plan and simple records help new beekeepers measure profit, track losses, and meet program rules.
Startup costs, ongoing expenses, and revenue options
Estimate startup costs for hive bodies, frames, protective gear, tools, and the bees themselves. Add ongoing items: feed, treatments, replacement queens, and processing supplies.
Balance expenses against likely income from honey, wax, nuc or queen sales, and pollination fees. Use USDA survey data to benchmark yields and set realistic targets by region.
Record‑keeping, taxes, and insurance
Keep dated records of purchases, sales, inspections, and treatments. Meticulous logs support tax claims, program applications, and any 1‑d‑1 Open Space valuation in Texas after required years of documented use.
Consider liability and property insurance that covers visitors and product sales. Compare DIY management time to turnkey leasing options that handle colonies and paperwork for a fee.
- Tip: Track yield per hive and year to spot underperforming yards.
- Reserve: set aside funds for replacement bees and emergency gear to limit downtime.
- Resource: use a practical guide for logs and templates like beekeeping records.
| Category | Typical first‑year amount | Ongoing yearly cost |
|---|---|---|
| Startup (hive + gear) | $300–$600 | — |
| Feed & treatments | $50–$150 | $50–$200 |
| Replacement bees | $100–$300 | $50–$200 |
Conclusion
This conclusion pulls key steps together so new beekeepers can move from plan to practical work with confidence.
Focus on a few things done well: keep regular inspections, track notes, and match box size to your lifting comfort. Right equipment and spare frames let you respond fast during spring and heavy flows.
Engage neighbors early and place entrances away from walkways; hedges or fencing raise flight paths and reduce conflict. Use USDA, extension services, and tools like Beescape for site choices and ongoing learning.
Protect wax and honey quality, steward colony health, and grow slowly. For reference and further learning, see beekeeping resources and books at beekeeping resources and books.
FAQ
What are the first steps to set up a small apiary on a rural property?
Start by defining your goals—honey, pollination, or conservation. Check local zoning and state apiary laws, pick a sheltered, sunny site with nearby forage and water, and plan access and security. Buy basic equipment (hives, protective gear, smoker, hive tool) and source bees from a reputable supplier in the region. Begin with one to three colonies while you learn seasonal care and record keeping.
How do zoning, registration, and inspections affect keeping bee colonies?
Many counties and states require apiary registration and periodic inspections to track pests and disease. Zoning may dictate setbacks from property lines or public areas and limit hive counts. Contact your state department of agriculture and county planning office for forms and timelines. Proper documentation helps avoid fines and supports disease control programs.
Can honey bees qualify my land for agricultural valuation or Texas Open Space programs?
Some states, including Texas, allow agricultural or open‑space valuation if hives meet minimum acreage and production thresholds. Rules vary: they often require a multi‑year history, a specific number of hives per acre, and documented income or management plans. Consult your county appraisal district and provide records of hive counts and sales to qualify.
How do I choose the best site on my acreage for hives?
Select a well‑drained, level spot with morning sun and afternoon shade. Ensure diverse forage within a few miles and a reliable water source. Use mapping tools like BeeScape to assess forage bloom and pesticide risk. Place hives with flight lanes away from neighbors and high‑traffic areas and orient entrances toward open space.
What should I consider about neighbors, setbacks, and flight paths?
Communication is key—notify neighbors and explain benefits and safety measures. Maintain setbacks where required and use natural barriers, hedgerows, or tall vegetation to direct flight paths upward and away from people. Locate entrances several feet above ground or toward less used parts of the property to reduce encounters.
How do I reduce pesticide exposure to my bees?
Map nearby crops and spray schedules, and talk with neighboring farmers about timing and tank cleanout. Avoid placing hives near treated fields or lawns. Provide abundant alternative forage and water to discourage foraging in hazardous zones. Consider buffer planting and time hive placement to coincide with low spray periods.
Which hive style and box sizes are best for beginners?
Langstroth hives are the most common for new beekeepers because frames are standardized and equipment is widely available. For a balance of manageability and capacity, many start with 10‑frame deeps for brood and 10‑frame mediums or shallow honey supers. Choose what local mentors use to simplify swapping frames or buying equipment.
What protective gear and core tools do I need first?
A quality veil or full suit, nitrile or leather gloves, a smoker, a hive tool, and a gentle brush are essential. Invest in a comfortable veil with good visibility and a reliable smoker with fuel like untreated burlap. Add a frame grip and an entrance reducer before you need them.
How should I winterize hives on multi‑acre land?
Reduce hive entrances to block robbing and cold drafts, ensure adequate honey stores or feed with dry sugar or fondant, and manage moisture with top ventilation or absorbent quilting when needed. Insulation depends on climate—windproofing and windbreaks help more than heavy insulation in many U.S. rural areas. Consolidate weak colonies in late fall if appropriate.
When and how should I acquire bees—nucs or packages?
Nucs (nucleus colonies) have a laying queen and brood, so they build up faster and adapt locally quicker. Packages are less expensive but require the colony to raise brood and take longer to build stores. Buy locally raised stock when possible to reduce transport stress and disease risk. Install in spring after the last frost when forage begins to emerge.
What are best practices for transporting and installing colonies?
Transport bees upright in ventilated, secure carriers during cool parts of the day. Limit trip time and avoid shaking boxes. On arrival, place hives in their permanent locations for at least a day before full installation so foragers can reorient. Follow supplier instructions for queen introductions and check after a week for acceptance.
How should I manage colonies through the seasons—spring, summer, and fall?
Spring focuses on space management: add supers and monitor brood and queen health. Summer requires vigilance for dearths, robbing, and swarming—reduce entrances during nectar dearths and maintain apiary hygiene. In fall, consolidate boxes, ensure adequate winter stores, treat for pests as needed, and adjust entrances for cold weather.
What are the most important pest controls for rural beekeepers?
Monitor varroa mites regularly using sugar shake or alcohol wash and treat with integrated methods—chemical miticides, drone brood removal, or screened bottom boards—based on thresholds. Manage small hive beetles with traps and sanitation, and prevent wax moth damage by maintaining strong colonies and storing combs properly.
How do I improve colony nutrition and provide water?
Promote forage diversity by planting native wildflowers, legumes, and trees that bloom across the season. Provide supplemental feed—pollen patties or protein supplements—during dearths. Keep a clean, shallow water source with landing areas so bees can drink safely without drowning.
What are typical startup costs and ongoing expenses?
Startup costs vary but usually include hives, frames, protective gear, tools, and initial bees—budget several hundred dollars per colony. Ongoing expenses cover feed, treatments, replacement queens, equipment repairs, and potential marketing. Track receipts and production carefully to evaluate profitability over several years.
What records should I keep for taxes, programs, and insurance?
Maintain hive inventories, health treatments, production logs (honey pounds, wax, sales), purchase receipts, and maps of apiary locations. Good records support tax filings, conservation or open‑space applications, and insurance claims. Consider liability insurance and talk to an agent experienced with agricultural operations.
How can I learn practical beekeeping without risking my colonies?
Join local beekeeping clubs or state beekeeper associations, attend extension workshops, and mentor with experienced beekeepers. Read up‑to‑date resources from universities like Penn State or Cornell and combine classroom learning with supervised hands‑on practice. Start small to reduce risk while you build skills.
How much honey can I expect per hive and how is it measured?
Honey yields vary widely by forage, climate, and management—productive hives in good areas may produce 30–100 pounds per year, while others yield much less. Measure harvest by weighing supers before and after extraction and keeping records by colony to track trends year to year.