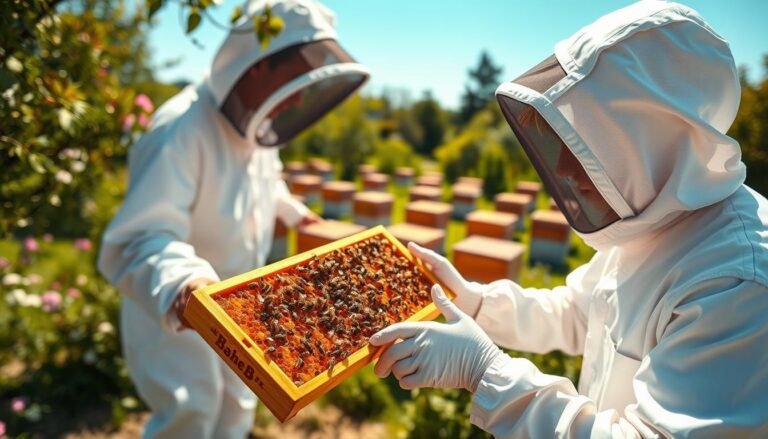
Plan your apiary work by season and weather, not just dates. This concise guide helps you set realistic expectations for the year and make confident choices on each day in the yard. It focuses on practical checks like hefting hives to gauge stores, quick entrance inspections on cold days, and when to add a super during a strong nectar flow.
Winter prep saves spring headaches. Repair equipment, order queens early, and avoid opening a tight cluster unless you must add emergency feed. During swarm season inspect every 7–10 days and add space when a super is about three-quarters full of nectar.
Balance treatments and honey goals. Finish mite and medication work before you add honey supers, then resume after harvest. Adjust timing for local weather and follow regional guidance like the beekeeping calendar to shift tasks earlier in warm zones or later in cold ones.
Key Takeaways
- Use hefting and quick entrance checks to assess stores without disturbing the cluster.
- Prep equipment in winter so spring inspections and supering stay on schedule.
- Inspect every 7–10 days in swarm-prone weeks and add supers at ~3/4 full.
- Complete mite treatments before honey supers go on; resume after extraction.
- Clear entrances and maintain ventilation to avoid moisture and stress.
How to Use This USA How-To Calendar for Year-Round Beekeeping Success
This guide adapts task timing to local bloom and weather so you act when the bees need it. Use it as a flexible plan you shift by region rather than following fixed months. That keeps work aligned with nectar flows and real hive signals.
Shift timelines by local weather, nectar flows, and region
Adjust tasks 2–4 weeks later in cold zones and earlier in milder areas. Watch local bloom and daily temps, not just the calendar. Inspect every 8–10 days in spring to check brood and queen cells.
Tools, equipment, and records to prepare before the season
Order package bees and queens early to match your region’s spring delivery window. Finish workshop chores and have boxes, frames, smokers, and protective gear ready.
- Stage spare frames to equalize brood quickly.
- Build a simple record system for queen status, stores, treatments, and super additions.
- Plan mite monitoring so treatments finish about four weeks before major honey flow.
Plan inspection days around safe temps and bee activity to avoid chilling brood.
8. seasonal beekeeping calendar USA
A flexible, weather-driven plan helps you build strong colonies and time work by real hive signals.
Cold, moderate, and warm climate considerations across the country
Cold regions lag about 2–4 weeks behind milder zones. Warm areas begin brood buildup and splits earlier. Adjust inspections and feeding to local bloom and daily weather so actions match colony needs.
Key goals by season: strong colonies, healthy queens, ample stores
Keep the queen laying steadily and watch brood patterns. Requeen before major flows if brood is spotty or temperament worsens. Align brood expansion with extra space to prevent swarming.
“Finish mite treatments before you add honey supers; timing makes or breaks crop quality.”
| Region | Spring cadence | Action trigger |
|---|---|---|
| Cold | Inspections every 10–14 days | Delay buildup until sustained warm days |
| Moderate | Inspections every 8–10 days | Add space as frames reach 75% nectar |
| Warm | Inspections every 7–10 days | Expect earlier swarm activity; split early if needed |
Practical thresholds: add supers when current combs are ~3/4 full of nectar. Feed 2:1 syrup in fall to build winter stores, install mouse guards, reduce entrances, and ensure top ventilation before winter.
Late Winter Actions: January to February
In January and February, simple, low-impact checks keep colonies safe and fed. Avoid full openings on very cold days. Instead, use gentle hefts and entrance checks to assess stores and airflow.
Hefting, entrances, and normal debris
Heft the hive by tilting slightly to judge weight. If it feels light, add fondant or a candy board rather than breaking the cluster.
Clear snow, ice, and accumulated dead bees at the entrance so air and cleansing flights can occur on mild days near 50°F.
Emergency feeding and syrup guidance
Use solid winter feeding for emergencies. Reserve 1:1 syrup for spring build-up and 2:1 syrup for fall stores. Liquid syrup is best only on warmer days when bees can process it.
Ventilation, condensation, and gear prep
Watch for excessive condensation under the lid; add top ventilation to reduce moisture dripping on the cluster. Repair smokers, assemble frames, and order package bees, queens, and equipment now to match spring needs.
- Log food checks and entrance status to spot trends.
- Pick mild weather windows for brief tasks to avoid chilling brood.
- Use the monthly guide and a seasonal tasks reference to time orders and work.
“Minimize disturbance in cold weather—small actions now prevent bigger problems later.”
Early Spring Build-Up: March Checks and Feeding
March is a turning point for hive growth. As temperatures rise, brood rearing increases and colonies consume stores more quickly. Watch for gaps between floral availability and colony demand and act before shortages force emergency moves.
Brood expansion, pollen patties, and avoiding starvation
Check hive weight often; expanding brood uses food faster than in winter. Feed 1:1 sugar syrup and add a pollen patty for strong colonies when natural pollen is scarce.
Quick inspections on warm days without chilling brood
Choose calm, warm days for short checks. Focus on frames with brood to confirm a solid pattern and adequate stores. Avoid long openings in marginal temperature to prevent chilling the cluster.
Planning varroa monitoring before major nectar flow
Prepare for varroa tests such as sugar or alcohol rolls now so treatments finish about four weeks before major nectar begins. Reverse brood chambers and equalize capped frames between hives to balance growth and lower swarm pressure.
- Confirm drawn frames are available for rapid expansion.
- Reassess entrance reducer as traffic rises to balance airflow and security.
- Keep concise records of brood coverage, food, and temperature windows.
“Finish varroa checks early so treatments won’t taint the first honey.”
Spring Growth and Space Management: April
April calls for focused inspections and timely space so fast-growing hives don’t bottleneck. Conduct full checks every 8–10 days when the weather is warm enough to open without chilling brood. Focus on clear, short inspections to verify the queen, brood pattern, and stores.
Full inspections: queen status, brood pattern, and disease signs
Confirm a laying queen and an even brood pattern. Look for spotty brood or unusual brood frames that may indicate disease or impending queen turnover.
Check pollen and nectar stores; document any abnormalities so you can act fast in the next inspection.
Reversing brood boxes and adding space before congestion
Reverse brood boxes when brood is shifting upward to keep brood contiguous and centered. Add drawn frames or a super before the hive becomes crowded.
Proactive space prevents congestion and reduces swarm pressure during the rising flow.
Swarm prevention fundamentals during rising nectar flow
Provide room, remove or manage queen cells, and consider splits for strong colonies. A timely split is often a simpler choice than recovering from a lost colony.
Removing medications before adding honey supers
Schedule varroa monitoring and treatments early so all medications are cleared before honey supers go on. Never place honey supers while residues remain.
- Verify queen presence and brood health on each inspection.
- Keep the top ventilated on warm days to control moisture.
- Add supers as frames fill and first nectar appears.
- Record any reversals, space additions, and interventions for follow-up.
“Remove treatments before you add honey supers; timing protects crop quality.”
| Check | Trigger | Action |
|---|---|---|
| Queen & Brood | Spotty brood or missing queen signs | Inspect frames, requeen or unite if needed |
| Space | Most frames occupied or nectar appearing | Add drawn frames or a super |
| Varroa | Pre-flow monitoring date | Treat early; remove meds before supers |
Peak Spring Flow and Swarm Season: May
Rapid colony growth in May makes 7–10 day checks the single best tool to prevent swarming and protect honey stores.

Inspection rhythm and queen space
Keep a tight schedule of inspections every 7–10 days to spot queen cells and signs of crowding early.
Confirm the queen has open comb for laying so the brood nest does not become honey-bound.
Supering strategy
Add a super when the current box of frames is roughly 3/4 full of nectar. Both top- and bottom-placement work; choose the method that saves you the most time in the yard.
Balancing splits, mites, and harvest goals
Select only the strongest hives for splits so you do not sacrifice honey production. Continue monitoring mites with sugar or alcohol rolls, but delay chemical treatments until after harvest.
- Note frame filling rates to forecast when the next box is needed.
- Watch for drones and swarm signs; add ventilation or space to reduce triggers.
- Prioritize short, focused inspections to limit disruption during heavy flow.
“A steady inspection rhythm and timely supers keep colonies productive and swarms rare.”
| Task | Trigger | Recommended action |
|---|---|---|
| Inspection cadence | High nectar intake | Inspect every 7–10 days; remove or manage queen cells |
| Super addition | Frames ~75% full | Add honey supers above or below based on workflow |
| Varroa monitoring | During flow | Continue rolls; avoid treatments until after honey removal |
For a broader seasonal plan and timing cues, consult the beekeeping calendar to align actions with local bloom and weather.
Early Summer Honey Management: June
June often brings peak colony populations and a steady nectar flow that tests your management rhythm. Time-efficient moves now preserve honey quality and keep brood development steady. Prioritize quick checks for space, super fill rates, and queen performance.
Maintaining brood space and rotating honey supers
Keep brood space open so the queen can lay without congestion. Add frames or another brood box when the brood nest expands.
Rotate honey supers by swapping full boxes with empties as soon as combs near capacity. This keeps nectar moving and prevents missed harvests.
Monitoring mites without contaminating honey
Monitor varroa levels with noninvasive tests. Postpone chemical treatments while honey supers are on to avoid contamination.
Track mite trends and plan treatments for after supers come off. Use records to time interventions by hive history.
Requeening and equalizing colonies where needed
Evaluate queen performance regularly and requeen weak layers to maintain brood continuity. Move frames of capped brood from strong hives to weaker ones to equalize strength.
Ensure new frames are drawn in fresh supers so storage is efficient during the nectar flow.
“Rotate supers promptly and keep brood space open — small, timely actions yield better honey and healthier colonies.”
| Focus | Trigger | Action |
|---|---|---|
| Brood space | Brood covers most frames | Add frames or a brood box |
| Supers | Frames near full | Swap full with empty supers |
| Mites/varroa | Rising mite counts | Monitor; postpone treatments until after honey removal |
| Queen & balance | Weak laying or uneven colonies | Requeen or equalize with capped brood frames |
Keep water available near the apiary and manage ventilation on hot days. For a broader planning guide, see a comprehensive beekeeping calendar.
Heat, Dearth, and Robbing Control: July
As regional blooms wane in July, practical steps keep colonies fed, cool, and safe from robbers.
Ventilation and cooling
Keep upper air paths clear so heat and moisture exit freely. Shade and paired boxes help lower internal temperature during heat waves.
Water, entrances, and behavior
Provide a reliable water source nearby and watch the entrance for heavy traffic or fighting. Bearding on humid nights is usually cooling, not a sign of swarm intent.
Harvesting and stores
Take honey only from fully capped frames and leave ample reserves for the summer dearth. Pause removals if the flow drops or food levels fall.
“Balance harvest with colony needs: a well-fed hive resists robbing and recovers faster after heat stress.”
- Provide shade and water to help multiple hives regulate internal climate.
- Use robbing screens or reduce openings at first sign of theft.
- Keep inspections short to lower stress and avoid comb damage in warm weather.
| Condition | Sign | Action |
|---|---|---|
| High heat | Bearding, fanning | Increase ventilation, add shade |
| Low stores | Light weight, few foragers | Delay harvest; consider emergency feeding |
| Robbing | Fighting at entrance, rapid traffic | Install robbing screen; reduce openings |
Late Summer Strategy: August Mite Control and Space
After you remove honey, act fast to protect fall brood and build healthy winter populations. Start with short, clear checks that give you the data you need without stressing the hive.
Testing and timing treatments
Remove supers and immediately run mite counts using a sugar or alcohol roll to measure varroa pressure. If counts exceed your threshold, apply treatments per label directions now that honey is off.
Robbing risk and protecting hives
Late summer raises robbing risk. Secure vulnerable hives with entrance reducers or robbing screens and keep inspections brief. Maintain top ventilation so bees can cool while you reduce opening size.
Combining and preparing weak colonies
Identify weak colonies and combine them with stronger units when necessary. Confirm queens are present and laying before you invest resources. Plan supplemental feeding with 1:1 sugar syrup if late flows fail.
- Document mite levels, treatments, and outcomes for next year.
- Store spare supers clean and dry to prevent wax moth and rodents.
- Watch hive weight trends and adjust plans quickly to protect fall buildup.
“Prompt testing and decisive consolidation in August set the stage for a stronger fall and winter.”
Fall Preparation and Feeding: September Focus
Assess hive stores early in fall to decide feeding, treatments, and protection before cold weather arrives. A short, practical check now saves time and loss later.

Assessing stores and topping with 2:1 sugar syrup
Weigh hives and target roughly 50–60 lb of honey per colony as a baseline; colder regions may need more. If stores fall short, feed a 2:1 sugar syrup to build reserves.
Keep feed close to the brood so bees can move food into winter clusters with minimal effort.
Reducing entrances, mouse guards, and robbing prevention
Fit entrance reducers and mouse guards as nights cool. Tightening the entrance helps defend weak units and slows robbing during nectar gaps.
- Limit long openings during inspections to reduce theft.
- Watch weather-driven nectar breaks and increase feeding cadence when foraging is poor.
- Seal gaps but maintain top ventilation to avoid moisture problems.
Requeening options and brood consolidation
Consider requeening if the queen shows a poor pattern; a late requeen can improve spring performance. After honey removal, run mite checks and apply varroa treatments if counts exceed thresholds.
| Task | Trigger | Action |
|---|---|---|
| Low stores | Hive light on heft | Feed 2:1 syrup; place near brood |
| Weak colony | Poor brood pattern | Requeen or combine with strong hive |
| High mites | Positive counts | Apply approved mite control post-harvest |
“Finish treatments and top off food now so winter bees develop with low parasite loads.”
Store cleaned frames and supers in dry, rodent-proof space. Finalize records of stores, treatments, and days fed to guide next year’s planning.
Winterization Essentials: October to November
Finish strong in October: finalize feed and simplify each hive to only what the winter cluster needs.
Final feeding, removing extra supers, and sealing drafts
Complete fall feeding early so syrup can be capped before cold weather arrives. Capped stores stabilize internal moisture and help the colony move food during the cluster phase.
Remove extra supers and leave only brood boxes and necessary stores. Fit mouse guards and reduce the entrance to conserve heat while keeping airflow.
Insulation, top ventilation, and wind protection
Provide controlled top ventilation to let moisture escape. Use insulated covers or wraps when local temperature and wind demand extra protection.
Secure lids and hardware against strong wind and animals. Avoid opening the hive unless you need to check external signs.
Storing cleaned supers and frames
Store cleaned frames and boxes in a pest-resistant area to block wax moths and rodents. Check stored gear periodically and keep it dry.
“Finish feeding early so syrup is capped and the hive can stabilize before cold sets in.”
| Action | Trigger | Recommended step |
|---|---|---|
| Final feed | October warmth window | Feed and allow capping; stop before sustained low temperature |
| Super removal | After honey harvest | Remove supers; leave brood and stores only |
| Ventilation & insulation | High condensation or cold nights | Install top vent; add insulation or covers |
| Frame storage | Cleaned & dry | Store in sealed, pest-resistant space |
Deep Winter Stewardship: December
A steady, low-impact approach in December protects the cluster and preserves stores for spring.
Minimal disturbance, tilt tests, and entrance checks
Keep disturbances to a minimum. Avoid opening the hive on cold days when the bees are in a tight cluster.
Routinely perform gentle tilt tests to judge hive weight and reserve heavier checks for mild, calm days.
Clear entrances of accumulated dead bees to maintain airflow and allow cleansing flights when conditions permit.
Planning gear, treatments, and goals for the coming year
Use December to order equipment, frames, and queens so supplies arrive before the spring rush.
Review treatment records and evaluate outcomes to refine timing and product choices for next year.
- Clean smokers, hive tools, and boxes; render wax and store gear in pest-proof locations.
- Track expected delivery day windows for packages or nucs and align them with local spring cues.
- Set requeening, split, and honey targets per apiary and note adjustments on your season calendar.
- Use downtime for study—join club meetings or courses to sharpen skills before spring work resumes.
“Minimal disturbance now protects the winter cluster and gives you clear data for spring planning.”
| Check | When to act | Practical step |
|---|---|---|
| Weight/tilt test | Monthly or after long cold spells | Lift slightly at the back to assess stores; add emergency feed only if light |
| Entrance block | Observed buildup of dead bees | Clear small blockages; avoid full openings in freezing weather |
| Equipment & orders | Now (December) | Order queens, frames, and gear to avoid spring shortages |
| Record review | Off-season | Analyze treatments, mite counts, and set goals for next season |
For expansion planning and to make sure your spring orders match your management goals, review guides like beekeeping expansion tips as you finalize equipment lists.
Conclusion
Finish the year with a clear, weather-driven plan that keeps hive actions aligned with real signs at the apiary. Use this beekeeping calendar as a guide and make sure your timing flexes with local weather and nectar cycles.
Focus on building and sustaining strong colonies by managing brood space, queen quality, and adding supers when frames are about three-quarters full. Let hive cues — weight, brood pattern, and entrance behavior — guide most moves.
Make sure treatments occur away from honey production. Feed 2:1 syrup in fall, consolidate weak units, and winterize with good ventilation and entrance protection to protect stores and overwinter success.
Keep concise notes so each decision improves next spring’s plan. Anchor choices in observations, adjust 2–4 weeks for local climate, and you will close the loop on a productive year.
FAQ
What is the best way to shift timelines by local weather and nectar flows?
Adjust inspections and management to local temperature and bloom. In colder regions wait for consistent daytime temps above 50°F for safe full checks. In warm areas move faster during early nectar flows to add space and supers. Track local bloom charts, join regional beekeeping clubs, and watch your hives’ stores and population rather than strict calendar dates.
What tools, equipment, and records should I prepare before the season starts?
Have gloves, smoker, hive tool, bee brush, feeder types (entrance and top), extra frames, foundation, and properly fitting supers ready. Maintain a simple ledger or app with colony IDs, queen status, mite counts, treatments, feedings, and inspection dates. Clean and repair stored equipment in late winter to avoid delays when colonies need space.
How do cold, moderate, and warm-climate strategies differ?
Cold climates focus on conserving stores, mite treatment timing after the main flows, and insulation. Moderate zones balance buildup and early swarm prevention. Warm climates require rapid spring supering, multiple nectar flows, and year-round mite monitoring. Tailor feeding and ventilation to your regional weather and forage patterns.
What are the key seasonal goals for maintaining strong colonies and ample stores?
Early goals: prevent starvation and ensure a healthy queen. Mid-season: provide space, prevent swarms, and maximize honey supers during major flows. Late season: treat mites, consolidate brood, and build winter stores. Each action should protect brood health and colony strength ahead of forage changes.
How do I properly heft hives and interpret normal dead bees in late winter?
Heft by lifting the back of the hive to judge weight—compare to known full and light hives. Expect small piles of dead bees near the entrance; large numbers or unusual odors indicate problems. If light, consider emergency feeding. Perform minimal disturbance to avoid breaking the cluster.
When should I use fondant, candy boards, 1:1 syrup, or 2:1 syrup for emergency feeding?
Use fondant or candy boards in cold weather when liquid feed risks chilling brood. 2:1 syrup (thicker) is best for fall weight gain and winter stores. 1:1 syrup (thinner) encourages brood rearing in early spring. Choose method by outside temperature, ability to stimulate brood, and whether supers are on the hive.
How do I control condensation and ventilation for clustered bees?
Provide top ventilation with an upper entrance or a moisture quilt to allow warm, moist air to escape. Insulation and reduced internal space help bees keep cluster heat. Avoid sealing too tightly; moisture pooling kills more colonies than cold alone.
When should I order bees, frames, and equipment to avoid delays before spring?
Order queens, nucs, packages, and foundation as soon as you know regional spring nectar timing—often in late winter. Suppliers can sell out; aim to order 6–8 weeks before planned installation. Keep spares of frames and supers for sudden splits or emergency expansions.
How do I expand brood and avoid starvation in early spring?
Provide pollen patties or protein substitutes when natural pollen is scarce. Feed light syrup (1:1) to stimulate brood rearing if stores are low. Inspect quickly on warm days to avoid chilling brood and combine or feed colonies showing weak population growth.
How should I monitor varroa before major nectar flows?
Perform baseline mite counts with sugar-roll or alcohol wash in early spring. If counts exceed your threshold (commonly 2–3% in spring), plan treatment well before heavy nectar to avoid contaminating honey and to protect brood expansion.
What should I check during full spring inspections for queen and disease status?
Confirm presence of the queen or consistent eggs and brood pattern, look for spotty or sunken brood indicating disease, check for mites, and inspect for unusual brood odors. Note stores and brood distribution to plan for reversing boxes or adding space.
When and how do I reverse brood boxes or add space to prevent congestion?
Reverse or redistribute boxes when the lower box is crowded and brood is filling frames; do this before queen cells appear. Add empty frames or a shallow super to give room. Timing aligns with increasing brood and nectar flow to reduce swarm pressure.
What swarm prevention fundamentals work during rising nectar flow?
Regular inspections every 7–10 days, eliminating or managing queen cells, providing ample space through supers or splits, and requeening if colonies show excessive swarm tendency. Timely splits create new productive colonies without losing honey production.
Why remove medications before adding honey supers?
Many treatments can contaminate honey. Finish nonapproved treatments and follow label waiting periods before placing supers for nectar. Use approved miticide timings and monitor residues to protect consumer safety and honey quality.
How often should I inspect during peak spring flow and swarm season?
Inspect every 7–10 days to find queen cells early and manage crowding. Keep inspections focused and efficient to avoid chilling brood. Increase visits if you suspect queenlessness or rapid population changes.
When should I add a super based on frame nectar levels?
Add a super when frames in the brood boxes are roughly 3/4 full of nectar or when the top brood box shows signs of nectar storage. Adding too late risks congestion and swarming; adding too early reduces colony focus on brood unless population supports the extra space.
How do I balance making splits, producing honey, and keeping strong colonies?
Time splits after colony buildup but before peak flow to allow both colonies to exploit the main nectar. Retain enough brood and foragers in the parent colony. Use intermediate boxes or nucleus colonies to keep production and colony strength balanced.
What are best practices for honey management in early summer?
Rotate supers to avoid brood in honey supers, check for capped honey before harvesting, and keep honey supers clean and dry. Continue mite monitoring and avoid miticide use while supers contain honey intended for harvest.
How do I monitor mites without contaminating honey?
Conduct mite tests on a small sample of bees from brood frames and treat only after removing honey supers or using contact methods with approved labels and timing. Consider organic acids or formic treatments that align with label restrictions and honey flows.
When should I requeen or equalize colonies in early summer?
Requeen if laying patterns decline, aggression increases, or mite resistance appears. Equalize strength by moving frames of brood and bees between hives to boost weak colonies. Do this before dearths and major heat stress periods.
How do I control heat, dearth, and robbing in July?
Increase ventilation, provide nearby water sources, reduce entrance size if robbing occurs, and avoid heavy inspections during extreme heat. Harvest only fully capped honey and leave ample stores—usually a season-specific assessment—so colonies don’t starve during dearth.
When is it appropriate to harvest capped honey and how much should I leave?
Harvest when frames are mostly capped (typically 80%+). Leave enough honey based on regional winter needs; consult local extension services but commonly 40–60 pounds per colony is recommended. Adjust for colony strength and local forage availability.
How and when should I test for varroa and time treatments after super removal?
Test in late summer after honey removal when brood rearing slows. If counts exceed thresholds, treat promptly with approved miticides per label directions. Time treatments to avoid honey contamination and to reduce winter mite loads.
What steps protect weak colonies from robbing and strengthening methods?
Reduce entrances, place robbing screens, feed internally, and combine weak colonies with stronger ones if needed. Use robber-proof feeders and avoid leaving open syrup on strong hives that attracts robbers.
When should I combine weak colonies to prepare for fall flows?
Combine in late summer or early fall before broods consolidate and before major fall nectar ends. Use the newspaper method to allow gradual integration and preserve the stronger colony’s resources and queen.
How do I assess winter stores and decide on 2:1 syrup feeding in September?
Weigh hives, inspect frames for honey depth, and estimate winter needs. If stores fall short, feed 2:1 syrup for winter buildup. Consider local winter length and bee population; thicker syrup helps bees store heavier winter provisions.
What fall steps reduce entrances and prevent mice and robbing?
Install mouse guards and reduce entrance size in late fall. Remove exposed syrup and secure honey to reduce robber attraction. Keep ventilation adequate while minimizing predator and pest access.
What are requeening options and brood consolidation strategies in fall?
Requeen with mated queens or introduce nucs earlier in fall if queens fail. Consolidate brood by combining weak colonies or moving frames to centralize brood in fewer hives. This reduces feeding needs and improves winter survival odds.
What final feeding and super removal steps are important in October to November?
Remove empty supers, finish 2:1 syrup feeding if needed, and ensure colonies have adequate stores. Seal drafts, provide top ventilation, and leave bees with compact, well-protected space for cluster movement.
How should I insulate and protect hives from wind and moisture before winter?
Add windbreaks, tilt hives slightly forward for drainage, and use inner covers or moisture quilts to manage condensation. Insulation can be helpful in the coldest zones but avoid sealing hives airtight; bees need some ventilation.
How do I store cleaned supers and frames to protect them from wax moths and rodents?
Freeze clean frames to kill brood pests, store in sealed containers or pallets off the ground, and use airtight bins or pest-proof storage. Moth pheromone traps and low-humidity storage reduce wax moth risk.
What minimal checks and actions are recommended during deep winter in December?
Keep disturbances minimal: perform quick entrance checks for ventilation and cluster activity, tilt tests for weight, and ensure vents aren’t blocked by snow. Plan treatments, equipment purchases, and goals for the coming year while colonies remain clustered.