Reviewed by Thomas B. · Last Updated September 22, 2026 · How we review
Honey processing is the sequence of steps that moves honey from a capped frame into a sealed jar: uncapping the wax seals, extracting the honey by centrifugal force or gravity, straining out wax and debris, letting the honey settle so air bubbles and fine particles rise, confirming the moisture is low enough to resist fermentation, and bottling. Nothing in that sequence adds anything to the honey. Every stage is about separation, patience and temperature control. The single number that governs the whole process is water content: the USDA standards for grades of extracted honey require a minimum of 81.4 percent soluble solids for U.S. Grade A, which is another way of saying a maximum of 18.6 percent moisture.
Key Takeaways
- Processing removes and separates — it never improves the honey. The quality ceiling is set in the hive, before the frames ever reach your table.
- Moisture is the governing variable. U.S. Grade A and Grade B extracted honey both require at least 81.4 percent soluble solids, a ceiling of 18.6 percent water; Grade C allows 80.0 percent solids, or 20.0 percent water.
- “Strained” and “filtered” are not interchangeable marketing words. The USDA grade standard defines them separately, and the difference is whether pollen grains survive.
- Settling is the cheapest quality step you have. Gravity does in a few days what a finer filter would otherwise do badly, and it costs nothing but tank space.
- Heat is the one input that causes irreversible damage. Every degree above what you need to move the honey buys speed at the cost of aroma and enzymes.
- Cottage food and licensing rules for selling honey are set state by state, not federally, so verify your own state’s rules before you label a jar for sale.
Table of Contents
- The Six Stages at a Glance
- Before You Start: Is the Honey Actually Ripe?
- Stage 1: Uncapping the Comb
- Stage 2: Extracting the Honey
- Stage 3: Straining and Filtering
- Stage 4: Settling and Skimming
- Stage 5: The Moisture Check
- Stage 6: Bottling and Sealing
- Strained vs Filtered: What the USDA Standard Says
- How Much Heat Is Too Much
- Before You Sell: Labelling and State Rules
- Frequently Asked Questions
The Six Stages at a Glance
Whether the work happens on a kitchen table with two hives’ worth of frames or in a packing plant running pallets, honey moves through the same six stages. What changes is the scale of the equipment, not the order of operations. The table below is the whole article in miniature: what each stage is actually for, and the specific failure that most often shows up at that stage.
| Stage | What it is for | What typically goes wrong |
|---|---|---|
| Uncapping | Removing the wax seal so honey can leave the cell | Cutting too deep, which destroys drawn comb the bees would otherwise refill next season and dumps far more wax into the honey |
| Extracting | Separating honey from comb using centrifugal force or gravity | Spinning too fast from a standstill, or loading the basket unevenly, which blows out comb faces and breaks frames |
| Straining | Removing wax flakes, propolis and bee parts | Going straight to a fine mesh, which clogs in minutes and turns a one-hour job into an evening of scraping screens |
| Settling | Letting gravity lift air bubbles and fine wax to the surface | Not allowing enough time, so foam and bubbles end up sealed in the jar and look like a defect to the buyer |
| Moisture check | Confirming water content is low enough to resist fermentation | Reading an uncalibrated refractometer, or reading it at the wrong temperature without applying the correction |
| Bottling | Getting clean honey into a clean container without trapping air | Filling too fast or from too high, which whips a fresh layer of bubbles into honey you just spent days clearing |
Before You Start: Is the Honey Actually Ripe?
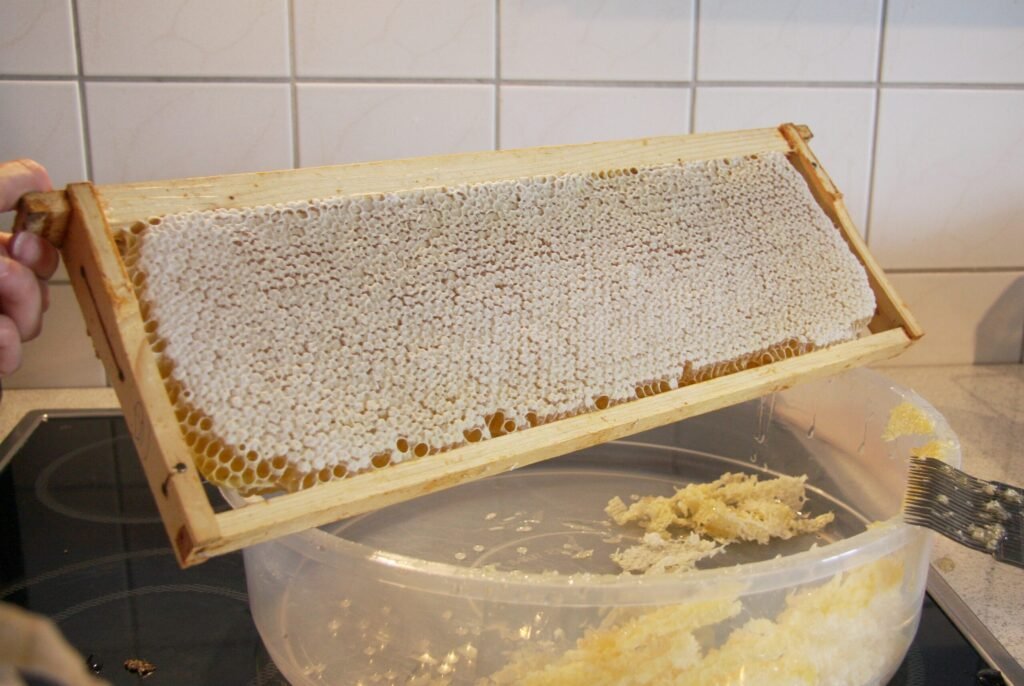
Everything downstream depends on this and nothing downstream can fix it. Bees cap a cell when they have driven the water out of the nectar far enough for the honey to keep. A frame that is mostly capped is the colony’s own verdict that the honey is finished, and it is a more reliable signal than anything you can judge by eye.
The conventional threshold is that frames should be at least 80 percent capped before you pull them, with fully capped being better. The trap is assuming capping is a guarantee rather than a strong indication. Bees will occasionally cap cells that are still wetter than you would like, particularly in a humid season or a fast flow, which is why the moisture check later in the process is a real test and not a formality. If you are unsure, the practical move is to leave the super on for another week rather than to extract and hope. There are reliable ways to what a ripe moisture reading actually looks like, and they take minutes compared with the weeks of work a fermented batch costs you.
The other pre-flight consideration is the room. Uncapping and extraction have to happen indoors in a clean, bee-proof space, because the smell of open honey will bring every forager in the neighbourhood. A warm room also makes honey less viscous and easier to spin and strain, which is why many beekeepers stage supers indoors overnight before extracting.
Stage 1: Uncapping the Comb
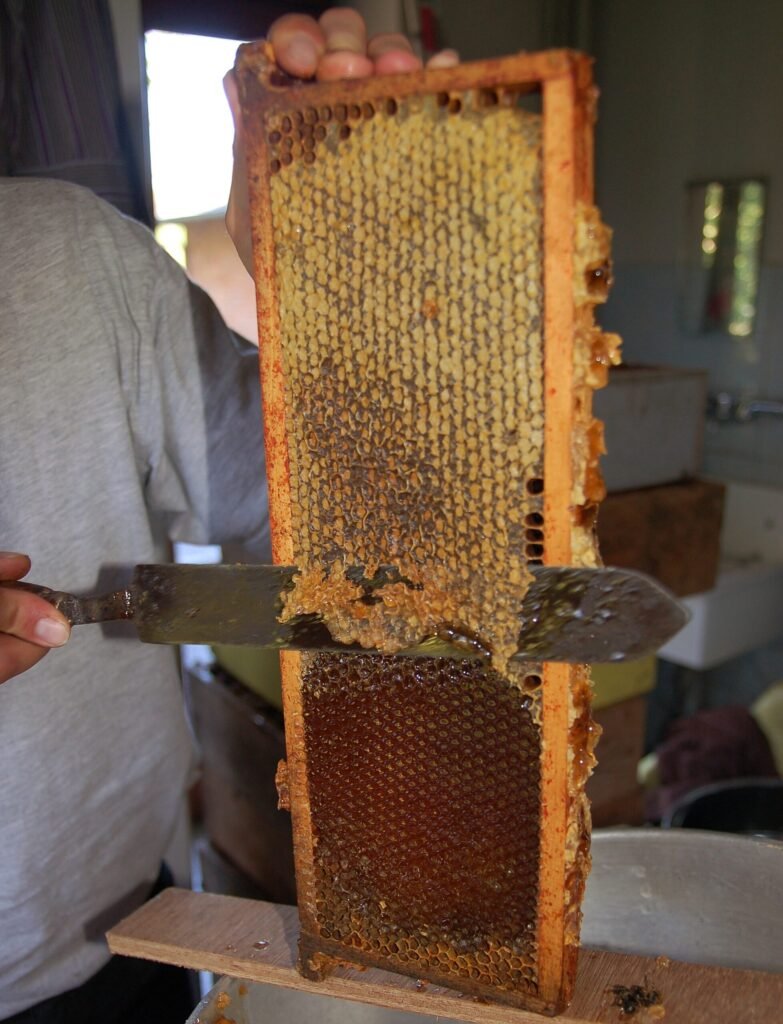
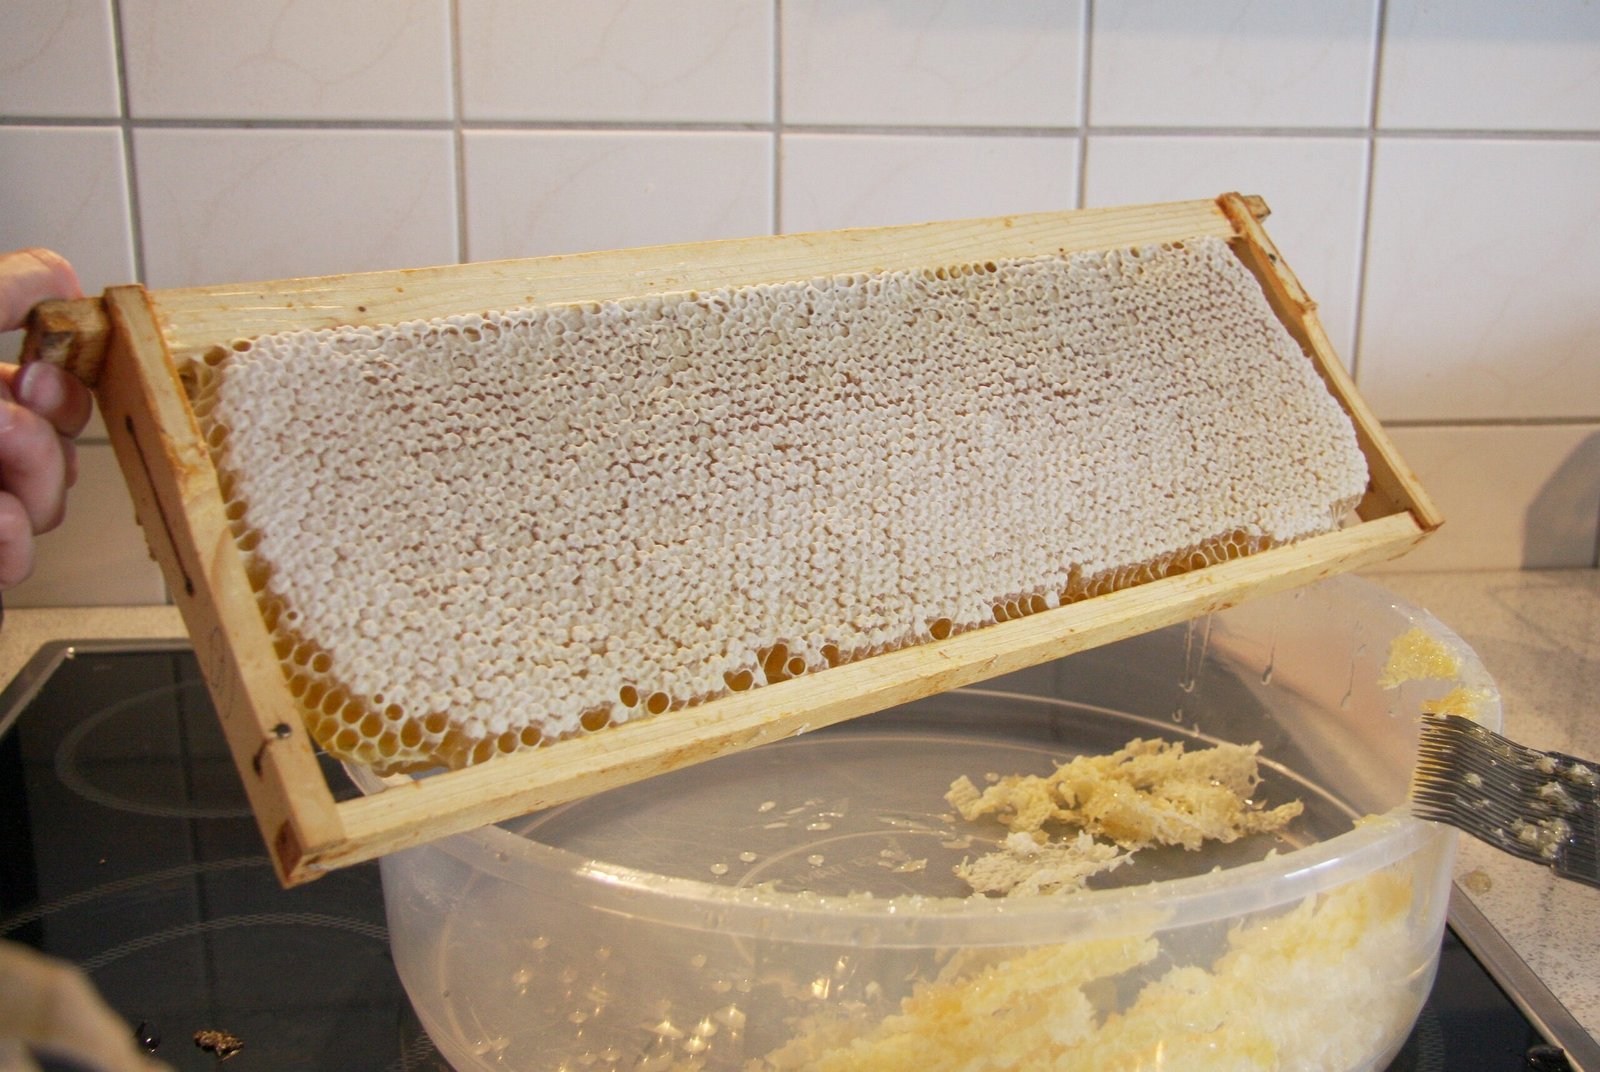
Uncapping means shaving off the thin wax lid the bees built over each full cell. The goal is to open every cell while taking as little comb as possible, because drawn comb is expensive for a colony to rebuild and preserving it is one of the quiet economies of beekeeping.
The main tools are a heated knife, a cold knife, an uncapping plane and a cappings scratcher or fork. A heated knife glides through wax in long passes and suits frames that are evenly drawn. A scratcher is the tool for the cells a knife misses, which is most of them on any frame that is not perfectly flat. Most beekeepers end up using both, and the choice between cold knives, heated knives and uncapping planes comes down to frame consistency and how many boxes you are running.
Cappings are not waste. They are the cleanest beeswax you will ever handle and they carry a surprising amount of honey with them. Working over an uncapping tank lets that honey drain through a screen and join the harvest instead of being thrown out with the wax.
Stage 2: Extracting the Honey
Extraction is the step that gave the modern honey industry its shape. The USDA grade standard defines the product in exactly these terms:
Extracted honey (hereinafter referred to as honey) is honey that has been separated from the comb by centrifugal force, gravity, straining, or by other means.
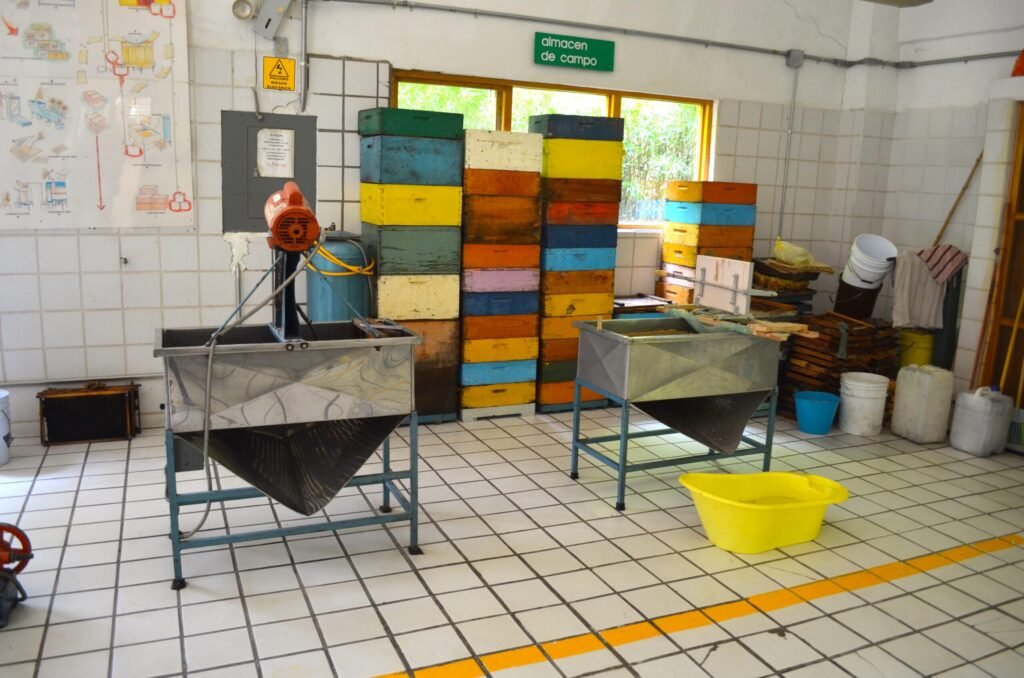
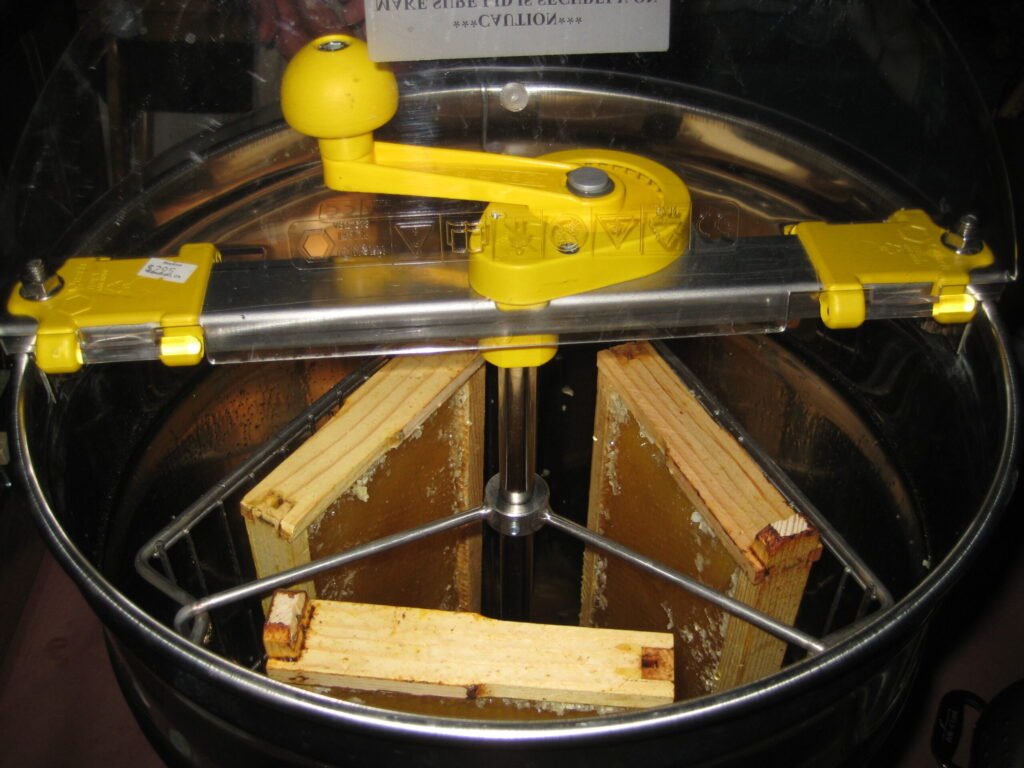
In a centrifugal extractor, uncapped frames sit in a basket inside a drum. Spinning the basket throws honey against the drum wall, where it runs down and collects above a gate at the bottom. Tangential extractors hold frames side-on and need each frame flipped to empty both faces; radial extractors hold frames like spokes on a wheel and empty both sides at once, which is why they take over as hive counts climb. The practical decision between a manual hand-crank and an electric extractor is driven almost entirely by how many frames you process in a season.
Two habits protect your comb. Load the basket so opposite positions carry roughly equal weight, because an unbalanced drum vibrates hard enough to damage frames and machine alike. And bring the speed up gradually rather than starting fast, since full comb is heavy and a sudden start is what blows out comb faces.
Not every beekeeper uses an extractor. The crush-and-strain method skips the machine entirely: you scrape comb off the frame, crush it, and let the honey drain through a sieve overnight. It costs almost nothing and suits one or two hives, but it sacrifices the comb, so the colony has to rebuild it before it can store again.
Stage 3: Straining and Filtering
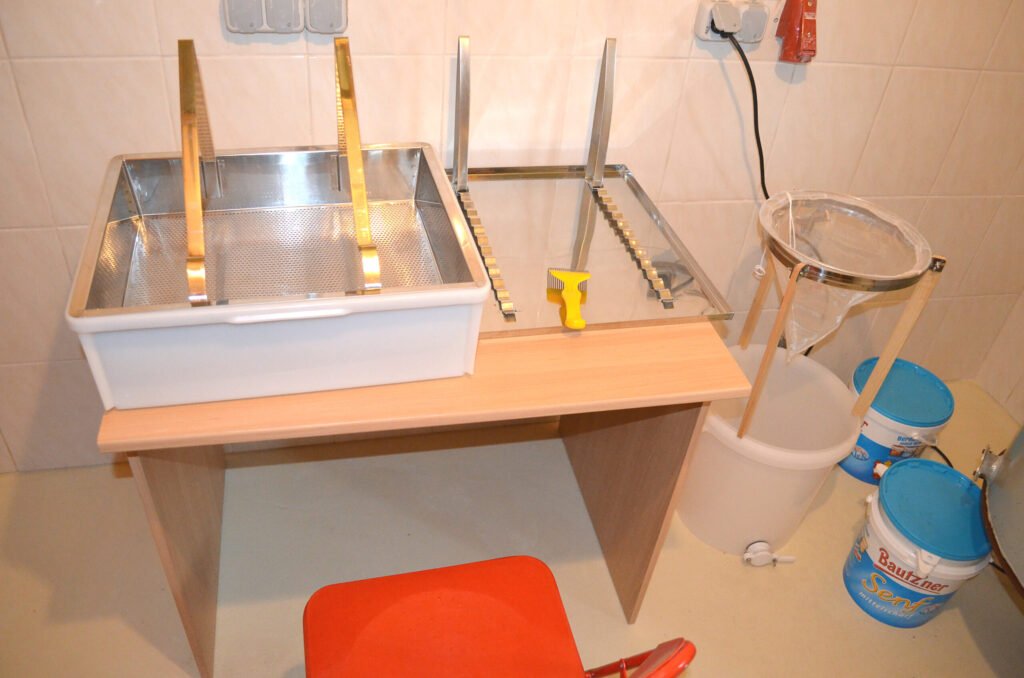
Honey coming off the extractor gate carries wax flakes, bits of propolis, the occasional bee part and a great deal of entrained air. Straining removes the coarse material.
The mistake almost everyone makes once is to route the extractor gate straight into a fine filter. Fine mesh clogs quickly against fresh wax, and you spend the evening lifting and scraping screens instead of extracting. The standard fix is to run the extractor into a bucket through a coarse screen first, then strain more finely afterwards when the bulk of the wax has already been caught. Choosing between a coarse strain and a fine strain is a genuine decision about the product you want, not just a convenience, and there is a whole spectrum of raw honey filtration levels between a kitchen sieve and commercial pressure filtration.
Warm honey strains far more readily than cool honey, which is the honest reason most beekeepers keep the extracting room warm. That is also where the temptation to overheat begins, and the section on heat below is worth reading before you reach for a heater.
Stage 4: Settling and Skimming
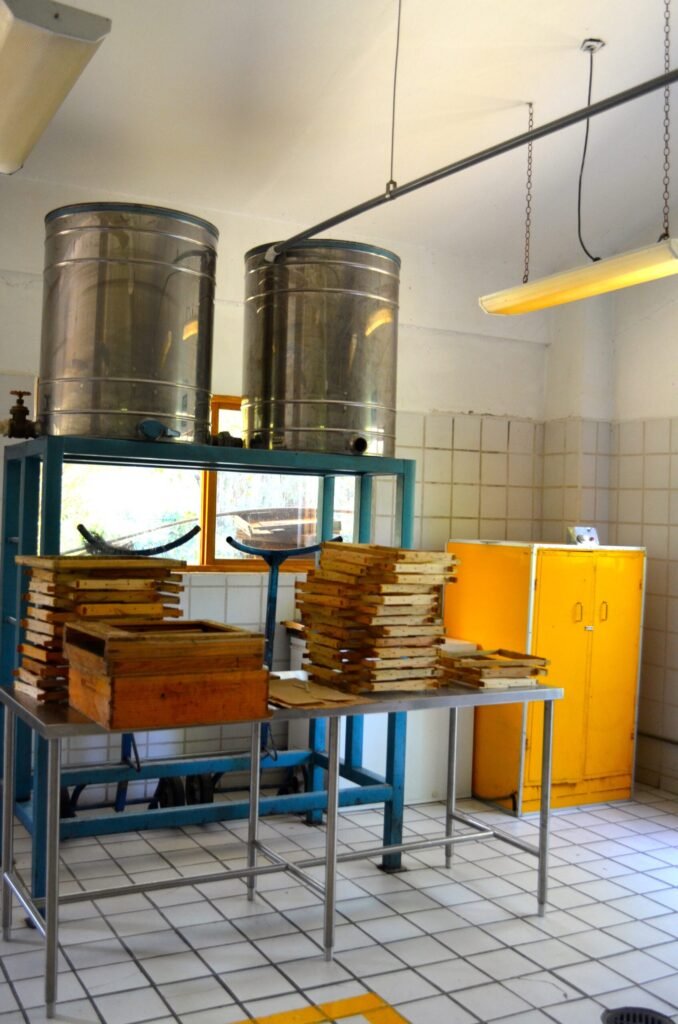
Settling is the most underrated stage in the whole process, partly because it looks like doing nothing. Honey is dense and viscous, so anything lighter than honey — air bubbles, fine wax, foam — will float to the surface if you simply leave it alone in a tall tank. The University of Georgia’s honey bee program describes the tank’s role plainly:
As honey settles in the tank, air bubbles and small debris rise to the top and can be skimmed off, allowing honey that is bottled from the honey gate to be clear and attractive.
The geometry matters. A tall, narrow tank clears faster than a wide shallow one because the bubbles have a shorter vertical distance to travel per unit of volume. Drawing from a gate near the bottom means you are always bottling from the clearest layer, with the foam still sitting up top where you can skim the wax and foam off before it ever reaches a jar. How long to leave it depends on temperature and how finely you strained, and there is genuine guidance on how long to let honey settle before bottling rather than a single universal number.
Keep the tank covered. Honey is hygroscopic, meaning it pulls water out of the air, and an open tank in a humid room can undo the moisture work the bees did for you.
Stage 5: The Moisture Check
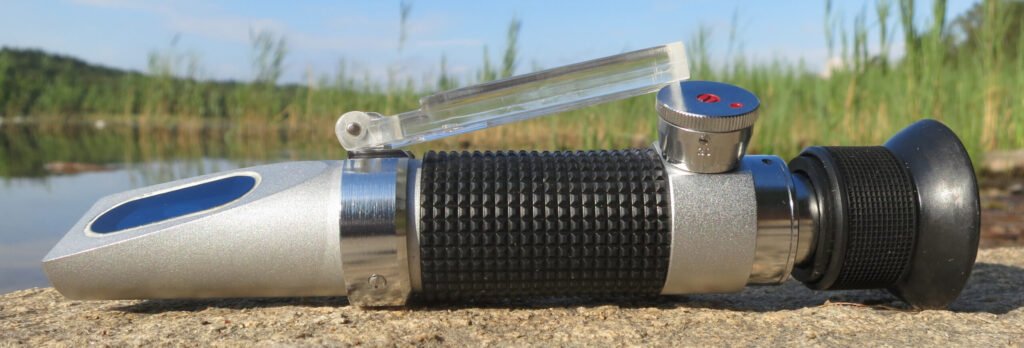
This is the one stage with an objective pass mark, and it is the stage hobby beekeepers most often skip. Honey ferments when its water content is high enough to let naturally present osmotolerant yeasts become active. Below roughly 18 percent that risk is low; as moisture climbs, it rises sharply.
The USDA standards make the threshold explicit. For the analytical factor, U.S. Grade A and U.S. Grade B filtered honey both require a minimum of 81.4 percent soluble solids, which corresponds to 18.6 percent moisture. U.S. Grade C requires a minimum of 80.0 percent soluble solids, or 20.0 percent moisture. The standard specifies that soluble solids are determined with a refractometer at 20 °C (68 °F), and it gives an explicit temperature correction: add 0.00023 to the refractive index for each degree Celsius above 20 °C, or 0.00013 for each degree Fahrenheit above 68 °F, and subtract the correction if the reading is made below that temperature.
That correction is the detail that catches people out. Work the arithmetic through, though, and the direction is the opposite of what most people assume. The correction is added above 20 °C, and a higher refractive index means more dissolved sugar and therefore less water, so applying it makes the corrected figure the drier one. An uncorrected reading taken in a warm extracting room reports honey as wetter than it really is, which is the forgiving direction to be wrong in. The reading you cannot afford is the cold sample: there the correction is subtracted, and leaving it out makes honey look drier than it is. Two things follow. First, learn to test honey moisture with a refractometer properly, including letting the sample equalise to the instrument’s temperature. Second, calibrate the instrument. An uncalibrated refractometer produces confident, precise, wrong numbers, and the readings that mean do not bottle yet takes only a few minutes with calibration oil or a known standard.
If the reading comes back too high, bottling anyway is the worst available option, because honey that ferments after bottling will push caps off and taste sour. Drying the honey in a warm, dehumidified room before bottling is the usual remedy.
Stage 6: Bottling and Sealing
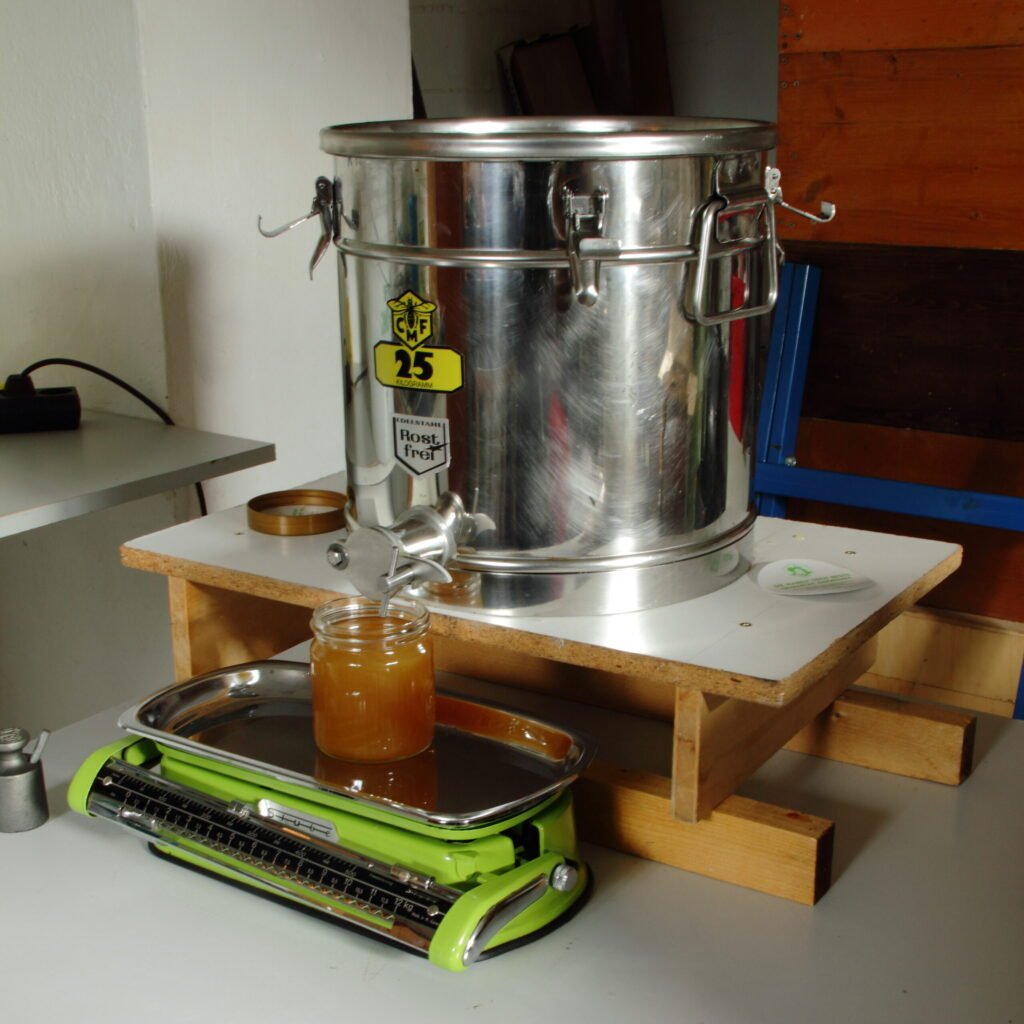
Bottling is mostly about not undoing the previous five stages. Honey that has settled for days into perfect clarity can be re-aerated in thirty seconds by a careless fill.
Fill slowly, with the gate or nozzle close to the bottom of the jar, and let the level rise around the outlet rather than splashing honey down from the rim. Use clean, dry containers; even a little residual rinse water raises the moisture at the surface, which is exactly where fermentation starts. Temperature at fill matters too, since honey that is too cool moves sluggishly and traps bubbles, while honey that is too hot degrades — the question of ideal honey bottling temperature has a real answer worth knowing.
Expect crystallisation, and do not treat it as a fault. Granulation is a natural property of a supersaturated sugar solution, and the USDA standard explicitly recognises crystallised and partially crystallised honey as types rather than defects. The rate depends largely on the glucose-to-fructose ratio of the floral source, which is why some honeys crystallise faster than others regardless of how carefully you processed them.
Strained vs Filtered: What the USDA Standard Says
Most articles about honey processing treat “strained” and “filtered” as loose synonyms. The federal grade standard does not. It defines them as two distinct styles, and the dividing line is whether pollen survives:
Strained honey is honey of any type defined in these standards that has been strained to the extent that most of the particles, including comb, propolis, or other defects normally found in honey, have been removed. Grains of pollen, small air bubbles, and very fine particles would not normally be removed.
Filtered style, by contrast, is defined in the same section as honey filtered to the extent that all or most of the fine particles, pollen grains and air bubbles normally held in suspension have been removed. The standard reflects that difference in how it grades the two styles: clarity is scored out of ten points for filtered honey, but for strained honey the clarity factor is not scored at all, and the remaining two factors are rescaled to produce the total.
This is not a quality hierarchy. It is a choice about product. A strained honey keeps its pollen, which is what allows floral source to be identified and what many direct customers are specifically buying. A filtered honey is brighter and resists visible crystallisation longer, which is what a supermarket shelf rewards. Knowing which style you are producing, in the standard’s own vocabulary, is the difference between describing your honey accurately and guessing.
How Much Heat Is Too Much
Heat is the only genuinely irreversible input in honey processing. Uncapping too deep costs you comb; straining too finely costs you pollen; both are recoverable decisions next season. Overheating permanently degrades aroma compounds and enzymes, and no later step restores them.
The useful mental model is that heat should only ever be used to move honey, never to improve it. Warming honey lowers viscosity so it strains and pours; that is the entire legitimate purpose. The moment you are heating beyond what flow requires, you are trading quality for convenience.
For reference on where meaningful heat sits, the USDA standard directs that crystallised and partially crystallised honey be liquefied by heating to approximately 54.4 °C (130 °F) and cooled back to approximately 20 °C (68 °F) before the product is graded. That is a laboratory instruction for making a sample readable, not a recommendation for routine processing, and it is deliberately at the low end of what will reliquefy honey. Commercial pasteurisation runs hotter and faster and is aimed at killing yeasts and delaying crystallisation, which is a legitimate goal for a shelf-stable product and an unnecessary one for most small producers.
Before You Sell: Labelling and State Rules
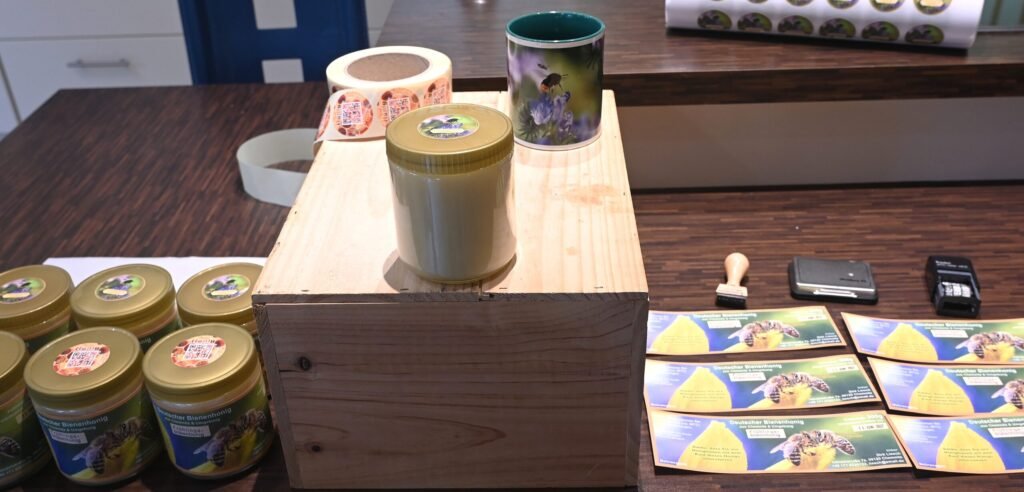
Once honey goes into a jar with your name on it, a second set of rules applies, and this is where general advice stops being useful. Food safety and cottage food requirements for selling honey are set at state level in the United States, not federally, and they vary substantially: some states exempt honey sold in small volumes directly to consumers, others require registration, licensing, a permitted kitchen or specific label elements. Sales volume caps, permitted venues and inspection requirements all differ by state.
This article is not legal advice and cannot tell you what your state requires. Check your own state’s rules before you label a jar for sale. The National Agricultural Law Center maintains a state-by-state compilation of cottage food laws, which is the right starting point for finding the statute that actually applies to you, and your state department of agriculture is the authority that can confirm it. On the labelling side, the FDA has published guidance on the proper labeling of honey and honey products, which covers how honey and honey blends should be named and declared. The USDA grade standard itself carries an explicit reminder on this point, noting that compliance with the grade standards does not excuse failure to comply with the Federal Food, Drug, and Cosmetic Act or with applicable state laws and regulations. For the practical picture of what small producers actually face, our guide to cottage food laws and selling honey legally walks through the common patterns.
If you have not settled on a method yet, start with our comparison of honey harvesting methods: extractor, crush and strain, cut comb and Flow frames.
Frequently Asked Questions
What are the steps followed when processing honey?
Six stages, in order: uncapping the wax seals from the comb, extracting the honey by centrifugal force or gravity, straining out wax and coarse debris, settling the honey in a tank so bubbles and fine particles rise, checking moisture content with a refractometer, and bottling into clean containers. Scale changes the equipment, not the sequence.
What moisture content does honey need to be safe to bottle?
The USDA standards for grades of extracted honey require a minimum of 81.4 percent soluble solids for U.S. Grade A and Grade B, equivalent to a maximum of 18.6 percent moisture. Grade C allows 80.0 percent solids, or 20.0 percent water. Below roughly 18 percent, fermentation risk is low.
Do I have to filter honey before bottling it?
No. Filtering is optional and is a product decision rather than a safety requirement. Straining to remove wax, propolis and bee parts is near-universal, but fine filtration that removes pollen grains changes what you are selling. The USDA standard treats strained and filtered as two distinct styles, not two quality levels.
Can I bottle honey straight from the extractor?
You can, but the result will be cloudy with suspended wax and full of entrained air bubbles that rise into a foam layer in the jar. Straining and then letting the honey settle for a few days in a tank costs you nothing but time and is what produces clear, presentable honey.
Does processing destroy the goodness in honey?
Straining, settling and bottling do not. Heat does. Warming honey only as far as needed to make it flow preserves aroma compounds and enzymes, while sustained higher temperatures degrade them irreversibly. Fine filtration removes pollen, which matters if floral source identification or pollen content is part of your product’s appeal.
Why is my bottled honey full of bubbles?
Almost always insufficient settling time, bottling too fast, or filling from too great a height. Air whipped into honey during extraction and straining takes days to rise out in a tank. If you bottle before that has happened, or splash honey into the jar, the bubbles get sealed in.
Do I need a licence to sell my own honey?
That depends entirely on your state. Cottage food and food safety rules for honey are set at state level in the US and vary widely in volume limits, permitted sales venues, registration and labelling requirements. Check your state department of agriculture and your state’s cottage food statute before selling.