Starting a hive means balancing food, equipment, and timing. When you receive your bees, most shipments include a can of syrup and basic instructions. This hands-off support helps workers settle and keeps stores stable during early movement.
Honey remains the best source of food because it offers vitamins and minerals that plain sugar lacks. Still, sugar syrup and feeders are useful until nectar flow begins and workers can collect pollen and water from local sources.
Good management during spring sets the brood rhythm and encourages comb and frame building. Keep an eye on temperatures and available stores, and place a reliable feeder at the top of the box for quick access.
Key Takeaways
- Most bee shipments arrive with sugar syrup to sustain early workers.
- Honey provides better nutrition than refined sugar for long-term health.
- Spring management of stores, frames, and feeders supports brood growth.
- Monitor temperatures and water access to reduce stress on bees.
- Plan now for winter by building stores during the nectar flow.
Understanding the Importance of Supplemental Feeding
Early spring shortages often force beekeepers to step in with liquid carbohydrates. Supplemental feeding bridges gaps when floral nectar is scarce. Honey remains the best diet for bees because it supplies vitamins and minerals that refined sugar lacks.
When natural sources lag, offering a 1:1 sugar syrup mix gives workers the carbs needed for comb construction and brood care. This syrup acts as a short-term energy bridge until nectar returns.
The Role of Sugar Syrup
Providing sugar syrup at a 1:1 ratio is common among experienced beekeepers. That syrup helps bees maintain activity and build stores without forcing them to forage far from the hive.
Why Bees Need Help
- Energy support: Syrup supplies quick carbohydrates for foragers and nurses.
- Brood growth: Feeding ensures enough reserves for brood rearing during slow blooms.
- Survival: Without supplemental sugar, some hives risk starvation before strong nectar flows begin.
“Supplemental syrup is a practical, temporary tool that preserves colony strength until nature resumes supply.”
Determining How Much to Feed a New Package Colony
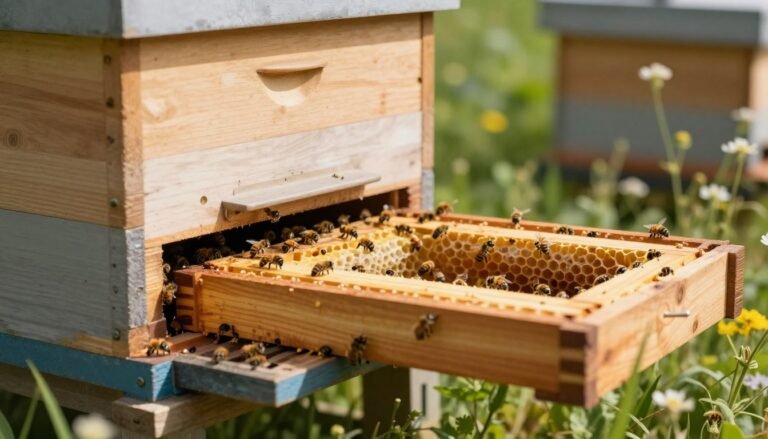
When bees arrive with no comb, consistent syrup becomes the hive’s backbone. A package placed in an empty box will struggle without steady sugar syrup. Start with an accessible feeder and keep syrup available until the first strong nectar flow.

Plan for foundation building: young bees need syrup to draw comb, raise brood, and store food for winter. Monitor frames and stores weekly and adjust the amount as spring conditions change.
Each package is unique. Observe activity at the entrance, comb construction, and pollen intake. That tells the beekeeper when to add or cut back syrup.
- Provide a steady source of syrup while bees make comb.
- Keep clean water near the hive.
- Watch for increased foraging during a nectar flow and reduce supplemental feeding then.
“Consistent feeding early saves time later and helps the hive grow into a productive unit.”
Essential Equipment for Hive Feeding
Simple, durable feeding gear makes spring management easier for any beekeeper. Proper equipment keeps bees healthy and reduces unnecessary disturbances inside the box.
Jar Feeders
Jar feeders are the easiest and cheapest option for beginners. Many people use boardman-style jars at the entrance so workers can access syrup with minimal fuss.
Frame Feeders
Frame feeders sit inside the hive and offer a neat way to place syrup among the frames. They are versatile but do take up space that might otherwise hold brood or honey.
Top Feeders
Top feeders hold large volumes and, when installed correctly, help prevent drowning. Using a top unit also lets you support the hive without opening brood boxes often.
- Jar feeders are affordable and easy to set up at the entrance.
- Frame feeders fit inside but reduce available frame area.
- Top feeders store a lot and lower handling stress for bees.
- Choosing the right feeder ensures steady feeding during spring.
“Good equipment lets the bees work with minimal interruption and supports steady growth.”
For starter gear recommendations, see this beekeeping starter kit guide.
Selecting the Right Food Source for Your Bees
Choose a safe, nutritious food source before spring for steady comb building and brood support. The best option is capped honey taken from a healthy, trusted hive inside your apiary. This reduces the risk of spreading pathogens and gives bees real vitamins and trace minerals.
Do not use corn syrup. It lacks the nutrients bees need and can harm long-term health. If honey isn’t available, use a 1:1 sugar syrup made from refined white or organic sugar and clean water. That syrup supports comb drawing and frames while natural nectar returns.
Beekeepers must avoid store-bought honey unless its origin is confirmed. American Foulbrood (AFB) spores can hide in commercial jars and infect hives.

- Best source: capped honey from a known, healthy hive.
- Sugar syrup: mix 1:1 sugar and water when needed.
- Never: feed corn syrup or untested store honey.
- Equipment: keep feeders clean and secure to prevent robbing.
“Providing a clean, reliable food source in spring helps bees build comb and stores that carry them through winter.”
For practical starter tips on offering syrup and preventing robbing, see this syrup feeding guide. For disease checks before sharing honey, review this inspection resource.
Risks of Using Honey from Unknown Sources
Unknown honey sources can carry hidden threats that quickly overwhelm a healthy hive. Honey can harbor American Foulbrood (AFB) spores and other pathogens. Introducing contaminated jars into your bees increases the risk of disease spread across frames and brood areas.
Never offer honey from another apiary or unverified store jars. Even small amounts may contain resilient spores that survive storage and transfer. That makes rescue or treatment costly and stressful for bees and beekeepers.
Avoiding Disease Transmission
Use honey only when its origin is known and trusted. If you cannot confirm the source, choose a 1:1 sugar syrup as a temporary and safer option.
- AFB risk: Unknown honey can introduce spores that devastate bees.
- Source matters: Do not feed jars from other yards or untested store honey.
- Safer alternative: sugar syrup avoids pathogen transfer when supplemental food is needed.
“Protecting your bees from disease begins with avoiding risky food sources.”
For more detail on risks tied to external honey and best practices, read this guide on external honey risks.
Why You Should Avoid Open Feeding Methods
Open feeding often attracts unwanted visitors and creates conflict at the hive entrance.
Open feeding promotes robbing. When syrup or candy sits exposed, stronger foragers locate the resource and overwhelm nearby hives. That pressure forces defenders to fight, and smaller groups often lose stores.

Weak hives rarely benefit from exposed food. They cannot compete with aggressive neighbors and quickly lose nourishment meant for brood and comb building.
- Use individual feeders per hive to give each group controlled access to syrup.
- Avoid scattering trays or piles that act like beacons for robbers.
- Reserve open feeding only for large operations with staff and strong oversight.
Protecting your bees during spring buildup is critical. Closed feeders reduce stress and defend stores without constant intervention.
“Closed, hive-specific feeding prevents robbing and supports steady growth during sensitive spring weeks.”
For practical protocols on safe supplemental feeding, see this feeding guidance.
Managing Your Colony During the First Week
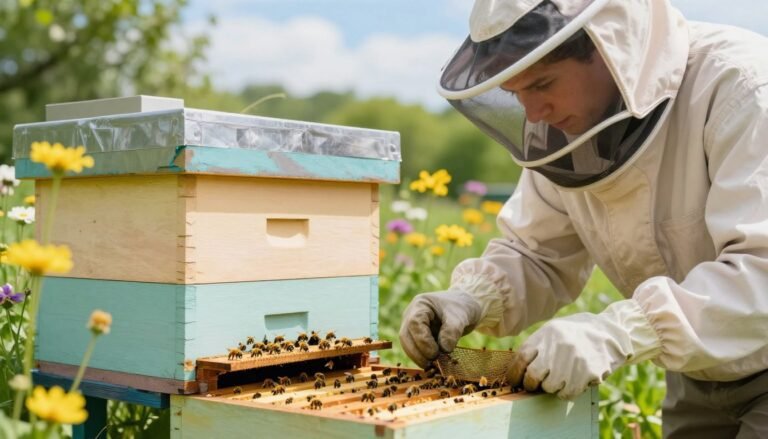
Begin the first week by securing the hive and offering steady nourishment so bees can settle quickly. Reduce the entrance and place a closed feeder with 1:1 sugar syrup to limit robbing and keep stress low.
Remove the queen cage after 2–3 days. Leaving it longer can cause bees to build unwanted comb between frames in the box. Check gently, then close the hive.
Cold spring nights make bees huddle for warmth. Keep the screened bottom closed so the cluster holds heat and the group stays strong.
Provide consistent syrup throughout this week. That sugar helps workers draw comb and prompts the queen to begin laying brood. Avoid frequent inspections; let frames develop quietly.
“A calm first week with steady syrup and minimal disturbance gives the hive its best chance for fast growth.”
| Action | Purpose | Timing |
|---|---|---|
| Reduce entrance | Protect stores and reduce robbing | Day 0–7 |
| Remove queen cage | Prevent stray comb between frames | Day 2–3 |
| Keep feeder with syrup | Support comb draw and brood | Continuous through week |
| Close screened bottom | Maintain cluster warmth | Nighttime and cold days |
Monitoring Growth During Weeks Two and Three
Short, targeted inspections at week two and week three tell you if the bees are on track for spring growth. Open the hive briefly and look for drawn comb across four to six frames.
Expect a mix of pollen, nectar, and open brood. The queen should be laying in any available cells and you should see eggs, larvae, and sealed brood progressing by the end of week three.
Keep a closed feeder full of 1:1 sugar syrup nearby and continue supplemental syrup while the group draws comb and fills stores. Provide clean water close to the hive.
If frames are not drawn after two weeks, consider queen quality or package issues. Slow comb building can signal a weak queen or poor package health. Inspect for queen cells; their presence may mean the hive plans to swarm or replace the queen.
- Perform brief inspections—limit disturbance and watch frame progress.
- Confirm 4–6 frames of comb are being drawn.
- Continue steady syrup until natural nectar flow takes over.

“A calm, focused check at weeks two and three gives early warning of problems and guides timely action.”
For tips when comb is slow, see these reasons bees won’t draw comb.
Expanding the Hive and Feeding in Week Four
Week four often brings a clear shift: the population grows and hive activity accelerates. New bees emerge and brood care ramps up. Workers increase comb work and store gathering.
Keep sugar syrup available until the bees have eight frames fully drawn. Continue using a closed feeder and fresh water nearby. This ensures steady stores while the group builds.
If four to eight frames are drawn, consider adding a second box. Extra box space lets bees store nectar and raise brood without crowding.
- Watch brood pattern for even egg laying and solid coverage.
- Expect higher foraging for pollen and nectar as spring peaks.
- Contact a mentor if brood looks patchy or activity stalls.
| Indicator | Action | When |
|---|---|---|
| 4–8 frames drawn | Add second box | Week 4 |
| 8 frames drawn | Reduce syrup | After drawn |
| Poor brood pattern | Inspect queen; seek advice | Any inspection |

“Proper space and steady syrup in week four set the hive up for strong growth this year.”
Peak Nectar Flow and Feeding Adjustments
Peak nectar brings frantic activity; colonies expand rapidly and demand quick adjustments.
During this phase the population can grow by 1,000–1,500 bees per day. That pace means you may need to add another box as workers fill frames and build comb. Pull two drawn frames into the middle of a new box to encourage upward movement.
Keep sugar syrup available until eight frames are fully drawn, but watch if bees prefer natural nectar or honey. Reduce syrup when foragers bring steady nectar and stores build naturally.
Keep the screened bottom closed. This helps maintain internal hive temperature for healthy brood and faster comb construction.
- Expect 5–9 frames drawn by the end of this period, with much capped brood.
- Provide clean water and a closed feeder at the top or entrance as needed.
- Add boxes promptly when crowding limits brood expansion.
“A timely box and steady supplemental syrup let the hive turn an intense flow into lasting stores.”
| Indicator | Action | Why |
|---|---|---|
| Population +1,000–1,500/day | Add box | Prevents crowding and encourages brood expansion |
| 4–7 frames drawn | Keep sugar syrup | Supports comb drawing until nectar steadies |
| 8 frames drawn | Stop supplemental syrup | Allow bees to store natural honey for winter |

Recognizing Signs of a Healthy Queen
Check frames early for eggs, tiny larvae, and sealed pupae to confirm queen vitality. These three stages of brood show the queen is laying and the hive is reproducing successfully.
Look for a solid brood pattern. A uniform spread of brood across adjacent cells means the queen lays consistently and workers raise young well.
Spotty or irregular brood suggests trouble. If the pattern is broken or scattered, consider queen quality and plan an intervention before the bees weaken.
- A healthy queen lays in a steady pattern across multiple frames.
- Observe eggs, larvae, and capped pupae within comb to confirm development.
- Act quickly on irregular brood to protect the colony and prevent decline.
| Sign | What it means | Action |
|---|---|---|
| Eggs in many frames | Queen is active and mating was successful | Monitor weekly |
| Uniform brood pattern | Good laying and worker care | Maintain routine inspections |
| Spotty brood | Possible failing queen or disease | Inspect queen, consider replacement |

“Regular checks for eggs, larvae, and sealed pupae give beekeepers the early warning needed to keep hives strong.”
For more on recognizing strong hives, review signs of a strong and healthy honey bee, and consult expansion tips when planning interventions.
When to Stop Supplemental Feeding
Cease sugar additions when the first honey super goes on. Adding that box signals the hive should store pure honey for harvest. Stopping then keeps frames free from syrup contamination.
Watch behavior at the feeder. If bees stop taking feed and several frames show capped stores, end supplemental syrup. That change usually arrives as the local nectar flow improves.
Timing matters. Stop too late and workers may fill brood comb with sugar rather than nectar. Stop too early and the group may lack winter stores. Match decisions to brood pattern and drawn comb.
- Stop feeding once the first honey super is added.
- End when bees stop accepting syrup or when multiple frames are capped.
- Continue only for a poor performing hive after careful review.
“By mid-summer most healthy colonies are self-sustaining; use syrup only as a temporary aid.”
| Indicator | Action | Why |
|---|---|---|
| First honey super added | Stop sugar syrup | Preserves honey quality for harvest |
| Bees refuse feed | Remove feeder | Natural nectar meets demand |
| Several frames capped | End supplemental feeding | Stores are secured for winter |

Common Challenges for New Beekeepers
New beekeepers often face surprises in spring that test patience more than skill. Small issues like missing eggs or poor brood patterns are upsetting, but they are the exception rather than the rule.
Watch key signs: if bees are not drawing comb, or frames show no eggs, contact your mentor for timely advice. Quick guidance can prevent escalation and preserve the hive’s spring rhythm.
Avoid quick fixes. Do not use medicated syrup unless clear symptoms appear. Unnecessary antibiotics can harm immune defenses and create long-term problems for workers and brood.
Keep the entrance reducer in place while the group is small. That simple step lowers robbing risk and helps defend stores of honey and sugar during early growth.
Remember that beekeeping blends art with science. Observe temperature, water, and feeder placement, and learn with patience. For extra reading on starting packages, check this bee packages guide.
“Most problems respond to calm, measured management and a mentor’s advice.”

Best Practices for Frame Manipulation
Smart placement of drawn and blank frames speeds comb expansion during spring work. Move drawn frames toward the edges of the box. That gives room in the center for brood and new building.
Place new foundation next to brood frames. Bees prefer drawing foundation when it neighbors active brood cells. This encourages the queen to lay across fresh comb.
Avoid pulling frames from the middle of the hive. That action may roll the queen or scatter brood, raising stress and slowing growth.
- Shift drawn frames outward; keep central space for brood.
- Set foundation beside brood so comb draws faster during nectar flow.
- Handle frames gently; avoid crushing comb or harming workers.
| Action | Purpose | Timing | Outcome |
|---|---|---|---|
| Move drawn frames to box edge | Create central drawing space | During inspections in spring | Faster comb expansion |
| Place foundation next to brood | Encourage queen laying | When adding frames | Even brood pattern |
| Avoid middle-frame removal | Prevent queen disturbance | Any inspection | Stable hive structure |
| Handle frames with care | Protect comb and bees | Every manipulation | Healthy, productive hive |

“Strategic frame moves guide bees, speed comb draw, and protect brood.”
For guidance on growing populations alongside frame work, see boost colony population naturally.
Conclusion
Small, consistent actions in spring build resilient hives over the season. Focus on steady sugar syrup at first, fresh water nearby, and calm checks. These steps help workers draw comb and raise brood without excess stress.
Prioritize clean food sources and reliable equipment. Avoid unknown honey that might carry pathogens. Use closed feeders and keep hygiene high so your group gains strength for the coming nectar flow.
Plan so the group stores enough honey for winter. For practical feeding guidance, review this Feeding guidance from MSU MSU Extension.