Reviewed by Thomas B. · How we review
A dirty feeder is one of the easiest biosecurity mistakes to fix, and one of the easiest to overlook. Syrup residue, propolis film, and the occasional drowned bee build up fast, and a feeder that looks “good enough” to refill can still be carrying spores or fermenting sugar from the last colony that used it.
Cleaning feeders properly between colonies is not complicated, but it does take a consistent process rather than a quick rinse. Getting it right matters most whenever a feeder is being moved from one hive to another, reused after a colony died out, or shared across an apiary during a nectar dearth.
This guide walks through exactly what to use, how to clean each common feeder type, and how often the job needs to be repeated to actually cut disease risk rather than just make the feeder look tidy. For the science behind why this matters, see our companion guide on how shared feeders spread disease between bee colonies.
Key Takeaways
- Sticky syrup residue and biofilm, not just visible dirt, are what actually harbor spores and mold.
- A dedicated scrub brush, hot water, and a mild bleach solution handle the vast majority of feeder cleaning needs.
- Boardman, frame, top, and pail feeders each have a slightly different cleaning routine because of their shape and materials.
- Feeders should be fully dried before storage or reuse, since residual moisture is what allows mold and spores to persist.
- Cleaning frequency should track use: every refill gets a rinse, every colony change gets a full disinfection.
Table of Contents
- Why Feeder Cleaning Matters for Apiary Biosecurity
- What You’ll Need
- Step-by-Step Cleaning Process
- Cleaning Different Feeder Types
- Bleach Ratios and Disinfection Best Practices
- Drying and Storage
- How Often to Clean Feeders
- Mistakes to Avoid
- Conclusion
- FAQ
Why Feeder Cleaning Matters for Apiary Biosecurity
A feeder is one of the few pieces of equipment that comes into direct, repeated contact with bees from potentially more than one colony. Unlike a frame or a hive body, which usually stays with one colony for its working life, feeders regularly get pulled, refilled, and handed off between hives as needs change through the season.
That movement is exactly what makes cleaning routine so important. Syrup residue left in a feeder can ferment, mold, or simply act as a growth medium for Nosema spores and other pathogens that survive between one colony’s visit and the next. Moving a feeder straight from a weak or recently deceased colony to a healthy one without cleaning it first is one of the more common, avoidable ways disease spreads in a small apiary.
This ties directly into broader apiary biosecurity planning, and it pairs naturally with other routine sanitation habits like sanitizing hive tools between colonies.
What You’ll Need
Feeder cleaning does not require specialized equipment. A basic kit covers nearly every situation:
- A stiff bottle brush or dedicated scrub brush (kept separate from household dishware).
- Hot water, ideally as hot as the feeder material can tolerate.
- Unscented household bleach for disinfection, or white vinegar as a lighter-duty alternative for routine rinses.
- A five-gallon bucket or basin large enough to fully submerge smaller feeders.
- Rubber gloves and eye protection when working with bleach solutions.
- A drying rack or clean towel, plus a sunny spot for air-drying.
Step-by-Step Cleaning Process
The same basic sequence works for almost any feeder design, with small adjustments for shape and material covered in the next section.
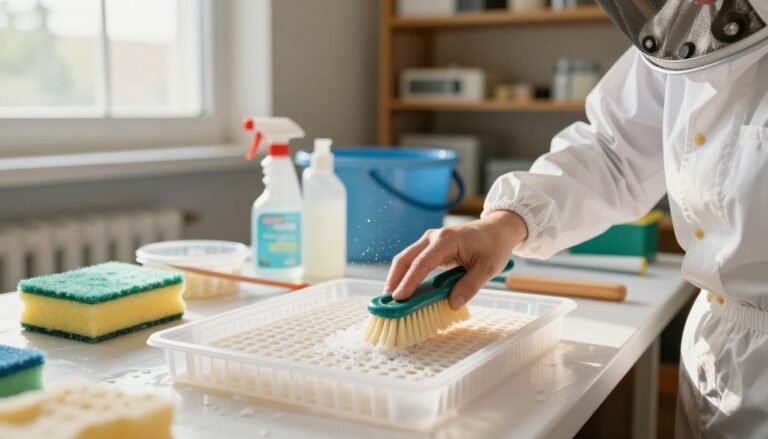
- Empty and rinse immediately. Dump any remaining syrup and rinse with plain water as soon as the feeder comes off the hive, before residue has a chance to dry and harden.
- Scrub with hot, soapy water. Use a bottle brush to break up sticky film on interior walls, corners, and any small holes or slots where syrup pools.
- Disinfect with a bleach solution. Soak or wipe down all surfaces with a diluted bleach solution (see ratios below) for at least ten minutes.
- Rinse thoroughly. Bleach residue is harmful to bees, so rinse with clean water until no smell remains, then rinse again.
- Dry completely before storage or reuse. Air-dry in full sun when possible, since UV exposure helps break down any remaining spores.
Cleaning Different Feeder Types
Boardman (Entrance) Feeders
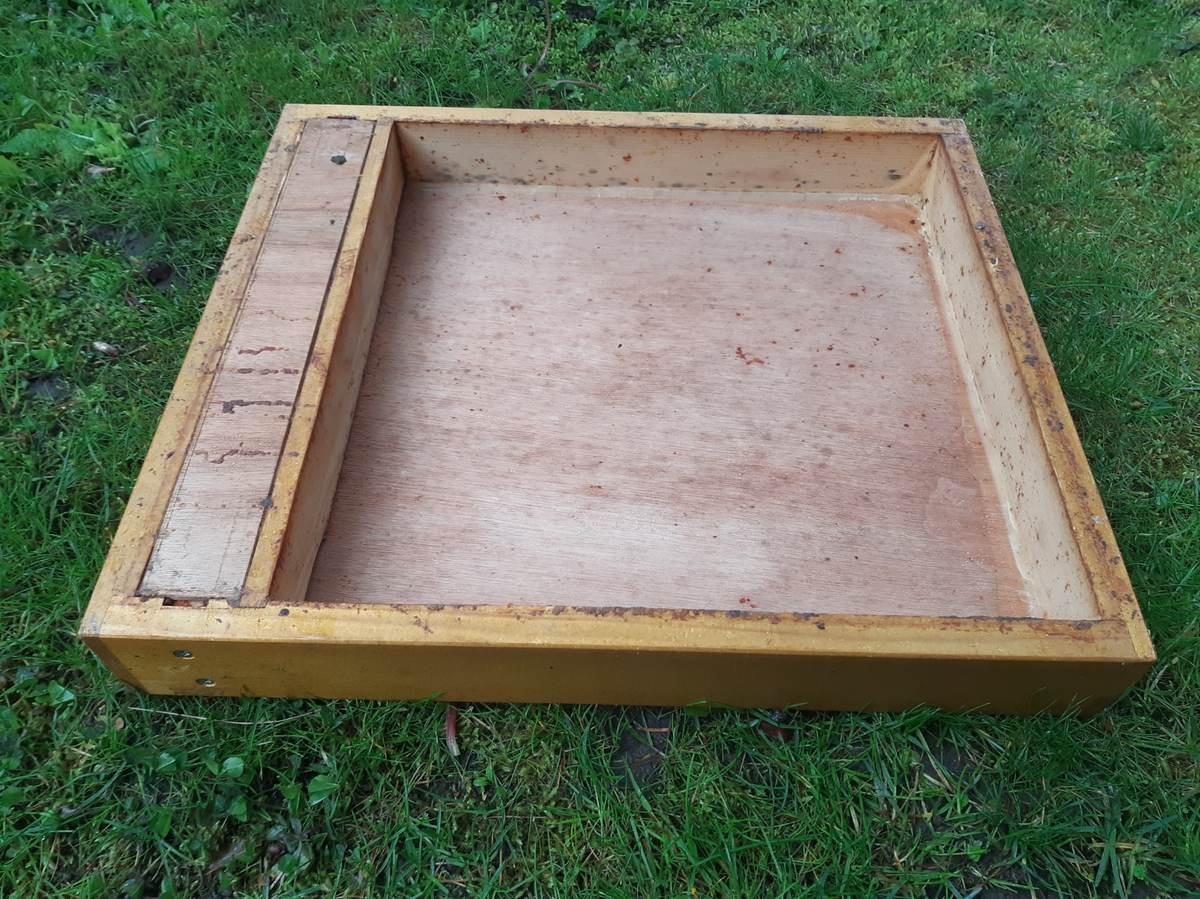
These feeders use an inverted jar seated in a wooden entrance tray. Clean the jar like any glassware, and pay close attention to the wooden tray, which absorbs syrup and can harbor mold in its grain over time. See our full Boardman feeder guide for more on this design’s tradeoffs.
Frame Feeders
Frame feeders sit inside the hive body in place of a frame, and their narrow internal chambers are prone to leaks and residue buildup; see this breakdown of frame feeder leaks and wax buildup. Flush the internal chamber repeatedly with hot water before scrubbing, since a bottle brush often cannot reach every corner.
Top (Hive-Top) Feeders
Top feeders typically have the largest surface area and the most nooks around center dividers and screened access points. Disassemble any removable parts fully before cleaning rather than trying to scrub around fixed dividers.
Pail (Bucket) Feeders
Pail feeders rely on a perforated lid to control syrup flow, and dried syrup can clog these holes between uses; our guide on pail feeder hole size and lid setup covers getting this right. Soak the lid separately, since its small holes need direct scrubbing with a toothbrush-sized tool to clear buildup.
Bleach Ratios and Disinfection Best Practices
A standard disinfecting solution for beekeeping equipment is roughly one part unscented household bleach to nine parts water (about a 10% solution). This matches the general approach covered in our guide to using a bleach solution for beekeeping equipment, which also applies well to feeders.
Submerge or thoroughly wipe every surface the syrup contacts, including lids, gaskets, and any rubber or silicone seals, since these materials can trap residue in ways rigid plastic or glass does not. Let the solution sit for at least ten minutes to allow it to work before rinsing.
Drying and Storage
A feeder that is cleaned but stored wet has not really been cleaned at all. Residual moisture supports the same mold and spore survival that the cleaning process is meant to prevent.
Air-dry feeders fully, ideally in direct sunlight, before stacking or storing them. If feeders must be stored for an extended period between seasons, keep them somewhere dry and well-ventilated rather than sealed in a closed container while still slightly damp.
How Often to Clean Feeders
Cleaning frequency should scale with how the feeder is being used:
- Every refill: A quick rinse and wipe-down to clear visible residue and check for mold.
- Every time a feeder changes hands between colonies: A full scrub-and-disinfect cycle, no exceptions, even if the feeder looks clean.
- End of season: A thorough cleaning before long-term storage, paired with an inspection for cracks or damage that could harbor residue permanently.
This routine fits naturally alongside other seasonal biosecurity habits, including keeping new colonies protected from robbing, since robbing pressure often coincides with heavier feeder use.
Mistakes to Avoid
- Rinsing with cold water only: Cold water does little to break down dried syrup or sanitize surfaces.
- Skipping disassembly: Fixed dividers and screens hide residue that a surface wipe will miss entirely.
- Reusing a feeder from a suspect colony without disinfecting it: If a colony was showing signs of disease, treat its feeder as contaminated until proven otherwise; see how to quarantine a suspect diseased hive for the broader protocol.
- Storing feeders damp: As covered above, this undoes most of the benefit of cleaning in the first place.
Conclusion
Cleaning feeders between colonies is a simple habit that closes one of the more overlooked gaps in everyday apiary biosecurity. A consistent routine of rinsing after every use, scrubbing and disinfecting whenever a feeder moves between hives, and drying thoroughly before storage handles the vast majority of the risk.
None of this requires special equipment or much extra time once it becomes routine. Beekeepers who build feeder hygiene into their normal workflow are far less likely to see disease move quietly between colonies through shared equipment.
FAQ
Can I just rinse a feeder with water instead of using bleach?
A water rinse is fine between refills for the same colony, but any time a feeder changes hands between colonies, a proper disinfection with a diluted bleach solution is worth the extra few minutes.
What bleach-to-water ratio is safe for beekeeping equipment?
A roughly 10% solution, about one part unscented bleach to nine parts water, is standard for disinfecting feeders and other equipment, followed by a thorough rinse.
Is vinegar a good alternative to bleach for feeder cleaning?
White vinegar works reasonably well for routine cleaning and mild mold, but it is not as reliable as diluted bleach for disinfecting equipment that has been in contact with a diseased colony.
How long should I let a feeder soak in bleach solution?
At least ten minutes of contact time is generally recommended to allow the solution to disinfect surfaces before rinsing.
Do I need to clean a feeder if it’s only ever used on one hive?
Yes, though less urgently. Even a single-colony feeder benefits from regular rinsing and periodic disinfection, since fermenting syrup and mold can build up regardless of whether other colonies ever touch it.
Why does the feeder still smell after rinsing with bleach?
A lingering bleach smell usually means it was not rinsed thoroughly enough. Rinse repeatedly with clean water until no odor remains before returning the feeder to a hive, since bleach residue can harm bees.
Can mold in a feeder actually harm a bee colony?
Yes. Moldy syrup can be rejected by bees or, if consumed, contribute to digestive stress, and a moldy feeder is also a sign that moisture and residue have been sitting long enough to support other pathogens as well.
Further Reading
Sources
For further reading, see USDA APHIS’s National Honey Bee Surveys program.