Reviewed by Thomas B. · How we review
Maintaining clean beekeeping gear keeps colonies healthy and reduces disease spread across an apiary. A single frame full of beeswax represents roughly 102,000 bee-hours of work, so protecting that investment matters.
Proper management of equipment prevents pests and environmental damage. Learning how to store contaminated frames until disposal safeguards hives and supports long-term productivity.
Effective storage uses a clear system. Label containers, choose sturdy lids, and segregate materials by risk. For guidance on handling hazardous waste and labelling, consult this hazardous waste guidance.
Every beekeeper plays a role in hygiene standards. Follow protocols to lower risks of colony loss and keep equipment safe for future use by your bees.
Key Takeaways
- Keep gear clean to protect colony health and productivity.
- Label and segregate hazardous materials in sturdy containers.
- Follow documented protocols for safe handling and storage.
- Recognize the value of each frame—it’s a major beeswax investment.
- Use professional guidance when managing risky waste streams.
Table of Contents
- Understanding the Risks of Contaminated Frames
- Initial Cleaning and Debris Removal
- How to Store Contaminated Frames Until Disposal
- Freezing Techniques for Pest Control
- Heat Sterilization Methods
- Chemical Sterilization Options
- Air Tight Storage Solutions
- Open Air Storage Strategies
- Criss Cross Stacking for Ventilation
- Stacked and Sealed Storage Methods
- Safety Precautions for Handling Chemicals
- Conclusion
- FAQ
Understanding the Risks of Contaminated Frames
Aged comb can hide serious pathogens that threaten hive health and productivity. Old comb is far more likely to carry varroa mites than fresh brood comb. That raises the chance of spreading diseases like chalkbrood and nosema through a colony.
Pathogens and Spores
Old comb acts as a reservoir for spores and bacteria. These agents persist in wax and comb. They can re-infect healthy colonies when equipment is reused.
Pest Infestation Risks
Wax moths and small hive beetles seek dark, debris-filled comb for breeding. Moths and hive beetles chew through wax, causing structural damage and loss of comb integrity.
- Neglected comb attracts pests and increases the risk of rodent intrusion and mice wax issues.
- Small hive beetles and other opportunists thrive in unmaintained hives.
- Early recognition of moth infestation signs helps protect bee colonies and preserves valuable wax.
Understanding these hazards helps beekeepers decide when to clean, sterilize, or remove equipment. Quick action limits spread and protects overall apiary health.
Initial Cleaning and Debris Removal
Begin by removing sticky honey and loose debris from each frame before any deeper cleaning step.
Clear visible contaminants like dirt, dust, propolis and loose wax from the equipment. Use a hive tool and stiff brush for quick removal so pests have less reason to investigate stored panels.
Honey extractors are great for bulk removal, but resourceful bees often finish cells better than any tool. For remaining syruped honey, a short warm rinse or letting guards work the racks can save time and waste.

Make sure all honey residue is gone; that substance attracts ants and other pests. You may also use a pressure washer or hose for stubborn debris, then let panels dry in sun and breeze.
- Wipe tools after each use with a clean cloth to avoid moving disease between hives.
- The difference between clean and sterile equipment matters: sterilization kills spores and viruses, while cleaning only removes visible soil.
For guidance on handling biological risks and labeling, consult this biological waste guidance.
How to Store Contaminated Frames Until Disposal
A dry, inspected stack cuts pest pressure and saves beekeepers time later.
First step: make sure each frame is completely dry before packing. Damp comb invites mold and moths and shortens useful life.
Freeze cleaned frames when possible; freezing kills many pests and secures the wax. Use sturdy containers—thin plastic bags will fail because wax moths can chew through them.
Protect honey-bearing comb by removing sticky residues first. Dry racks in sunlight and cool breeze for best results.
- Inspect stored equipment every few weeks for signs of chewing, webbing, or beetle activity.
- Prefer rigid boxes or sealed tubs over trash bags for longer storage life.
- Regular checks save time later by avoiding repeated cleaning cycles.
For proven cleaning steps and sterilization guidance, review cleaning and sterilizing beekeeping equipment and tips on how to store frames to prevent pests.
Freezing Techniques for Pest Control
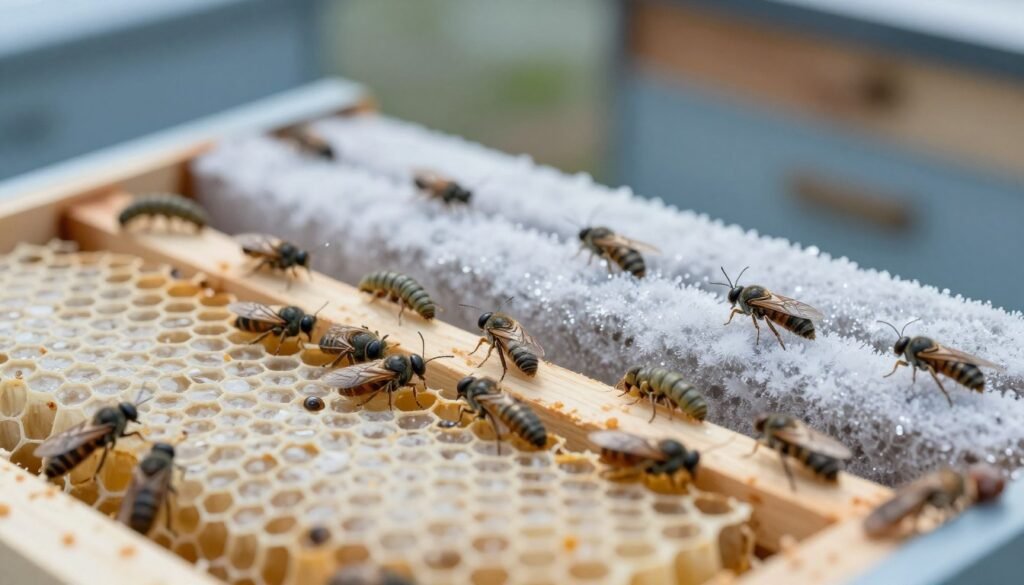
A controlled freeze is a simple, proven step that removes hidden insects from comb. Freezing is an accessible method that targets eggs and larvae without chemicals. It works well for small operations and backyard bee keepers.
Temperature Requirements
Set a deep freezer at 20°F (-6°C) or lower and hold frames for at least 5 hours to reliably kill wax moth eggs.
For faster results, lower the temperature to 5°F (-15°C) or below and maintain that for 2 hours. Always make sure comb is fully dry before treatment; damp wax can freeze unevenly.
- Practical tip: place each dry frame inside a large kitchen bag. This keeps debris from contaminating other freezer contents.
- The freezing method is widely considered the most reliable way to ensure frames are free of pests prior to longer-term storage.
- Treat every frame; a single surviving larva can reintroduce moths and damage valuable wax.
Heat Sterilization Methods
Applying targeted heat can sterilize many beekeeping parts without harsh chemicals. Heat kills surface microbes on metal and wood when used carefully. These methods suit small-scale operations and quick field work.
Torching Equipment
Torching uses a propane torch to heat metal parts until red-hot. This reliably destroys bacteria and many viruses on tools and metal frames.
When treating wood bee boxes, char lightly and avoid open flames that cause structural damage. Always cool items fully before returning them to a hive.
Boiling Tools
Boiling is best for small tools and comb parts. Use a 1:5 washing soda-to-water mix and boil for 5–10 minutes for effective sterilization.
- Practical tip: Boil scrapers, metal tools, and small hardware rather than full wooden boxes.
- Note that heat may not eliminate American foulbrood; such cases need stricter measures.
- Allow ample cooling time to prevent heat damage when you next use equipment in a hive.
Chemical Sterilization Options
Targeted chemical treatments offer a fast pathway to sanitize beekeeping equipment when mechanical methods fall short.
Safety first: use rubber gloves and a respirator when handling strong acids or bleaches. Acetic acid fumigation requires an 80% solution and full PPE. Seal all external seams of the hive with plastic wrap or tape so fumes remain contained.

A common immersion option is a 1:5 bleach-to-water mix. Submerge small parts and wood pieces for 10 minutes, then rinse thoroughly to remove residue. Rinsing prevents chemical damage and keeps honey and wax safe for future use.
- Document each step so the process and time intervals stay consistent across seasons.
- Keep records and consult your local apiary inspector if you suspect American foulbrood or severe hive disease.
- Chemical methods are powerful but must be applied in controlled ways to avoid damage and protect bees.
Air Tight Storage Solutions
Sealing beekeeping boxes against air exchange keeps pests out and protects stored wax.
Airtight storage is one of the most reliable methods for keeping moths and mice away during winter. Use rigid boxes or large plastic totes and check lids for gaps that allow insects entry.
Wax moths can chew through thin plastic, so reinforce lids with duct tape along the top seam. That simple step stops most entry points and adds a layer of defense for frames and foundations.
After a freeze treatment, place each dry frame into an airtight container right away. This prevents fresh infestations and keeps wax clean for future use.
- Reliable: the airtight method keeps moths and mice out of stored equipment.
- Space-friendly: sealed boxes work well when you don’t have much space indoors.
- Practical tip: use tape on the lid gap of plastic totes for an extra seal.
For additional prevention advice, review our guide on preventing wax moths in stored equipment.
Open Air Storage Strategies
Open-air racks keep comb exposed to sunlight and breeze, which cuts pest shelter and preserves wax quality.
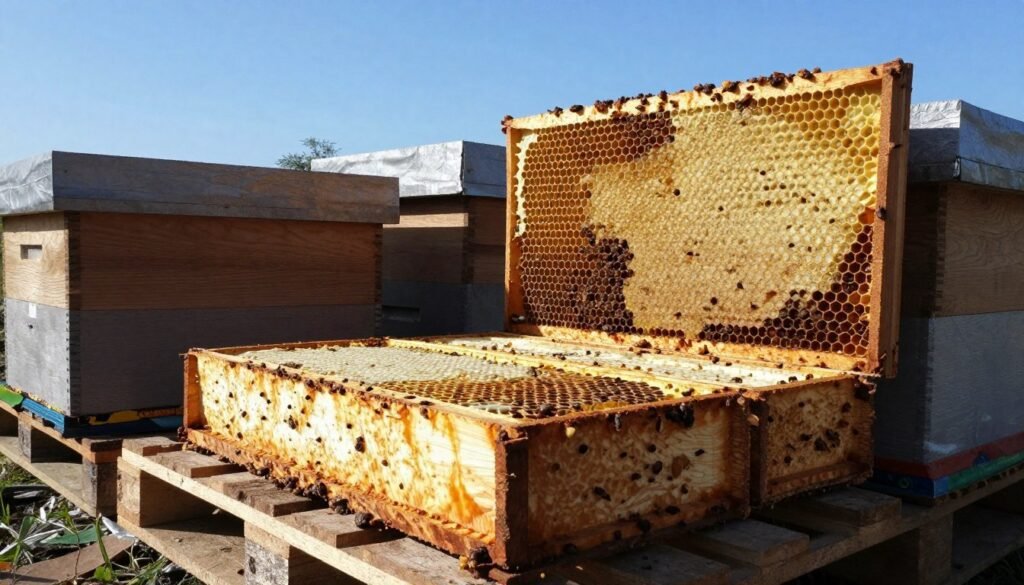
Hang frames with 1–2 inches of gap between each piece. That spacing lets sunlight reach cells and allows steady airflow around the equipment. Sun and air discourage wax moth and other common hive pests.
This method suits DIY beekeepers who want a rack that holds about 100 frames. It works well when you do not have much space in a garage or basement. By keeping comb out of dark boxes, you limit the places moths and small hive beetles prefer.
Place racks away from living areas. This approach may also attract hornets, so set a rack at least 100 yards from your house. Check stored items on a regular time cycle to spot any beetle or rodent signs early.
| Method | Best for | Main benefit | Drawback |
|---|---|---|---|
| Open-air rack | DIY beekeepers, limited space | Sunlight and airflow reduce moths | May attract hornets; needs distance from house |
| Sealed boxes | Long-term indoor storage | Blocks pests if airtight | Requires proper sealing and space |
| Freeze then store | Small operations | Kills eggs and larvae | Needs freezer space and dry wax |
Safety note: when working outdoors with large stacks or chemical cleaners, follow official preparedness guidance available at hazardous waste preparedness.
Criss Cross Stacking for Ventilation
Criss-cross stacking turns each bee box 90 degrees so light and air can pass through the pile. This simple, chemical-free method uses existing boxes and a stand to create natural ventilation that keeps comb drier and less attractive to pests.
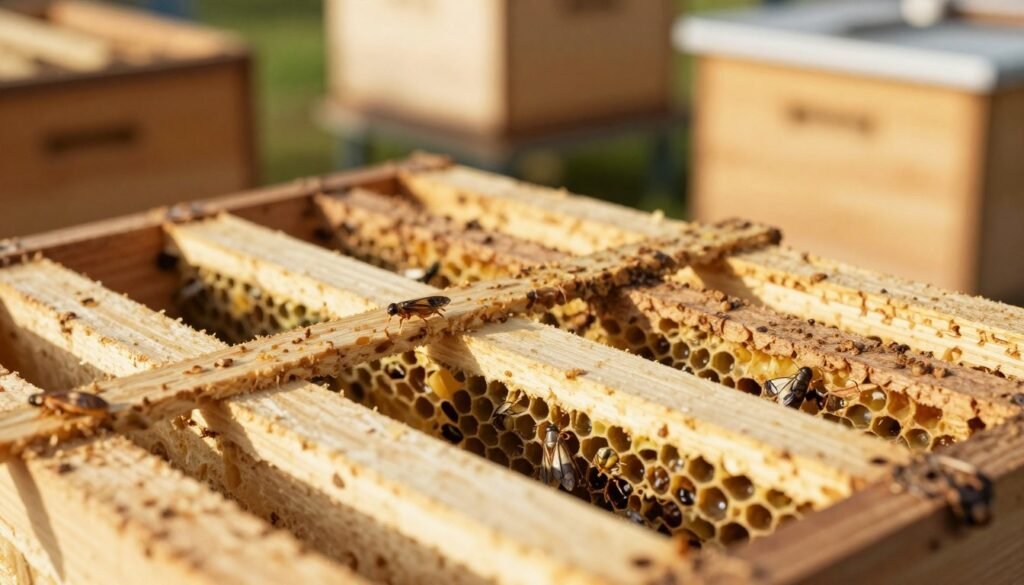
By alternating the orientation of each box, you form channels that let sunlight reach inner cells and allow steady airflow. That bright, moving air discourages wax moth and small hive beetle activity.
Many beekeepers praise this method for being low-cost and effective indoors. Place one or two mousetraps around the stack to catch scavengers, since mice can still probe gaps in wooden boxes.
- Easy setup: use only your existing boxes and a raised stand.
- Ventilation is key: prevents the dark, stagnant spaces moths prefer.
- Indoor use only: outdoor placement may invite mildew if direct light is lacking.
For extra guidance on preventing wax moth damage, see our short guide to prevent wax moth infestations.
Stacked and Sealed Storage Methods
Stacking sealed bee boxes creates a compact, sealed barrier that slows pests and preserves wax quality.
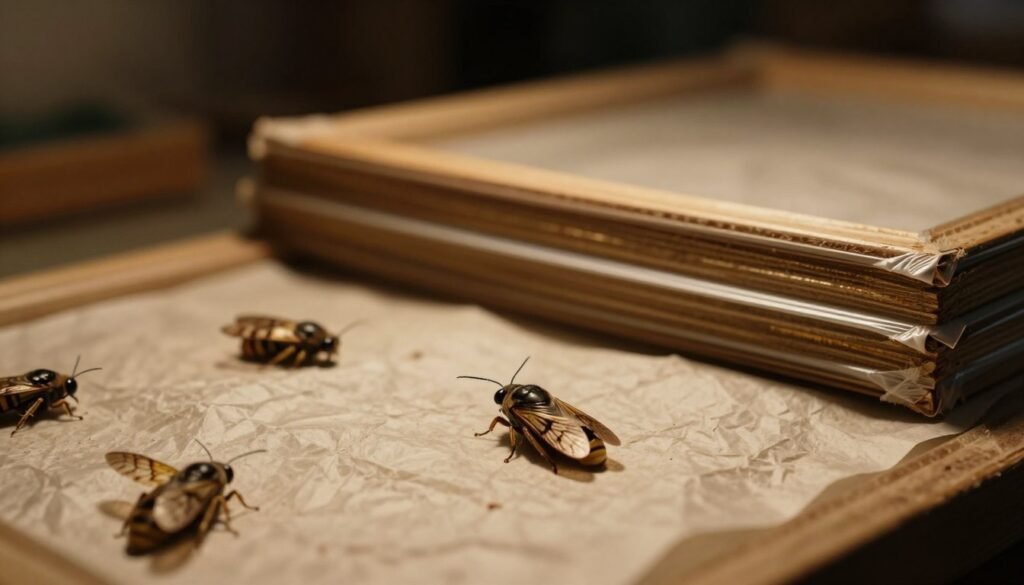
Before stacking, freeze each frame for at least 48 hours to kill wax moth eggs, larvae, and pupae, or spray both sides of the comb with a Bacillus thuringiensis aizawai product (Certan/B402-type) and let it dry. Do not use p-dichlorobenzene (PDB) crystals or mothballs: PDB residues persist in beeswax and can carry into honey, and naphthalene mothballs are not approved for hives.
Sandwich the stack between two telescoping top covers. Tape gaps around the sides so adult moths cannot slip through seams and lay new eggs in the treated comb.
This indoor method works well when space is limited. Keep the sealed stack in a cool, dry place; cold storage slows or stops wax moth development. Check the stack every few weeks for webbing or frass until spring use.
- Effective: freezing or Bt treatment kills moths already in the comb, and the sealed stack keeps new adults out.
- Simple prep: freeze or spray first, then stack with taped seams and telescoping covers.
- Best use: indoor storage where sealed stacks fit easily and stay undisturbed.
Safety Precautions for Handling Chemicals
Before any chemical work, confirm that personal protective items are ready and in good condition. This step protects your skin, eyes, and lungs while you treat bee gear.

Personal Protective Equipment
Essential items: chemical-resistant gloves, face mask or respirator, goggles, and an apron. Wear full eye protection when splashes are possible.
Ventilation is mandatory. Open doors, run fans, or use an exhaust system to remove fumes during treatment.
“Proper PPE and fresh air are the simplest, most effective safeguards when working with sterilants.”
| Item | Purpose | Notes |
|---|---|---|
| Gloves | Skin protection | Use chemical-resistant pairs and change if torn |
| Respirator | Fume control | Match cartridge to the chemical used |
| Goggles | Eye safety | Seal around eyes for splash-prone work |
Checklist: Before you begin, make sure you gathered scrubbing tools, water, and clear instructions. Read manufacturer guidance for each product and for any equipment you will treat.
For detailed lab-grade setup and protocols, consult this research micro lab guide.
Conclusion
Keep consistency, and your drawn comb, wax, and tools will last through winter. Protecting frames and foundations is a vital choice that affects hive health and honey yield.
We reviewed four practical storage methods: airtight boxes, open-air racks, criss-cross stacking, and stacked and sealed systems. Each method has clear benefits depending on space and preference. Test a couple this first year to find the best fit for your beekeeping setup.
Routine checks and simple steps stop moths, small hive beetles, and other pests from causing damage. With steady care, your boxes, frames, and stored equipment stay ready for the season ahead. Keep at it, and prioritize the health of your bees and comb.
FAQ
What counts as contaminated frames and why handle them carefully?
Contaminated frames include drawn comb, brood frames, or supers with disease spores, chemical residues, heavy wax moth damage, or small hive beetle infestation. These items can spread pathogens, parasites, and pests across hives if not isolated. Treat them as potential biohazards and limit movement until they are neutralized or properly disposed of.
Which pathogens and spores are beekeepers most concerned about?
Common concerns are American foulbrood (AFB) spores, European foulbrood bacteria, Nosema, and other fungal or bacterial agents. AFB spores are especially hardy and can survive long in wax and equipment, so frames suspected of AFB require strict containment and proven sterilization or destruction.
How do pest infestations factor into risk assessment?
Wax moths, small hive beetles, and rodents can carry and spread contamination. Moth larvae tunnel through comb and contaminate stored equipment. Beetles and larvae also leave residues that attract pests. Prioritize frames with visible larval damage, frass, or beetle trails for quarantine and treatment.
What cleaning and debris removal should be done before storage?
Remove cappings, loose propolis, and heavy debris. Scrape off comb or loose wax that can hide pests. Do this outdoors or in a well-ventilated area wearing gloves. Avoid excessive brushing that aerosolizes spores; collect debris in sealed bags for later disposal or sterilization.
How should frames be kept prior to final disposal?
Isolate affected equipment from active hives in a dedicated area. Use labeled, sealed containers or heavy-duty plastic bags to prevent pest escape. Keep boxes off the ground on pallets and limit access. Mark boxes clearly with date and contamination reason so they aren’t mixed with clean gear.
Can freezing kill wax moths and small hive beetles?
Yes. Freezing is effective for many pests when done correctly. Solidly freeze frames at -4°F (-20°C) for at least 48 hours to kill eggs, larvae, and adult insects. Larger stacks may need longer times; ensure center temperatures reach target by testing with a thermometer.
What temperature and timing do freezing techniques require?
Aim for -4°F (-20°C) sustained for 48–72 hours for reliable pest mortality. Thicker wooden equipment or stacked boxes require longer exposure. Use a commercial freezer if possible; household freezers may not hold steady temperatures or fit full frames.
Is heat sterilization a viable method for frames?
Heat can sterilize comb and tools but must be applied safely and evenly. Torching or boiling methods can destroy pests and reduce spores, but uneven heating risks incomplete sterilization and warping of wood or melting of plastics. Choose validated methods for critical contamination like AFB.