Expanding a 5-frame nuc is a core skill for any beekeeper managing multiple colonies in the United States today. This short guide explains the essential steps and gear needed to move frames, protect brood, and set up a new hive box with care.
David and Sheri Burns of Long Lane Honey Bee Farms stress that a well-prepared nuc box helps prevent swarming and supports steady colony growth. Bring a reliable hive tool, smoker, and feeder so bees settle quickly and stores remain adequate.
Prepare the entrance and clear the apiary area before lifting frames. Transfer frames methodically, keep orientation, and reduce the entrance after transfer to help workers defend their new, larger home.
Key Takeaways
- Use a calm, warm day and brief checks to reduce stress on the colony.
- Keep frame order and orientation when moving brood into the new hive box.
- Bring a hive tool, smoker, and feeder for smooth transitions.
- Reduce the entrance after transfer to aid defense and reorientation.
- Reference practical guides on nuc handling for detailed steps: bigging up nucs and inspecting purchased nucs.
Understanding the Role of a 5-Frame Nuc
A compact nucleus hive serves as a strategic reserve within an apiary. A nuc, short for nucleus, is a smaller portion of a larger hive kept for support and flexibility. It holds frames of brood, stores, and an active queen so resources stay available when needed.
Defining the nucleus
A frame nuc is built around five frames that combine brood, food, and workers. This small box makes it simple to move frames of brood or honey into another hive when colony strength dips. David and Sheri Burns note these setups work well for queen rearing and population management.
Benefits of support hives
- Reserve resources: A nuc box acts as a support hive year-round for quick reinforcement.
- Flexible transfers: Keep frames ready to strengthen a weak colony or replace lost queens.
- Management tool: Small hives simplify breeding and emergency responses in beekeeping.
For more detail on practical uses and colony division, see this helpful guide: role of a 5-frame nuc hive.
How to Expand a 5-Frame Nuc Safely
Before moving any frames, preserve the colony’s heat center. Work on a calm, warm day and limit chair time at the hive. A small puff or two of cool smoke at the entrance will calm guard bees and ease handling.
Prepare the new hive box and place it next to the starter unit. Carefully lift each frame and set brood frames in the middle of the larger hive. This keeps the comb structure intact and helps bees keep the nest organized.
Place one frame of foundation on the side of the brood nest. That encourages gradual comb building without forcing swarming behavior. Keep frame order and orientation as you move frames.
- Stay calm: The safest way is to be methodical and brief.
- Middle placement: Brood belongs in the center of the new hive.
- Have backup: Keep an empty nuc or capture box ready for sudden swarm activity.

Document each step for repeatable success. Clear procedures protect bees, frames, and the long-term strength of your hives during every transfer day.
Recognizing When Your Colony Needs More Space
Watch your hive traffic and frame coverage; crowded frames often signal an imminent need for more space. Monitor the box weekly during spring so you catch growth before the colony commits to splitting.
Monitoring Population Density
Rule of thumb: when 80%–90% of frames show bee coverage, act. In a standard five-frame unit, three or four full frames of brood mean the queen has limited room.
Identifying Brood Nest Congestion
Look for packed cells and stacked brood. Congestion raises stress and reduces brood pattern quality. A healthy queen may lay 1,000–3,000 eggs per day, filling the brood box in weeks.
Spotting Reproductive Signs
If you find swarm cells, the colony plans a split and a quick move becomes urgent. Add space and food early; this reduces swarm pressure and protects honey and pollen stores.
- Weekly checks during spring keep you ahead of crowding.
- Three or four full brood frames in a five-frame setup indicates limited room.
- Spotting swarm cells requires immediate action.
For guidelines on capacity management and boosting numbers, see managing hive capacity and advice on how to boost colony population naturally.
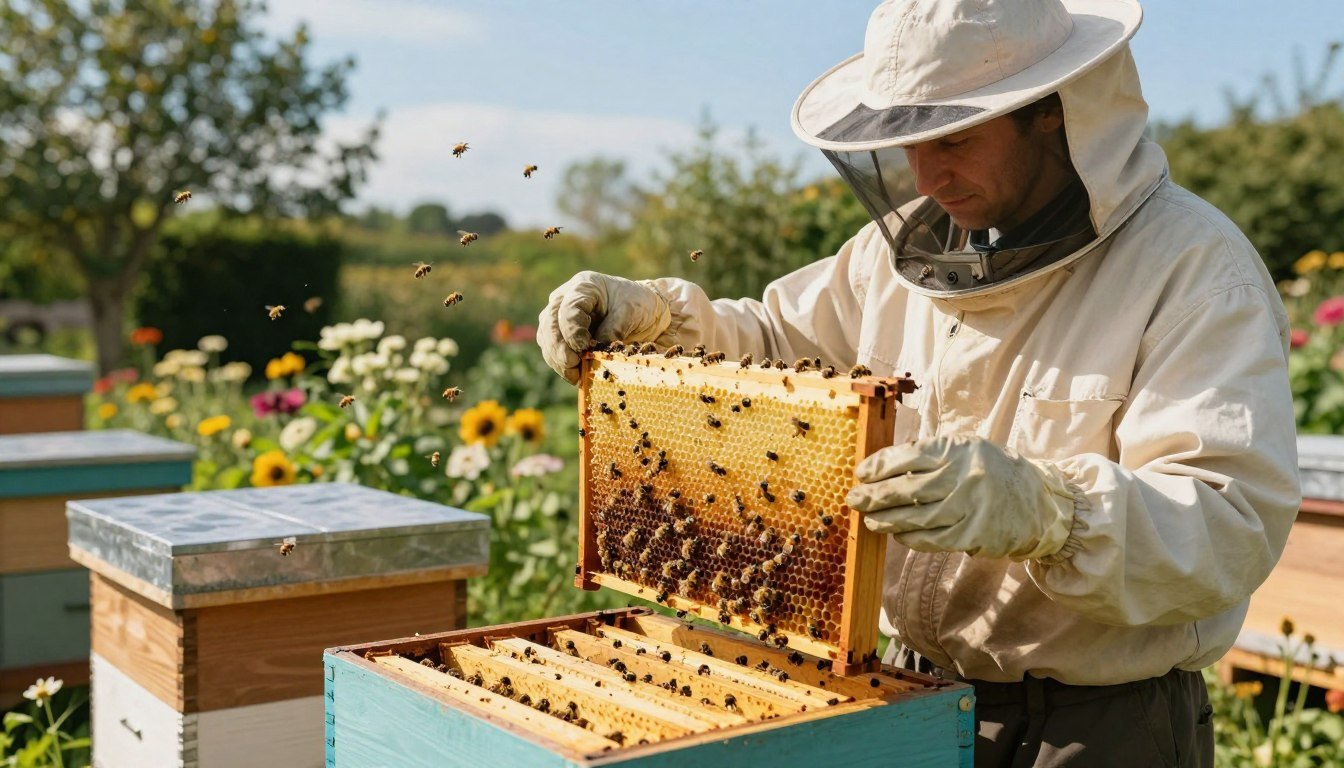
Essential Tools for a Successful Transfer
Good gear makes transfers quicker and less stressful for both the beekeeper and the colony.

Start with basics: a sturdy hive tool and a reliable smoker are indispensable. These let you separate frames, lift comb, and calm bees during each frame move.
David and Sheri Burns offer a complete equipment special that includes a hat, veil, smoker, and hive tool. Their kit also bundles a feeder for maintaining stores while you build the new hive box.
- Hive tool: pry and lift frames without damaging comb.
- Smoker: gentle puffs reduce defensiveness during transfers.
- Feeder: keep stores steady after inserting brood frames.
- Spare set: an extra feeder and smoker prevent delays on busy days.
| Tool | Purpose | Recommendation |
|---|---|---|
| Hive tool | Separate and lift frames | Sturdy steel, hooked end |
| Smoker | Calm bees during handling | Well-sealed bellows, dry fuel |
| Feeder | Provide emergency stores | Top or frame feeder, easy fill |
| Protective gear | Personal safety for the beekeeper | Hat, veil, gloves |
Using a small box as a mating nuc speeds queen rearing and lets beekeepers manage population growth during the busy season. Keep a dedicated tool set for your nucs and your hives; this saves time and lowers stress across the apiary.
For step-by-step transfer guidance, see this practical guide on transferring a nuc into a full-size. For sourcing starter colonies, check options for buying packaged bees and nucs in the.
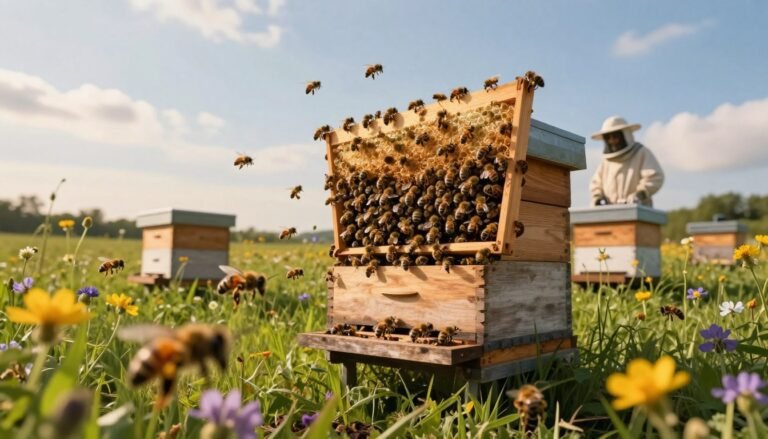
Preparing Your Apiary Site for Expansion
Setting up the area before a transfer reduces stress for bees and beekeeper alike.
Place the nuc box directly beside the prepared hive body. Keeping the box next to the new hive cuts returning-forager confusion. Workers find the entrance faster, and the colony regroups with less drift.
Use the smoker with measured puffs before you begin. A gentle cloud calms guards and gives you time to move frames and inspect comb. This is a standard practice in professional beekeeping today.
Minimizing Forager Disorientation
Position hives and nucs so flight paths do not cross. Clear nearby clutter and keep the landing area level. David and Sheri Burns note that 5-frame nucs may sit behind or beside a support hive to save space while maintaining orientation.
- Site layout: an organized apiary helps bees learn entrances quickly.
- Access: make sure the entrance faces a clear foraging corridor.
- Tool readiness: have your smoker and hive tool within reach for quick, calm moves.
Good site management keeps bees on task and preserves colony strength during every frame move.
Setting Up the Full-Size Hive Body
Open the brood box and extract the center five frames, creating a clear void for the incoming colony and brood. This central pocket is where the transfer will anchor the new nest and heat center.
Place the five frames from your nuc into that void. Arrange them in the middle so the brood sits centered. On each side, install five fresh frames of foundation to guide comb building and future honey storage.
Use a screen bottom board and a proper feeder as part of the setup; David and Sheri Burns recommend these for ventilation and steady stores during growth. Keep your hive tool at hand so frame placement stays quick and precise.
- Center placement: keep brood frames together in the middle of the box.
- Foundation flanks: new foundation frames on both sides encourage straight comb.
- Equipment ready: feeder, screen bottom, and tool should be staged before opening the colony.

For practical setup tips and transport gear, consult this guide on starter colony setup and this roundup of the best nuc box for transporting bees.
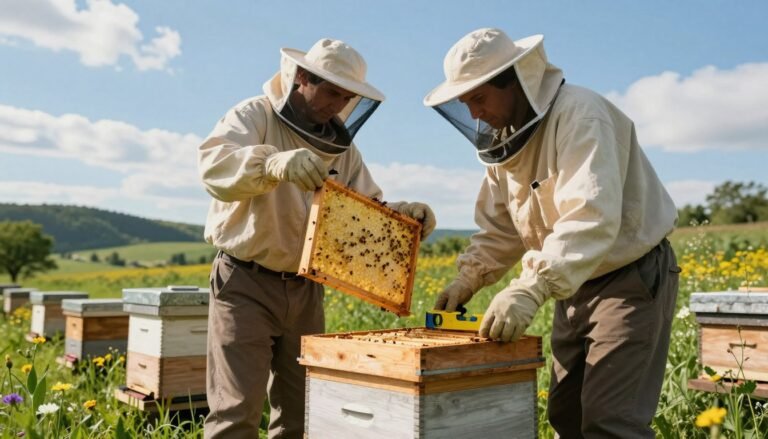
Executing the Frame Transfer Process
Move each frame with purpose, keeping brood frames together in the center of the new hive body. Start by lifting frames in the same order they sat in the nuc so the colony retains its heat center and comb orientation.
Gently shake any remaining bees from the lid and box into the new hive. This step prevents loss of foragers and nurse bees and helps the queen find her brood quickly.
Place resource frames—honey and foundation—on the sides of the brood nest. Keep the frame faces aligned and avoid twisting comb; use your tool only when needed and work with brief, calm moves.
- Center brood: brood frames go in the middle of the brood box.
- Shake bees: empty the nuc lid and box into the new hive.
- Watch for cells: swarm cells mean the transfer addressed crowding; monitor the colony for a week.
- Use smoker: a few puffs at the entrance eases handling and reduces agitation.
For step-by-step guidance on moving bees from a nuc, see this practical guide on moving bees from a 5-frame nuc. If you suspect reproductive activity, review advice on preparing for swarm signs.
Maintaining Proper Frame Order and Heat Centers
Keep the brood frames tightly grouped in the center of the box. That placement preserves the heat core and prevents chilling of developing brood.
Surround the central brood cluster with frames of honey and pollen. These resource frames supply workers and help the queen continue steady laying.
Place empty frames and fresh foundation on the outermost sides. David and Sheri Burns advise this arrangement to encourage bees to draw comb outward from the middle.
- Why order matters: Proper frame order preserves the nest’s temperature and reduces stress on the colony.
- Avoid checkerboarding: Do not separate brood frames with empty foundation; this can chill developing young.
- Quick checks: Keep brood frames together and monitor the queen’s pattern for steady growth.

| Placement | Purpose | Recommended action |
|---|---|---|
| Center frames | Protect brood heat core | Group brood side-by-side in the middle |
| Adjacent frames | Provide stores | Place honey and pollen frames next to brood |
| Outer frames | Guide expansion | Install foundation on the sides for comb drawing |
Avoiding Common Pitfalls During Expansion
Keeping brood clustered and stores close protects developing young and keeps the queen laying steadily. Small layout errors can chill the brood or stress the colony if frames and foundation are mixed incorrectly.

The Dangers of Checkerboarding
Checkerboarding means alternating brood frames with empty foundation. That split pattern breaks the heat core and raises mortality among larvae.
Do not separate brood with empty foundation. Keep the cluster tight in the middle of the brood box so temperature stays stable.
Preventing Swarm Risks
Waiting too long before adding space increases swarm risk and reduces honey yield. David and Sheri Burns warn that lack of room often leads a strong colony to split.
Check the entrance regularly for heavy traffic or scouting activity. Early intervention reduces the chance of swarm cells forming and preserves population strength.
- Avoid checkerboarding: keep brood frames together in the middle.
- Monitor the entrance: watch for signs of congestion or swarming.
- Be prepared: have a hive tool and feeder ready during peak growth time.
For practical expansion tips and timing advice, consult the linked guide. Thoughtful placement and timely action keep colonies healthy and productive year after year.
Managing Seasonal Timing and Weather Risks
Weather dictates risk: avoid major moves during cold, wet stretches that stress the colony and chill brood.
Late spring is the best season for adding frames or moving a box. Warm days and steady forage let the queen keep laying and help bees draw foundation quickly.
Moving a nuc in late fall can be harmful. If temperatures drop or rains persist, overwintering in the smaller box is safer than forcing a transfer.
David and Sheri Burns note that a shrinking population fares better if kept in the nuc. Monitor the brood box and entrance each week before any change.
- Plan around weather: pick calm, warm days with good forage.
- Check food stores: provide extra food in spring if nectar is scarce.
- Watch the queen: strong laying patterns mean the colony can handle more space.

| Season | Risk | Recommended action |
|---|---|---|
| Late fall | Cold, wet weather; brood chill | Keep colony in nuc box; delay transfer |
| Late spring | Rapid growth; nectar variability | Move on warm days; add frames and foundation |
| Early summer | Swarm pressure if crowded | Monitor brood; add hive space at side as needed |
Long-Term Strategies for Growing Colonies
Plan long-term growth by building reliable infrastructure that supports multiple hives across seasons. Partner with trusted suppliers like HONESTBEE for quality boxes, feeders, and frames that reduce maintenance and boost colony resilience.
Focus on space, queen health, and resource flow. Keep brood together in the center of each hive and give the queen room to lay eggs. Regularly rotate frames and add foundation at the edges during spring or peak growth weeks.

- Maintain a supply of frame nuc and spare frames for quick reinforcement.
- Share honey and pollen between boxes when stores run low.
- Invest in training—advanced beekeeping courses taught by experts like David and Sheri Burns streamline queen rearing and mating techniques.
| Strategy | Benefit | Action |
|---|---|---|
| Quality infrastructure | Less loss, faster growth | Buy durable nuc box and feeders |
| Resource sharing | Stable brood development | Move frames and honey when needed |
| Skill development | Scalable apiary | Attend courses and document practices |
Troubleshooting Queen and Population Issues
A laying queen on hand in a spare box can turn a crisis into a quick recovery for any apiary.
Troubleshooting queen problems is a core beekeeping skill. A queenless colony loses brood fast and worker numbers fall in weeks.
Signs of a failing queen include few or no eggs, spotty brood, and scattered laying patterns. Identify these signs on a weekly check and act promptly.

If a larger hive is queenless, move a laying queen from a nuc box using a marshmallow-covered cage. This method eases acceptance and lowers rejection risk.
Remember egg output: a good queen lays about 1,000–3,000 eggs per day. Waiting 14 days for a new queen can mean roughly 21,000 lost bees in potential workforce.
- Keep a reserve: a small box with a laying queen lets you replace losses immediately.
- Use frames: moving a frame of eggs from a strong colony helps a queenless hive raise a local queen.
- Support the colony: provide food with a feeder and use your hive tool for careful frame moves.
Quick action preserves brood and stores of honey and pollen. With steady checks and basic tools, beekeepers can stabilize colony numbers and reduce swarm risk today.
Conclusion
Finish each transfer with calm checks and clear placement in the nuc box. Small habits at the end of the day help bees find the entrance and settle back quickly.
Keep brood and frames grouped in the center of the new hive. Protect the queen and the frame order during every move. This preserves heat, supports steady laying, and speeds comb drawing.
Plan, watch, and act early so the colony avoids crowding. David and Sheri Burns highlight using support boxes as reliable reserves. With proper tools and sound beekeeping, your hives will grow into strong, productive units.
FAQ
What is a 5-frame nucleus colony?
A 5-frame nucleus colony is a small, portable support hive that contains about five frames with brood, bees, honey, and pollen. Beekeepers use these nucs for starting new colonies, requeening, or replacing lost hives. They provide a compact, manageable population for queen mating and early-season buildup.
When should I move frames from a nucleus into a full hive body?
Move frames when the nuc shows steady population growth, brood covers multiple frames, and stores are increasing. Ideal timing is during warm, calm weather in spring or early summer so foragers return reliably. Avoid transfers during cold spells or heavy nectar flows that could disrupt orientation.
Which frames should I transfer first?
Transfer frames containing the queen, brood (eggs, larvae, capped brood), and adjacent pollen and honey. Keep the brood nest intact by moving frames in the same order. Place the queen’s frame centrally in the new brood box to preserve the heat center and minimize brood chilling.
How do I keep bees from drifting after the move?
Reduce drifting by moving the nuc only a few yards from its original spot or by transferring frames into a hive at the nuc’s current location, then relocating the full hive later. Use a screened nuc or entrance reducer temporarily and avoid changing landmarks around the apiary during the first week.
What tools and equipment are essential for a safe transfer?
Bring a hive tool, smoker, protective suit or veil, spare frames with foundation or drawn comb, entrance reducer, and a feeder if stores are low. A spare brood box helps if you need more space. Keep everything sterile and organized to speed the process and reduce stress on the colony.
How do I preserve the brood nest heat during transfer?
Work quickly and in warm daylight hours. Keep frames upright and close together to maintain the heat center. Avoid exposing open brood to cold air; limit inspections to 10–15 minutes. If necessary, transfer frames one at a time and close the hive promptly between moves.
Can I use foundation frames when expanding a nuc?
Yes, but introduce foundation frames at the hive edges, not inside the brood cluster. Bees will build comb on foundation outward from the brood nest. Place drawn comb or frames with comb adjacent to brood to encourage acceptance and reduce queen egg-laying disruption.
What signs indicate the colony needs more space to prevent swarming?
Watch for crowded brood patterns, clustered bees on frame faces, many queen cups, reduced forager return rates, and strong nectar flows. Rapid population increases and tight comb spacing signal the need for additional boxes or supers to relieve congestion and reduce swarm impulses.
Is checkerboarding recommended during expansion?
Avoid aggressive checkerboarding during a critical transfer. While checkerboarding can stimulate spring buildup in some cases, doing it improperly during expansion may confuse the colony and raise swarm risk. Use it intentionally and outside of the immediate transfer operation.
How long after a transfer should I monitor the new hive closely?
Inspect at one week, then at two- to three-week intervals, watching for queen activity, brood pattern, and food stores. Early checks confirm queen laying and orientation. Avoid frequent disturbances; each inspection should be purposeful and brief to reduce stress.
What do I do if I lose track of the queen during the move?
If the queen is not found, leave the colony undisturbed in the new hive and inspect for consistent egg-laying after one week. If no eggs appear after 10–14 days, consider introducing a marked mated queen or creating a plan for requeening with a reliable supplier like Mann Lake or Kelley Beekeeping.
How does weather affect the transfer process?
Choose a calm, warm day—ideally above 55°F (13°C)—with low wind and no rain. Cold nights or sudden temperature drops can chill brood and harm larvae. Plan transfers during stable weather windows and avoid moving frames in late fall or very early spring when colony resilience is lower.
Should I feed the colony after expanding into a full hive?
Provide pollen substitute or sugar syrup if natural forage is scarce or stores are low. A frame feeder or entrance feeder helps boost reserves. Feeding supports brood rearing and reduces robbing risk during establishment, but reduce artificial feeding once nectar flows begin.
How can I reduce robbing and other risks after combining colonies?
Minimize exposed honey and avoid sugary spills. Use entrance reducers, perform moves in the evening when foragers are inside, and limit open-comb handling. If robbing starts, tighten entrances, add robbing screens, and reduce feeding until stability returns.
What long-term steps help a colony grow after moving up from a nuc?
Provide timely supering during nectar flows, monitor for mites and disease, rotate older combs periodically, and ensure good queen health. Regular varroa management, seasonal inspections, and strategic splitting or requeening support sustained growth and productivity.