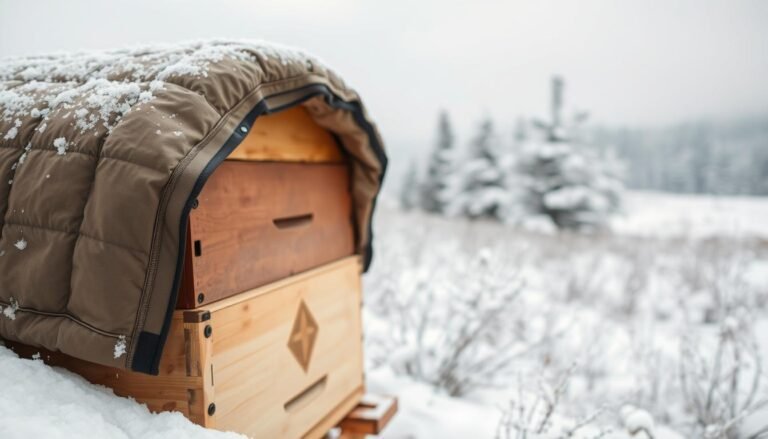
Cross comb occurs when bees build wax that links two frames, creating a tangled structure that makes inspections hard.
For beekeepers, spotting this issue early keeps the hive healthy. A single torn frame can spill honey and damage brood. The 1800s discovery of bee space by Mr. Langstroth still guides how frames should sit inside a wooden box.
Using a hive tool is the usual way to separate stuck frames. When comb grows across frames, the standard tool work becomes tricky. Follow a clear guide to correct wax orientation safely and keep bees calm while you work.
Timely action prevents a small problem from becoming a big mess at harvest. Learn practical steps for fixing cross comb and preserving frame structure during routine inspections by checking this helpful resource on fixing cross comb.
Key Takeaways
- Cross comb links frames and complicates inspections.
- Early detection protects honey and brood.
- Bee space is the core principle for frame spacing.
- A hive tool is essential but harder to use on crossed comb.
- Follow a step-by-step guide to correct orientation safely.
- Regular checks reduce repair time at harvest.
Understanding the Mechanics of Cross Comb
A solid grasp of how bees form comb helps prevent costly repairs during inspections.
Bee behavior aims to preserve proper bee space, but gravity, a tilted hive, or gaps let workers build where they please. Bees will fill any space larger than 3/8 inch with wax and will seal tight gaps under about 1/4 inch with propolis.
Even when a beekeeper provides foundation, colonies may choose to build comb that links adjacent frames. That beeswax is fragile makes separation tricky. Use a sharp hive tool and steady hands to ease joined frames apart.
Maintaining consistent spacing and leveling prevents most problems. Keep inspections brief and regular so frames stay parallel and honey stores remain intact. If you need step-by-step help, review a practical guide on how to handle cross comb.
- Rule of thumb: >3/8 inch = filled, <1/4 inch = sealed.
- Level hives and monitor frames to reduce mess.
What Causes Cross Comb in Foundationless Hives
A slight tilt to the box often nudges worker bees to lay wax along a slanted path rather than down the frames.
Environmental Factors
Temperature, airflow, and early-season disturbances shape where the colony starts new comb. When conditions change, bees adapt their pattern to fit available space. That adaptation can lead to cross comb if the colony begins building across adjacent frames.
Watch the first weeks closely. If your bees build comb at odd angles, intervene quickly to avoid damage to brood or honey. A quick read on why colonies sometimes fail to draw straight comb helps: reasons bees won’t draw comb.
Hive Leveling
Leveling is one of the simplest fixes. Use a level to check the box front-to-back and side-to-side. A balanced hive encourages straight work and reduces the chance that bees will bridge frames with beeswax.
Tip: During inspections use a hive tool to test alignment and free small bridges early. For a practical walkthrough on field repairs, see a hands-on guide to fixing cross comb.

The Role of Bee Space in Hive Construction
A correct gap between frames keeps workers from filling unwanted space with wax.
Mr. Langstroth discovered in the 1800s that maintaining a bee space between 1/4 inch and 3/8 inch prevents bees from building where they shouldn’t. When the space exceeds 3/8 inch, bees will fill it with wax. When it is under 1/4 inch, they seal with propolis.
The top bar gives a visual guide for bees to build comb parallel to each frame. Foundation helps guide wax direction, but it does not replace the need for correct spacing. A careful beekeeper checks frame spacing during inspections to keep everything aligned.
- Measure frames: keep 1/4–3/8 inch between each frame.
- Inspect with a hive tool: test for early bridges and free small connections.
- Level the box: ensure the top bar leads comb straight down the frame.
Managing this space is ongoing. Learn more about managing alignment and avoiding stuck frames at an introduction to cross comb.
Why Foundationless Beekeeping Increases Risks
A shift to foundation-free frames lets colonies set their own layout, sometimes creating extra work.
Warre and Top Bar designs give bees freedom to build. That freedom often leads to irregular wax bridges between frames. The result can be a sticky mess and fragile stores of honey and brood.
Plan the transition. Alternate foundation-free frames with a few framed guides. This helps bees build comb along the desired line while you keep the natural feel of the box.
The Transition to Foundationless Frames
- Expect more frequent checks; alignment needs early correction.
- Use a hive tool and a steady hand to steer wax toward frames.
- If the box shows a messy cluster, add one guided frame to the mix.

| Approach | Inspection Time | Risk of messy build | Ease of harvest |
|---|---|---|---|
| Guided frames | Low | Low | High |
| Foundation-free mix | Medium | Medium | Medium |
| Full foundation-free | High | High | Low |
For stepwise tips on a safe switch, read a practical guide about foundationless beekeeping. For hands-on repair methods after irregular building, see this how-to guide.
Proactive Prevention Strategies for New Hives
Set your new hive up right and the colony will usually follow the lines you give.
Start with level boxes and correct spacing between frames. Check that the bar or frame guide runs straight. This helps bees build comb along the intended path.
Inspect every three days during the first few weeks. Use a hive tool to fix small deviations before they grow. Quick checks save time at harvest and keep honey and brood safe.
For top bar designs, the bar itself acts as a guide. Still, verify the pattern often. If bees begin to build comb outside the box, act fast to redirect them back inside.
- Step checks: level, space frames, and confirm the guide line.
- Use tools: a hive tool makes minor corrections simple.
- Plan setup: combine a few foundation frames during hive making for new colonies.
| Action | Frequency | Benefit |
|---|---|---|
| Level box | Once at setup | Encourages straight comb |
| Inspect frames | Every 3 days (early) | Early correction of small bridges |
| Add foundation guides | At hive making | Reduces messy build |
Assessing the Severity of Your Hive Situation
A quick, methodical scan will reveal whether extra wax is mere burr or a larger structural problem.

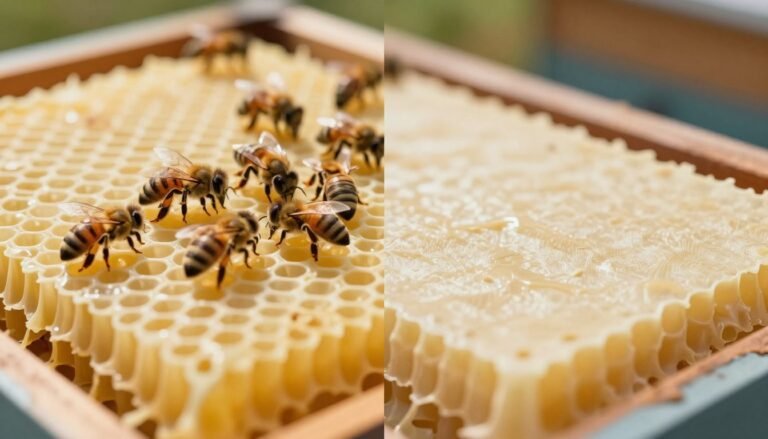
Identifying Burr Comb
Start by opening the box calmly and scanning each gap between frames. Look for small patches of stray wax that sit apart from the regular comb line.
Use a hive tool to test the space gently. If bees used propolis to seal a gap, the bridge will resist a light pry. Note whether brood or honey sit behind the wax before you act.
Seasonal Considerations
Decide if the problem needs immediate work or if it can wait. Late season repairs risk chilling brood and wasting time.
Rule of thumb: small burr patches can be fixed now. Large sheets spanning multiple frames often wait until warmer weather.
| Sign | Severity | Action |
|---|---|---|
| Small burr wax | Low | Remove with tool; monitor |
| Propolis bridge | Medium | Prise gently; avoid brood disturbance |
| Multiple frames joined | High | Delay if cold; plan careful repair in spring |
Every beekeeper should learn to tell apart cross comb and burr comb. If you need hands-on tips for removing stray wax safely, see this guide to remove burr comb properly.
Step by Step Guide to Correcting Misaligned Comb
Begin each repair with a slow, deliberate routine to keep bees calm and preserve wax.
Work with one frame at a time. Move steadily and speak softly if the colony is active. Wear light protection and keep tools ready.
Separating the Structure
Use a hive tool to pry gently where the sheet meets the adjacent frame. Start at the top bar and work down in small, careful motions.
If propolis holds the wax, apply slow pressure rather than jerking. Aim to free the sheet without tearing brood cells or spilling honey.
Securing the Comb
Once free, position the wax within the target frame. Use rubber bands or similar bands to hold the wax to the top bar.
- Attach bands over the bar and around the comb so the sheet hangs vertically.
- Check that the direction faces the same way as other frames so bees continue to build comb straight down the bar.
- Work by hand and tool together to avoid crushing any bees.
Finalizing the Repair
Return the frame to the hive and keep inspections brief. Mark the repair and plan to revisit after a few days.
When bees have secured the sheet to the bar, remove the bands gently. This method saves comb and keeps the overall structure intact.
For additional tips on tricky repairs, see a practical guide to the challenges of cross-comb.
Handling Fragile Comb During Inspections
A calm, vertical hold is the single best move when you lift a delicate frame. Keep the bar level and never tilt a sheet toward the ground. That prevents the weight of honey from pulling the wax free.
Work slowly. Use a hive tool only to loosen stuck edges. Apply gentle pressure and avoid fast jerks that tear the structure.
If a sheet is not yet secure, support it with rubber bands looped over the top bar and around the comb. This temporary fix holds wax within frame while bees attach it more firmly.

Address any cross comb at once. Small bridges become large repairs if you delay. Free small joins with steady hands, then re-seat the frame and let the colony finish the job.
“Treat every frame as fragile and move like the bees are watching.”
- Hold frames vertically to protect beeswax and brood.
- Use a hive tool gently; back off if resistance is high.
- Use rubber bands to secure loose sheets within frame until they set.
For a practical walkthrough on field repairs, see a hands-on guide to fixing cross comb.
Conclusion
, A steady maintenance rhythm keeps small wax problems from growing into large repairs.
Managing cross comb is a core skill for beekeepers who want a tidy hive and easy inspections.
Use a reliable hive tool and keep checks short and regular. Secure loose sheets with rubber bands or bands until the colony reattaches the wax to the frame.
Maintain correct space and level boxes during hive making to reduce extra work later. With the right tool set and practice, beekeepers can protect bees, preserve comb, and enjoy smoother harvests.
FAQ
Why do bees build comb angled across frames?
Bees often set comb where conditions feel right: open space, temperature, and access. If bars sit too far apart or rubber bands and starter strips aren’t aligned, workers bridge gaps and attach sheets to adjacent frames or the box wall. Proper spacing, straight starter strips, and clean bar placement guide bees to build parallel sheets.
How does hive level affect comb alignment?
A tilted box encourages bees to orient comb along gravity lines rather than frame tops. Level hives keep comb hanging straight between bars. Use a small level during set-up and check after heavy winds or when moving boxes to keep structures true and reduce misaligned construction.
Can weather and season prompt errant building?
Rapid drops or swings in temperature change bee activity and wax flow. During cool spells, bees cluster and extend wax nearer to heat, sometimes creating burr or bridging comb. Spring and fall transitions are high-risk times; steady internal temps lower the chance of unexpected attachments.
What role does bee space play in preventing attached sheets?
Bee space — the roughly 3/8 inch clear area bees leave — is critical. When gaps exceed that or are inconsistent, workers fill them with propolis or wax, producing unwanted comb. Maintaining uniform bar spacing and proper frame fits preserves bee space and discourages filling.
Are foundationless frames more likely to get misaligned construction?
Yes. Without built-in wax guides, workers choose orientation themselves. Transition methods such as using starter strips, properly spaced top bars, or short strips of drawn comb reduce errors. Many beekeepers use light guides or rubber bands to keep initial cells in line.
How should new beekeepers prevent problems when switching to foundationless?
Start small: convert one box at a time and use frames with firm starter strips or wax guides. Secure comb with string or small nails when necessary, and watch early inspections closely. Teach bees initial patterns with light-colored starter wax and avoid wide bar spacing.
How can I tell if comb between frames is removable burr comb?
Burr comb is irregular, often thin, and spans gaps or corners. It lacks the straight, parallel appearance of regular sheets. If it connects frames or ties a frame to the box wall, it’s likely burr comb and can be carefully cut away during inspection.
Do seasons change how fragile comb will be during checks?
Yes. Late winter and early spring comb can be brittle from cold. Summer comb tends to be flexible and well-repaired. Plan gentle inspections in cool periods, support comb when lifting, and avoid jarring frames to reduce breaks.
What’s the safe way to separate misaligned comb without hurting bees?
Work slowly. Smoke lightly at the entrance, open a single box, and use a hot hive tool or warmed knife to cut attachments cleanly. Support adjacent frames with the other hand to prevent snapping. Move gently to limit brood chilling and queen disruption.
How can I secure thin comb to frames after separating it?
Reattach by threading food-safe string or fishing line through comb and tying to the top bar, or use small staples or wire loops where allowed by local practice. Wax dabs and melted starter strips help bees reinforce joins. Keep repairs tidy to encourage reworking by the colony.
What final steps ensure a repaired frame stays aligned?
Reinstall frames with consistent spacing and use a follower board or dummy to keep pressure so comb doesn’t sag. Recheck level and top-bar alignment. Inspect again in a week to ensure bees finish reinforcing the area and remove any loose burr comb.
How should inspections change when comb is thin or fragile?
Limit inspection time and frequency. Use warm tools to ease cuts, steady hands to lift frames from the top bar only, and avoid twisting. If possible, inspect on warm afternoons when bees are active and comb is more pliable, reducing accidental damage.