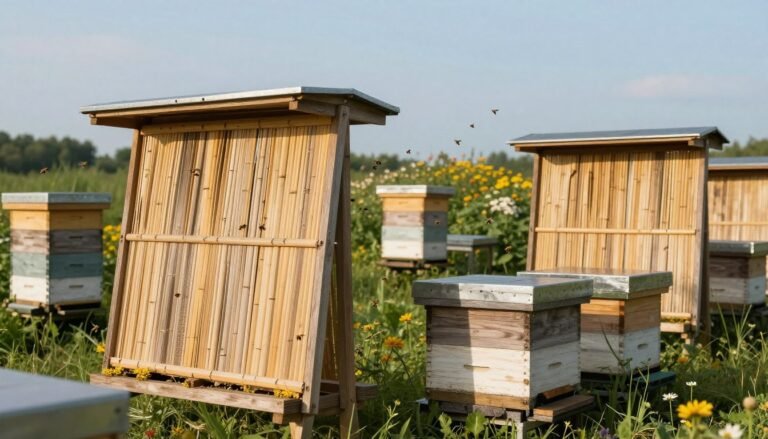
Protecting colonies starts with a reliable base. This introduction explains a tested approach to an anti-ant moat hive stand design that many beekeepers have used for one year or more.
After one year of field use, these systems showed strong results. The primary goal was simple: give the bee colony the ability to stay free from ground invaders.
Durability matters. Builders often add PVC elements to extend life and keep maintenance low. The result is a top solution that keeps colonies undisturbed through each production year.
We offer our thanks to practitioners who shared methods and feedback. For a practical reference on improving noise and stability alongside pest protection, see this resource at noise-reducing hive stands.
Key Takeaways
- Proven systems work well after one year of use.
- Simple construction can block ant access effectively.
- PVC parts improve longevity and low upkeep.
- Professional builds rank at the top for apiary management.
- Community-tested methods increase reliability.
Why Protecting Your Hives from Ants is Essential
Ants at the base change more than a nest’s cleanliness; they alter behavior and reduce productivity. In Florida, the Big Headed Ant is a common pest that can provoke defensive actions from the colony. Protecting the hive early preserves calm and keeps bees focused on foraging.
Colony Health and Stress
When ants invade, they may bring bacteria and fungi that weaken brood and adult bees. This leads to extra disease risk and stress. The colony spends valuable time defending the entrance instead of caring for young or gathering nectar.
Preventing Resource Loss
Ants can quickly steal honey and pollen, forcing colonies to rebuild stores during dearths. A proper post or hive stand with a water barrier topped by a thin layer of oil gives the ability to stop most invaders before they climb. This method helps protect honey and sustain the bee population.
| Threat | Impact | Simple Fix |
|---|---|---|
| Big Headed Ant | Causes agitation; carries microbes | Elevated stand with water and oil |
| Honey theft | Loss of winter food; wasted forager time | Secure entrance; monitor regularly |
| Stress on bees | Reduced brood care and growth | Stable post and barrier system |
Thanks to researchers who highlighted these risks; their work guides practical steps to protect hives and honey.
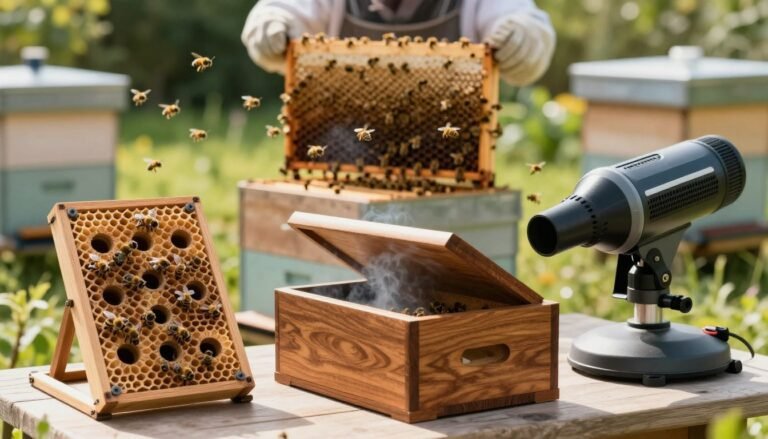
Essential Materials for Your Anti-Ant Moat Hive Stand Design
Gathering the right materials is the first step to a durable, pest-resistant hive base.
Core parts: metal pipe legs, treated wood 4×4 posts, and galvanized buckets to act as water barriers. Add cement for footings and a measured mix of water and oil to keep ants from crossing.
Use a 4×4 block of wood to mock the legs during layout. This helps place pipe and post holes accurately. Secure each leg so the post stays stable under full hives.

- Choose metal pipe for strength and long life.
- Use galvanized buckets to hold the water-and-oil mix.
- Include PVC couplers where pipes meet wood for added durability.
- Set concrete footings to prevent shifting in wet seasons.
Solving the ant problem starts with tough, weather-resistant parts. We give our thanks to DIY beekeepers who recommended metal and PVC for long-term protection. Proper materials protect bees and preserve honey stores.
Constructing a PVC Based Moat System
Organize your PVC caps, pipe, and fasteners on a clean work surface before you begin. This prepares each leg assembly so you can work efficiently and avoid mistakes.
Preparing the PVC Components
Preparing the pieces
Use version #3 parts: 4″ PVC caps for a rain cover and 3″ PVC caps for the moat walls. Cut 1 1/4″ pipe into 2″ segments to make the short posts that support the top of the hive.
Inspect each cap and pipe for burrs. We offer our thanks to innovators who suggested using a Dremel to grind rough spots before gluing.
Gluing and Assembly
Clean surfaces, apply primer, then use a PVC solvent cement for a sealed fit. Glue the 3″ caps to form the moat wall and seal the 4″ cap as a rain cover.
Fill the moat with oil so ants cannot cross. This version prevents rain from filling the water barrier and solves a common problem with simple buckets.
Adding Anti-Slip Features
Drive a 3 1/4″ nail so it bites into the leg wood; this is the most effective way to stop the leg from slipping on the smooth surface.
Once assembled, the pipe legs hold the post securely and the hive sits protected from ants and rain over time.
| Component | Size | Purpose |
|---|---|---|
| Cap (rain) | 4″ | Covers moat; keeps rain out |
| Cap (wall) | 3″ | Forms moat perimeter |
| Post segment | 1 1/4″ × 2″ | Supports top; stabilizes leg |
| Fastener | 3 1/4″ nail | Prevents leg slip on PVC surface |
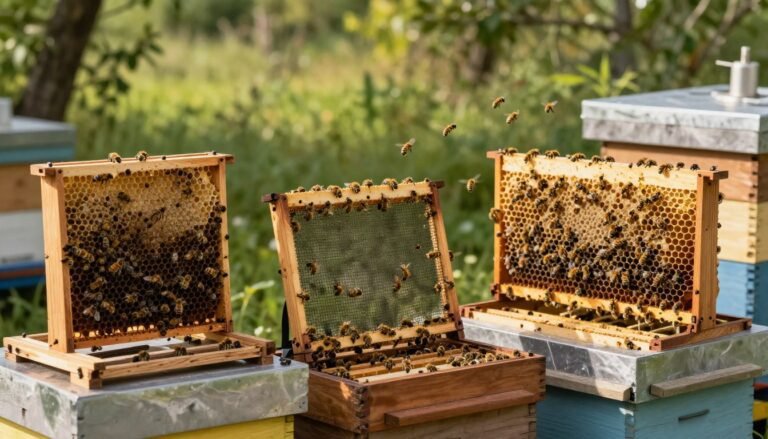
Building a Heavy Duty Metal and Bucket Stand
A durable metal and bucket solution raises hives to a comfortable working height and blocks ant access.

Plan for 18–24 inches of clearance so inspections are easier and back strain is reduced. Use steel pipe legs set into concrete-filled galvanized buckets to anchor each post.
Each leg gets a pipe sunk into cement inside the bucket. Fill the rim with water and add a thin layer of oil to form a barrier ants won’t cross. This method creates a reliable wet perimeter that lasts through rain and time.
- Build capacity for up to six full colonies on a single frame.
- Reinforce posts with welded cross-bracing to prevent sag over the year.
- Use PVC collars where pipe meets wood posts to reduce wear at contact points.
| Feature | Specification | Benefit |
|---|---|---|
| Height | 18–24 in | Comfortable inspections, less strain |
| Capacity | Up to 6 hives | Scales apiary efficiently |
| Barrier | Water + oil in galvanized bucket | Stops ants; endures rain |
| Legs | Metal pipe in cement | Stable for years |
For construction tips and engineering notes consult this foundational engineering guide, and read practical sanitation and ant control steps at hive stand sanitation and ant control.
Proper Placement and Leveling for Maximum Effectiveness
A well-chosen location and careful leveling make the barrier system far more effective year-round.
Place the hive stand in an area with good sunlight and steady airflow. Sunlight helps warm the colony in the morning and reduces damp conditions that attract ants.
Set the base on flat square pavers so buckets do not sink into mud. Level the pavers precisely, but give the top a slight tilt toward the entrance to ensure rain drains away from the opening.
Optimizing for Drainage and Sunlight
Keep the top of each moat clear of leaves and sticks. Debris can form a bridge for ants and defeat the water and oil barrier.
- Use metal pipe legs and a sturdy post to prevent shifting if the ground settles.
- Check water + oil levels regularly to protect honey and keep ants at bay.
- Clear tall grass and debris around the area to remove ant pathways.
- Design the arrangement so moats are easy to access and refill.
| Factor | Recommendation | Benefit |
|---|---|---|
| Surface | Flat square pavers | Prevents buckets from sinking |
| Tilt | Slight toward entrance | Keeps rain away from hive top |
| Support | Metal pipe legs + post | Stable, resists settling |
| Barrier | Water with thin oil layer | Stops ants reaching honey |
For more setup tips see a guide on bee hive stands and practical removal steps at remove ants naturally.
Maintenance Tips for Long Term Success
A few minutes each week can stop ants from finding a way into your colony. Regular checks keep the water-and-oil barrier working and your bees calm.
Weekly routine: inspect buckets and refill water and the thin oil layer. In hot weather add a few drops of food-grade oil to slow evaporation. Clean any debris so ants cannot bridge to the legs or post.
Check metal fittings, pipe joints, and PVC collars once a year for rust or wear. Tighten fasteners and replace parts that show damage. A well-kept post and moat system will protect hives for years.

- Keep water clean and topped up; the oil layer should remain continuous.
- Remove leaves, grass, or sticks that could form a bridge for ants.
- Top off oil with a few drops when the layer thins from evaporation.
- Inspect legs and metal parts annually for corrosion and secure pipe fittings.
For persistent ant pressure in your area, consult this guide to keep Argentine ants out and adapt your maintenance schedule by season.
Conclusion
Investing in a solid post and water barrier pays off with calmer, healthier colonies over time.
Implementing a professional post-and-bucket system is the most effective way to protect your hive from ant intrusion. With proper materials—metal legs and PVC collars—you build a durable post and moat setup that will serve your apiary for more than one year.
Consistent upkeep of water and the thin oil layer keeps ants away and lets your bees focus on honey production. The combination of metal, PVC, and a well-seated post creates a reliable barrier in any environment.
For product choices and practical examples, see our guide to bee hive stands. Investing time in a quality stand now protects your hives long-term and helps colonies thrive.
FAQ
How does a water-filled barrier prevent ants from reaching bee colonies?
A water barrier creates a physical gap ants cannot cross. Place a trough or capped pipe under each bee box leg and keep it filled. Ants cannot swim across the water, so access to the hive is interrupted without using poisons that might harm bees.
What materials work best for a durable water trough under hive legs?
Use PVC pipe or heavy-duty metal buckets rated for outdoor use. PVC resists rot and is light, while galvanized or stainless steel offers longevity in wet conditions. Add tight-fitting rubber or plastic caps to prevent leaks and protect the water from dirt and beeswax.
Can I use oil instead of water to stop ants?
Light horticultural oil or mineral oil can be effective because it creates a slippery surface. However, oil needs regular replacement, can attract debris, and may pose environmental concerns. For safety and ease, plain water is preferred in most apiaries.
How often should I check and refill the water in the troughs?
Inspect the barriers at least once a week during warm months and after heavy rain. Evaporation and debris can lower effectiveness. Refill as needed and clean out algae or leaves to maintain a clear barrier.
What is the best way to level posts or pipes supporting the hive to prevent tipping?
Use a spirit level and compacted gravel or paver base under each post. For adjustable setups, threaded metal posts with leveling nuts offer fine adjustments. Proper leveling reduces strain on bee legs and prevents water from spilling out of the troughs.
Are elevated platforms better than ground-level installations for ant control?
Elevated platforms reduce ground contact and make barriers more effective. Raising colonies 12–18 inches helps with ventilation and predator avoidance. Ensure the platform is stable and that wind or heavy loads won’t tip the comb boxes.
How do I prevent rainwater from overflowing the barriers during storms?
Position the water receptacles slightly recessed and include overflow holes set above the effective water line. Use a simple screened cover to reduce direct rainfall. Regular maintenance after storms is essential to restore optimal levels.
Will the barrier harm bees if they fall into the water?
Healthy adult bees can usually escape shallow water, but avoid deep, open containers. Use shallow troughs with roughened edges or small islands that allow bees to climb out. If using oil, avoid exposure since it can coat wings and kill bees.
How do I add anti-slip features to metal or PVC supports?
Apply textured rubber pads, adhesive non-slip tape, or coarse sand mixed into outdoor epoxy at attachment points. These improve grip for hive boxes and reduce wobble during inspections, extending the lifespan of your supports.
Can I retrofit existing wooden posts with water barriers?
Yes. Attach a sleeve or collar around the post that forms a sealed trough, then cap the top and fill with water. Seal joints with outdoor silicone and use metal flashing at the base to prevent wood rot. Regularly check for leaks and replace seals as needed.
What steps reduce ant attraction beyond physical barriers?
Keep the apiary clean of spilled sugar, fermenting honey, and plant sap. Trim vegetation to reduce ant pathways and inspect colonies for debris that attracts pests. Combining sanitation with physical barriers gives the best protection for colonies.
How do large numbers of ants indicate stress in a colony?
Persistent ant activity can harass workers, interfere with foraging, and stress the colony, potentially reducing honey stores. Early detection and consistent barrier maintenance prevent long-term resource loss and help maintain healthy bee populations.
Are there commercial products that simplify installation of water barriers?
Several apiary suppliers sell preformed plastic stands, stainless steel cups, and capped pipe kits made for bee equipment. Brands like Mann Lake and Betterbee offer components sized for standard hive legs, saving time on fabrication.
How should I winterize water-based systems to prevent freezing damage?
Drain and dry troughs before freezing temperatures arrive, or use antifreeze-safe methods like insulating jackets around fitted cups. Remove water and store smaller components indoors to avoid cracking and extend service life.
What local regulations or environmental considerations should I check before using oils or chemicals?
Review state agricultural guidelines and local beekeeping association recommendations. Avoid broad-spectrum insecticides near hives and choose materials that don’t leach harmful substances into soil or groundwater. When in doubt, consult your county extension office.