This guide delivers a clear, professional plan for new and experienced beekeepers who want to start a hive at home with safety and efficiency in mind.
The Langstroth system leads backyard projects because its modular boxes make honey harvests simple and gentle on colonies. Starter kits often include a smoker and hive tool, and beginning with new equipment reduces hidden problems and disease risk.
Typical starter colonies arrive with about 10,000 bees in a ventilated package. Frames and foundation replace every three to five years to keep disease low and protect honey quality.
Place hives near nectar sources like trees, shrubs, and pollinator plants, and give bees a safe water spot such as a shallow pan with pebbles. Elevate stands at least 18 inches to deter skunks and raccoons.
This article outlines site choice, yard layout, equipment selection, sourcing bees, and proper installation. Expect hands-on time in the first weeks; calm handling and consistent checks set the stage for healthy, productive colonies.
Key Takeaways
- Use the Langstroth hive for easy, modular management and gentle harvests.
- Start with new components and starter kits to lower disease risk.
- Provide nearby forage, water, and elevate hives at least 18 inches.
- Expect about 10,000 bees in starter colonies and rotate frames every 3–5 years.
- Plan for focused time and calm handling during the first weeks.
- Follow proven field methods for setup and early hive growth.
What You’ll Achieve by Setting Up a Backyard Apiary
Bringing hives into your garden gives plants steady pollination and provides beekeepers with fresh honey and practical learning.
Well-sited hives near trees, shrubs, and flowering plants deliver steady nectar and pollen that boost fruit set and vegetable yields. A nearby water source — a shallow pan with stones or a birdbath — helps bees drink and regulate brood nest humidity during warm spells.
New starter kits with smoker, hive tool, frames, and boxes lower disease risk and make setup faster. Beginning with clean equipment gives colonies the best chance to thrive from the first season.
- Fresh, high-quality honey and surplus stores for home food use.
- Stronger colonies that support stable local bee populations.
- Educational value: watching the queen and checking for eggs teaches life-cycle care.
- Space planning and equipment readiness reduce stress on hives and aid inspections.
- An apiary can act as a community teaching tool for pollinator stewardship.
Responsible management keeps colonies healthy and productive over time. For further reading and practical guides, see our beekeeping resources.
Choosing the Best Place in Your Yard for Hives
Site choice shapes colony health and daily foraging. Pick a place that gets morning sun and some afternoon shade in hot climates. Position entrances toward the southeast so worker bees warm early and begin foraging sooner.
Sun, shade, and southeast-facing entrances
Morning warmth reduces chill and encourages early flights. In warm regions, add afternoon shade to lower small hive beetle pressure and heat stress.
Wind breaks, drainage, and slight forward tilt
Use shrubs, fences, or buildings as wind breaks to steady temperature. Make sure the ground drains well. Tilt the hive slightly forward so moisture runs out and does not drip on brood.
Nectar, pollen, and nearby water
Place hives within a few hundred yards of trees, shrubs, and flowering plants for steady nectar and pollen. Provide water—such as a birdbath or a 2-gallon waterer with stones—so bees can land and drink safely.
Avoid pesticide exposure and pick an easy-access area
Keep colonies away from pesticide drift from farms and courses; if needed, consult neighbors or choose an alternate area. Plan paths so you can reach hives easily with equipment and honey during inspections and harvests.
- Position entrances southeast for early activity.
- Use wind breaks and ensure good drainage.
- Provide nearby water and reliable nectar sources.
- Avoid pesticide drift and select an accessible area.
For detailed location tips and mapping ideas, review site selection principles at site selection guidance.
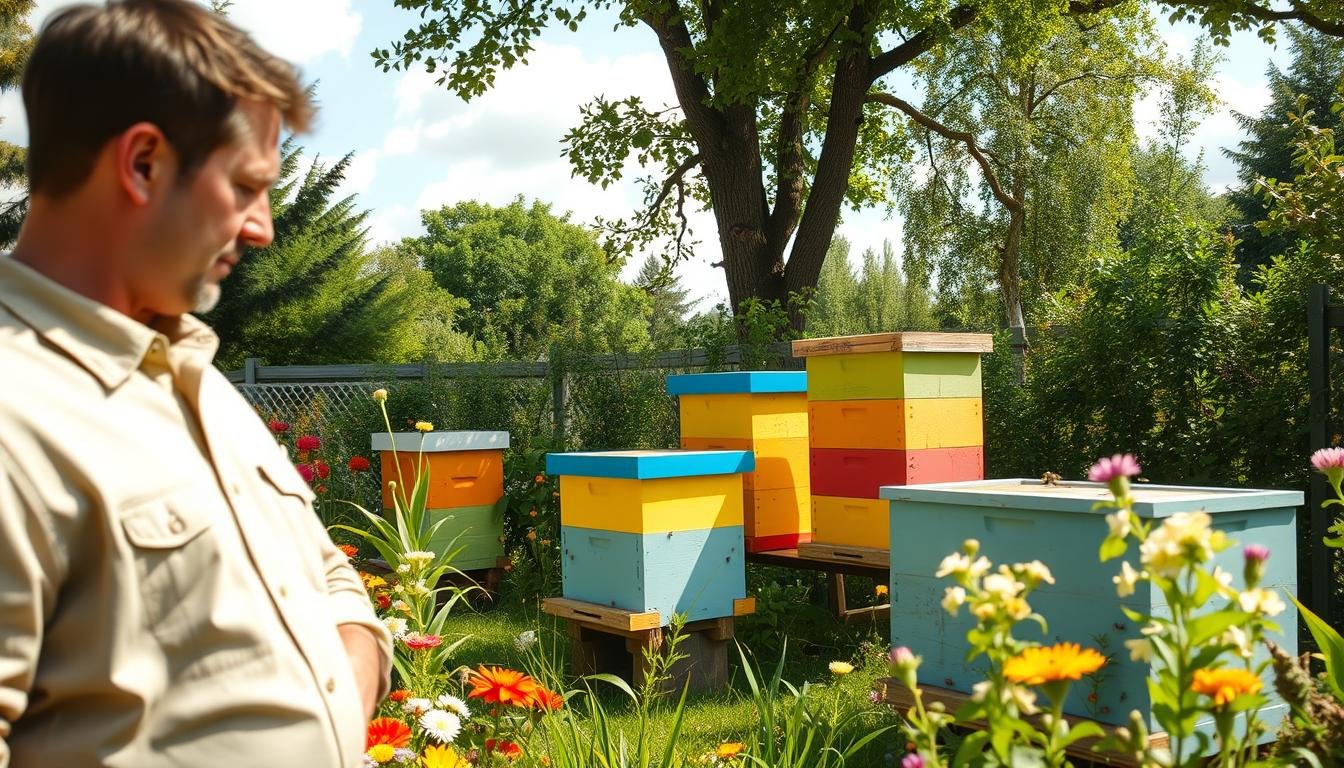
Designing the Bee Yard: Space, Ground, and Workflow
A compact, well-planned yard makes routine checks faster and keeps bees calmer during inspections. Give yourself room to move and a simple path from the garage for hauling heavy boxes.
Clearance for inspections and supering
Provide roughly two feet of clearance at the front, back, and between hives so you can work from either side without crowding. This space keeps you from leaning over entrances and reduces disturbance to bees.
Make sure walking lanes stay clear; neat lanes speed inspections and make supering safer and quicker.
Groundcovers, fabric, mulch, and retaining edges
Lay premium landscape fabric or several layers of newspaper under mulch to suppress weeds without herbicides. Use a low retaining edge on slopes so mulch and groundcover won’t wash away during storms.
Offset electric fencing if bears are a concern so wires do not sit in your normal paths. Choose durable groundcover that won’t sling debris toward entrances and avoid string trimmers near the hive area.
- Map a compact yard footprint with generous space for approach.
- Group hives for efficient workflow while preserving ventilation.
- Establish a staging spot and a clear route from the garage for gear and full boxes.
“A tidy yard equals calm bees and fewer surprises during inspections.”
These steps help beekeepers keep the bee yard orderly and make routine beekeeping predictable and safe.
Hive Stands and Elevation to Protect Colonies
Elevating hives off the soil protects colonies and makes regular work far easier. Raise each unit at least 18 inches on stands, cinder blocks, or pallets to discourage skunks and raccoons. This height also improves ergonomics during inspections and honey removal.
On uneven ground, level stand tops carefully. Preserve a slight forward tilt so rain and condensation run out of the entrance rather than pooling inside the box.
Place pavers beneath legs where frost or soft soil could let posts sink. Check for rocking when colonies cluster or when boxes become heavy, and re-level as needed.
Practical setup tips
- Raise each hive well off the ground to discourage predators and ease back strain.
- Use sturdy materials and pavers so stands won’t settle unevenly over time.
- Leave enough space around stands for your body, smoker handling, and adding boxes.
- Anticipate colony growth: choose stands that bear weight and allow pest guards or fencing.
Tip: Set entrance direction before placing bees; adjusting later disturbs colonies.
Essential Equipment and Materials for a Langstroth Hive
A neat inventory of components prevents last-minute trips during that first hive inspection. Assemble core parts before bees arrive so work flows and colonies face minimal disturbance.
Core components
- Bottom board (entrance), a deep brood box that holds 10 frames with foundation, an inner cover, and an outer cover for weather protection.
- Supers fit above the brood box to store surplus honey while keeping brood concentrated below.
Tools and protective gear
Non-negotiables include a reliable smoker, a hive tool, gloves, and a veil. Many suppliers offer starter kits that bundle these items.
Pro tip: Start with new equipment to reduce hidden contamination and replace frames and foundation every 3–5 years.
| Item | Purpose | When to use |
|---|---|---|
| Frames with foundation | Support brood and comb build | Always in brood box; replace every 3–5 years |
| Supers | Hold honey stores | Add as colony fills top frames |
| Feeder (internal/external) | Supplement food during dearth | Use early season or when nectar and water are scarce |
Choose quality materials and tight-fitting boxes. Stage tools on a nearby stool so boxes can be added smoothly and inspections stay safe and efficient.
Packaged Bees vs. Nucs: Picking the Right Start
Your starter choice shapes early workload, growth, and disease risk. Consider your experience, available drawn comb, and local nectar timing before ordering.

Packaged shipments: sizes and use
Packaged bees commonly arrive in 2-, 3-, or 5-pound boxes. They may come with or without a queen. Beekeepers pick packages when they have ready boxes and drawn comb. Packages are flexible and useful for refilling equipment.
Nucleus colonies: faster buildup
Nucs arrive with 3–5 frames that include brood, a laying queen, workers, pollen, and some honey. These small colonies usually build up faster in spring because they already contain brood and stores.
Health risks and buying tips
Be cautious: nucs can transfer pests and disease, and may include older comb that should be rotated within five years. Ask sellers about queen sourcing, brood pattern, and frame age before purchase.
| Starter Type | Pros | Cons | Best for |
|---|---|---|---|
| Package (2–5 lb) | Flexible; works with drawn comb; lower upfront disease risk | Slower buildup; needs queen introduction if not included | Beekeepers with ready boxes and time for early feeding |
| Nucleus (3–5 frames) | Faster colony growth; immediate brood and queen | Possible pests/old comb; variable regulation | Those needing quicker populations for spring nectar |
| Timing note | Align purchases with local nectar flows for smoother buildup and lower feeding needs. | ||
Plan for inspections and management intensity. Nucs often need less time to reach strong populations, but both choices require careful monitoring as the season progresses. For seasonal tasks and timing guidance, see seasonal beekeeping tasks.
Preparing the Hive Boxes Before Bees Arrive
Prepare every wooden component and frame before your delivery day so the new colony meets a finished, stable home.
Assemble, paint, and stage
Build and join boxes and set frames with foundation in place. Paint exterior surfaces for weather protection, but leave interior wood untreated so the colony accepts it readily.
Seat boxes squarely so bee space is consistent. Check joints and nails, and confirm the stack sits level with a slight forward tilt for drainage.
One deep first, add more later
Start with a single deep brood box. That focuses warmth and encourages straight comb draw during early spring. Add a second box only after at least three-quarters of the frames are drawn.
Use the same three-quarter rule before adding supers to prevent erratic comb and wasted honey effort.
Final checklist before pickup
- Preassemble equipment and materials so nothing is missing when bees arrive.
- Place the hive where it will remain long term to avoid moving once established at home.
- Confirm the site is level, staged, and has a dependable nearby water source.
Tip: A fully staged hive reduces stress on bees and makes your first inspections smooth and safe.
17. how to set up a backyard apiary
Build the hive from the ground so each piece sits square and sealed before bees arrive. Start with a sturdy stand or concrete blocks, then center and level the bottom board.
Placement and basic stack
Seat one deep brood box with frames and foundation directly on the bottom board. Add an inner cover and an outer cover last. Confirm boxes align with no gaps that invite burr comb.
Entrance, flight paths, and safe routes
Orient the entrance toward the morning sun, ideally southeast, so worker bees launch early. Give the front flight line clear space and route human traffic away from that area.
- Base: position and level the stand, then align the bottom board.
- Brood box: seat prepared frames upright and square.
- Feeder: stage an inner-cover or bottom feeder for early syrup access.
- Drainage: tilt hive slightly forward for runoff and to avoid moisture buildup.
- Timing: leave bees undisturbed for 3–5 days, then verify queen release and early brood.
“A calm setup gives colonies the best chance to settle and grow.”
For an illustrated checklist and further guidance, consult our beehive for beginners.
Installing Packaged Bees: Two Proven Methods
Install late in the day and keep packages shaded and cool from pickup until transfer. Inspect each container: a thin dusting of dead bees is normal, but any layer half an inch thick or greater signals trouble.
Prepare the hive and tools ahead of time. Have syrup, a small feeder, your hive tool, and a gentle smoker ready so the transfer goes smoothly and quickly.
Method A: Candy-release queen with gradual exit
Plug the package entrance briefly with grass to limit drift while you work. Remove the queen cage, pierce the candy plug, and mount the cage near drawn comb or next to foundation.
Shake a few bees onto the cage and then set the package in the center of the box. Close the hive—this lets workers exit slowly while the candy controls queen release.
Method B: Sugar mist and gentle shake onto frames
Lightly mist the cluster with 1:1 sugar syrup, remove the feeder can, and take out the queen cage prepared as above. Gently shake the bulk of bees onto the frames so they cluster quickly on comb.
Finish with sensible steps:
- Plug the entrance briefly so bees imprint on their new home.
- Start feeding syrup immediately when installing onto bare foundation to support wax building and early brood care.
- Use the smoker sparingly—one or two soft puffs will guide behavior without stressing the colony.
“A calm, well-timed install gives the colony the best chance to settle and grow.”
Installing a Nuc: Transferring Frames, Queen, and Brood
When a nuc arrives, give the bees time at the hive entrance to orient before you move frames into the new box. Set the nuc on the prepared stand, open entrances, and wait a few minutes so workers can make short orientation flights and learn the exact hive location in your area.

Move frames in order and check for eggs
Transfer 3–5 frames from the nuc into the center of the hive, keeping them in the same order. Place brood frames together in the middle so the cluster can maintain temperature and development.
Carefully look for eggs and young larvae as proof of a laying queen. If the queen is not visible, inspect the empty nuc box before discarding it and leave that box near the entrance so stragglers can rejoin.
Where to place resources and final checks
Position honey and pollen frames adjacent to the brood nest so workers can feed the developing brood quickly. Preserve bee space while arranging frames and handle each frame calmly to avoid rolling the queen and upsetting the worker force.
- Monitor behavior: watch for steady movement and relaxed work.
- Provide water and feed if local forage is scarce to stabilize the colony.
- Keep the nuc nearby for a few hours so lingering bees can return.
“Keep brood centralized and resources close for the fastest, healthiest start.”
For a step-by-step checklist and extra tips on installing a nuc colony, consult the linked guide.
Feeding, First Inspections, and Supering Up
Begin supplemental feeding soon after placing bees; this supports wax production and early brood. Use 1:1 syrup to encourage comb drawing and 2:1 when you need to boost stores ahead of cool stretches.
Feeding ratios and access
Inner-cover feeders with jars (tiny holes in lids) give safe access in cool, wet weather and cut robbing risk. Keep a separate water nearby for foragers.
First checks and when to add boxes
Perform a brief inspection at 3–5 days. Confirm queen release and look for eggs and early capped brood. A steady, expanding brood pattern shows the colony is on track.
- Add a second deep when roughly three-quarters of frames in the first deep are drawn and in use.
- Super up once the second deep reaches the same three-quarters threshold.
- Stop feeding when incoming nectar and natural foraging replace syrup; this prevents syrup in honey stores.
| Goal | Syrup | When to use |
|---|---|---|
| Draw comb | 1:1 | Early spring after installation |
| Build stores | 2:1 | Before cool weather or during dearth |
| Feeding method | Inner-cover jars / under-cover | Wet, cool conditions or to reduce robbing |
“Feed with purpose and add boxes only when colony strength warrants the extra space.”
Predators, Pests, and Safety Around the Hive
Smart protection uses elevation, fencing, and shade management to keep colonies safe and productive.
Skunks, raccoons, and bears: elevation and electric fence basics
Raise your hives at least 18 inches off the ground to deter skunks and raccoons. Where bears roam, install a solar-powered electric fence with t-posts, plastic insulators, and 15-gauge aluminum wire.
Use three six-foot grounding rods spaced about ten feet apart and offset the fence so you won’t back into it while you work. Proper grounding ensures effective voltage and reliable protection.
Managing shade and small hive beetle pressure
Balance sun and shade: morning sun helps bees warm quickly, while afternoon shade reduces heat stress in hot regions. Too much shade can favor small hive beetles, so aim for dappled cover rather than dense canopy.
Keep the yard tidy with mulch or landscape fabric so you avoid using a weed trimmer near entrances and reduce hiding spots for pests.
Working safely: smoker use, calm movements, and protective clothing
Use the smoker sparingly—one soft puff can calm a cluster without overheating them. Move deliberately, keep tools organized, and wear appropriate protective gear for your climate and season.
Plan clear access from the garage for moving boxes and gear when honey flow peaks. These small steps help beekeepers protect the colony and make everyday beekeeping safer.
| Threat | Prevention | Key detail |
|---|---|---|
| Skunks / Raccoons | Elevate hives | At least 18 inches; stable stands |
| Bears | Electric fence | Solar charger, t-posts, 15-gauge wire, three grounding rods |
| Small hive beetle | Sun management & tidy ground | Avoid dense shade; remove debris near entrances |
“A few simple defenses can keep your yard peaceful and your colonies strong.”
For more on siting and yard layout that supports safe beekeeping, see our practical guide at set up a bee yard.
Conclusion
Careful placement, sound stands, and fresh frames reduce early stress and help queens lay into strong, organized comb. A complete Langstroth setup—sited, elevated, and well supplied—gives bees space to grow and makes inspections straightforward.
Keep water, nearby forage, and measured timing for feeding and supering. These steps help populations build steadily and let beekeepers learn beekeeping the right way. Replace frames periodically and add supers only when the colony shows strength.
Both packages and nucs can succeed when installed calmly and monitored for early queen performance. Apply this plan methodically at home and your yard can yield reliable honey while supporting healthy bee populations in the season ahead.
FAQ
What are the first steps for establishing a small apiary in my yard?
Choose a sunny, southeast-facing spot with morning light and afternoon shade. Provide good drainage and a slight forward tilt for the hive. Set up a level stand 18 inches off the ground using pallets or blocks. Assemble and paint hive exteriors, insert foundation into frames, and stage your bottom board, brood box, and feeders before the bees arrive.
Should I buy packaged bees or a nucleus colony (nuc)?
Nucs come with a laying queen, brood, and established frames, so they build up faster and often have lower stress. Packaged bees cost less and suit flexible timing but require introducing a queen and more initial care. Consider disease risks and old comb transfer when choosing; new equipment lowers disease exposure.
What essential equipment do I need for a Langstroth hive?
Core items include a bottom board, brood box (deep), frames with foundation, inner and outer covers, and supers for honey. Add a smoker, hive tool, protective veil or suit, gloves, and a feeder (entrance or inner-cover). Keep spare frames and replacement foundation on hand.
How do I install a package of bees safely?
Two common methods: let the bees exit the package naturally with a candy-release queen, or shake them onto frames after misting with sugar syrup. Place the package or shaken bees into the prepared brood box late in the day, plug the entrance if needed, and start light feeding with 1:1 syrup until foraging begins.
What’s the correct way to install a nuc into my hive?
Transfer frames in order—brood with the queen centered, then honey and pollen—keeping frames upright. Place frames from the nuc into the prepared box to preserve orientation. Allow orientation flights by keeping the hive near the nuc’s original spot for a day or two if relocating.
When and how should I feed a new colony?
Feed with 1:1 sugar syrup in spring for rapid brood rearing; use 2:1 in late fall for winter stores. Use an inner-cover feeder or entrance feeder for short-term support. Stop feeding once natural nectar sources provide sufficient forage or when supers are added for honey collection.
How often should I inspect a new hive and what should I look for?
Inspect every 7–10 days during buildup. Look for the queen or signs of her (eggs, young larvae), capped brood, adequate pollen and honey, and absence of disease symptoms. Add additional deep boxes or supers as the colony expands; avoid overly long inspections that stress the bees.
How do I position hives relative to neighbors and yard traffic?
Place hives away from busy yards, play areas, and footpaths. Orient entrances toward a flight path over fences or hedges to guide bees upward. Maintain clear access for inspections and equipment movement. Inform neighbors and provide a water source so bees don’t use pools or birdbaths.
What pest and predator precautions should I take?
Elevate hives and secure them to deter skunks and raccoons. In bear country, use an electric fence. Reduce small hive beetle pressure with shade management and sanitation. Monitor for varroa mites and treat using Integrated Pest Management methods when thresholds are exceeded.
How do I manage hive stands and elevation for colony health?
Keep hives about 18 inches off the ground on stands, pallets, or concrete blocks. Ensure stands are level with a slight forward tilt for drainage. Position multiple boxes so weight distributes evenly and frames are accessible for inspections and supering.
When should I add supers and how do I decide placement?
Add a super when the brood boxes are about 80% drawn and pollen/honey stores are present. Place honey supers above the brood boxes with an inner cover between if needed. Monitor nectar flow and add or remove supers to prevent swarming and to manage space for the queen.
How often should I replace frames and comb?
Replace older comb every 3–5 years to reduce disease and pesticide residues. Rotate frames gradually, introducing new foundation and allowing bees to draw comb. New frames help maintain hygienic colonies and improve honey quality.
What water provisions does a hive need?
Provide a nearby, safe water source like a shallow basin with stones or floating corks so bees can land. Water close to the apiary reduces flights to neighbor pools. In drought or urban settings, keep the source filled to prevent foraging in undesirable locations.
How can I reduce pesticide risk to my bees?
Locate hives away from treated agricultural fields and communicate with neighbors about spray schedules. Plant pollinator-friendly trees and native flowers that minimize exposure. Avoid using systemic pesticides in your yard and provide diverse forage to dilute contaminants.
What protective clothing and tools are best for new beekeepers?
Start with a veil or full suit, nitrile gloves, a hive tool, and a smoker. Use lightweight, breathable gear for hot weather. A frame grip and bee brush can help gentle manipulations. Proper gear keeps inspections calm and reduces the chance of stings.