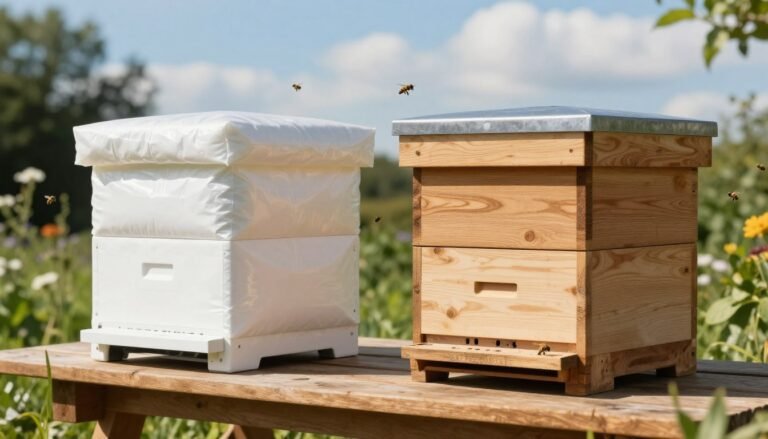
Good airflow keeps a hive healthy through winter. Every professional beekeeper must balance air movement with bee safety. The right opening helps control moisture and prevents heat buildup that can harm a colony.
Design matters: choose an entrance that allows bees to move freely without risking blockage. Small openings can trap insects and stop proper flow. A front-of-upper-hive-body opening is common for exhausting warm, moist air.
For practical guidance on recommended dimensions, consult the recommended dimensions. For broader setup tips, see this comprehensive guide.
Key Takeaways
- Airflow protects honey and brood during cold months.
- Openings must let bees move without getting stuck.
- Front placement aids in exhausting warm, moist air.
- Balance moisture control with structural strength.
- Use proven standards and quality equipment for best results.
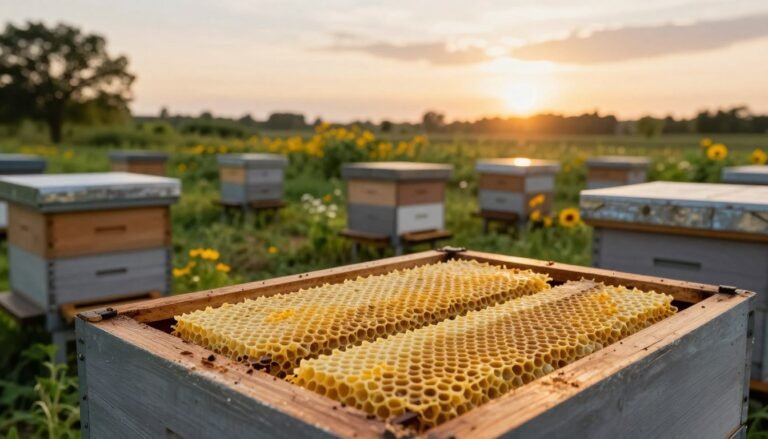
The Importance of Proper Hive Ventilation
Keeping air moving through a hive prevents moisture buildup and protects the colony in winter. Small shifts in temperature can make water vapor condense on comb and frames. That wetness harms honey, brood, and the bees themselves.
Moisture control matters because trapped damp air invites mold and disease. When the cluster generates heat, it also produces water vapor. If the box cannot exchange that air, condensation collects on the top and sides.
Moisture Control
Effective airflow stops fatal condensation and keeps stores dry. Experienced beekeepers add simple top outlets or screened sections to the top to help the air escape without exposing the colony to drafts.
Winter Survival
During winter, bees work to maintain a steady internal temperature. Proper ventilation lets excess heat and moisture exit while keeping the cluster stable.
“A dry hive is a surviving hive.”
For guidance on entrance dimension and recommended openings, see the recommended entrance sizes. For winter prep tips, consult this short guide to winterizing hives.
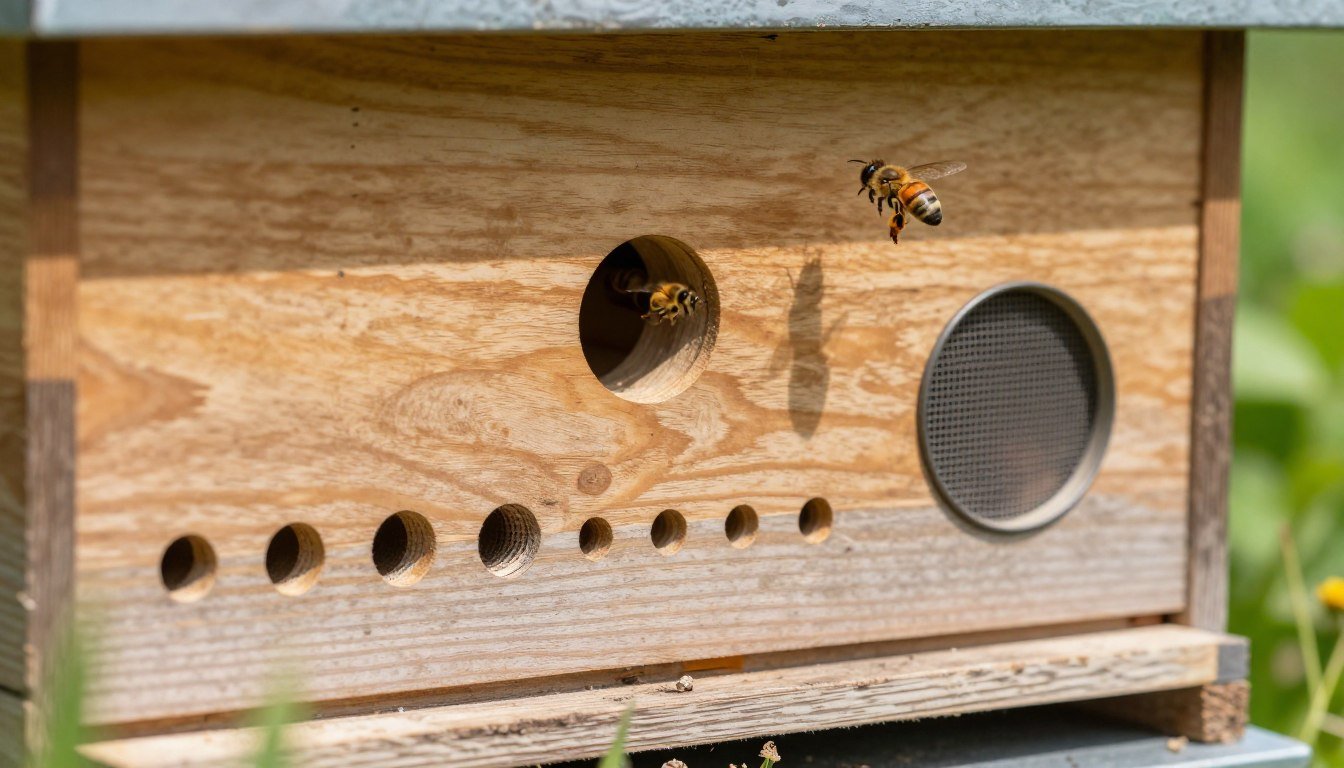
Understanding Bee-Proof Ventilation Hole Sizes
Sizing vents to the body of the honey bee helps ensure reliable air flow and reduces the risk of obstructions. The recommended diameter for a ventilation hole is between 1/2 inch and 5/8 inch.
Any opening smaller than 1/2 inch risks trapping a bee and sealing the vent. That plug can stop crucial air movement and let moisture build inside the hive.
When you drill vents, consider bee anatomy so individuals can pass or retreat freely. Proper placement on the top or front of the box lets warm, moist air escape without chilling the cluster.

For beekeepers, maintaining the correct diameter is a simple winter task that protects comb, honey, and the colony. Check drilled openings before cold weather and replace or widen any that are too small.
For more on moisture management and related setup tips, see this short guide on managing hives in wet climates.
Optimal Placement for Maximum Airflow
Correct placement of an exhaust opening makes a hive work with physics, not against it. Put the exit at the front of the upper hive body to catch rising warm air and move moist air out before it condenses.
Upper Hive Body Exhaust
Front-mounted upper exhausts use the chimney effect: warm air rises to the top of the box and naturally escapes. This keeps the top frames and the cluster dryer through cold weather.
Keeping moist air moving prevents condensation from dripping onto bees. That simple change cuts a common cause of winter losses and protects honey and brood.
- Use the upper hive entrance as a secondary exit so bees can come and go without disrupting airflow.
- Position the opening slightly forward to direct moist air away from the cluster and toward the top-front exit.
- Check placement before winter so the colony stays dry and strong.
| Placement | Benefit | When to Check |
|---|---|---|
| Front of upper hive body | Maximizes natural exhaust of moist air | Before cold weather |
| Upper hive entrance (secondary) | Allows bee traffic without losing airflow | During routine inspections |
| Top-center (complementary) | Helps vent heat while preserving cluster warmth | When adding inner covers or racks |
For practical tips on managing hive temperature and improving airflow, see hive temperature management tricks.
Material Requirements for Hive Modifications
Choose materials that keep the hive sturdy through seasonal wear and allow safe modifications.

Standard construction uses wood at least 3/4 inch thick. This thickness preserves the strength of the box and protects frames and honey when you add an opening.
Measure before you drill. Always confirm the thickness of hive bodies and the bottom board so the new entrance will sit in solid material.
- Use a sharp drill bit to cut cleanly and avoid splintering that can harm bees or trap comb.
- Pick rot-resistant wood or properly treated lumber for long-term durability against moisture and winter wear.
- If the wood is too thin, the hive may lose structural integrity and the colony may become unstable.
Proper material selection lets beekeepers add durable openings that stand up to seasonal change. Small prep steps prevent big problems later.
Avoiding Common Obstruction Pitfalls
Small blockages in an entrance can shut down an entire hive’s air exchange and invite pests. Protecting the opening keeps the colony dry and strong through winter.
The Bee Corking Risk
Bee corking happens when a bee becomes lodged in a hole smaller than 1/2 inch. That single plug can stop air flow for the whole box.
Check entrances for narrow points and smooth edges. Replace or widen any opening that traps insects.
Structural Integrity Concerns
Do not weaken the frame for a quick fix. Drilling carelessly can reduce support and create gaps inside hive walls.
Top-bar hives need a 120-degree angle between bottom and sides for reliable comb attachment. Any modification must preserve that geometry.
- Avoid drilling where it thins the wall below recommended thickness.
- Keep openings reachable from inside hive to prevent dead zones that attract hive beetles.
- Use rot-resistant wood and neat cuts to protect honey and comb.
| Risk | Cause | Action |
|---|---|---|
| Bee corking | Opening under 1/2 inch with rough edges | Widen to recommended diameter; smooth edges |
| Beetle entry | Poorly placed or oversized gaps | Maintain correct entrance dimensions; use screens if needed |
| Structural weakening | Drilling into load-bearing walls | Reinforce with braces; avoid critical areas |
“A secure entrance balances air flow and strength to protect bees and comb.”
Integrating Screened Bottom Boards
A screened bottom transforms a hive’s underfloor into a steady source of fresh air and pest protection. This simple add-on improves internal airflow and keeps mice and wasps out of the box.
Summer cooling benefits are immediate: the screened bottom allows a large volume of air to enter the hive. That steady air flow helps regulate temperature and reduces moisture buildup around frames and honey.

Screened bottom boards also protect colony health by blocking larger intruders while letting debris fall away. They work especially well when paired with upper outlets to create a chimney effect that pulls damp air out through the top.
- Improves air delivery: fresher air reaches the cluster without opening the hive entrance.
- Increases colony safety: prevents mice, wasps, and other pests from entering.
- Reduces moisture: combined top and bottom flow helps dry the interior before condensation forms.
For beekeepers aiming to protect the hive entrance while boosting airflow, a screened bottom board is an essential upgrade. Learn more about managing entrances and compatible parts like a best entrance reducer for nuc boxes.
Utilizing Inner Covers and Slatted Racks
Well-designed covers and racks improve air flow inside the hive and protect the brood nest from drafts and pests.
A screened inner cover provides steady exchange of air while blocking predators. It helps move moist air upward without exposing the cluster to cold drafts.
Place a quilt box over the inner cover in winter. The quilt box soaks excess moisture and adds insulation. This keeps the brood nest drier and supports honey bees through cold snaps.
Slatted racks give bees a place to congregate away from the hive entrance. That reduces jamming at the entrance and keeps the brood nest clear so nurse bees work efficiently.
- Inner covers protect while letting air escape.
- Quilt box layers add moisture control and warmth.
- Slatted racks prevent entrance congestion and calm the colony.
| Component | Primary Benefit | When to Use |
|---|---|---|
| Screened inner cover | Air exchange without drafts | Year-round, especially fall and spring |
| Quilt box | Moisture absorption and insulation | Winter months |
| Slatted rack | Reduces entrance congestion | During active foraging and brood rearing |
Manage the outer cover so the system works as intended. A snug outer cover directs rising air through the screened inner cover and quilt box rather than leaking at the edges.
For tips to improve summer airflow with compatible equipment, see gear to improve summer ventilation.
Future Innovations in Hive Design
Engineers are rethinking hive geometry to balance heat retention with precise air exchange. New prototypes include ventilated gabled roofs and guided channels that move warm air from the bottom to the top.
HONESTBEE leads with precision-drilled hive bodies that reflect the latest findings on ventilation and structural strength. These bodies help commercial apiaries scale while keeping honey and brood safer through winter.
Commercial hives now test roof shapes and top openings to cut moisture in summer and winter. Adopting these designs can improve colony health and reduce losses from damp comb.

- Ventilated gabled roofs for seasonal moisture control
- Precision-drilled box components that fit modern flow models
- Integrated openings that protect entrances and improve air paths
| Innovation | Benefit | Best Use |
|---|---|---|
| Ventilated gabled roof | Improves moisture control | Year-round, especially damp climates |
| Precision-drilled hive body | Consistent air flow and structural fit | Commercial apiaries and large yards |
| Guided top openings | Directs warm air and reduces condensation | Winter protection and honey preservation |
“Ongoing design research will yield more robust hives that help beekeepers succeed across climates.”
Conclusion
A well-managed hive breathes better, and that simple fact often decides whether a colony thrives through winter.
Proper ventilation is the most critical factor in maintaining a healthy hive. Select correct hole diameters, keep entrances clean, and use quality parts to avoid bee corking and moisture build-up.
Prioritize the physical needs of your bees when modifying the box. Invest in professional-grade gear from brands like HONESTBEE to protect structural strength and honey stores.
Stay curious and practical: small, well-informed changes to the top and bottom air paths make big differences. For configuration ideas, see this ventilation configuration guide and tips to prevent damp and mold in a hive at prevent mold inside a beehive.
FAQ
What size opening lets honey bees pass while keeping pests out?
A common recommendation for a screened entrance or guard uses openings around 3/16 to 1/4 inch (4.5–6 mm). That spacing lets worker bees move freely while reducing access for larger invaders like mice and many hive beetles. For screened bottom boards and internal screens, use mesh with openings about 5–6 mm and sturdy wire to prevent sagging or tearing.
How does proper airflow help control moisture inside the hive?
Good airflow removes humid air created by respiration and evaporating syrup, lowering condensation that can chill brood. Slight, controlled air exchange near the top of the brood nest and a screened bottom board plus an insulating quilt or shavings box in winter help balance dry air movement with necessary warmth.
Should I add extra openings for winter survival of my colony?
No large openings. In cold months, reduce drafts but maintain minimal upper ventilation to prevent moisture buildup. Use a small top vent or an inner cover notch plus a quilt box filled with absorbent material such as wood shavings to give vapor a path out while keeping the cluster warm.
Where is the best place to position exhaust openings for maximum airflow?
Place a controlled exhaust near the hive top—either a small notch in the inner cover, a screened outer cover vent, or an upper box screened panel. Warm, moist air rises, so a top exit encourages passive removal without chilling the brood area at the bottom.
Can I drill additional holes in the bottom board to improve circulation?
Avoid large open holes in the bottom board. Instead, install a screened bottom board or a small, protected entrance reducer. Large bottom openings increase cold drafts, allow predators in, and can disrupt thermal regulation inside the brood nest.
What materials work best when modifying hive openings and screens?
Use galvanized or stainless steel mesh for longevity and strength. Plywood or pine for inner covers and quilt boxes must be well-sealed to resist moisture. Avoid cheap plastic that can warp; choose hardware that resists rust and maintains firm tension so screens do not sag and expose the colony.
How do beekeepers prevent bees from sealing small openings with propolis?
Bees will propolize bothersome drafts and gaps. To minimize unwanted sealing, keep entrance edges smooth and consistent, use tight-fitting reducers, and avoid excessively narrow or irregular gaps that trigger sealing behavior. Periodic inspection and gentle cleaning of frames and covers helps maintain intended airflow.
Does using screened equipment increase the risk of small hive beetles entering?
Properly installed screens can reduce small hive beetle movement while boosting ventilation. However, poorly fitted screens or large peripheral gaps let beetles in. Combine screening with good apiary hygiene, beetle traps, and solid bottom edges to limit beetle access to brood and comb.
Are slatted racks or inner covers beneficial for hive health?
Yes. Slatted racks and properly vented inner covers create a buffer between the brood and the outer cover, improving air movement and reducing condensation. They also give bees a place to form a vertical cluster under cold conditions and support honey storage patterns.
Will additional vents increase honey production by cooling the hive in summer?
Controlled upper exits can help with heat and moisture during hot weather, letting bees evaporate nectar more efficiently. Avoid over-ventilating; bees manage temperature and will recruit water for cooling. Aim for moderate air paths—such as screened crown boards or small top vents—so bees can regulate internal climate without excessive energy loss.
How do I balance pest exclusion with the colony’s need for airflow?
Use entrance reducers, fine-gauge but strong mesh, and well-fitted inner covers. Place screens where they vent rising moist air but remain protected from direct wind. Regular hive checks, proper spacing between boxes, and using a quilt box in winter give the colony ventilation without exposing comb or brood to predators.
What innovations in hive design help modern beekeepers manage air and moisture?
Recent improvements include adjustable screened crown boards, insulated top vents with replaceable absorbent pads, and modular quilt boxes. Many beekeepers in cooler climates use removable moisture traps or salt-stuffed chambers to reduce condensation. Combining these tools with basic practices—tight seams, screened bottoms, and small top exhausts—yields reliable internal conditions.