Prompt action helps protect bees and hive strength when parasite levels rise. Start with an integrated pest management (IPM) plan that blends monitoring, records, and targeted treatments.
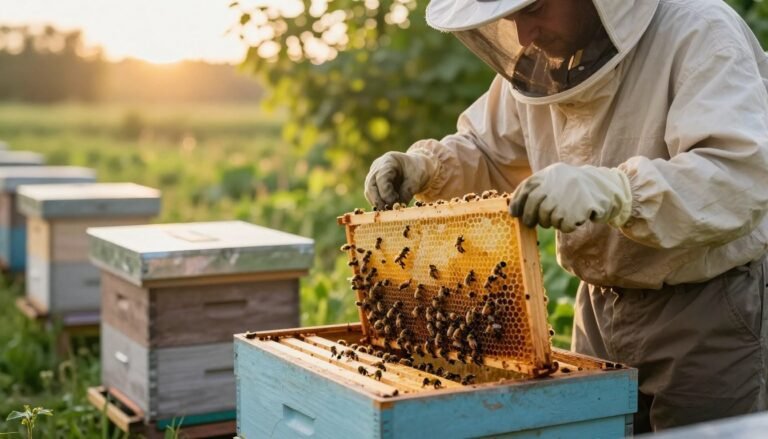
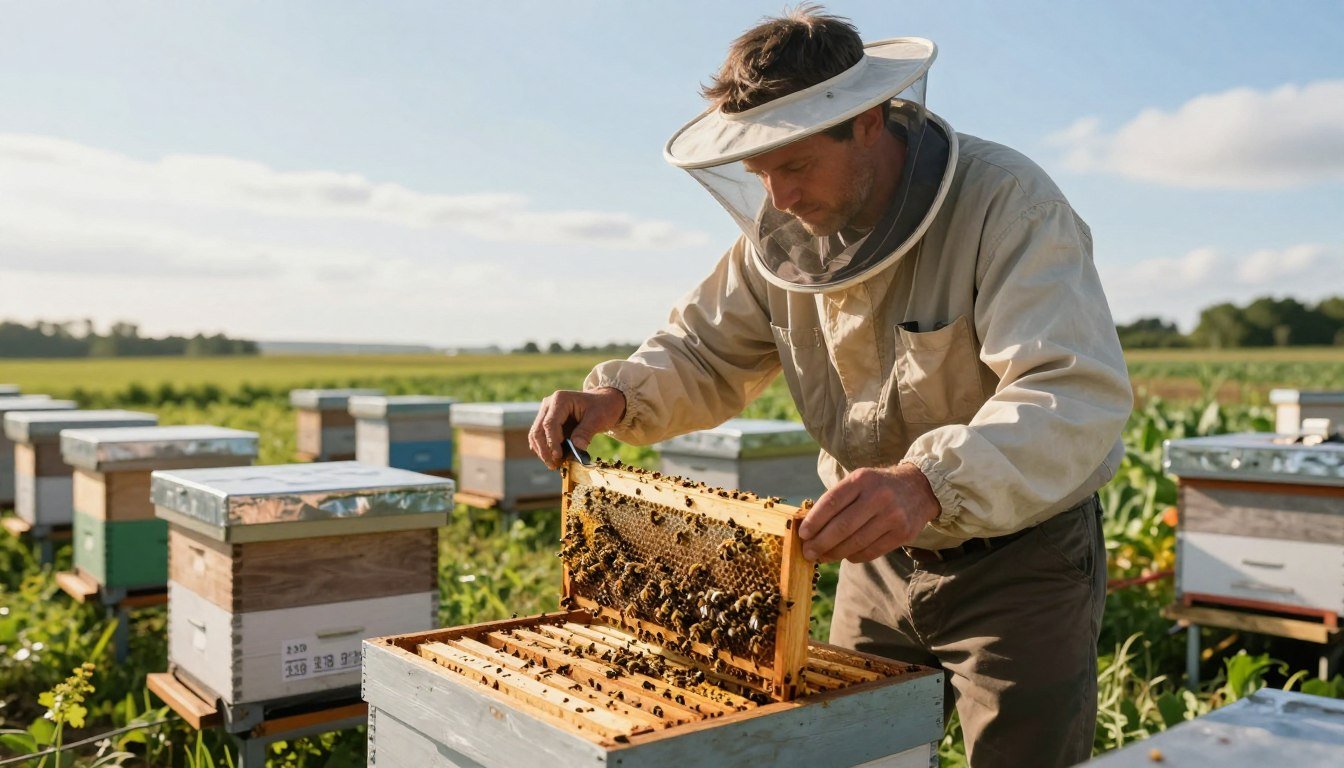
Regular brood inspections reveal colony health and show whether the queen and brood patterns remain strong. Well-fed colonies handle pressure better, so consider sugar supplements during nectar shortages.
Track numbers through the season, especially spring and summer, and use accurate tests such as an alcohol wash or sugar roll. Use local guidance and post-treatment checks like those outlined in post-treatment varroa mite count reports to judge results and plan next steps.
Key Takeaways
- Implement an IPM strategy promptly to protect colonies.
- Inspect brood and comb often; queen health matters.
- Monitor through spring and summer; keep records across the year.
- Use accurate testing and confirm treatment success with post-treatment checks.
- Support weak hives with sugar during dearths and plan for winter survival.
Understanding the Impact of High Mite Counts
Understanding lifecycle and signs helps prioritize quick action when varroa threaten colony strength.
Varroa pass through two clear stages. In the reproductive phase, foundress females enter capped brood cells and feed on developing bees. Worker brood usually yields the foundress plus one or two offspring, while drone cells often produce two to three, making drone cells a preferred breeding site.
The phoretic stage occurs on adult bees and lasts roughly three to fourteen days. During this time, mites move between hives and spread viruses that weaken the population.
The Lifecycle of Varroa
- Reproduction: inside capped cells, parasites reduce healthy brood production and honey output.
- Phoretic phase: mites ride on adult bees for 3–14 days, increasing spread between colonies.
Signs of Infestation
Spotty brood patterns, deformed wings on bees, shrinking colony size, and heavy mite numbers in spring and summer are key red flags.
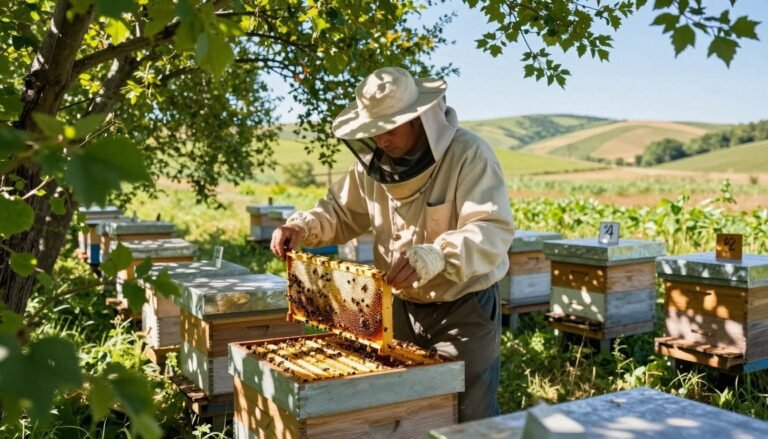
Use gentle monitoring methods such as powdered sugar or an alcohol wash for varroa mites to estimate levels without harming honey bees. A healthy queen and frequent comb checks help keep production steady through the year.
What to Do After a High Mite Count
A confirmed surge in mites calls for a clear, coordinated response across all hives. Select a proven treatment that matches your colony’s needs and follow the label exactly. Treat every hive in the yard at the same time to lower reinfestation risk.
Keep records of treatment dates, product names, and post-treatment numbers. Do another mite test after treatment so you can measure effectiveness. Avoid repeating the same chemical in succession; rotation helps prevent resistance.
Support weak colonies with extra sugar or frames of honey if stores are low. Mites in brood cells reduce population and comb production, so protect the queen and maintain brood checks during spring and summer.
“Treat all hives together and verify results with follow-up counts for the best long-term control.”
- Coordinate treatments across the apiary.
- Monitor levels after application.
- Keep records and plan changes for next year if counts stay high.
| Action | Why it matters | Timing | Follow-up |
|---|---|---|---|
| Select approved product | Targets varroa mites while protecting bees | Immediately after confirmation | Test after recommended days |
| Treat all hives | Reduces rapid reinfestation | Same day for entire apiary | Record dates and results |
| Rotate chemicals | Limits resistance | Across the year, not back-to-back | Adjust plan next season if needed |
| Support nutrition | Improves survival to winter | Spring through fall | Monitor honey stores |

Assessing Your Current Colony Health
Start by checking brood patterns and stores; a steady queen and full frames are the first clues of colony strength. Regular brood inspections reveal spotty cells or missing areas that signal problems early.
Check honey levels often. Well-fed bees resist pressure better than hungry ones. If stores run low before winter, add sugar or frames of honey so the population holds steady.
Use a powdered sugar shake as a non-lethal monitor for mites in your honey bee colonies. It gives a rapid indication of levels without harming bees and helps time treatments.
- Inspect brood for healthy, consistent cells and an active queen.
- Verify honey stores so the colony can survive winter and maintain production.
- Watch for spotty brood or a shrinking population; those are red flags.
Look inside hives for other pests, such as small hive beetles, which exploit weak colonies stressed by mites. Keep hive registration current as a standard practice for U.S. beekeepers.
“A healthy colony is your best defense; inspect often, feed when needed, and monitor for mites regularly.”
For reliable lab methods and guidance on testing, see varroa mite testing.
Selecting the Right Treatment Approach
Pick an approach that balances effectiveness with colony safety for your region and season.
Consider local conditions and the current strength of each hive before you act. Regional climate, forage availability, and past treatment history affect which control will work best.
In temperate areas, treat during spring when bees build population and comb. This timing helps colonies survive peak nectar flows and reduces long-term pressure from mites.

A combined plan often works best. Pair mechanical measures with approved chemical treatments for steady reductions in mite numbers. Treat all hives in the yard at once to lower reinfestation risk.
- Match treatments with colony needs and the time of year.
- Follow label directions and avoid back-to-back use of the same chemical.
- Pick options that keep bees healthy so they can build comb and store honey.
“Plan treatment for the whole year, monitor results, and choose methods that reduce stress on the bees.”
Finally, test after treatment and adjust plans for the next season. Good records and careful timing protect colonies through winter and improve honey production the following year.
Implementing Chemical Control Methods
Chemical tools can be effective when used as part of an IPM plan. Choose products based on colony strength, season, and label instructions. Safety and timing protect both bees and the beekeeper.
Formic Acid Applications
Formic treatments can reach mites inside capped brood cells, making them valuable during brood periods.
- Formic Pro strips must remain in the hive for at least 7 days for best impact.
- These treatments are temperature-sensitive; follow label temperature ranges closely.
Oxalic Acid Methods
Oxalic acid targets phoretic mites on adult bees, not those hidden in brood cells.
- Use oxalic applications when brood levels are low or during winter treatments.
- Wear protective gear and follow safety directions; oxalic can harm the applicator if mishandled.
Thymol Considerations
Thymol offers another control option but can disturb the colony. Bees may try to remove thymol strips, which can stress populations that lack sufficient honey stores.
- Apply thymol when honey reserves are adequate and labels permit use in your climate.
- Rotate chemical families across the year to reduce resistance risk.
“Follow label directions, protect yourself, and use chemical tools as part of a wider plan for colony survival.”
Utilizing Mechanical and Cultural Techniques
Simple hive adjustments often remove large numbers of varroa without exposing bees to treatments.
Uncapping drone brood and removing infected frames catches many parasites at once. Drone comb removal works because varroa prefer drone cells; removing that brood cuts the population rapidly.
Place a sticky mat on the bottom board to track natural drop. Clean the bottom board regularly so counts stay accurate and you can judge when further action is needed.
Offer a planned brood break during spring when possible. This cultural technique interrupts the reproductive cycle and lowers mites across the apiary.

“Combine drone comb traps, bottom-board monitoring, and brood breaks for steady, chemical-light control.”
- Use drone comb as a trap and uncap cells to remove many mites by hand.
- Monitor daily drop with a sticky mat and record trends.
- Pair these methods with selective treatments when thresholds rise; see recommended varroa control methods.
| Technique | Benefit | When |
|---|---|---|
| Drone brood removal | Removes many mites at once | Spring, summer |
| Sticky mat monitoring | Tracks daily natural drop | Year-round |
| Brood break | Disrupts reproduction | Planned during low nectar |
Managing Treatment Timing and Seasonal Factors
Timing treatments with low brood periods reduces reproductive success for varroa and helps colony recovery. Plan around local nectar flows and brood breaks so treatments hit the greatest proportion of phoretic mites.
Seasonal Thresholds
Follow NSW DPI guidance: treat when you find 9 or more mites per 300 bees in spring and summer.
In autumn and winter the threshold falls to 5 or more per 300 bees. Lower winter numbers raise colony survival odds through cold months.
Treat all hives in the apiary at the same time. This approach limits reinfestation as phoretic mites move between colonies during their 3–14 day phoretic phase.
“Treat every hive together and align timing with low brood periods for the best seasonal control.”
- Monitor mite levels every few days during peak season to catch rising numbers early.
- Prefer spring treatment in temperate zones to protect bees through the main nectar flow.
- Record treatment dates, products, and post-treatment numbers for better yearly planning.
| Season | Action | Threshold | Goal |
|---|---|---|---|
| Spring | Treat during low brood windows when possible | 9+ mites per 300 bees | Protect build-up and nectar flow |
| Summer / Early autumn | Monitor frequently; treat before peak numbers | 9+ mites per 300 bees | Reduce late-season reproduction |
| Autumn / Winter | Lower threshold; ensure low numbers entering winter | 5+ mites per 300 bees | Increase overwinter survival |
For product comparisons and application details, review this treatment comparison before choosing methods that match your season and hive strength.
Monitoring Effectiveness During and After Treatment
Measure changes in mite presence during treatment so you spot failures early and switch methods quickly. Do a follow-up count after the recommended wait period to judge success.
Perform counts during treatment and again afterward. Use a powdered sugar shake or an alcohol wash for reliable results. For guidance on sampling size, see alcohol wash sample guidance.
Remove treatment strips at the label’s prescribed time. Leaving strips in too long stresses bees and risks resistance. Record dates, product names, and post-treatment numbers for every hive.
The Chamomile hive saw a 3300% rise in mites in four weeks, showing how fast populations can explode. Some hives show little change after two weeks of treatment; that signals the need for a different chemical or method.
- Check hives every few days during spring and summer for resurgence.
- If levels stay high, act quickly to protect colonies and honey stores.
- Keep detailed logs so year-on-year trends guide future plans.

“Consistent sampling and prompt adjustment protect colonies and preserve treatment options.”
Addressing Colony Nutrition and Stress
Feeding now supports winter bee production and helps stressed colonies rebuild.
Importance of Fall Feeding
Fall feeding gives bees energy when natural forage drops. The Salvia hive used more than 10 medium frames of honey in four weeks. That pace shows why managers must watch stores closely.
Provide supplemental sugar in small, steady amounts so the colony can raise a robust winter population. Well-fed bees resist stress and recover faster from infestations.
Managing Nectar Dearth
We are in the middle of a nectar dearth. Spotty brood patterns across frames may reflect poor nutrition as much as parasite damage.
Ensure access to pollen and a reliable carbohydrate source during this time. Healthy colonies maintain a stronger population into winter and give managers more time for treatments.
“A well-nourished colony has a better chance of surviving winter and returning strong in spring.”
- Check honey reserves at each inspection.
- Feed sugar if frames fall low or consumption is rapid.
- Balance feeding with pollen sources for brood health.
| Concern | Action | Timing |
|---|---|---|
| Rapid honey loss (Salvia) | Supplement with sugar frames or fondant | Immediate, through fall |
| Spotty brood | Provide pollen patties and monitor queen | Inspect weekly |
| Nectar dearth | Maintain steady feeding and water source | Throughout dearth period |

For guidance linking nutrition with varroa management, see varroa mite and nutrition.
The Role of Genetics in Mite Resistance
Hygienic behavior in some bee lines reduces infestation by removing unhealthy brood. That trait helps keep varroa mites low without constant chemical pressure.
Feral colonies that never received treatment often show this adaptation. Their queens are darker, and their bees can limit parasite buildup through brood removal and grooming.
Commercial Italian packages — like the Chamomile hive with blonde Italians — sometimes lack those defenses. That contrast shows genetics matter for long-term survival.

Requeening weak stock with resistant lines such as Russian or Carniolan improves performance. A queen that produces hygienic offspring raises the whole colony’s odds of surviving winter with fewer treatments.
“Selecting for stronger bees is one of the most sustainable steps a keeper can take.”
- Monitor brood patterns for removal of infested cells — that signals hygienic behavior.
- Consider breeder stock from feral survivors or tested lines to reduce chemical reliance.
- Track queen lineage and replace queens that produce spotty brood or poor recovery.
For practical breeding steps and selective programs, review selective breeding resources such as selective breeding for mite resistance.
Coordinating with Local Beekeeping Communities
Coordinated action across yards reduces reinfestation and raises survival odds. A united effort to treat all hives on the same day limits spread between colonies during the phoretic phase.
Talk with nearby beekeepers before treatment windows. If one neighbor’s bees are heavily infested, your own colony faces greater risk.
Attend guild meetings and local lectures to learn regional tactics. Experienced keepers often share practical tips about feral versus package bees and resistant stock.

- Coordinate treatment timing with other beekeepers to protect every hive in the area.
- Share results and records so the whole community watches trends across colonies.
- Open communication saves time, cuts losses, and helps all bees reach winter in better shape.
“A neighborhood that treats together preserves more colonies than one acting alone.”
Avoiding Common Treatment Mistakes
Mistakes during chemical application often accelerate resistance and harm colony recovery. Follow label directions every time and avoid off-label mixes that can weaken bees or fail against varroa mites.
Preventing chemical resistance starts with rotation. Do not use the same active ingredient in consecutive seasons or back-to-back runs. Record product names, dates, and numbers so you can spot patterns across the year.
Remove strips at the label’s prescribed time. Leaving treatments in too long stresses the queen and the population. For temperature-sensitive options like formic acid, monitor ambient conditions closely during the recommended weeks.
- Perform a post-treatment check — an alcohol wash or powdered sugar sample — so you know whether control worked.
- Remember oxalic acid targets phoretic varroa, not those inside brood cells; plan timing accordingly.
- Keep concise logs so you avoid repeating failed steps next season.
“Treat carefully, test again, and rotate chemicals; that simple cycle defends hives and preserves treatment options.”

For guidance on interpreting results after an alcohol wash, consult this alcohol wash reading.
Preparing for Future Mite Management
Design a yearly calendar that matches splits, brood breaks, and treatment windows for consistent control.
Start with an IPM plan that schedules planned brood interruptions and splits. Mark the spring season early so the yard is ready when the first flow arrives. Beekeepers should agree on timing so reinfestation risk falls across the apiary.
Split any hive that proves its mettle after winter. That simple step reduces local population pressure and creates more strong colonies for next year. Survivors become the foundation for selective breeding.
Keep concise records of tests, treatment names, and results. Track sugar needs and split dates in the same log. Over the weeks this data will guide choices and cut reliance on chemical treatments.

“Select survivors, plan splits in spring, and use records as the backbone of future management.”
- Prioritize splitting strong hives at season start.
- Requeen weak colonies with resistant lines before spring.
- Align treatments around the nectar flow to protect honey.
Conclusion
Apiary resilience grows from regular sampling, targeted steps, and honest record-keeping. Keep monitoring on a steady schedule and use an IPM plan that blends cultural methods with approved treatments.
Prioritize nutrition before winter and keep honey stores steady so colonies can raise winter bees. Good feeding and timely splits lower population pressure and build long-term health.
Record every test, product, and result. These notes guide future decisions and cut reliance on any single chemical. For practical treatment options and planning, consult this treatment guide.
In the end, consistent checks and sensible care protect your honey bees and help you enjoy healthy hives and better honey over time.
FAQ
How urgent is treatment when varroa levels rise above threshold?
Act quickly. High varroa pressure damages brood, reduces honey production, and weakens the queen’s output. Take immediate steps to lower mite numbers using an integrated pest management plan that combines monitoring, chemical or organic options, and cultural controls.
How can I confirm varroa infestation in brood and adult bees?
Use diagnostic checks such as alcohol or sugar rolls, sticky boards, and visual inspection of drone and worker brood. Count mites per 100 bees or per sample and compare against seasonal thresholds. Reassess after treatment to confirm effectiveness.
Which chemical treatments work reliably for heavy infestations?
Effective choices include formic acid, oxalic acid, and thymol-based products. Follow label directions, consider brood presence, and respect honey supers timing. Rotate actives across seasons to reduce resistance and consult product manufacturers like Mann Lake, Veto-pharma, or BASF for specifics.
Are oxalic acid vaporization and dribble both safe and effective?
Both methods reduce phoretic mites when brood is low. Vaporization treats quickly but requires caution with respirators and equipment. Dribble is simple but must use precise dosing to avoid queen harm. Avoid using oxalic while honey supers are on unless product labels allow it.
When is formic acid the best choice?
Formic penetrates capped brood, making it useful during active brood periods like summer flows. It can stress colonies and requires careful temperature management. Use products such as Mite-Away Quick Strips according to temperature guidelines to protect bees and honey stores.
Can thymol treatments protect colonies during late summer and fall?
Thymol formulations like Apiguard can lower mite loads in warm, stable conditions. They work best when colony strength is good and temperatures stay within recommended ranges. Avoid use in extreme heat and follow retreatment intervals for best results.
How do mechanical methods such as drone brood removal help?
Removing drone brood traps mites because varroa favor drone cells. Periodically cut and freeze frames of drone comb during brood rearing to reduce population. Combine this with screened bottom boards and powdered sugar dusting for short-term mite drops.
Does powdered sugar reduce varroa significantly?
Powdered sugar dusting can dislodge some phoretic mites and improve hygiene but offers modest, short-term control. Use it as part of an IPM routine, not as sole treatment, and repeat applications during low humidity for best effect.
How should I time treatments across seasons, including winter preparation?
Target low brood windows in late fall or early winter with oxalic applications. Treat again in early spring if mite pressure persists. Avoid treating during major honey flows and ensure colonies enter winter with mite levels below recommended thresholds to preserve overwinter survival and spring build-up.
What thresholds and seasonal targets should I use for action?
Thresholds vary by season, but many recommend treating if a 300-bee alcohol roll shows more than 3% mites in summer or more than 1% before winter. Adjust targets based on local conditions, colony strength, and beekeeper goals for honey production and genetics.
How do I monitor treatment effectiveness during and after application?
Use sticky boards for two-week counts, perform follow-up alcohol or sugar rolls, and inspect brood for mite-inflicted deformities. Record treatments, dates, and results to evaluate efficacy and plan rotations to prevent chemical resistance.
How can I support colony nutrition and reduce stress after treatment?
Provide supplemental feeding—sugar syrup or pollen substitutes—during nectar dearths and fall feedings to build winter stores. Maintain strong, disease-free comb and reduce hive manipulations during stress to help recovery and improve treatment outcomes.
What role does genetics play in long-term mite control?
Selecting queens and stock with hygienic and Varroa Sensitive Hygiene traits reduces mite buildup over time. Use local survivor lines or stock from reputable breeders and integrate selective breeding into your management plan to lower chemical reliance.
How should I coordinate with local beekeepers about mite control?
Communicate treatment plans and timing with nearby beekeepers and clubs to reduce re-infestation from drifting and robbing. Participate in county or regional monitoring programs and share data to improve area-wide control strategies.
What common treatment mistakes cause resistance or colony harm?
Avoid under-dosing, repeating the same chemistry annually, and treating during inappropriate temperatures. Misuse can select for resistant mites and harm queens or brood. Follow labels, rotate treatment classes, and document results.
How can I prepare colonies for better long-term mite management?
Combine regular monitoring, diversified treatments, genetic selection, and good nutrition. Schedule proactive fall and spring interventions, maintain clean comb, and plan for emergency requeening or splits if mite damage persists.