Many beekeepers assume a new colony will inherit low mite levels from the parent hive. That assumption can cost colonies. USDA data show 30% of spring splits reach the summer varroa threshold sooner than their parent colony.
Early monitoring and timely action help protect bees and preserve honey flows. Track the number of days since a split and count mites on frames or with a sugar shake. Whether you start with a package or a weak split, the time you spend in the first weeks pays dividends.
This article gives clear options, from dribble and sugar counts to oxalic use, and explains life stages of the mite. A steady schedule keeps hives and colonies strong through spring and into summer. Read on to learn practical steps every beekeeper can apply.
Key Takeaways
- About 30% of spring splits hit threshold before the parent colony, so monitor early.
- Count mites using sugar shakes or frame checks in the first days after a split.
- Set a consistent schedule to protect bees and preserve honey stores.
- Options include mechanical checks and targeted oxalic applications.
- Careful early care strengthens colonies and improves summer outcomes.
Understanding the Varroa Risk in Spring Splits
A new split often carries a higher mite risk because the same number of mites now lives on far fewer bees. When you move brood and frames to form a new hive, you can concentrate mites onto that smaller colony.
Research shows about 30% of spring splits reach the summer threshold sooner than the parent colony. That data underscores why every beekeeper must count mites and monitor the queen and brood closely in the early days.
By late winter the bees have already faced stress, and the split creates a vulnerable phase. Even a productive queen can’t protect a tiny population if mites climb quickly.
Pay attention to how many frames you move. Transferring many brood frames often moves a disproportionate number of mites with the developing bees in cells. Small colonies have fewer workers to dilute that load.
For setup and timing tips on dividing hives, see our guide on splitting hives. Early counts using sugar tests and regular checks give you options to protect honey flows and colony health.
Why Spring Varroa Treatment Before Splits is Essential
Mite counts often climb faster than workers multiply, creating risk pockets in small colonies. New hive populations are vulnerable during brood buildup. Slow action lets mites multiply while the queen ramps up egg laying.
Mite Population Dynamics
Mite populations can double every 4–6 weeks during the spring buildup. That pace means a low count today can spike in a single month.
- Rapid growth: Doubling every month shortens the window for safe action.
- Brood risk: More brood creates more sheltered cells for mites to reproduce.
- Frame management: Moving many brood frames can concentrate mites in the new colony.
The Threshold Challenge
A spring count at or above 1% calls for immediate action. Many beekeepers use formic acid or oxalic acid as part of early options to keep mite numbers down before the main nectar flow.
Prioritize a quick count and protect your hive and honey prospects. Proper early checks save time and maintain a stronger colony through summer.
The Mechanics of Mite Transfer During Hive Division
The middle of the brood nest is a hotspot for mites; moving frames from that core shifts a concentrated load into the new hive.
When you pull frames from the brood center, you often carry the highest mite density into the split. A smaller bee population in the receiving colony means those mites become a larger percentage of the population fast.
The queen will keep laying in transferred brood frames, which gives mites steady access to cells for reproduction. That dynamic can let mite numbers climb in only a few days.
Every beekeeper should monitor both the number of bees and the amount of brood in a new colony. Early counts and quick action keep honey prospects and colony health intact.
- Limit frames taken from the brood center when possible.
- Check counts within the first 7–14 days after a division.
- Use resources like managing mite levels for stepwise options.
| Frame choice | Risk | Action |
|---|---|---|
| Center brood frames | High mite concentration | Limit transfer; monitor counts closely |
| Peripheral brood frames | Moderate risk | Rotate in nurse bees; reassess in days |
| Frames with stores only | Lower mite load | Use to boost bee numbers and dilute mites |
Establishing a Baseline with Early Mite Counts
A timely sugar shake offers precise data that helps protect brood and honey production. Start counting within the first one to two weeks after creating a new colony. An early number gives clear guidance on whether action is needed as the hive population grows.

The Sugar Shake Method
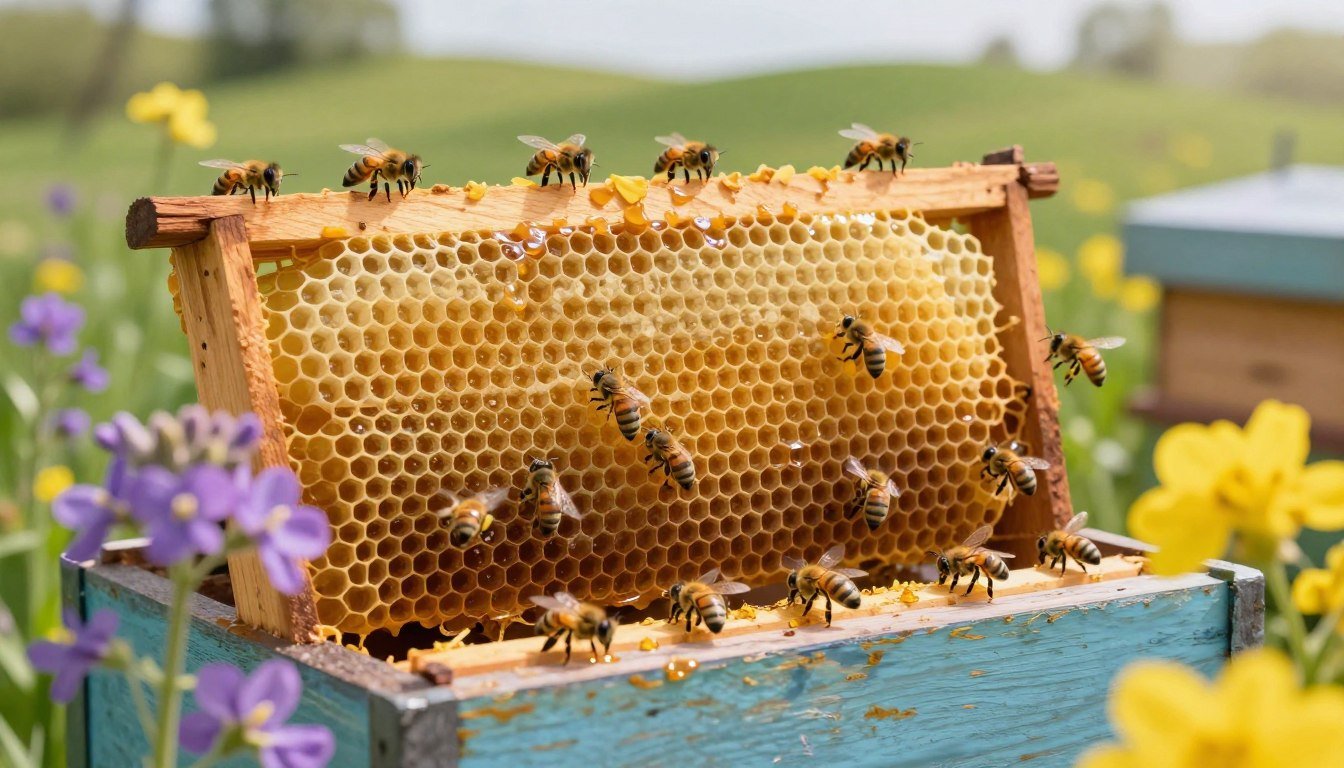
The sugar shake is simple, non-destructive, and repeatable. Collect about 300 bees from the brood area into a jar, add powdered sugar, shake gently, and let mites fall free. Count fallen mites to calculate percent infestation.
- How to calculate: (mites counted / 300 bees) × 100 = percent.
- Perform the test on a calm day; avoid cold mornings or right after feeding in winter.
- Record the date, hive ID, number, and any notes about brood or queen status.
| Result | Action | Notes |
|---|---|---|
| 0–0.5% | Monitor every 14–21 days | Low risk; track trends through the year |
| 0.6–1.0% | Increase monitoring; consider control options | Watch brood and frames closely |
| >1.0% | Plan approved treatment; consult local extension | Protect brood to preserve colony strength |
Every beekeeper should keep these counts. Consistent records let you compare hives, evaluate oxalic or other options, and protect honey flows as the season advances.
The Importance of the Thirty Day Monitoring Rule
A thirty-day check gives a clear picture of colony progress after the queen resumes steady laying. Log your first mite count on every spring split no later than 30 days post-split. That date often captures one full brood cycle and a reliable baseline.
Why 30 days matters:
- By day 30 the queen has usually settled and brood cells show true reproductive rates.
- Counts taken at this time reveal whether mites are rising faster than worker bees.
- Waiting longer risks missing the window to stop a summer population surge.
Mark the split date in your apiary records and set a reminder for the count. Use a sugar count or quick frame check to record results on the exact date.
Consistent 30-day monitoring helps protect honey prospects and winter survival. For complementary natural options, see our guide on natural remedies for varroa mites.
Evaluating Treatment Needs Based on Colony Data
Use actual hive counts to decide if action is needed, not the calendar on the wall. Record a 30‑day sugar count and note bees, brood and frames to see real risk.
If the 30‑day count is above 1%, plan a treatment and schedule it to occur prior to June. This protects the queen and limits mite growth as populations rise.
Compare the mite number to the size of the colony and the amount of brood cells. A high count on a small hive demands faster action than the same number in a large, robust hive.
If counts stay low, lengthen the interval and recheck in 60 days. Consistent data through the year helps beekeepers spot resistant hives to use for future splits.
| Metric | Low Risk | Moderate Risk | High Risk |
|---|---|---|---|
| 30‑day count | <0.6% | 0.6–1.0% | >1.0% |
| Action | Recheck 60 days | Increase monitoring; consider options | Plan treatment now |
| Notes | Track trends through the year | Compare bees, brood, frames | Use colony data to choose method (eg. dribble) |
Selecting the Right Treatment for Your Split
Effective care starts with matching the method to the colony’s population and the queen’s laying rhythm. Assess the number of bees and the consistency of brood before choosing a plan. Use your 30‑day count as the key data point.
Apivar Strips for Established Colonies
Apivar strips work well in queenright hives with active brood. They release amitraz steadily and fit into routine care. For a small split with fewer than five frames of bees, one strip is generally recommended.
Follow the label for timing and duration. Remove strips as directed if honey supers are present to avoid contamination.
Considerations for Small Populations
Smaller colonies can stress easily. Do not over-apply products that can disturb the queen or reduce brood growth.
- Match the option to population size and brood pattern.
- Use gentle methods when frames and bees are few.
- If you have questions, weigh the 30‑day count and the time of year.
| Colony size | Recommended option | Notes |
|---|---|---|
| Fewer than 5 frames | One Apivar strip | Gentle, suitable for queenright colonies with brood |
| 5–8 frames | Two strips or alternative | Follow label; consider removal if supers present |
| Large colony >8 frames | Standard strip regimen or other approved methods | Choose based on mite count and honey flow timing |
Always follow manufacturer directions and record the day you start and stop any application. Keep multiple options on hand so beekeepers can adapt as the hive grows and the mite count changes.
Utilizing Formic Acid in Warm Weather
When daytime temperatures hold above 50°F, formic acid becomes a practical option to reduce mite pressure in a growing hive. Products such as Mite Away Quick Strips (a 7-day application) are designed to penetrate capped cells and reach mites hidden with developing brood.
Use strict ventilation and timing. Ensure the hive has good airflow and that you place strips per label directions. Overheating or leaving strips past the recommended day count can harm the queen and worker bees.
Formic options are popular because they can be applied during the nectar flow and still protect honey yields. Remove Mite Away Quick Strips after seven days to avoid residual effects.
- Temperature window: Daytime >50°F for safe use.
- Duration: Mite Away Quick Strips — 7-day application.
- Ventilation: Keep hive aerated to prevent heat stress.
- Brood reach: Acid penetrates capped cells to affect mites inside.
- Queen safety: Follow label and check the colony daily when possible.

For new beekeepers or anyone balancing honey goals and pest control, combine a 30‑day count with this option when conditions fit. If you want a quick primer on common errors and timing, review our guide on beginner mistakes.
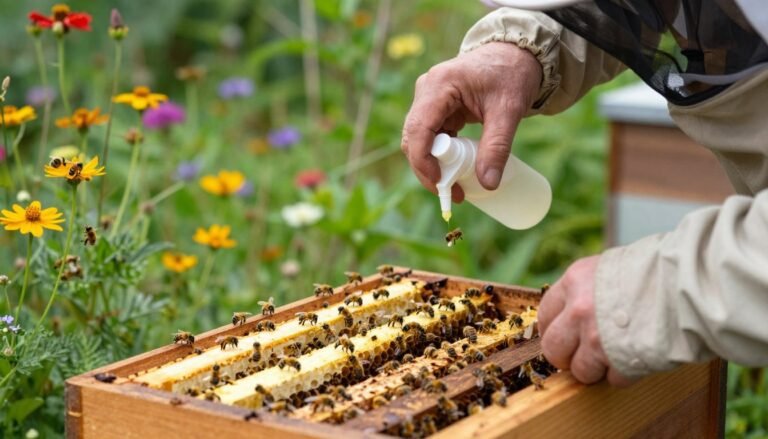
Implementing Oxalic Acid Vaporization Techniques
Oxalic acid vaporization gives beekeepers a targeted way to lower mite numbers while minimizing hive disturbance. Use this method in a queenright colony with active brood to reach mites when they leave capped cells.
Key protocol: apply three separate oxalic acid applications spaced five days apart to catch mites across the brood cycle. Carry out treatments when daytime temps hold above 50°F to ensure proper vapor action.
Wear full protective gear. The vapor can irritate lungs and eyes, so use a respirator, gloves, and eye protection. Only enter the apiary with gear on and follow label directions for your vaporizer device.
- Record your 30‑day count and confirm the hive has active brood.
- Apply the first oxalic acid dose, then repeat at five‑day intervals for two more days of application.
- Monitor the queen and brood after the series to ensure normal laying and brood build‑up.
Benefits: this approach reduces mite load without long chemical exposure in honey stores and is less disruptive than long‑term strips. Consistent timing across the three days is essential for success.
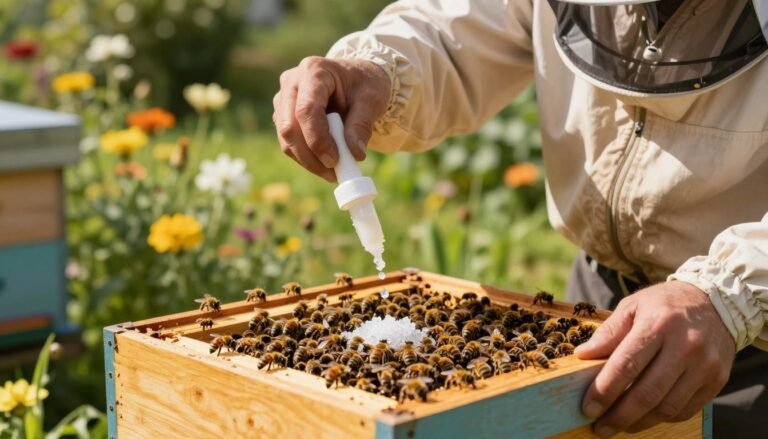
Managing Queenless Periods for Maximum Efficacy
A brief, deliberate queenless phase creates ideal conditions to apply a precise oxalic acid dribble. Holding a colony without a laying queen exposes mites on adult bees and removes their refuge in capped cells.
Dribble Application Benefits
The oxalic acid dribble is the highest-efficacy option when brood is absent. Apply 5 mL per seam, carefully coating bees along each frame seam so the dose spreads evenly without over-wetting the cluster.
Because there is no brood to hide mites, this approach can deliver very high kill rates. It gives a new colony a clean start and reduces the need for heavier interventions later in the season.
If a split remains queenless at day 30, the window is still open to perform the dribble before the next queen begins laying. Always confirm the hive is truly queenless to avoid harming any developing brood.
- Dose: 5 mL per seam.
- Timing: Apply during broodless phase for best results.
- Outcome: High efficacy and cleaner hive going into honey flow or winter preparation.
Integrating VarroaVault for Automated Tracking
A simple tracking app can turn scattered hive notes into a clear health timeline for each colony. VarroaVault automates reminders and keeps your records consistent so you spend less time guessing and more time working with your bees.
The app schedules the critical 30‑day count automatically, so you never miss the window that predicts future mite pressure. Link a parent hive to a new split and the system preserves a complete history for comparison.
- Log sugar counts and frame checks quickly on a phone or tablet.
- Track the number of mites and follow trends across multiple hives.
- Compare colony outcomes and honey yields to past records.
| Feature | Benefit | Action |
|---|---|---|
| Automated 30‑day reminder | Consistent monitoring | Perform scheduled count |
| Parent-linking | Historical tracking | Review lineage performance |
| Count logging | Data-driven decisions | Adjust care per hive |
Start using the Hive Check Schedule Tool to centralize records. With automated reminders and clear logs, you can focus on growing strong colonies and protecting honey yields all season.
Avoiding Common Spring Beekeeping Mistakes
Small oversights in feeding and equipment prep can turn a promising hive into a struggling colony fast. Early attention to nutrition and disease limits loss and keeps honey goals on track.
Feeding and Nutrition
Feed a 1:1 syrup and a quality pollen substitute early in the season when natural forage is scarce. This supports brood rearing and helps the queen lay without interruption.
Use the Mountain Camp Sugar Method or similar sugar-feeding routine when weather delays nectar flow. Keep extra boxes ready to accept growth and avoid crowding.

Brood Disease Awareness
Be vigilant for signs of brood disease and act quickly. If you suspect American Foulbrood, contact your state inspector the same day. Prompt reporting protects neighboring hives and the apiary.
Manage timing for any interventions carefully. For example, place Mite Away Quick Strips only during the approved temperature window and follow label direction to avoid harming brood or the queen.
- Avoid starvation by feeding when stores are low.
- Rotate or reverse brood boxes to give the queen room to lay.
- Keep records of counts and any treatments so future colonies learn from past actions.
Monitoring Trends Throughout the First Summer
Regular counts during summer turn guesswork into clear decisions for each hive. Beekeepers should log results on fixed dates so trends are easy to read.
Perform a midsummer check on July 1 to catch rising mites before they impact brood and queen health. This pre-peak count tells you if early steps held the population steady.
On August 1 run a critical fall prep count. That number helps plan any late-season moves to protect winter stores and honey production for the year.
Track the number of mites over time to confirm whether the treatments you used were effective. If you see a spike, act quickly so the colony does not decline as brood cycles continue.
- Log each count with date and hive ID.
- Compare July 1 and August 1 results to the 30‑day baseline.
- Use trends to guide timing and the need for follow-up care.
Consistent summer monitoring keeps small problems from growing into losses. Successful beekeepers know the work continues past early checks and into every day of the season.
Verifying Treatment Success Through Follow-up Counts
Run a mite count 2–4 weeks after a regimen ends to confirm the outcome. This window captures any rebound and lets you compare a true pre‑ and post‑application result.
Use the standard efficacy formula: ((pre-count – post-count) / pre-count) × 100. Record both counts with hive ID, date, and notes about brood and honey stores.

What to expect: a result above 90% shows an effective approach. Below 80% should prompt an investigation into resistance, application errors, or timing issues.
- Document the pre-count and the post-count for every hive.
- If you used oxalic acid or another approved method, note dose, device, and days applied.
- Compare results across hives to spot patterns and resistant colonies.
| Range | Interpretation | Action |
|---|---|---|
| >90% | High efficacy | Continue monitoring |
| 80–90% | Moderate efficacy | Recheck in 14 days; review application |
| Low efficacy | Investigate method; consider alternatives |
Consistent verification protects brood and maintains honey goals. Run follow-up counts, record results, and adapt your plan based on data to keep colonies healthy.
Preparing for Fall Prep and Winter Survival
Fall preparation marks the point where careful work secures colony survival through winter. Watch mite levels closely as the colony shifts to raise winter brood. A low count now protects the long-lived bees that must carry the hive to spring.
The treatments you used in spring and summer set a foundation, but fall confirms readiness. Keep the queen healthy, check stores, and confirm frames with solid brood and adequate honey. If mites creep up, plan a targeted approach on a clear day.
Every beekeeper should verify hive strength and insulation in late season. Add outer covers or mouse guards and ensure ventilation without drafts. Healthy bees with good stores need less emergency feeding in cold spells.
- Monitor mite numbers and recheck counts as days shorten.
- Protect the queen and winter brood by keeping stress low.
- Secure honey stores and weatherproof hives for the year ahead.
For a step-by-step checklist, review our fall preparation guide to finish strong and give your colonies the best chance at spring success.
Conclusion
Data and routine keep queens healthy and colonies strong. Start independent monitoring on day one and log a reliable 30‑day count to set your baseline.
Act on clear signals: use approved options such as oxalic or formic and choose the right treatment for colony size and brood pattern. Timely steps limit mite growth and protect honey goals.
If you have questions, consult local experts or use tools like VarroaVault and our seasonal tasks guide to organize records. Consistent counts and prompt action give your bees the best chance to thrive all season.