Keeping your apiary clean protects colonies and preserves honey production. The National Bee Unit urges strict hygiene when managing outbreaks like American foulbrood, since spores can survive in an environment for decades.
Remove wax, propolis, and debris first, then choose a proven method: diluted bleach, boiling solutions, steam, or controlled flame for wooden boxes. Proper washing and a correct contact time help neutralize hardy spores and bacteria.
Personal safety matters. Wear gloves and eye protection when handling chemical solutions and use caution with flame methods near wooden parts or brood boxes.
For detailed cleaning steps and maintenance guidance, consult this practical guide on cleaning beekeeping equipment: clean and maintain beekeeping equipment.
Key Takeaways
- Follow strict hygiene to reduce cross-contamination between hives.
- Clear wax and propolis before applying any sanitizing solution.
- Use bleach, boiling, steam, or flame methods depending on material and contamination.
- Wear gloves and eye protection when handling chemicals or open flame.
- Contact the National Bee Unit for suspected serious infections.
- Dry and store equipment in ventilated, dry areas to prevent regrowth.
The Importance of Apiary Hygiene
Keeping beekeeping equipment clean protects colonies and preserves honey production. The National Bee Unit warns that bees live in close contact, so infections can spread quickly across a yard.
Regular cleaning of frames, boxes, and a good hive tool prevents wax and propolis buildup. These residues can hide pests and harmful microbes that stress the queen and brood.
Routine checks matter. Inspect boxes and equipment often and remove debris promptly. A steady maintenance habit lengthens the life of wooden ware and saves money on replacements.
- The National Bee Unit notes social bees spread infections fast—cleaning reduces that risk.
- Well-maintained tools and boxes cut chances for small hive beetles and wax moths.
- Consistent hygiene practices support stronger colonies and better honey harvests.
For practical routines on keeping a clean work flow between colonies, see this guide on sanitizing hive tools between colonies.
How to Disinfect Hive Tools After Disease
Begin by isolating used equipment and choosing an appropriate sterilization process.

Sterilization of Instruments
Immersion is the benchmark for killing AFB spores. Research supports a 0.5% sodium hypochlorite soak for twenty minutes to inactivate tough spores and many bacteria.
Plastic components respond well to scrubbing with a soda solution before chemical treatment. Wooden boxes and frames need thorough removal of wax and propolis first, then a chosen method that reaches pores in the wood.
Severing Transmission Paths
Always treat every tool and hand‑held piece, including the hive tool and bee brush, with a professional disinfectant after contact with an infected colony.
- Never rely on the heat from a smoker; it fails against persistent pathogens.
- Wear protective gloves when handling bleach or strong solutions.
- Allow all equipment to dry fully; moisture can harbor new bacteria or fungi.
| Material | Recommended Action | Contact Time / Note |
|---|---|---|
| Metal tools | Soak in 0.5% sodium hypochlorite | 20 minutes; rinse and air dry |
| Plastic parts | Scrub with soda solution, then disinfect | Scrub first; follow with chemical contact time |
| Wooden boxes & frames | Remove wax/propolis; use thermal or chemical methods | May require longer treatment; ensure full dryness |
| Brushes & PPE | Professional-grade disinfectant after each use | Treat immediately after contact with an infected colony |
Quick action cuts spread. If you handled a compromised colony, clean gear at once and follow safe handling steps. For tips on renewing plastic foundation and cleaning after losses, see this guide: clean plastic foundation after colony loss.
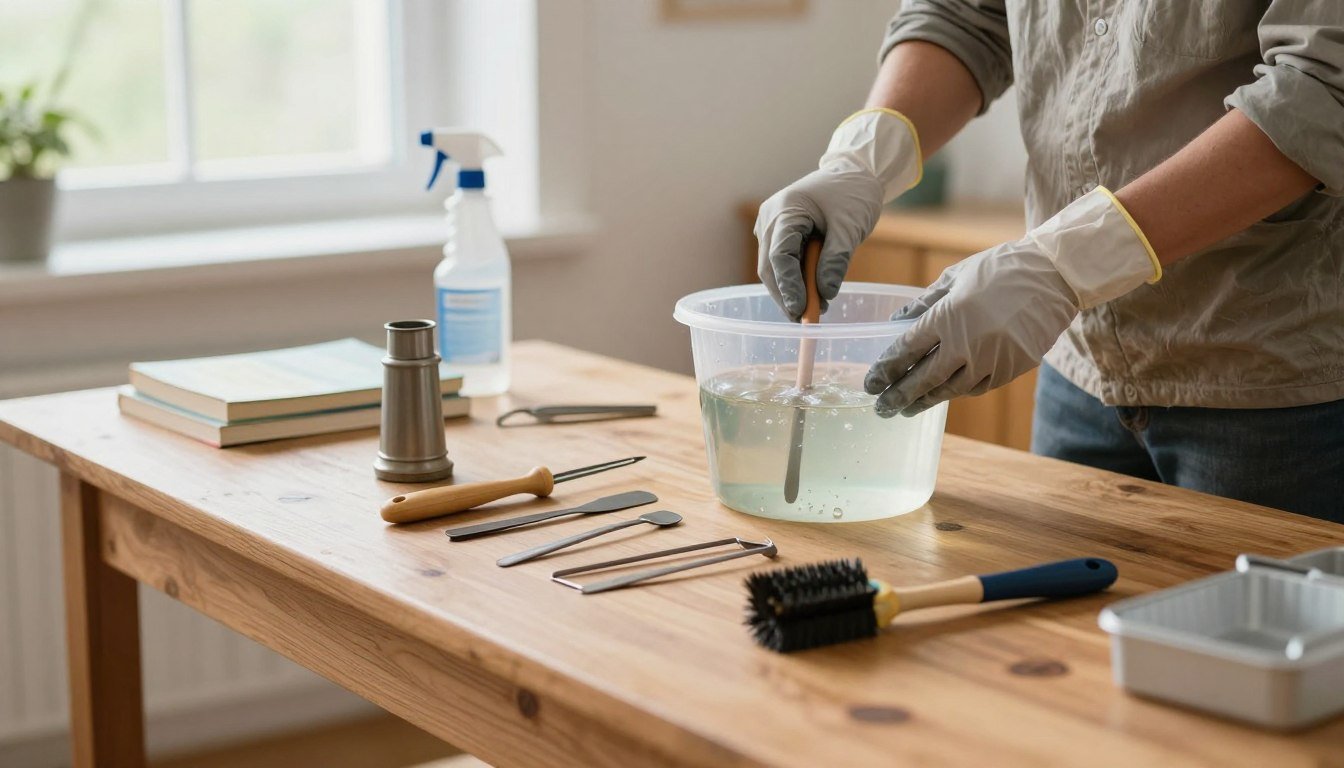
Preparing Your Equipment for Decontamination
Start by isolating each part and removing visible buildup before any chemical or thermal step.
Mechanical Scraping and Debris Removal
Freeze and sort. Place frames, boxes, and loose parts into a chest freezer at -20°C for at least 48 hours. This kills wax moth larvae and limits pest spread.
Scrape thoroughly. Use a sturdy hive tool or paint scraper to remove wax and propolis from boxes, frames, and runners. Work on a clean, stable surface to avoid recontamination.
Catch scraped debris on cardboard or newspaper and burn it immediately, as recommended by the National Bee Unit. Focus on internal corners and frame runners where pathogens hide in nooks and crevices.
- Replace badly soiled frame runners when possible to remove reservoirs of contamination.
- Always wear gloves while scraping; this protects your hands and maintains apiary hygiene.
- Mechanical cleaning is essential because bleach and other solutions cannot penetrate thick wax or propolis layers.
| Step | Action | Why it matters |
|---|---|---|
| Freezing | -20°C for 48 hours | Kills wax moth larvae and reduces pest re-infestation |
| Scraping | Paint scraper or hive tool; remove all wax/propolis | Exposes surfaces so solutions can reach microbes |
| Debris disposal | Collect and burn on cardboard/newspaper | Prevents spread of spores and larvae |
| Replacement | Swap damaged frame runners | Removes hidden contamination reservoirs |
Next steps. After debris removal, proceed with thermal or chemical methods suited for plastic or wooden parts. For flame methods and detailed sterilization options, consult this guide on sterilizing with flame and the full cleaning protocol from the National Bee Unit.
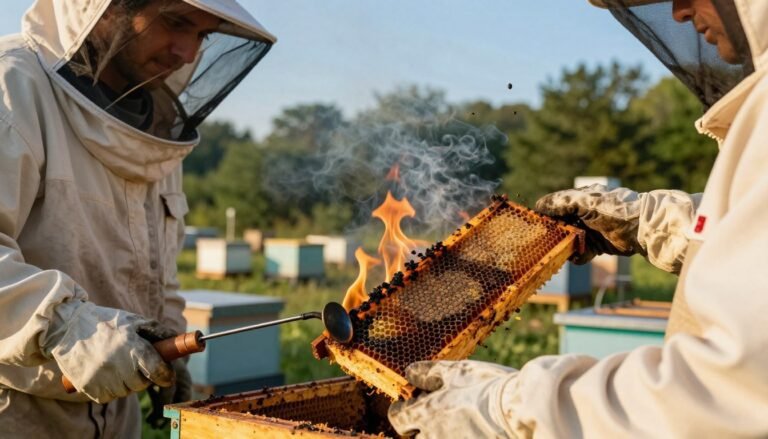
Thermal Sterilization Techniques for Wooden Ware
A controlled flame is a reliable route for treating wooden boxes that resist chemical baths. Use a blow torch and work until the timber has a uniform coffee-brown color. Pay special attention to corners and cracks where spores hide.

Safety is essential. Keep a bucket of water nearby in case smoldering starts. Work in a well-ventilated spot away from wind and other ignition sources.
- Thermal sterilization with a blow torch destroys spores and bacteria that survive mechanical cleaning.
- Never apply flame to plastic or polystyrene hives; they will melt and become unserviceable.
- When treating frames, avoid overheating metal joints or soldered parts to prevent damage.
- The heat also boils off propolis and wax residues, leaving boxes ready for the next colonies.
Wear safety glasses and gloves and inspect equipment after cooling. Regular thermal care of wooden equipment supports healthier bees and better honey yields.
For full protocols on cleaning and sterilizing beekeeping equipment, see this practical guide: cleaning and sterilizing beekeeping equipment.
Chemical Disinfection Methods for Hive Components
Well-mixed solutions tackle spores on contact and help restore contaminated boxes and frames. Chemical methods work where heat or scraping cannot reach porous surfaces.
Bleach Solution Ratios
Use a 0.5% sodium hypochlorite mix in cool water for a 30-minute soak. This concentration reduces hardy spores on metal and plastic parts without rapid corrosion when followed by a proper rinse.
Working with Soda Crystals
Dissolve 1 kg of soda crystals into 4.5 liters of hot water and add a dash of washing-up liquid. Scrub frames, plastic feeders, and a hive tool with a wire brush in this solution to remove wax and propolis.
Rinsing and Drying Protocols
Rinse thoroughly with plenty of hot water after any chemical treatment. Never mix bleach with other cleaners; mixing creates dangerous gases.
- Wear protective gloves and eye protection during all steps.
- Allow parts to air in direct sunlight until fully dry—this helps remove residual bleach and protect colony pheromones.
- For further guidance on safe cleaning mixtures and concentrations, consult this practical note on bleach solution for beekeeping equipment and this step-by-step on cleaning a hive tool.
Managing Contaminated Protective Gear
Treat clothing and gloves as essential pieces of equipment in your beekeeping routine. Your suit and outerwear can carry spores, propolis, honey, and wax between colonies if neglected.

Use nitrile or washing-up gloves for inspections. These can be cleaned or discarded quickly, lowering cross-contamination risk. If leather gloves touch a notifiable infection, dispose of them—leather is hard to sanitize.
Seal used gloves in a bag before discarding so foraging bees are not attracted by honey residues. Scrub wellington boots in a washing soda solution and wipe other footwear clean of mud, wax, and honey.
Launder bee suits at high heat. Add soda crystals to detergent to remove propolis and protect fabric zips and hoods by securing them inside before washing.
- Keep a spare set of gloves and a clean suit on site.
- Clean surfaces that contact your gear after inspections.
- Good gear care cuts the risk of spreading infection across hives and protects your honey harvest.
“Consistent cleaning of protective equipment is vital for a healthy apiary.”
For further guidance on managing contaminated protective gear, see this practical note on managing contaminated protective gear.
When to Destroy Infected Equipment
If contamination threatens other colonies, destruction may be the correct, responsible action. This protects neighboring hives and preserves long-term apiary health.
Report notifiable infections immediately. American foulbrood and European foulbrood are statutory and must be reported to the National Bee Unit. Your local inspector will confirm the diagnosis and advise on euthanasia or burning of frames.
Identifying Notifiable Conditions
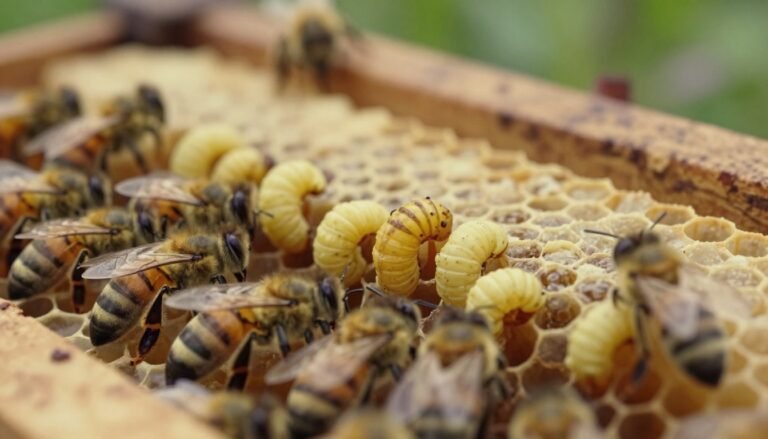
Signs of AFB or severe brood infections include sunken or perforated brood cappings and a foul odor. If you see these, do not attempt risky fixes alone. Spores can persist in the environment for decades.
- Legal duty: report suspected american foulbrood or EFB via the reporting requirement.
- Wooden boxes and frames infected beyond repair should be burnt in a pit at least 45 cm deep and covered afterward.
- Plastic hives or components that are contaminated and unserviceable must be handled by specialist waste services, not landfill.
- If equipment is clean, consider recycling plastic parts after checking local guidance and following recommended cleaning steps.
“Proper destruction of contaminated gear protects the health of your bees and the wider beekeeping community.”
Conclusion
strong, A steady cleaning routine protects colonies and preserves honey yields across seasons. Keep practices simple, regular, and thorough to support healthy beekeeping and stronger bees.
Maintain equipment with mechanical, chemical, and thermal steps as required. Check frames and remove crusted wax before any treatment so parts last longer.
Treat every tool and box seriously. Repair damaged wooden ware and plan repairs well in advance—see this guide on repair damaged hive boxes for tips on fixing wood and plastic parts.
Stay vigilant. If you suspect a notifiable infection call your inspector. Good cleaning habits and careful equipment care mean healthier hives and better honey for seasons ahead.
FAQ
What steps should I take immediately after finding a sick colony?
Isolate the affected hive from the apiary and limit contact. Wear disposable gloves and a dedicated apron or suit. Remove and bag heavily contaminated frames, wax, and propolis-coated parts for treatment or disposal. Clean visible debris from tools with a stiff brush and hot water before any further handling. Notify your state apiarist if you suspect notifiable pathogens such as American Foulbrood.
Which methods reliably sterilize metal instruments and plastic parts?
For metal and robust plastic, use a two-step approach: mechanically remove wax and propolis, then apply thermal or chemical treatment. Flame sterilization with a propane torch quickly incinerates spores on small metal items. Submerging tools in a 10% household bleach solution for 10–20 minutes followed by thorough rinsing is effective for many pathogens. Always dry completely to prevent corrosion and microbial regrowth.
Can wooden boxes and frames be treated, or must they be destroyed?
Woodenware can often be salvaged if contamination is light. Scrape off comb and propolis, then heat-treat boxes and frames using sustained high heat (140–160°F) for several hours in a kiln or solar dryer to reduce pathogens. If wood is deeply infected, warped, or contains visible AFB scale, destruction by burning is the safest legal and biosecure option.
What bleach ratio and contact time work best for equipment sanitation?
A 1:9 ratio of household bleach to water (about 10% sodium hypochlorite solution) is commonly used. Immerse items for 10–20 minutes, then rinse in clean water and air-dry in sun if possible. Avoid prolonged soak times on metals to limit corrosion; rinse promptly and oil metal tools after drying.
Are soda crystals (sodium carbonate) useful for cleaning hive parts?
Yes. Soda crystals dissolve wax, propolis, and organic grime without the corrosive effects of bleach. Use hot water with a strong soda solution to soak and scrub frames, plastic components, and non-lacquered metal. Follow with a disinfectant step if dealing with serious pathogens, and rinse well before returning items to service.
How should I dry and store equipment after cleaning?
Rinse thoroughly and allow full air-drying in direct sunlight when possible; UV light adds a disinfection benefit. Store clean items in sealed plastic bins or wrap in clean cloth to prevent recontamination. Keep cleaned gear separate from active hives and label containers with date and treatment used.
What personal protective gear needs special management after handling infected colonies?
Disposable gloves and single-use covers should be bagged and discarded. Wash reusable suits and jackets in hot water with detergent and an oxidizing disinfectant, or use a dedicated washing machine. Clean and disinfect footwear with a bleach footbath or spray before leaving the apiary. Replace or thoroughly decontaminate veils and gloves if heavily soiled.
When is burning equipment necessary, and how do I identify notifiable infections?
Burning is recommended when contamination is severe, when legal regulations require it, or when treatment risks further spread. Notifiable diseases such as American Foulbrood often present with sunken cappings, foul odor, and ropey larvae; confirm with your state apiarist or lab diagnosis. Follow local laws for destruction and record-keeping.
Can I use a torch on wooden frames and boxes to kill spores?
Open flame can char or warp wood and may not reach embedded spores. Controlled heat in a kiln or prolonged exposure to high temperatures is safer and more effective. Use a torch only for small metal parts and never leave open flames unattended near hives or dry wood.
How do I reduce cross-contamination risk while working in the yard?
Establish a clean zone and a dirty zone in your apiary. Use color-coded or dedicated tools per hive, change gloves between colonies, and disinfect tools between inspections. Keep water, brushes, and cleaning solutions on-site to treat equipment immediately. Minimize traffic between apiaries and report suspect disease signs promptly to authorities.
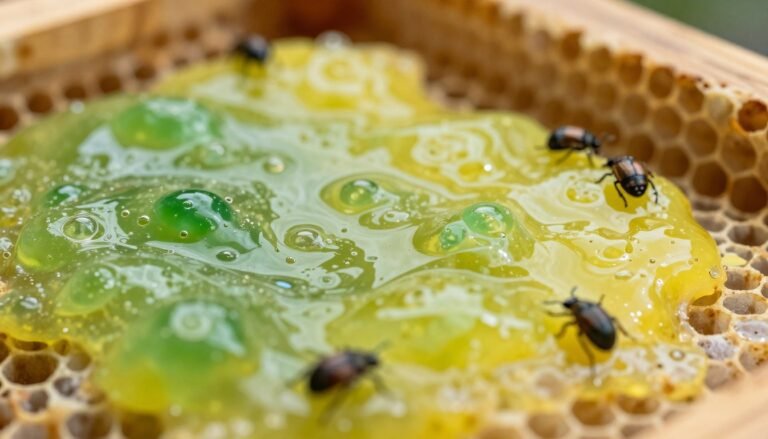
Are there specific recommendations for managing wax and honey from infected colonies?
Contaminated wax and honey should be handled conservatively. Avoid adding suspect wax to foundation making. Honey from infected hives should not be fed to bees in the yard and may need to be destroyed if linked to notifiable disease. Consult your state apiary inspector for disposal rules and testing options.
How often should I sterilize shared tools and equipment during active outbreaks?
During outbreaks, sterilize or replace tools between every hive visit. Clean scrapers and hive tools immediately after use; disinfect at the end of each row or apiary. Increase inspection intervals only after you confirm containment and negative lab results where applicable.