Every year beekeepers lose colonies, shrinking pollination income and honey yield. A nucleus is a small, portable group that contains three to five deep frames and a laying queen. This starter box gives an efficient route for adding hives in the active season.
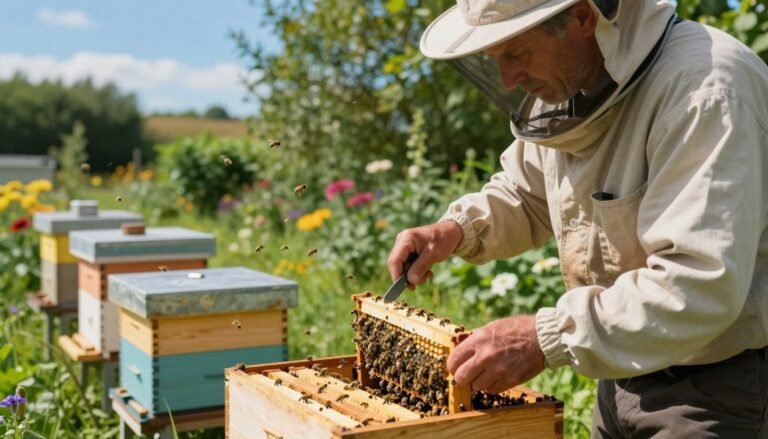
Proper care of brood, drawn comb and frame placement matters. Monitor the population of bees and available nectar during spring and summer. Watch worker numbers and larvae health each week and give support when needed.
Well-managed nucs provide revenue and resilience for local beekeeping. Use the nucleus as a source of honey, pollen stores and a strong cluster heading into fall. Focus on queen health, comb foundation and timely checks to reduce losses.
Key Takeaways
- Start early: establish nucs in the active foraging season for best results.
- Protect the queen: her survival drives brood production and population growth.
- Use drawn frames and good foundation to speed buildup of workers and comb.
- Monitor resources: check nectar flow, honey stores and worker numbers weekly.
- Plan seasonally: spring and summer efforts determine fall and winter success.
Understanding the Role of Nucleus Colonies
Nucleus units act as nimble rescue teams within an apiary when a queen fails or a hive weakens. These small nucleus groups let beekeepers respond quickly, reduce downtime in brood cycles, and preserve worker populations. Proper screening for pests and disease is essential before any transfer.
Benefits of Overwintered Nucs
Overwintered nucs arrive with a proven queen, laying pattern, and established brood. They offer a ready pool of frames, drawn comb, and workers that shorten recovery time after spring dead-outs.
- Fast restoration: introduce a nucleus into a queenless hive and skip prolonged queen introductions.
- Assessment: evaluate queen fecundity and brood pattern before larger transfer.
- Income: sell surplus nucleus colonies to local beekeepers.
Correcting Queen Issues
Queen events—loss by injury, departure with a swarm, or poor performance—drive short-term losses, per the Bee Informed Partnership. Nucleus colonies are ideal for replacing underperforming queens or correcting laying worker situations.
“Maintaining a queenright unit keeps the brood cycle steady and supports worker numbers.”
| Use | Advantage | When to Deploy |
|---|---|---|
| Replace queen | Immediate brood restoration | After queen event or poor laying |
| Repopulate dead-out | Cost-effective vs. packages | Early spring |
| Boost weak hive | Supports high nectar flow duties | Peak season |
How to Build Up Colony Strength Before Winter from a Nuc
A compact nucleus needs careful timing and space so the queen can fill frames with eggs.
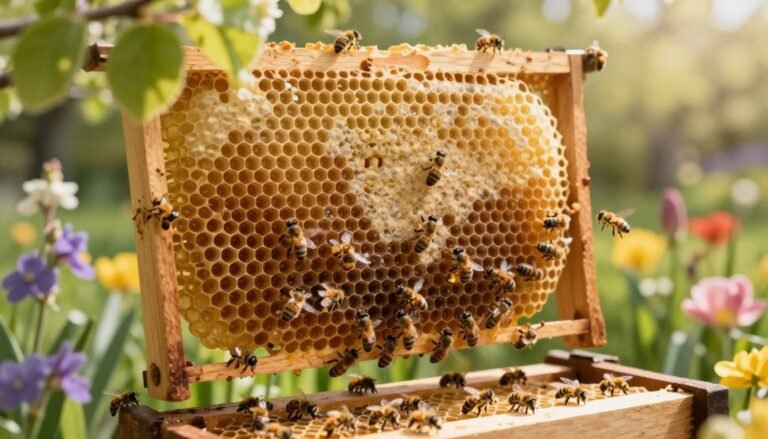
Give the box several drawn frames and workable foundation. This prevents the queen from being restricted and lets brood expand quickly.
Track the number of frames covered by workers each week. Growth correlates with covered frames and the amount of brood present.

During the nectar flow, inspect for rapid population gains and extra food stores. If local nectar is scarce, feed light sugar syrup to keep growth on schedule.
Move the nuc to a fresh yard when possible to reduce flyback drift and retain workers. Ensure the cluster can thermoregulate the nest in the first 20 days after installation.
- Target: aim for about 20 frames of bees before the main honey season.
- Monitor: weekly checks on brood, larvae, and worker numbers.
- Adjust: add drawn comb or another frame when the queen reaches laying capacity.
For more on practical population increases, see boost colony population naturally.
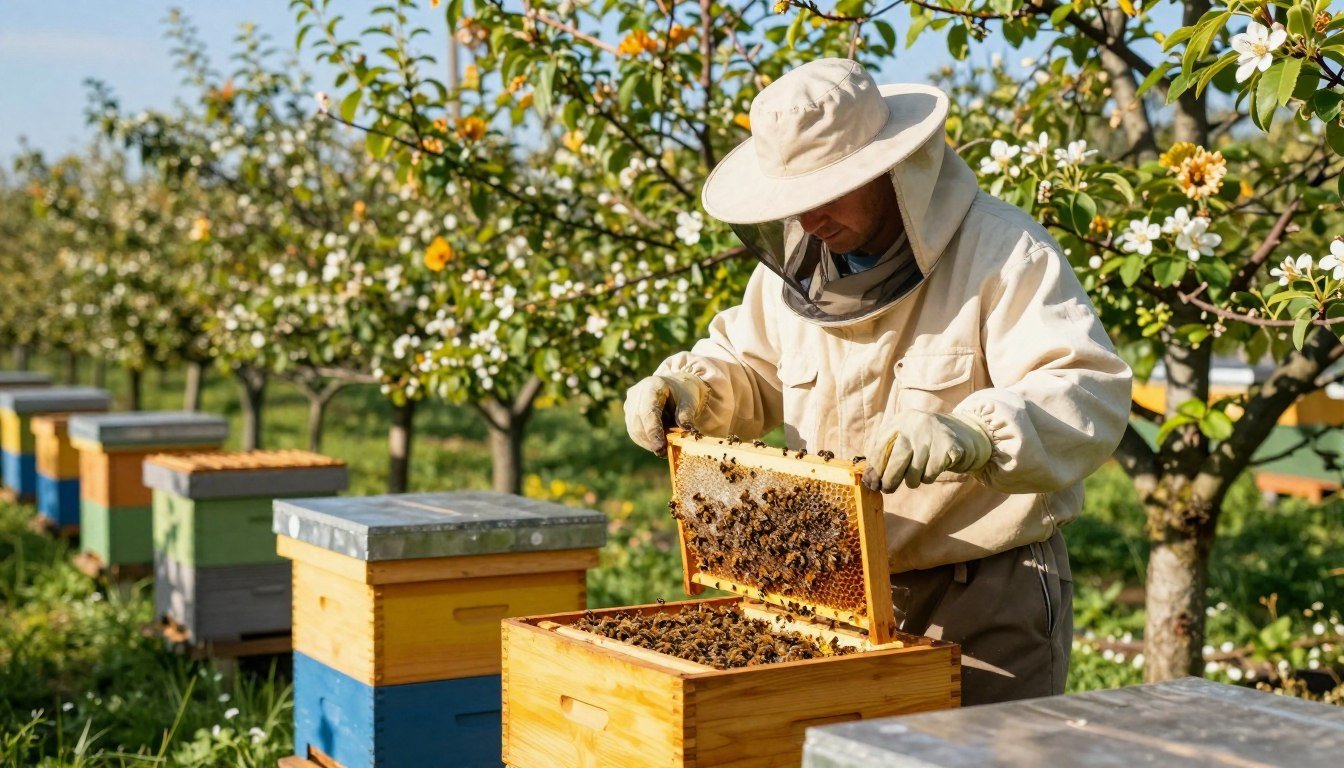
Selecting Healthy Donor Colonies
Pick hives with consistent egg-laying, plenty of drawn comb, and high worker numbers. A reliable donor shows even capped brood and healthy open larvae on the frames.
Only use strong, disease-free donor colonies. Check Varroa levels and confirm they sit below the treatment threshold of 3% to 5%. Feed the donor for six weeks before making the nuc to boost stores and population.
When selecting a brood frame, choose a mix of capped brood and open larvae plus some honey and foundation. Avoid bringing the donor queen into the new box by scanning frames carefully.
If one hive has an unusually large population, you can often split it into multiple nucs. Conversely, combine frames from two donor colonies when single-hive numbers are low.
Prepare the nucleus box with an extra feeder top and proper ventilation. By selecting drawn comb and honey-filled frames you give the new unit the best start for spring and fall development.
For guidance on disease checks before purchase, read this inspection guide: inspect purchased nucs for disease risk.
Essential Equipment for Nuc Assembly
Assembling the right gear makes the difference between a thriving nucleus and a slow starter. Gather clean parts, tools, and a prepared feeder top before any transfer.
Ventilation and entrance sizing matter. Cut a 1 1/4-inch by 5/16-inch entrance to help guards repel intruders. Drill a 1-inch ventilation hole on each short side and cover both with #8 hardware cloth.
Keep these items on hand for quick inspections and growth:
- Several empty frames and drawn comb for expansion
- Bee brush and spray bottle with sugar solution for gentle handling
- Bottom board designed for IPM and pest checks
- Telescoping cover and inner cover for weather protection
Invest in multiple 5-frame boxes if you plan several splits. Clean, easy-to-manipulate equipment speeds checks for the queen and brood, and lowers disease risk.

| Item | Purpose | Recommendation |
|---|---|---|
| Entrance slot | Defense and traffic control | 1 1/4″ × 5/16″ |
| Vent holes | Airflow and moisture control | 1″ holes, #8 hardware cloth |
| Feeder top & frames | Food support and comb space | Feeder top plus spare drawn frames |
For assembly diagrams and purchase notes, review the double-nuc instructions and guidance on buying packaged bees and nucs.
Timing Your Nuc Establishment
Plan the start date around local bloom windows so the queen’s egg-laying matches forage availability and the new unit can expand steadily.
Spring Establishment
May 20 is a useful target for many areas. A May start gives time for workers and brood to grow before the main nectar flow.
Watch swarm signals carefully. Avoid too many brood frames in early spring so the box does not overfill too fast.
Summer Peak Flow
A June 20 placement should include two frames of drawn comb and two frames of mixed brood. This mix speeds expansion during peak forage.
Post-Flow Considerations
A July 20 unit must enter the fall with solid food and strong worker numbers. In higher, cooler regions aim for a July 4 cutoff for reliable overwintering.
Adjust dates for local phenology and monitor population weekly. For guidance on purchasing established starters, see overwintered nucleus colonies.
Introducing Mated Queens for Success
Introducing a mated queen correctly gives the new unit the best chance at steady population growth.
Purchase a fresh mated queen from a reputable source whenever possible. This is the most reliable route for an overwintering nucleus. If workers must raise a queen from open brood, expect a six to seven week delay before new progeny emerges.

When you introduce a caged queen, remove the cork from the candy plug but do not poke through the candy. Many beekeepers wrap the candy plug with paper-based masking tape to slow release and improve acceptance.
Place the cage between frames of open brood with the screened side facing an empty space so workers can access her. If attendants share the cage, orient it candy side up so dead bees do not block the exit.
Close the box and avoid inspections for at least seven days. After one week, check the cage. If the queen has not been released, free her carefully so she does not fly off.
“A well-mated queen is essential for the unit to build the necessary population and food stores before onset of winter.”
| Action | Reason | Timing |
|---|---|---|
| Buy mated queen | Faster brood production and stable lay pattern | Early spring or before nectar flow |
| Candy plug with tape | Delays release for better acceptance | At introduction |
| Place cage among open brood | Allows workers to feed and scent the queen | Immediately when adding cage |
| Wait seven days | Reduces rejection risk and disturbance | Post-introduction |
Managing Bee Populations and Brood
Successful brood management hinges on clear ratios: enough workers per brood frame and stores placed nearby for the cluster.
Aim for a balance: a single frame of brood at about 65% coverage can yield roughly 4,500 workers, which will cover two full frames. Track the number of frames brood each week and compare that to your worker population.
Consolidate the brood nest and keep honey stores above it. This supports thermoregulation and feeding. During the nectar flow, add a second box or extra drawn comb to reduce swarm pressure.
- Relieve crowding: remove a brood frame and give it to a weak hive if the nuc grows too tight.
- Watch timing: population often dips about five to six weeks after establishment — plan inspections accordingly.
- Reinforce weakness: transfer frames of brood from strong hives rather than using packages when possible.
Regular checks help ensure the queen has space and that workers match brood needs. Clear management of the brood nest gives the best chance for healthy colonies when seasons change.
Controlling Varroa Mites in Small Colonies
Varroa pressure can topple a tiny hive quickly, so treatment choice matters for survival.
Adjust doses for small units. Most standard mite products target full-size hives, not five-frame boxes. For HopGuard II and Apivar, use one strip per five-frame colony. For Apiguard, apply a 25-gram dose with the proper pads.
Oxalic acid works well on small numbers when legal in your state. Apply 5 milliliters of solution between each frame of bees, following label and local regs.
Non-chemical tactics matter. Breaking the brood cycle during summer helps reduce mite reproduction. Combine this with timed treatments and you lower long-term pressure.
Monitor levels weekly. Small populations can swing fast, and early detection keeps queens and brood safe.
Beekeepers must follow label directions and check state rules for oxalic acid. For basic mistakes and prevention tips, review this short guide on beginner mistakes.

| Treatment | Dosage for five-frame box | When to use | Notes |
|---|---|---|---|
| HopGuard II | 1 strip | During treatment window in summer or fall | Safe for small boxes when label followed |
| Apivar | 1 strip | Use when infestation detected | Low toxicity to bees; remove per instructions |
| Apiguard | 25 g per application | Warm weather period for thymol efficacy | Use delivery pads for even distribution |
| Oxalic acid | 5 ml between each frame | When brood is low or per label | Check state registration and safety rules |
Feeding Strategies for Winter Stores
Late-summer feeding sets the stage for a nucleus that can ride out cold months with minimal losses.
Begin feeding in August or immediately after the nectar flow ends. Use a heavy syrup made of two parts sugar to one part water. This mix helps bees process and store food as honey.
Target about 45 pounds by the time feeding stops. Regularly heft each box so the beekeeper knows if weight matches the calendar date.

Sheltered jars with perforated lids work as top feeders. Keep them out of direct sunlight and protect openings during bad weather so water does not run into the hive.
Feeding early lets the brood nest consolidate into a warm cluster with stores overhead. That placement matters as the cluster moves upward in cold days.
“Consistent feeding helps maintain population and health through the winter.”
| Action | Purpose | Notes |
|---|---|---|
| Feed in August | Build winter stores | After nectar flow ends |
| Use 2:1 syrup | Efficient storage | Two parts sugar, one part water |
| Heft weekly | Check target weight (~45 lb) | Adjust feeding as needed |
| Protect feeders | Prevent dilution | Shelter from sun and rain |
For broader apiary planning and seasonal guidance, see the sustainable apiary plan.
Providing Thermal Protection
Insulating a nuc box keeps the cluster warm and conserves honey. Nucleus units are small and lose heat faster than full-size hives. Proper shelter gives the queen and brood the environment they need during cold spells.
Start with rigid foam panels cut to fit the top, sides, and back of the box. Tape panels in place so they extend slightly past the front rim. That overhang sheds rain and reduces drafts across the entrance.
Cover the insulated box with roofing felt and secure it with strapping or duct tape. This layer adds weatherproofing while remaining easy for the beekeeper to remove in spring.
Ensure insulation never blocks the entrance or limits worker flight. Face the entrance downwind when possible; this helps shield the cluster from prevailing winter winds.
Check insulation during the colder days and after storms. A secure, breathable wrap helps bees keep their cluster temperature and lowers honey consumption through the season.

| Action | Benefit | Notes |
|---|---|---|
| Foam panels on top/sides | Thermal barrier reduces heat loss | Cut to fit; extend past front rim |
| Roofing felt cover | Weatherproofs and sheds rain | Secure with strapping or tape |
| Entrance orientation | Less wind chill on cluster | Face downwind (north/northwest protection) |
| Periodic checks | Ensures insulation stays effective | Inspect after storms and in cold snaps |
For seasonal planning and timing of nuc placement, see the best time to start beekeeping.
Monitoring Spring Development
A quick weekly lift of the box tells the beekeeper more than a long inspection inside. Hefting reveals loss of honey or sudden consumption after a mild winter. Learn the feel of a well-filled nucleus so you spot drops in weight early.
Check frames of brood and count covered frames each week. Look for even brood pattern, active workers, and growing larvae. These signs show the queen is laying at a healthy rate.
If the population needs space, add a second box with drawn comb. This gives room for the queen and reduces swarm pressure during the spring nectar flow.
Keep concise records of weight, frame counts, and any emergency sugar feeding. These notes improve management next season and help decide when a nucleus can be sold or combined.
“Regular hefting and brood checks are the fastest way to confirm readiness for the coming flow.”

| Check | What to look for | Action |
|---|---|---|
| Heft weight | Normal vs. light feel | Add 2:1 sugar if light |
| Frames of brood | Even capped and open larvae | Track weekly; add frame when full |
| Worker activity | Foraging and guard bees | Move to larger hive when strong |
For deeper population dynamics and a scientific perspective, read this colony buildup analysis.
Conclusion
A small, well-run nucleus can become the backbone of a resilient apiary when given timely care. Choose healthy donor hives, protect the queen, and give drawn comb and frames of stores. Regular checks across spring and summer keep population and worker numbers on track.
Attention to mite control, proper feeding and thermal shelter matters. These steps raise survival odds and yield more honey in the next season. For a concise guide on making up overwintered nucs, see this overwintered nucs guide.
FAQ
What is a nucleus colony and why use one for fall buildup?
A nucleus colony, or nuc, is a small, established group of bees with brood, food stores, and a mated queen. Nucs speed population growth because they already contain worker bees and drawn comb. That gives beekeepers a head start compared with packages or starting from foundation, helping the hive reach a robust winter cluster faster.
When should I establish a nuc for best results toward overwintering?
Aim for establishment during the summer nectar flow or early fall, allowing several weeks for population growth and comb expansion before temperatures drop. Timing depends on local forage, climate, and calendar; many operators create or move nucs 6–8 weeks before expected cold weather to give queens and workers time to build stores and brood.
How many frames of brood and drawn comb should a healthy nuc include?
A strong nuc typically has 3–5 frames with a mix of open and sealed brood plus drawn comb for nectar and pollen. Drawn comb saves bees costly wax production and encourages rapid expansion. If drawn comb is scarce, provide frames with foundation and encourage natural comb build during flow.
What feeding strategy helps a small colony bulk up stores for winter?
Feed fondant or dry sugar in late fall and use thin syrup during active brood rearing in summer or early fall. Provide pollen substitute or patties if natural pollen is scarce. Monitor stores regularly and avoid overfeeding syrup when cold nights begin to prevent fermentation and condensation issues.
How do I introduce a mated queen to a nuc safely?
Use a queen cage and place it between brood frames in the nuc, leaving the release candy intact for 3–5 days. Keep queens in a sheltered, calm environment and ensure the queen’s pheromones mix with colony cues. Watch for acceptance by observing calm behavior and eventual laying across frames.
What signs indicate a nuc is strong enough to survive winter?
Look for a laying queen with steady brood pattern, at least 6–8 frames of bees at fall clustering time, good stores of honey or syrup, and healthy brood of mixed ages. Low mite counts and absence of disease also predict winter success. Consider combining weak nucs rather than risking single, small colonies.
How should I manage Varroa mites in small colonies?
Monitor mite levels with sugar shake or alcohol wash, and treat when thresholds are exceeded. Use oxalic acid vaporization or dribble in broodless windows, and consider formic acid or essential oil treatments during brood periods. Integrated pest management, like drone brood removal and hygienic stock, reduces reliance on chemicals.
Can I combine nucs to make a stronger hive for winter?
Yes. When two nucs are weak, unite them using the newspaper method or direct merge during warm, calm conditions. Ensure only one queen remains to prevent fighting. Combining increases adult bee numbers and brood, improving chances of overwinter survival and spring buildup.
What equipment is essential when assembling a nuc for late season growth?
Basic needs include a quality nuc box or deep brood box, 5–10 frames with a mix of drawn comb and foundation, a screened bottom board for ventilation, an entrance reducer, queen cage, and feeders for syrup or fondant. Insulation or inner covers help with thermal protection later in the season.
How important is ventilation and entrance management for small colonies?
Proper ventilation prevents moisture buildup that can chill a winter cluster. Use screened bottom boards and small entrance openings to reduce robbing and drafts. During warm days maintain good air exchange; as cold months approach, reduce entrance size to help the cluster defend and conserve heat while still allowing humidity control.
Should I correct queen issues immediately in a nuc?
Yes. Replace poorly laying or failing queens promptly to maintain brood continuity. A young, vigorous queen ensures steady winter population replacement. If replacement is unavailable, consider requeening with a proven mated queen or uniting with a nuc that has a good queen.
How does local nectar flow affect nuc expansion and timing?
Strong nectar flows accelerate brood rearing, comb building, and food accumulation. Establish nucs ahead of peak flows so they can exploit abundant forage. If your area lacks a reliable late-season flow, plan supplemental feeding and aim for larger adult populations before cold weather.
What measures reduce risks of robbing and disease during nuc buildup?
Keep entrances small, avoid leaving open syrup or exposed frames, and conduct inspections during cool parts of the day. Quarantine new colonies briefly and inspect brood for signs of brood diseases. Maintain hygienic practices, rotate comb when necessary, and use apiary spacing to reduce drift and disease spread.
How many workers are needed in fall for a good winter cluster?
Targets vary by region, but aim for the equivalent of 6–10 deep frames mostly covered with bees at the onset of cold weather. More workers improve forage collection and insulation. If a nuc cannot reach that level, consider combining or supplementing with additional workers from other colonies.
What role does comb foundation versus drawn comb play in nuc success?
Drawn comb saves energy and time, letting bees store nectar and raise brood quickly. Foundation requires bees to build comb, which uses resources and worker time. Provide drawn comb whenever possible during critical buildup windows, and use foundation only when drawn frames are unavailable.
How long after creating a nuc should I expect population growth and comb draw?
With good forage and a laying queen, measurable growth appears within 2–4 weeks, and significant comb draw may occur during a strong nectar flow. Expect full expansion toward overwintering numbers over 6–8 weeks in favorable conditions. Monitor and intervene if progress stalls.
Are packages a viable alternative if nucs are unavailable late in the season?
Packages can start colonies but usually lag behind nucs because they lack drawn comb, brood, and established workers. If you must use packages, provide drawn comb, feed actively, and plan for a longer buildup period. Nucs remain the preferred option for faster, stronger winter preparation.
What winterization steps help a newly established nuc survive cold months?
Ensure ample stores of honey or winter feed, reduce hive volume if necessary, add moisture control like absorbent pads, and provide wind protection. Insulation around the upper box can help in severe climates. Continue mite control and minimize late-season disturbances to preserve adult bee numbers.
How often should I inspect a nuc during its growth phase?
Inspect every 7–14 days during active buildup, focusing on queen activity, brood pattern, stores, and disease presence. Keep inspections brief and gentle to reduce stress. Increase inspection frequency if problems appear, but avoid excessive disruption during nectar flows or cold snaps.