Reviewed by Elena P. · How we review
To assemble a Langstroth frame, glue and nail the two end bars to the top bar, fit the bottom bar, check that the frame is square, then slide in the foundation and nail the wedge back over it. Every guide we checked follows that order. They do not agree on how many nails to use.
This guide builds a wedge-top frame, the usual choice for wax foundation. Still deciding whether to build at all? See assembled vs unassembled frames.
Key Takeaways
- Glue the long-grain joints, nail the top and bottom corners, and add a side nail through each end bar into the top bar.
- Published patterns use 8 or 10 frame nails and 3 to 5 wedge nails; Arkansas says 1 or 2 per corner. Pick one pattern and repeat it on every frame.
- Plastic foundation snaps into grooved bars, so there is no wedge to nail back.
- Fit wax foundation in a warm room; cold wax is brittle.
- By our arithmetic, 40 frames take 320 to 400 frame nails.
Table of Contents
- What You Need Before You Start
- Step by Step: Building a Wedge-Top Frame
- Nails, Staples and Glue: Where the Sources Differ
- Fitting the Foundation
- Mistakes That Weaken a Frame
- Frequently Asked Questions
- The Bottom Line
What You Need Before You Start
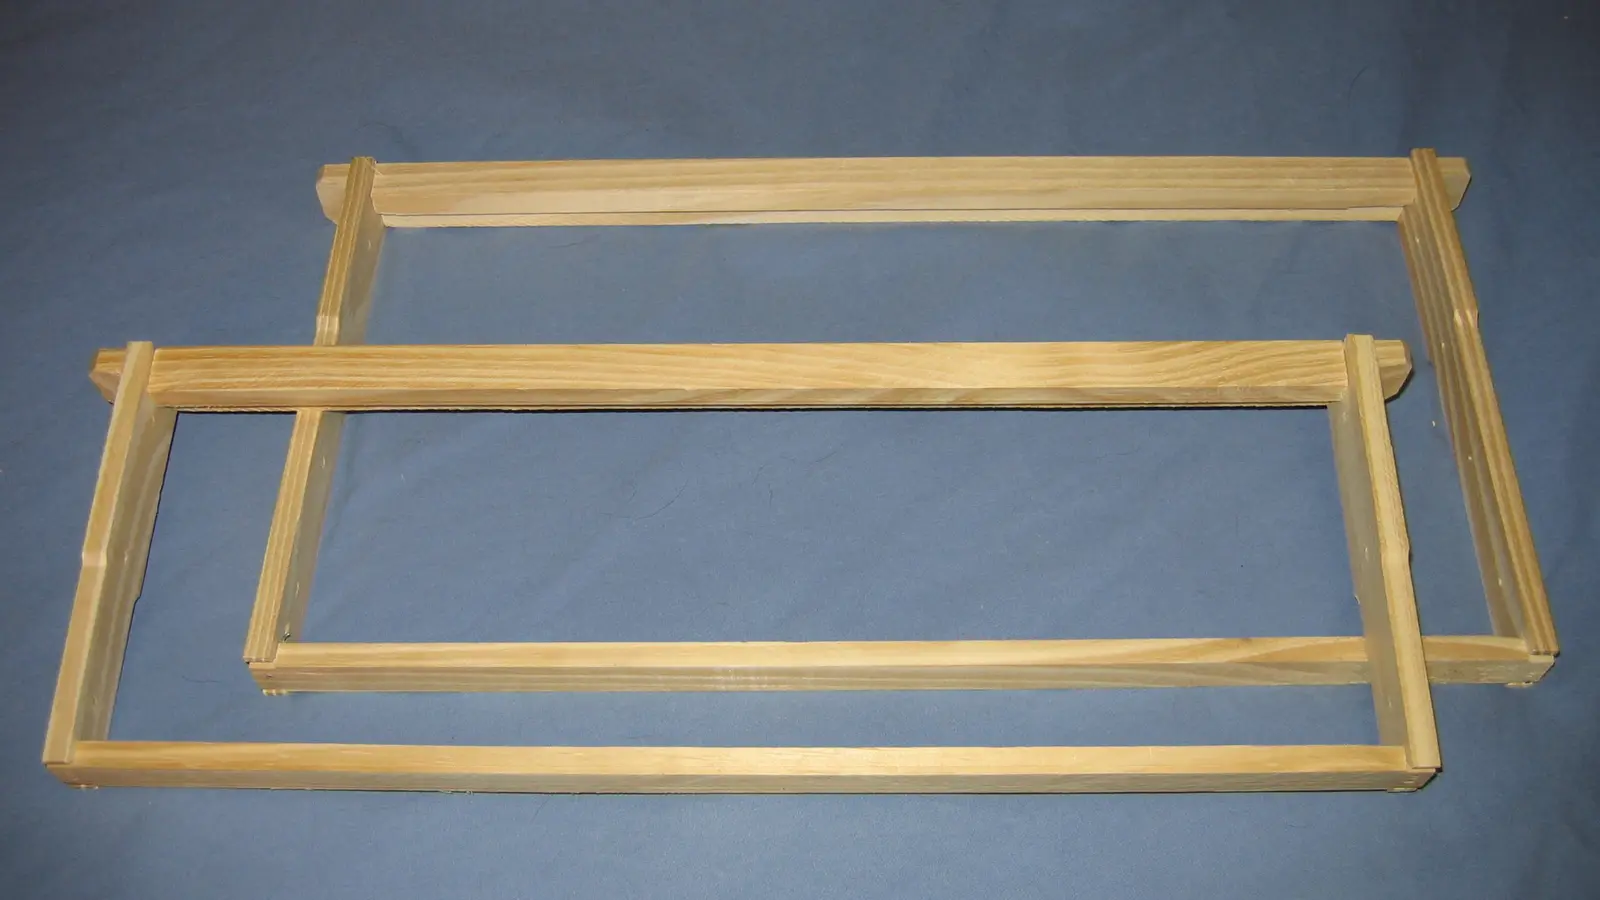
- An unassembled kit: one top bar, two end bars and one bottom bar per frame.
- Weatherproof wood glue, frame nails and shorter wedge brads.
- A hammer, a razor blade, a hive tool and a carpenter’s square.
- Paper towels for squeezed-out glue. A frame jig is optional.
Howland Blackiston, author of Building Beehives For Dummies, says to leave interior parts unpainted because paint can be toxic to bees. January to March suits the job: you have weeks before the frames are needed.
Step by Step: Building a Wedge-Top Frame
This four-minute 2021 video, made by a University of Florida Honey Bee Lab student, is chaptered into materials, cleaning, assembly, nails and foundation. Watch it first, then follow these steps.
- Clean the parts. Shave off slivers with a razor blade, then pop the wedge off each top bar and save it. You need it later.
- Test the fit. The wide ends of the end bars should sit snugly in the top bar’s notches. Shave a little wood if they are too tight.
- Glue the joints. The Guelph video explains that glue grips long-grain faces well and end grain poorly, so spread a thin coat where those faces meet.
- Join the top bar and end bars. If the end bars are bevelled on one side, face each pair in opposite directions, the same way on every frame.
- Add the bottom bar with its groove or split facing inward, where it will hold the foundation.
- Nail while the glue is wet, as Deeley advises. Drive two nails at each end of the bottom bar, flip the frame, and drive two through the top bar into each end bar. If a part splits, pre-drill; see our guide to pilot holes for frames.
- Add the side nail. Drive one nail through each end bar into the top bar, as in the diagram below.
- Check for square. Test every corner with a carpenter’s square, nudge the frame true, and wipe off glue. Build all your frames before starting on foundation.
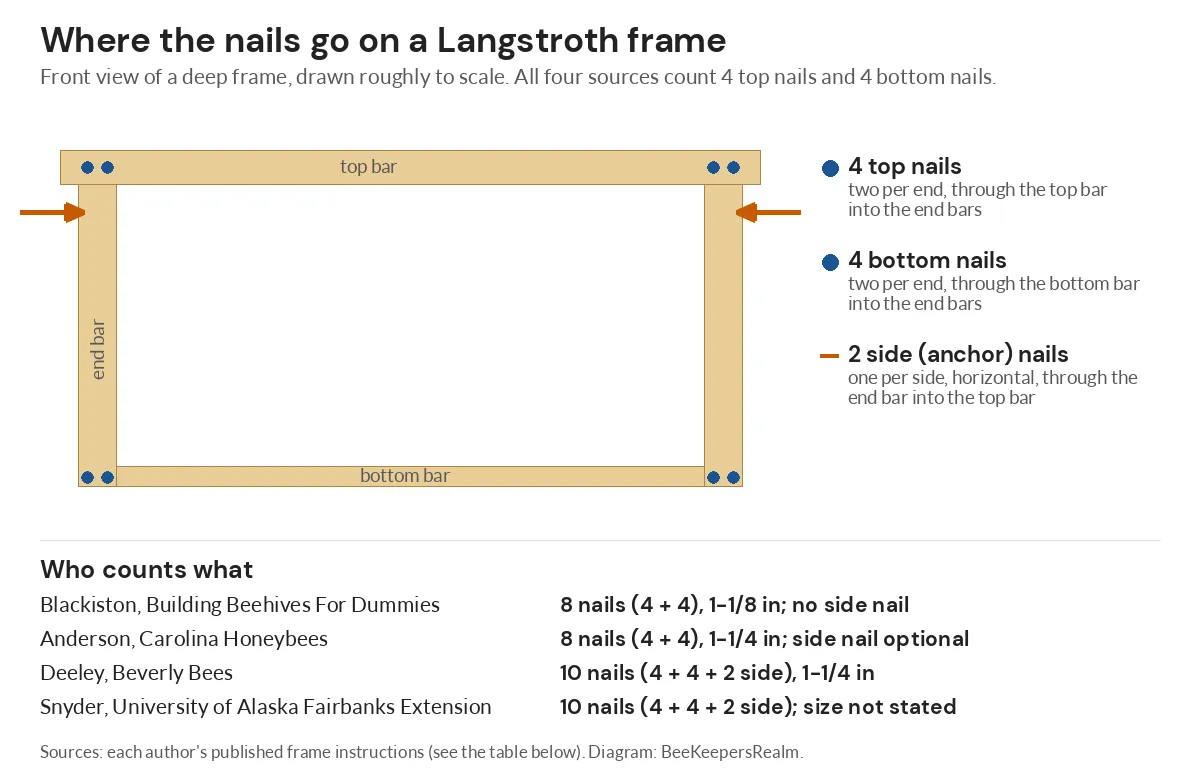
“If you’re going to be using just nails, a nail through the end bar is really important, most important nail in the frame”
The Guelph speaker’s reasoning: the main force on a frame pulls the top bar off the end bar, whether you pry with a hive tool or a full frame hangs in the box.
Nails, Staples and Glue: Where the Sources Differ
| Source | Frame nails | Side nail | Wedge | Glue |
|---|---|---|---|---|
| Blackiston, Dummies | 8, 1-1/8 in | Not mentioned | 3 brads, 5/8 in; no glue | Every joint |
| Anderson, Carolina Honeybees | 8, 1-1/4 in | Optional | Not covered | Small amount |
| Deeley, Beverly Bees | 10, 1-1/4 in | Yes, one per side | Not covered | A dab per joint |
| Snyder, Alaska Extension | 10, size not given | Yes, one per side | 5 nails | Sometimes |
| Zawislak, Arkansas Extension | 1 or 2 per corner | Yes, “anchor nail” | A couple of tacks or brads | Every joint |
Our arithmetic: a starter hive of two deeps and two mediums holds 40 frames at 10 per box. At 8 nails a frame that is 320 frame nails; at 10, 400. If every frame takes wax foundation, 3 to 5 wedge nails each add 120 to 200 more.
On staples, Arkansas accepts nails or staples but warns that either can shoot out the side if not driven straight. On glue, the sources split.
“Glue sometimes is used but makes later disassembly difficult.”
Arkansas says glue every joint, then nail. If you plan to rebuild frames with new foundation, Alaska’s caution matters. Otherwise glue plus nails is the majority practice here.
Fitting the Foundation
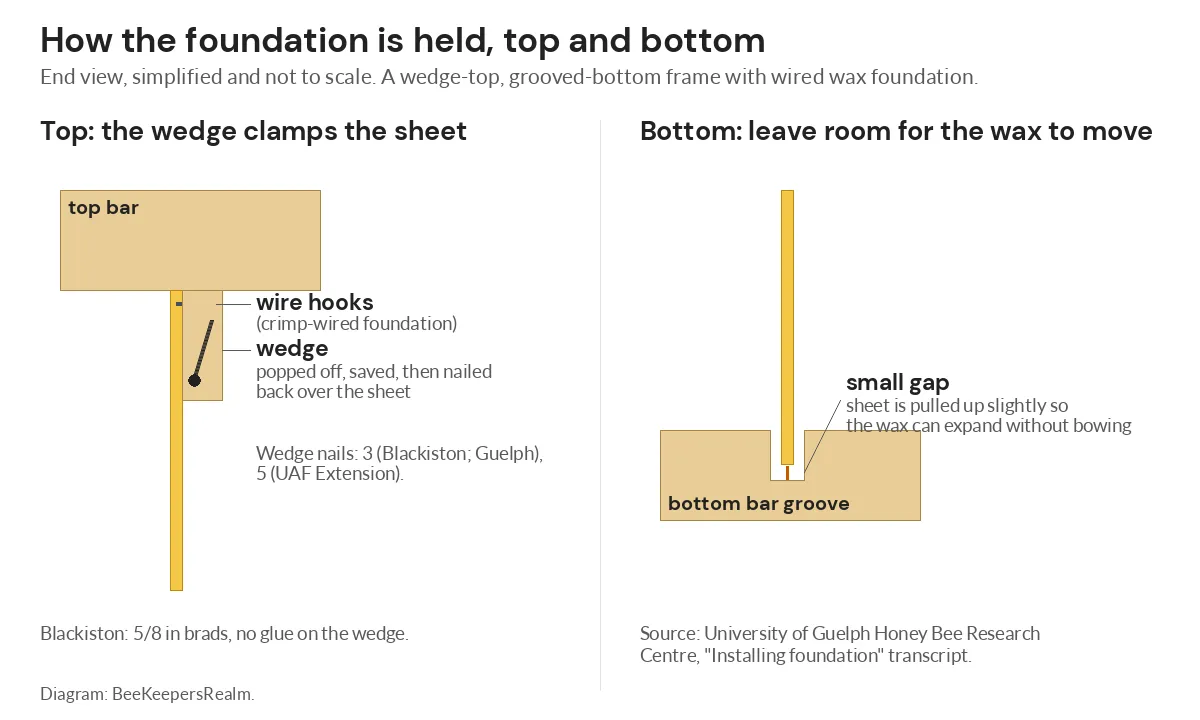
For wired wax foundation, Blackiston drops the sheet’s flat edge into the bottom bar, works the hooked wires into the gap where the wedge sat, centers the sheet, then tacks the wedge back with a brad in the middle and one at each end. Support pins, two per end bar, hold the sheet from the sides. For cross-wiring, see wiring wax foundation.
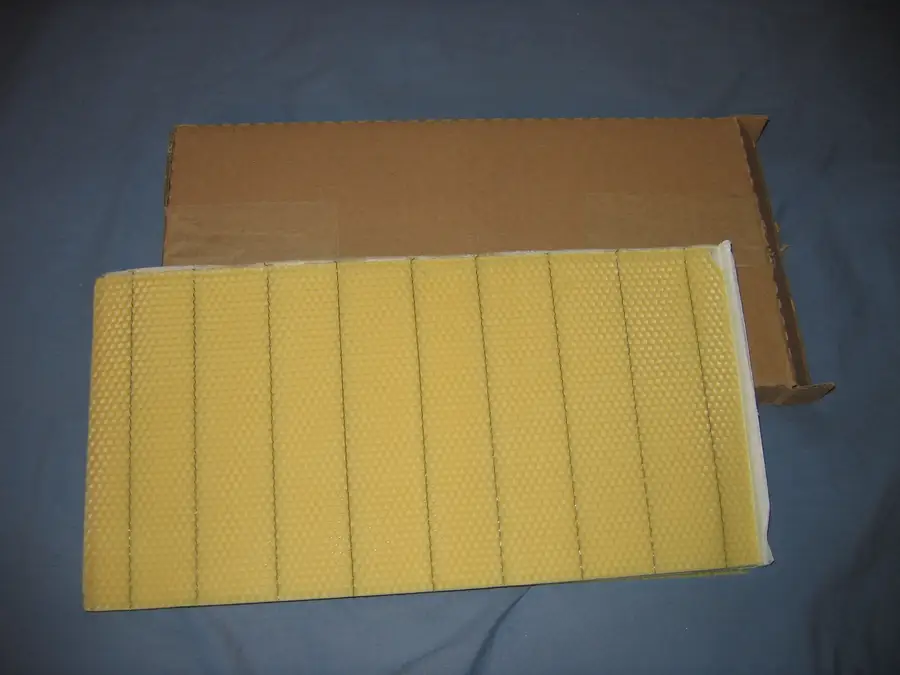
Two details come from the Guelph foundation video. Fit the sheet in a warm room, because cold wax is brittle. And pull it up slightly before nailing the wedge, so the bottom groove leaves room for expansion.
Plastic foundation is simpler. Arkansas says it usually snaps into grooves in the top and bottom bars, and Guelph’s speaker seats it by bending it into the groove, so there is no wedge to nail back. See grooved vs wedged top bars and plastic vs wax foundation. Foundation height must match frame depth; our frame sizes guide lists both.
Mistakes That Weaken a Frame
- Skipping the side nail. Arkansas notes the vertical nails eventually pull loose when you lever stuck frames out.
- Grooves facing outward. The kerf or split must face inside the frame to hold the foundation.
- Leaving it out of square. Correct it before the glue grabs.
- Fitting wax in the cold. It turns brittle.
Foundation errors have their own list: foundation installation mistakes.
Frequently Asked Questions
How do I put a beehive frame together?
Glue and nail the end bars to the top bar, fit the bottom bar, nail it, add a side nail, square the frame, then fit foundation and re-nail the wedge.
How many nails does a Langstroth frame need?
Sources use 8 or 10 for the frame, or 1 or 2 per corner (Arkansas), plus 3 to 5 on the wedge.
What size nails go in frames?
Blackiston uses 1-1/8 inch; Anderson and Deeley use 1-1/4 inch. Anderson says a nail need only be long enough to join the parts and thin enough not to split the wood.
Can I use staples instead of nails?
Arkansas Extension says nails or staples, driven in straight.
Do plastic-foundation frames need a wedge?
No. Grooved bars hold plastic foundation; the wiring Arkansas describes is for wax.
How do I keep frames square?
Check each corner with a carpenter’s square before and after nailing, or build them in a jig.
The Bottom Line
Choose one nail pattern, glue the long-grain joints, add the side nail and square every frame. Fit foundation in a warm room once the glue has set. Building a box too? Our hive box glue guide covers it.
Image credits: Hero photo: Robert Engelhardt, via Wikimedia Commons, CC BY-SA 3.0, cropped.