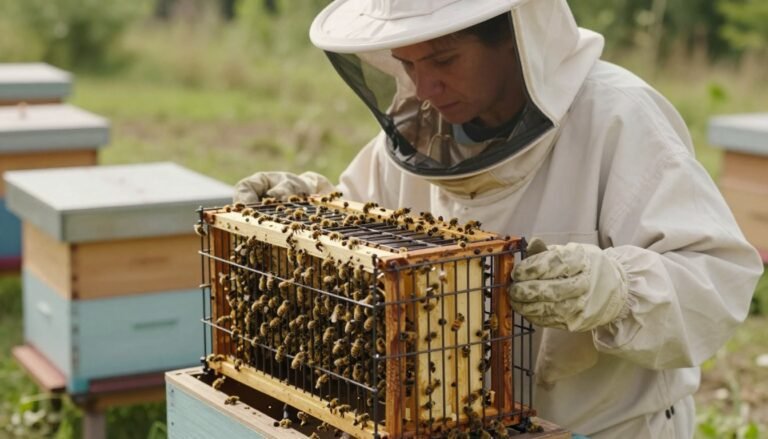
Introducing a new queen to a honey bee colony is a core beekeeping skill that must be done with care. The USDA CARE award (2020-68008-31409) supported research into methods that cut risk and improve acceptance.
A poor introduction can lead to the colony rejecting or killing the queen. Beekeepers choose between fast access and timed confinement inside a cage to balance acceptance and ease.
Workers rely on pheromones and time to accept a newcomer. A healthy queen provides eggs and scent that hold a hive together.
This guide explains how to prepare the colony, protect the queen inside a cage, and minimize risk during queen introduction. For detailed methods and timelines, see a practical overview at methods of introducing a queen bee.
Key Takeaways
- Plan carefully: preparation reduces the chance the colony will reject the queen.
- Using a cage for gradual exposure improves acceptance and lowers risk.
- Watch workers closely; they may bite or ball the cage if they sense a stranger.
- A healthy queen and placing her near brood help a smooth transition.
- Follow tested timelines and protocols to let the queen acclimate and begin laying.
Understanding the Importance of Successful Queen Introduction
How a new matriarch is accepted determines whether a hive will thrive or falter. A healthy queen emits strong pheromones that keep worker behavior aligned. This scent helps the colony stay organized and productive.
Successful changeover is the cornerstone of good beekeeping. When you add new breeder stock, you reset the hive’s biological clock and alter the scent profile workers must accept. Proper timing and conditions raise the odds of smooth acceptance.
Failure can leave a colony queenless. That leads to no brood, falling worker numbers, and weaker honey yields. Beekeepers must confirm the hive is truly without a matriarch before trying to add a replacement.
- Stability: A vigorous female ensures steady brood and workforce growth.
- Genetics: Replacing poor performers preserves apiary quality.
- Timing: Allowing adequate time for scent exchange improves acceptance.
For practical steps and timelines, see successful queen introduction techniques.
Evaluating Queen Health Before Introduction
A careful health check before adding a new female avoids many hive problems. Spend a few minutes inspecting appearance and behavior. This reduces risk for the colony and helps your management decisions.

Physical Appearance
Size and shape: The introduced female should be noticeably larger than worker bees with a rounded abdomen and firm thorax.
Mobility: Intact wings and strong legs mean she can walk the comb and reach brood without trouble.
Feet and tarsi: Pearly white foot pads suggest no shipping injury. Look for mites or deformities.
Behavioral Indicators
Responsiveness: A healthy individual moves when gently prodded and draws a small retinue of worker bees.
Activity matters: If a laying queen appears lethargic, she may be stressed, hungry, or dehydrated—wait or replace her.
| Check | What to look for | Why it matters | Action |
|---|---|---|---|
| Size & shape | Rounded abdomen, larger than worker | Indicates maturity and laying potential | Approve for introduction |
| Mobility | Walks comb, wings intact | Can reach brood and pheromone distribution | Keep; monitor first 24 hrs |
| Parasites | Deformed wings, mites visible | Risk to whole colony | Reject or treat before use |
| Cage check | Queen moving, not trapped | Prevents injury during transfer | Replace cage or reposition |
When in doubt, consult trusted equipment guides such as the best queen cages to ensure safe handling and transit.
Preparing Your Colony for a New Queen
Small management steps before adding a new matriarch reduce risk and improve acceptance.
Confirm the hive is truly without a leader. Remove any failing queen or verify her absence. Inspect every frame for queen cells or hidden cell cups.
Managing Queenless Periods
Allow the colony about 24 hours without a matriarch so workers notice the gap. This short time makes workers more receptive when you place a new queen.
- Use a small colony or nuc when possible; young workers accept a newcomer more readily.
- Feed 1:1 sugar syrup during a dearth to mimic a nectar flow and calm workers.
- Check for laying workers in colonies that have been queenless a long time; these need special handling.
Work slowly and inspect frames carefully. Rushing increases the chance the colony will ball and kill the newcomer. For detailed methods, see detailed introduction methods.
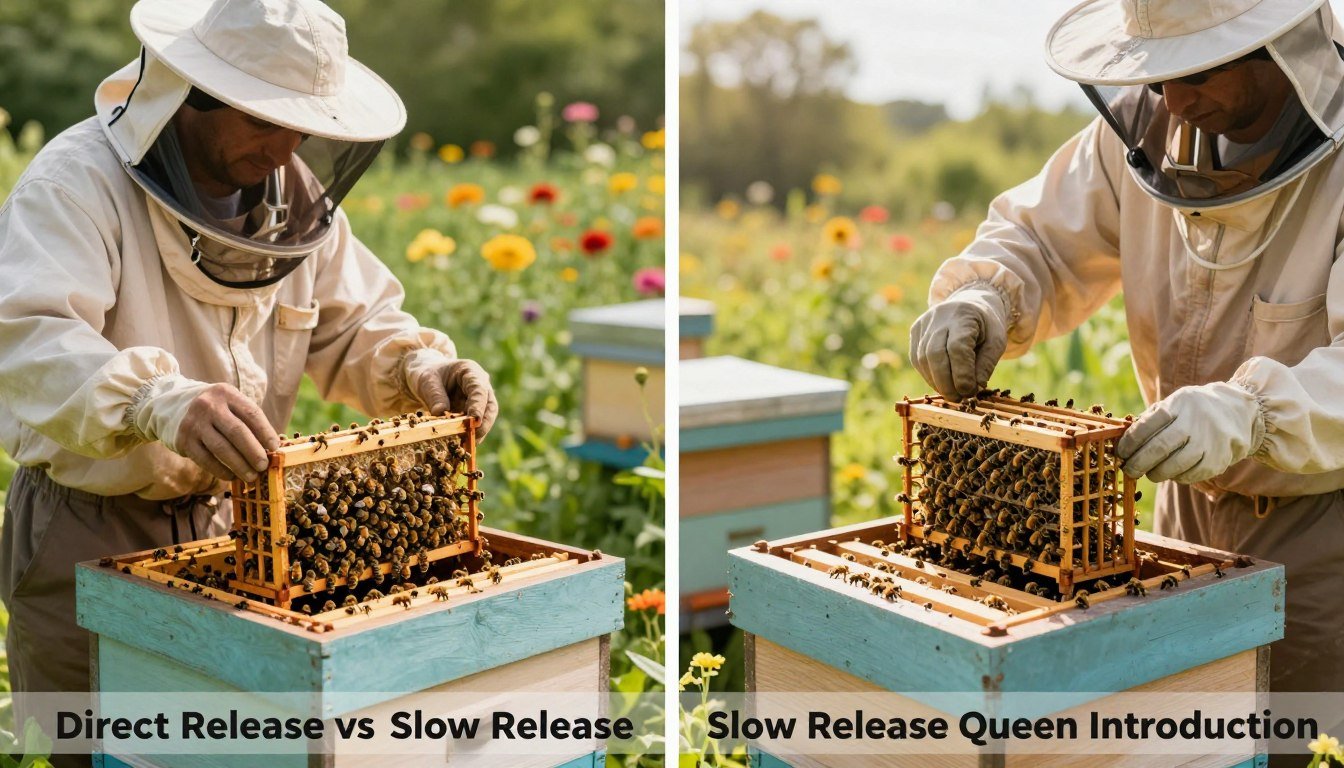
Comparing Direct Release vs Slow Release Queen Introduction
The technique you pick for bringing in a new female shapes the colony’s reaction over days. Most beekeepers prefer a gradual approach using a candy plug inside a cage because it gives workers time to adjust.

Benefits of the slow method: The candy barrier protects the queen until workers eat through it, usually taking 2 to 3 days. This lets her scent spread and calms worker aggression.
When not to rush: Removing the candy too soon or forcing a quick introduction often causes workers to ball and kill the newcomer. That leads to a failed introduction and lost time for the hive.
- The advanced alternative requires confident judgment of hive temperament and should be attempted only by experienced beekeepers.
- Monitor the cage after placing it. Bees biting the mesh is a clear sign the colony has not yet accepted the new queen.
- For valuable queens, the candy-cage method yields higher success and less stress on the colony.
Bottom line: Use a protected cage and allow the workers time. That method raises acceptance and lowers risk when introducing new queens.
The Mechanics of the Candy Plug Method
A controlled candy barrier gives worker bees a few days to accept a foreign scent without risking the newcomer’s safety. This method relies on gradual contact so the hive learns the new pheromone profile while the caged individual stays protected.
Suspension Techniques
Place the queen in a small cage with a tube packed with firm queen candy and suspend it between the frames in the brood area. Position the cage so the mesh side faces open space and workers can feed and inspect through the wire.
Angle the candy end slightly upward or toward the bottom as recommended by field experts. This helps dead worker bees fall away and prevents a blocked exit that would stop the chewing process.
Monitoring Candy Consumption
Workers will chew through the candy over about 2 to 4 days. That time allows brood-attending bees to become familiar with her scent and lowers aggression at the moment of emerging.
Check the cage each inspection. If the candy remains intact after 4 days, you may need to assist by opening the cage carefully to avoid harm to the colony or the caged insect.
- Keep the cage clear of direct contact with comb wax to ensure good ventilation and worker access.
- Place the cage between top bars and avoid touching brood frames where it could jam the mesh.
- Document days passed and worker activity; consistent chewing is a good sign of acceptance.
Utilizing the Butler Cage for Controlled Integration
A Butler cage lets a new breeding female meet workers slowly while staying protected. This method places the queen alone in a small holder so her scent can spread without her attendants present.

The cage is wedged between two frames of brood and secured horizontally or vertically between top bars. Firm wedging prevents movement and keeps comb contact minimal.
- Transfer solo: Move the queen without attendants so only her pheromones guide acceptance.
- Plug options: Use fondant, candy, or a newspaper cover to control the time before full access.
- Inspect in 4–6 days: Confirm the bee is free, settled, and beginning to lay in brood areas.
| Feature | Plastic Cage | Wire Mesh Cage | Timing |
|---|---|---|---|
| Durability | Durable; may slip if not wedged | Sturdy; good ventilation | 4–6 days typical |
| Worker access | Mesh face allows contact | High interaction through holes | Allows scent exchange over days |
| Best placement | Between frames, brood zone | Between frames, near comb | Monitor after inspection |
Tip: Use this method when you want a protected, gradual pathway for the newcomer. It balances safety and contact so the colony accepts her with less risk.
Advanced Push-in Cage Techniques
A push-in cage gives a new laying female protected space to begin productive work right on the comb. Built from 8 mesh hardware cloth and sized about 3-by-5 inches, the cage is pressed into the midrib of a frame so she can access a small patch of brood while staying safe.
Benefits of brood emergence: Positioning the holder over emerging brood means the newly hatched bees imprint on her scent. Those workers accept her quickly and help stabilize the colony.
Practical tips:
- Set the cage firmly into the midrib so workers cannot chew underneath and enter prematurely.
- Use a plastic push-in cage when possible; plastic edges resist chewing better than thin wire.
- Check the cage in 3 to 5 days. If bees start chewing underneath, move the cage to fresh comb.
- When she is laying eggs and bees show calm behavior, you may open the holder and let her join the hive fully.
This method is favored by experienced beekeepers and for instrumentally inseminated specimens because it raises acceptance and egg production in fewer days. For functional details on using introduction cages in larger apiaries see cage use for requeening, or learn how boosting colony population naturally pairs with cage strategies at population management tips.
Direct Release Methods for Experienced Beekeepers
Fast integration techniques should be attempted only with calm hives and steady hands. Move slowly and watch worker behavior at every step.

If you place a caged individual directly on open brood, emerging bees will learn her scent quickly. Pick a frame with fresh, open brood and room for the newcomer to walk and begin laying.
- Lightly mist the queen and surrounding workers with 1:1 sugar syrup to distract and calm them.
- The smoke approach can help: run the queen into the entrance and add a few cooling puffs to mask pheromones.
- Only use these tactics if the colony is truly without a laying female and the hive temperament is gentle.
“Direct techniques are fast but risky; they save time when done by skilled beekeepers and when conditions are right.”
| Action | When to use | Benefit | Risk |
|---|---|---|---|
| Place on open brood frame | Calm colony, experienced handler | Quick imprinting, faster laying | High chance of aggression if misjudged |
| Mist with 1:1 syrup | During transfer from cage | Distracts workers, reduces biting | Temporary only; may not prevent balling |
| Smoke entrance method | Queenless hive, cool smoke | Masks pheromones for easier entry | May fail if hive is defensive |
| No cage (immediate free) | Very calm nucleus colonies | Fastest start for laying | Highest injury or loss risk |
Close the hive carefully. Be sure no bees or the new queen sit on frames that will be crushed. Recheck the colony within 24 hours for signs of calm or aggression.
Managing Potential Risks and Rejection
Before you add a new breeder, scan frames for clear signs that workers have begun laying. Early detection reduces loss and saves time.

Identifying Laying Workers
Laying workers are the usual hidden cause of failure. Look for poorly centered eggs and more than one egg per cell.
If you see many spotty eggs and no brood pattern, assume laying workers and delay the process. Destroy any queen cells you find before proceeding.
Handling Aggressive Colonies
Aggressive behavior — biting the cage, balling the newcomer, or persistent pursuit — signals you need more time. Leave the hive without a matriarch for at least 48 hours when possible.
Patience pays. If aggression continues after a few days, change the method or move the new mated female into a different nucleus.
“Identify problems early and act calmly; most requeening failures trace to detectable colony issues.”
| Issue | Sign | Immediate action | Next steps (24–72 hours) |
|---|---|---|---|
| Laying workers | Multiple eggs per cell, scattered pattern | Remove workers if possible; clear brood frames | Hold off introduction; recheck after 48–72 hours |
| Active balling | Workers cluster and heat the cage | Cover and return hive quickly; avoid forcing entry | Try a different cage method or wait longer |
| Queen cells present | Swollen cells along frame edges | Destroy cells before placing new female | Confirm no unmated queen is present; then proceed |
| Unmated resident | Small, roaming virgin or mating signs | Locate and remove before adding a mated female | Consider moving the mated breeder to a calm nucleus |
For practical guidelines on managing hives and minimizing risk during requeening, consult the queen management guidelines.
Monitoring Colony Acceptance After Release
After the newcomer is freed, the next days tell the real story of acceptance. Check the hive at about 5 to 7 days to look for eggs and fresh larvae. These signs show the new female has begun laying and workers have accepted her.

Look for a tight brood pattern with few empty cells. If you see eggs, larvae, and capped brood in staggered stages, the colony is settling and the method worked.
Avoid opening the hive excessively. Frequent disturbance can slow acclimation and stress the bees. Wait at least 10 days before a full inspection to give the colony time to stabilize.
- If acceptance fails, repeat the process with a new female and consider a different cage or placement method.
- Confirm no unmated queen exists in the hive; an unmated resident will block acceptance of a mated breeder.
“Monitoring is the final step; it confirms that your efforts produced a productive and healthy colony.”
For broader colony care and to reduce requeening risks, review how to prevent swarming as part of long-term management.
Best Practices for Making Queen Candy
Good candy helps a new breeder meet workers slowly while preventing injury during the first days.
Start with correct proportions: warm honey to about 95°F, then mix 1 cup honey with 2 pounds of powdered sugar until a kneadable dough forms. The final mass should be firm but not rock-hard.
If selling caged females to the public, substitute corn syrup or invert syrup for honey to reduce the risk of spreading American Foulbrood. Store finished candy in a cool place or freeze for long-term storage.

- Knead until the candy pulls with rough edges — that texture means bees can chew it in a few days.
- A too-soft plug will leak from the cage; too firm and worker bees cannot remove it.
- Test consistency by tearing a piece; it should rip, not stretch.
| Attribute | Ideal | Problem | Fix |
|---|---|---|---|
| Firmness | Firm, kneadable | Too soft leaks | Add more powdered sugar |
| Texture | Rough edges when pulled | Too smooth = slow chewing | Knead longer; chill briefly |
| Sweetener | Honey or syrup | Honey risk for disease when sold | Use corn or invert syrup for sales |
| Storage | Cool or frozen | Room temp shortens shelf life | Refrigerate or freeze until use |
For practical techniques on placing a candy plug in a cage and timing the hive checks, see a methods overview at methods overview and step-by-step tips to requeen successfully.
Conclusion
Bringing a new breeder into a hive requires planning, patience, and clear checks. Prepare the colony, confirm it is truly queenless, and rule out laying workers before you proceed.
Choose the method that matches your skill and the hive temperament. Whether you use a candy-plugged or push-in cage, good gear—like a sturdy plastic holder—and proper candy raise your odds.
After the final step, watch quietly. Give the colony space to accept the newcomer, check for eggs in about a week, and keep records to improve future attempts. For a practical how-to on staged queen introduction and broader beekeeping basics, consult those guides.