Choosing the right method to introduce a new queen shapes hive health and productivity. Beekeepers often weigh simple, quick installs against methods that let a queen start laying eggs right away. The push-in method uses 8 mesh hardware cloth to secure the area on a comb, while the other approach relies on a metal frame or plastic wire enclosure for routine transfer.
Biology matters: Allowing immediate egg laying can speed brood production and help workers accept a new bee. Tools from HONESTBEE and quality queen cages support precise, low-risk introductions for nucs and full colonies.
Deciding between rapid release and biological integration affects acceptance rates, pheromone spread, and long-term success. Learn practical comparisons and recommended gear at best queen cages for introduction.
Key Takeaways
- Biological advantage: letting a new queen lay eggs can improve acceptance.
- 8 mesh hardware cloth offers secure, breathable protection for comb access.
- Standard wire or plastic designs make transfer fast but may delay brood.
- HONESTBEE supplies reliable tools for professional beekeeping setups.
- Choose method based on colony size, risk tolerance, and long-term production goals.
Understanding the Push-in Cage vs Standard Queen Introduction Cage
A practical comparison shows how a comb-mounted method encourages laying sooner and boosts colony stability. The comb-mounted approach is pressed directly into wax comb, creating a secure zone where the new reproductive can behave naturally.
Key difference: packaged methods rely mostly on pheromone acclimation. By contrast, a comb-mounted unit lets the female reach comb and start laying. That early brood signal often improves worker acceptance and supports faster integration.
For professional beekeeping, this biological edge matters for high-value stock. Many beekeepers still use plastic mailing devices for convenience. Yet those tools rarely allow immediate egg laying, which can delay colony stabilization.
Below is a quick comparison to highlight practical trade-offs.
| Method | Comb access | Early laying | Common use |
|---|---|---|---|
| Comb-mounted (push-in) | Directly pressed into comb | Yes — allows immediate laying | High-value queens, nucs |
| Packaged/plastic device | Sealed, no direct comb contact | No — relies on pheromones | Mailing, routine introductions |
| Practical outcome | Faster brood establishment | Higher acceptance rates | Better long-term colony success |
For more on how this method improves success, see how this method improves success.
Mechanics of the Standard Introduction Cage
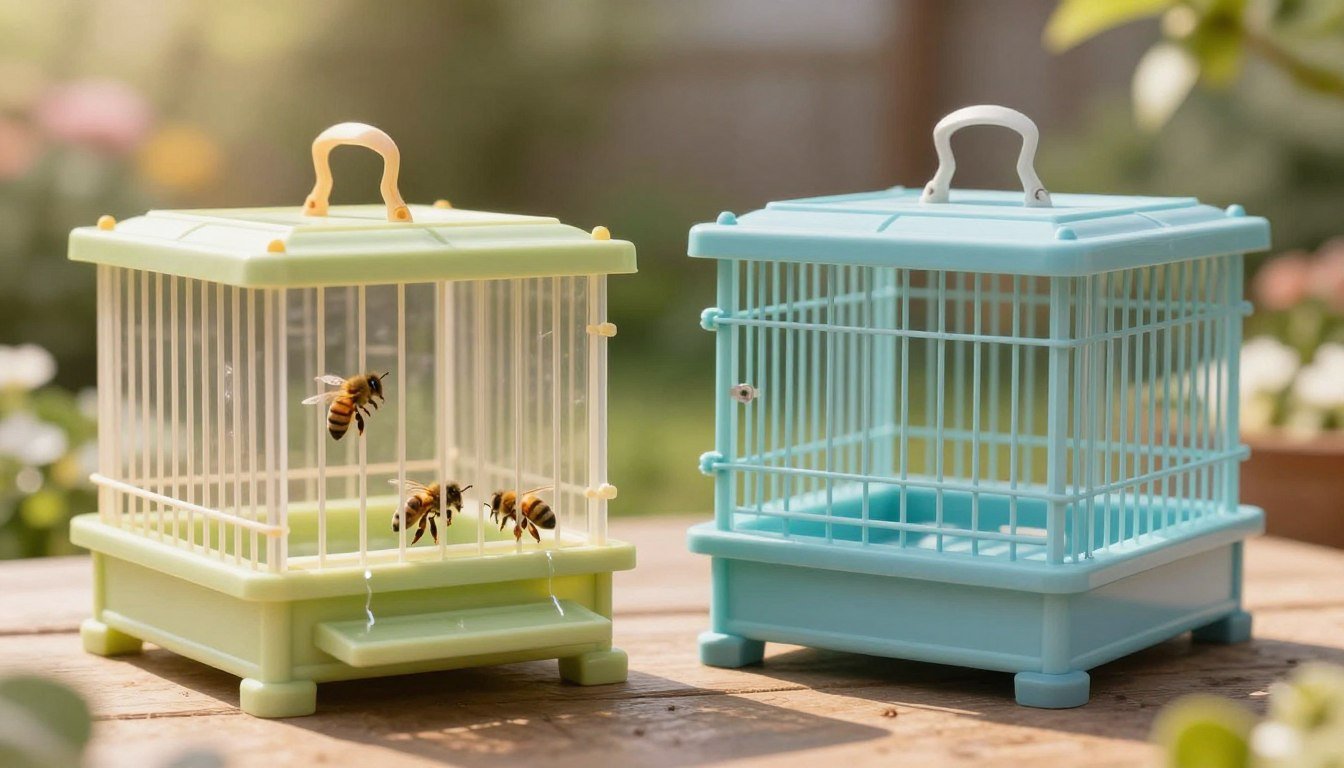
Suspended enclosures are commonly used to add a new reproductive to a hive without immediate contact with comb or brood.
Total confinement comes from placing the device between frames so the female is physically separated. A sliding screen lets workers smell her, but she cannot lay eggs while confined. That lack of direct contact limits her ability to build a brood signal and to integrate quickly with colony tasks.
The usual release uses a candy tube—made from one cup of honey mixed with two pounds of powdered sugar—placed at the tube end. Workers chew through that candy over two to four days, freeing the female once pheromone cues have settled.
Total Confinement Limitations
- The suspended method prevents egg laying and blocks comb interaction.
- Workers rely solely on scent, increasing the chance of rejection if the hive is stressed.
- Care is needed when using plastic or wire devices to avoid injuring the animal during placement.
Reliance on Pheromone Acclimation
Pheromones are the only proof of presence while the animal is confined. That single signal can succeed, but it can also fail if the colony lacks tolerance.

| Feature | Effect on Integration | Typical Time |
|---|---|---|
| Suspended between frames | Blocks comb contact; limits brood signaling | 2–4 days |
| Sliding screen access | Allows pheromone exchange only | Immediate but scent-based |
| Candy release tube | Controlled, delayed release | 2–4 days |
For practical troubleshooting and acceptance issues, read guidance on how a push-in device is used and common reasons bees reject a new leader.
The Biological Advantage of the Push-in Method
Establishing a controlled zone on comb and honey gives the female space to lay eggs and win worker trust.
Creating a Supportive Micro-Colony
Placing a push-in cage over emerging brood forms a mini workforce of young bees. These newly hatched workers have no loyalty to a prior ruler, so they tend brood and feed the newcomer.
The protective enclosure allows the queen to access empty cells and start laying eggs right away. Early laying signals health and productivity, which boosts initial acceptance by workers.
- Supportive brood area: young bees emerge inside the area and provide immediate care.
- Early egg laying: the female establishes pheromones by producing brood, improving acceptance rates.
- Physical protection: the device shields her from aggressive adults until she is established.
- Beekeeping success: high-value queens often integrate more reliably with this method.
Critical Factors for Successful Queen Integration
Small preparation steps before adding a new reproductive can cut rejection risk and speed acceptance inside the hive.
Preparing the Colony
Remove the old ruler and any queen cells 24 hours before adding a new queen. This brief queenless period increases worker readiness and lowers aggression.
Tip: Spray the bees and the new queen with a 1:1 sugar syrup to calm activity during placement.
Ensuring a Secure Comb Seal
Use a 3-by-5-inch unit made from 8 mesh hardware cloth pressed firmly into the comb midrib.
Press deeply so workers cannot crawl under the hardware. Select a frame with open nectar and emerging brood to provide food and a retinue of young workers.
Monitoring for Acceptance
Check the device after 3–5 days. Look for chewing under the mesh or signs of aggression.
If the new queen is not accepted, consider moving her to a nuc or trying a different method next time. Young bees in a small split often show higher acceptance rates.

| Action | Why it matters | Timing |
|---|---|---|
| Remove old queen & queen cells | Reduces rivalry; primes workers | 24 hours before placement |
| Press hardware cloth into midrib | Prevents worker entry; secures comb seal | At placement |
| Feed sugar spray and warm candy | Distracts workers; ensures correct candy texture | Syrup at placement; candy mixed at 95°F |
| Inspect for acceptance | Detects chewing or aggression early | 3–5 days after placement |
For guidance on hive setup and proper frame selection, see this short guide to beehive installation.
Operational Trade-offs and Equipment Requirements
Operational choices often come down to labor, equipment needs, and the time a beekeeper can commit to each introduction method.
Primary trade-off: a comb-mounted device demands more hands-on work. The beekeeper must shake bees from a frame and press hardware cloth into wax. This can take minutes per hive instead of seconds.
Production impact: the extra time and small comb damage often pay off with faster brood and higher acceptance rates. Commercial operations that want consistent honey yields usually favor the more precise method.
HONESTBEE supplies wholesale machinery and durable queen cage gear for apiaries that scale. Their hardware and cloth make precise installs easier and reduce the risk of errors.
- Higher labor but greater early brood signal and acceptance.
- Minor comb damage versus long-term colony production gains.
- Professional tools shorten installation time and cut risk.
| Factor | Effect | Typical Time |
|---|---|---|
| Hands-on install | Higher labor; better early brood | 5–10 minutes |
| Hanging candy-plug device | Low labor; delayed laying | Seconds to place; 2–4 days to release |
| Specialized hardware | Improves precision and acceptance | Reduces rework and rejection |
For details on the main advantage of using a push-in, consult HONESTBEE’s FAQ for best practices and equipment options.
Conclusion
Simple convenience rarely outweighs the biological benefits of allowing a new queen to begin laying eggs immediately.
The push-in method with a small cage gives the new queen space to lay and build pheromone bonds. This creates a stronger signal to workers and raises acceptance for the whole colony.
Research, including USDA-supported work, highlights careful introductions as vital for colony health. While other cages offer speed and ease, the comb-mounted option often wins tough or valuable additions.
Assess your labor, risk tolerance, and goals in beekeeping. For practical steps and deeper guidance on a successful queen introduction, review experienced sources before you decide.
FAQ
What are the main differences between a push-in method and a traditional introduction device?
The two approaches differ in how they control worker access and pheromone exchange. One method creates direct contact by embedding a new queen and a small cluster of workers into comb so she can move and lay while gradually exposed. The traditional device isolates the queen in a small enclosure with a food plug, relying on workers to feed and sniff her through mesh until acceptance. The embedded approach accelerates laying and permits worker assistance, while the isolated device emphasizes slow, protected release.
How does the embedded technique affect egg-laying and brood production?
Embedded placement often lets a healthy mated female begin laying sooner because she has immediate comb access and tends from a few escort workers. That promotes faster brood pattern development and helps the colony perceive her as productive. Isolated devices delay egg-laying until the queen is released, which can postpone brood buildup but reduce risk if the colony rejects her.
Do either method require special equipment or materials?
The embedded approach needs a secure seal of comb and often a small frame or hardware to hold the inserted cluster in place. Some beekeepers use trimmed comb and a gentle press to create a micro-colony. Traditional devices are usually plastic or wooden enclosures with mesh and a candy or syrup exit; they are widely available from vendors like Mann Lake and Betterbee. Both methods benefit from basic tools: smoker, hive tool, and protective gear.
Which technique has higher acceptance rates in established colonies?
Acceptance depends on colony temperament, population balance, and timing. Embedded placement tends to yield higher acceptance in strong, well-fed hives because the queen integrates with escorts and begins laying quickly. Isolated devices can work well in colonies that are suspicious or crowded, since the cage prevents immediate aggression and allows pheromone acclimation over days. Success hinges on preparation more than one method universally outperforming the other.
How should I prepare a receiving colony for introducing a new reproductive?
Reduce stress and set conditions that favor acceptance. Remove or destroy any existing queen cells, ensure adequate food stores or syrup feeding, and avoid splitting or excessive disturbance just before introduction. Introduce during calm weather so foragers return and maintain a robust worker population. A balanced nurse-to-forager ratio and healthy brood presence boost chances of acceptance.
What risks are associated with embedding a queen and her escorts into comb?
Risks include crushing or damaging comb during insertion, losing escorts during the move, and leaving gaps that allow robbing or drift. If the comb seal is poor, workers can attack the new queen. Proper technique—careful handling, a tight seal between frame and surrounding comb, and working quickly—reduces those risks.
How long should I leave a traditional introduction device in place?
Most beekeepers leave the device for 3 to 7 days. The typical window lets workers acclimate to the queen’s pheromones and eat through a candy plug or otherwise release her gradually. Monitor the colony; if aggression is noted or the queen is exposed too early, intervene. Removal after a week is common to prevent prolonged confinement stress.
Can I use these methods with an artificially inseminated or nucleus-bred female?
Yes. Both methods work with instrumentally inseminated or nuc-bred females, but ensure the queen is healthy and pheromone-active. A mated, vigorous queen with a strong pheromone profile integrates faster. If the queen shows low activity, the embedded method’s escort support may improve initial acceptance and laying.
What signs indicate successful integration after introduction?
Look for calm behavior around the introduced frame, workers tending the new female, and eggs or young brood within a week to ten days. Reduced aggression, absence of queen cells, and steady forager return also signal acceptance. If you spot fighting, dead workers, or persistent aggression, consider requeening options.
Are there seasonal or colony conditions that favor one method over the other?
In spring buildup, when colonies are strong and resources plentiful, embedding a new reproductive often gives faster brood expansion. In late summer or during dearths, a gradual-release device helps prevent rejection when colony stress is higher. Heavy populations or aggressive stocks may need the protection of an isolating device to reduce immediate conflict.
How do pheromones and worker escorts influence the outcome?
Pheromones are the primary communication that signals queen status. Escorts provide immediate pheromone reinforcement and physically protect the queen while she begins laying. Gradual pheromone exposure via mesh and time also works, but direct escort presence accelerates recognition and lowers conflict in many cases.
What practical tips improve success when using the embedded approach?
Use a small cluster of young workers as escorts, press the introduced comb gently into place for a tight seal, and minimize time out of the hive. Select frames with fresh foundation or clean comb and avoid moving frames with fragile brood. Perform introductions midday when foragers are active to reduce at-hive numbers and agitation.
If a colony rejects the introduced female, what are my options?
Remove the queen and assess colony health. You can retry with a different method, introduce a local or mated queen, or create a nuc combining parts of the colony with the new queen. Requeening with a proven stock or using a temporary frame of brood to calm the colony may solve persistent rejection problems.
How important is monitoring after introduction, and what should I check?
Frequent checks for the first 7–14 days are crucial. Confirm the queen’s safety, watch for egg-laying, inspect for acceptance behavior, and ensure no new queen cells appear. Also verify food stores and absence of pests. Early detection of issues allows corrective measures before brood collapse.