Many jars turn thick or gritty over time. Restoring that smooth, golden syrup is simple when you know the right steps. This guide explains clear, safe methods that protect the natural enzymes and flavor.
Understanding the role of heat is key. We cover the practical range for gentle warming, how long to hold a jar, and why overheating can harm beneficial enzymes. You will learn how to handle both small jars and larger containers with care.
Whether you cook often or keep a jar on your counter, the aim is the same: return honey to a smooth state without sacrificing quality. For deeper technical discussion and community tips, see this honey temperatures forum thread.
Key Takeaways
- Gently warm crystallized honey to restore texture while protecting enzymes.
- Follow safe heat ranges and timing to avoid flavor loss.
- Small jars and buckets need different handling; use a water bath when possible.
- Cooling slowly helps keep a smooth consistency and reduce re-crystallization.
- Consult community-sourced guidance for practical tips and temperature notes.
Understanding Why Honey Crystallizes
Crystallization starts at the molecular level when sugars separate from the syrup. Honey is a supersaturated solution made mostly of glucose and fructose. When glucose moves out of solution it can form tiny solid structures.
Microscopic particles act as seeds. Bits of pollen and tiny fragments of wax provide surfaces where crystals can begin to grow. That is why raw, unfiltered jars often change texture faster than processed ones.
Different floral sources alter how quickly this happens. Varieties like clover or alfalfa have specific glucose-to-fructose ratios that speed or slow crystal formation.
What people should know
When honey crystallizes, many people view it as a sign of quality from the bees rather than spoilage. Cooler storage—around 50–59°F—encourages crystals to form sooner than warm cabinets.
- Supersaturated sugar solution leads to crystal growth.
- Pollen and wax provide nucleation points for crystals.
- Floral source and storage temperatures change the rate of crystallization.
The Science Behind Sugar and Water Molecules
At a molecular level, the balance between sugars and liquid is what drives texture changes. Raw honey is roughly 70% sugar and under 20% water. That 16%–20% water range matters for how stable the syrup remains.
Supersaturation explains crystals. There are more sugar molecules than the water molecules can hold in a stable solution. Over time, glucose pulls out of solution and forms tiny solid structures.

When you see crystallized honey, you are observing sugar molecules stacking after separation from the liquid phase. The interaction between water and sugar is delicate. Changes in storage or temperature shift the balance and encourage crystals.
- About 70% sugar and less than 20% water creates supersaturation.
- Excess glucose separates and becomes visible crystals.
- Environmental factors change how quickly this happens.
Why this matters: knowing the molecular cause helps you choose gentle warming methods that reintegrate sugar back into the water without harming quality.
Identifying High-Quality Raw Honey
Look closely at a jar and you can spot clues that tell you whether the product is truly raw. High-quality raw honey often shows tiny flecks and cloudy streaks. These bits are usually pollen and small pieces of wax that filtering would remove.
Commercial processing changes the jar’s appearance. Large producers commonly heat honey to 145°F for 30 minutes to keep it liquid on shelves. That pasteurization reduces visible particles and can strip away delicate nutrients.
Choose jars that list minimal processing or say unfiltered. The presence of natural wax and pollen is a clear sign of quality and closer alignment with what bees produced.
- Less filtration means more pollen and wax remain.
- Pasteurization at 145°F keeps honey clear but alters nutrients.
- Visible particles usually indicate authentic, unprocessed product.
For details on handling and storage of raw jars, see this guide on extract and store raw honey.
Why Temperature Control Matters for Enzymes
Gentle control of heat preserves the living compounds that make raw jars valuable. Small rises in warmth can either restore texture or strip away nutrients.
Preserving Beneficial Nutrients
Temperatures above 104°F will destroy key enzymes that give raw jars their health value. For this reason, any warming method must be conservative and steady.

“Warm just enough to melt crystals; never reach levels that kill the enzymes.”
Professional beekeepers advise keeping heat low so antioxidants and proteins stay intact. When you heat honey, do so slowly and check with a thermometer.
- Strict control matters because enzymes lose activity above 104°F.
- Gentle warming keeps antioxidants and the complex flavor profile intact.
- Excessive heat converts a nutrient-rich syrup into a simple sweetener.
For more on how humidity and storage affect curing and texture, read this humidity effects on honey curing.
The Best Temperature to Decrystallize Honey
A narrow warming window brings crystallized jars back to smooth syrup without harming flavor. Hold jars in a gentle range so sugar returns to the liquid phase slowly.
Data shows crystals dissolve between 95°F and 104°F. The sweet spot sits roughly at 95°F–100°F for steady liquefaction while protecting delicate compounds.
Guidelines:
- Maintain 95°F–104°F so the crystals melt without damaging quality.
- Keeping the temperature steady helps sugar molecules rejoin the liquid efficiently.
- Exceeding this window can caramelize the jar and alter color, flavor, and nutrition.
- Close monitoring with a probe thermometer is the most important step.
“Stick to the narrow window and heat slowly; patience preserves natural value.”
By adhering to this specific range you manage the crystals while protecting the integrity of the raw honey you bought. Small, steady changes in heat work far better than quick, high bursts.
Essential Tools for the Process
Using reliable equipment keeps the restoration process efficient and gentle.
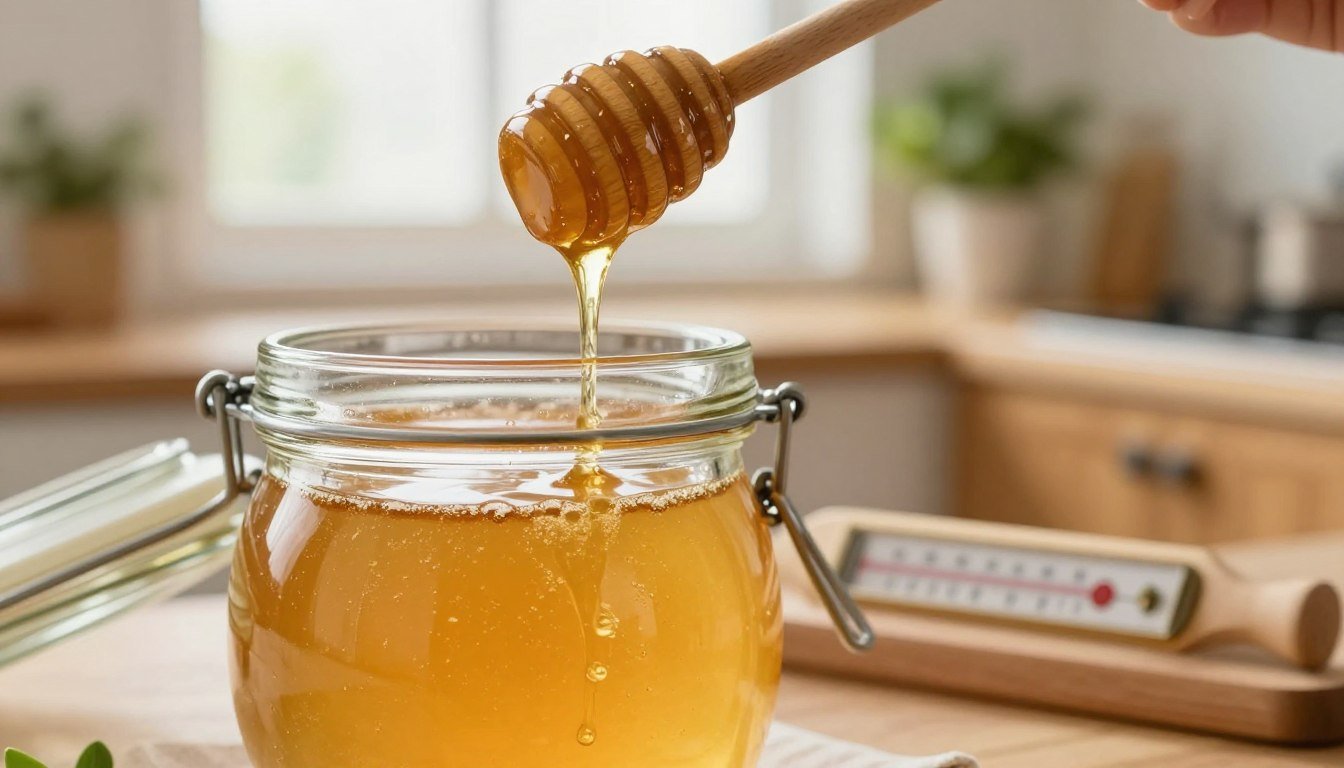
Thermometer: A probe or digital thermometer lets you monitor water heat precisely. This protects nutrients and keeps the jar within the safe warming band.
Sturdy pot: Choose a pot large enough for a water bath so the jar sits upright without the lid dipping under water. Stability matters for even warming.
Metal spoon: A clean metal spoon helps stir the jar at the end. Gentle stirring evens heat and breaks up lingering crystals.
Heat-resistant surface: Use a trivet or padded mat when removing the warm jar. This prevents accidents and shields counters from heat.

| Tool | Purpose | Tip | Typical cost |
|---|---|---|---|
| Digital thermometer | Monitor bath temperature | Probe reads water, not jar | $10–$30 |
| Sturdy pot | Hold water bath | Large enough for jar height | $20–$50 |
| Metal spoon | Stir for even heat | Use clean utensil only | $2–$10 |
| Trivet or mat | Protect surfaces | Heat-resistant material | $5–$25 |
- These simple items let you perform a careful, kitchen-level restoration.
- Keeping gear clean and stable improves results and safety.
Preparing Your Honey Jar for Warming
Before you apply heat, take a moment to prepare the jar so the syrup inside stays pure.
Seal and inspect. Check the lid and thread for tight closure. A well-sealed jar prevents water from entering during a warm water bath or slow warming.
Transfer if needed. If your product sits in plastic, move jar honey into a clean glass container. Glass reduces the risk of chemical leaching and holds heat evenly.
Read the label and look for debris or sediment on the lid. Wipe the rim and outside with a damp cloth so you handle a clean container while working.
- Place the jar on a stable, level surface before heating.
- Remove sticky residue from the exterior to avoid slips and mess.
- Use a heatproof trivet when setting a warm jar down.
Final check. Proper prep protects the purity of your honey and makes the warming stage safer and more effective. For more tips on restoring jars, see why honey crystallizes and how to fix.
Using a Warm Water Bath
A warm water bath offers a gentle, reliable method for returning crystallized jars to a liquid state. This indirect approach melts crystals without sudden hot spots that harm quality.
Setting Up the Bath
Choose a pot large enough so the jar bowl sits upright. Fill the pot water until it reaches the height of the syrup, but do not let water pass the lid seal.
Place the sealed honey pot in the water and bring the bath to a gentle warmth. Keep the pot stable so the jar does not tip.

Monitoring the Process
Use a candy thermometer to watch the temperature; stay below 104°F. Let the jar sit for 15–20 minutes. Stir the jar occasionally with a clean spoon to break up stubborn crystals and warm a bit honey near the center.
- This method is the safest way for steady, indirect heat.
- Check the pot water level and top up with warm water if it falls.
| Step | Duration (minutes) | Pot water level | Tip |
|---|---|---|---|
| Set up jar in pot | 1–2 | Reach honey height, below lid | Use glass jar for even heat |
| Warm bath | 15–20 | Maintain stable level | Keep thermometer in water |
| Stir and check | Every 5–7 | Top up with warm water | Break remaining crystals gently |
For a deeper guide on gentle restoration, see this warm bath restoration.
The Slow Cooker Warming Technique
For large containers, a low-and-slow approach melts crystals evenly over hours.
Set the slow cooker on the lowest or “warm” setting and place the sealed jar inside. Pour water around the jar until it reaches about halfway up the glass. This keeps heat even and avoids hot spots that can harm the jar honey.
Use a digital thermometer in the water and watch that the reading stays below 104°F. Let the process run for about 2–3 hours; patience helps the crystals return to a smooth liquid state.

Every 30 minutes, open the lid carefully and stir honey gently with a clean spoon. Stirring spreads heat through the jar and breaks stubborn crystals. If water drops, top up with warm water from the tap.
- This method works well when you have larger pots or several jars at once.
- Keep the pot stable and check the thermometer often for safety.
- Slow, consistent heat prevents flavor loss and preserves natural enzymes.
| Step | Duration | Water level | Tip |
|---|---|---|---|
| Place jar in slow cooker | 1–5 minutes | Halfway up jar | Use glass jars for even heating |
| Warm on low/warm | 120–180 minutes | Maintain halfway level | Monitor with thermometer |
| Stir at intervals | Every 30 minutes | Top up if needed | Stir gently to avoid air pockets |
Need more guidance? See a short guide on how to restore raw jars and tips for selling or packaging jar honey at packaging and labeling.
Utilizing Radiant Heat Sources
A warm windowsill or a cozy radiator can melt small crystals without any pots or timers.
Radiant heat offers a passive, low-risk method. Place a sealed honey jar in a steady warm spot and allow natural warmth to work for 24–48 hours.
Check the glass container every few hours. If crystals recede slowly, gently stir honey with a clean spoon once or twice to help heat reach the center.

- This way needs no special equipment and is ideal for a hands-off approach.
- Keep the jar out of intense direct sun that could spike the temperature above safe limits.
- If the room is cool, move the jar nearer a mild radiator rather than full sun for steadier warming.
“Allow natural warmth to work gradually; patience preserves flavor and enzymes.”
Why You Should Avoid Microwaving Honey
Microwaving honey creates uneven hot spots that can easily overheat and damage delicate enzymes in raw honey.
The microwave’s rapid, uneven heating makes it impossible to maintain the gentle range needed for safe restoring. Small pockets of extreme heat strip flavor and break down proteins faster than slow methods.
Using plastic containers in a microwave increases risk. Heat can cause plastic to leach chemicals into the jar product, affecting safety and taste.

Even low-power settings are uncontrolled. Microwaving often degrades color and aroma and leaves parts of the jar overheated while other areas remain set. For safer results, choose a gentle water bath and follow proven guides like this honey crystallization guide.
- Microwaving honey risks enzyme loss and flavor change.
- Plastic in microwaves can leach harmful compounds.
- Use a warm water bath for steady, even heat.
Risks of Overheating Your Honey
Applying too much warmth risks irreversible changes in color, aroma, and nutrient content. Overheating alters the subtle profile that makes quality jars valuable.
Temperatures above 110°F rapidly degrade natural enzymes and reduce overall nutritional content. When this happens, the product loses its complex aroma and delicate flavor.
Excessive heat can also cause sugar molecules to caramelize. That creates a burnt taste and darker color that you cannot reverse.

“A brief spike above safe levels can convert delicate sugars and dull the jar’s profile.”
Using a plain pot on the stove without a water bath often leads to uneven heating and hot spots. Those hot spots are the usual cause of ruined jars.
- Primary risk: permanent loss of the complex flavor profile and destruction of natural enzymes.
- Above 110°F, you are effectively cooking the product and lowering its nutrient content.
- Uneven stovetop heat or a dry pot damages texture and can cause caramelization of sugar.
Practical tip: keep a steady, low level of warmth and use a water bath for even distribution. For safe method options, review recommended methods used to heat honey and the raw vs processed comparison to understand how processing affects resilience during warming.
Proper Storage to Prevent Future Crystallization
A stable cupboard temperature prevents many jars from re-forming crystals after warming.
Store jars at room temperature, ideally between 70°F and 80°F. This range helps sugars remain in solution and slows crystallization.
Do not refrigerate. Cold conditions speed the process and make your jar solidify faster than normal.

Because raw honey acts as its own preservative, it stays safe in a cool, dark pantry. If your jar crystallize again, check whether storage temperatures dipped below the recommended range.
“Keep jars at consistent room temperature to avoid crystals.”
- Keep jars away from direct sunlight and temperature swings.
- Store opened jars on a shelf, not in the refrigerator, to keep honey liquid longer.
- If recrystallization occurs, review where you keep jars and adjust to a warmer, steady spot.
For a quick refresher on gentle restoration and care, see this how to decrystallize honey guide.
Choosing Between Glass and Plastic Containers
Packaging choice affects how safe and pure a jar stays when exposed to warmth.
Glass jars are non-reactive and they will not leach chemicals when warmed. This keeps flavor and natural compounds intact and reduces risk during any gentle warming step.
By contrast, many plastic containers are porous. Heat can accelerate breakdown and allow substances to transfer into the jar.

- Choose glass jars over plastic for long-term preservation of honey and quality.
- Glass does not alter flavor or purity, even with repeated gentle warming.
- Plastic may release compounds when exposed to heat; avoid low-quality plastic packaging.
“When in doubt, pick glass — it protects both taste and health.”
| Container | Heat stability | Effect on flavor |
|---|---|---|
| Glass jars | High — non-reactive | Neutral; preserves natural profile |
| High-grade plastic | Moderate — avoid heat exposure | Possible subtle changes over time |
| Low-quality plastic | Low — can break down with heat | May leach flavors and compounds |
Signs That Your Honey Has Been Compromised
A quick sniff and a small taste often reveal whether a jar has stayed true. If the aroma is fermented or the flavor tastes off, excess water content or poor storage may be the cause.
Watch the texture. When crystals form in a bubbly or foamy way, people should suspect fermentation rather than normal crystallization. That foamy look is a red flag.

Color shifts are important. A jar that turns very dark or oddly cloudy can mean aggressive heating or broken sugar content. Similarly, a clear layer of liquid over crystals that smells vinegary usually signals yeast activity and ruined product.
- Fermented smell or off flavor suggests excess water or contamination.
- Bubbly, foamy crystallizes patterns may indicate active fermentation.
- Darkening or cloudiness often follows harsh heat or poor method use.
- Liquid on top of crystals with a vinegar scent shows yeast has begun work.
Final check: use a clean thermometer if you warm a jar. If the syrup does not return to a smooth state, discard it for safety. For more on causes and safe handling, read why does honey crystallize and how to avoid honey contamination.
Conclusion
Finish with patience. Small, steady steps protect flavor and the natural compounds bees produce. Use a gentle water bath or low, slow warming as the chosen method.
Crystallized honey signals high-quality, raw honey and is normal. The process restores a smooth texture while keeping enzymes and aroma intact.
Avoid high heat and plastic containers; prefer glass and monitor the water carefully. For a practical walk-through, see this warm water bath guide.
FAQ
Why does honey crystallize?
Honey crystallizes because its sugars are supersaturated with glucose and fructose. Over time glucose separates from the water and forms crystals. Factors such as the floral source, pollen, wax particles and storage temperature influence how quickly crystals appear.
How does pollen and wax affect crystallization?
Tiny pollen grains and bits of wax act as seed points for crystal formation. Raw, minimally filtered jars contain more of these particles, which speeds crystallization compared with highly filtered commercial products.
What role do sugar and water molecules play in this process?
The ratio of sugar to water determines stability. Higher glucose relative to water encourages crystal growth because glucose is less soluble. Cooler storage allows molecules to arrange into solid lattices, causing visible crystals.
How can I tell if my jar contains high-quality raw honey?
High-quality raw honey often crystallizes sooner, has visible pollen or fine particles, and shows varied color and aroma depending on the nectar source. It should taste clean and retain natural enzymes and aroma.
Why is temperature control important for preserving enzymes?
Excess heat can denature enzymes, reduce antioxidant activity and degrade flavor. Gentle warming preserves beneficial nutrients while returning the product to a spreadable state without harming quality.
What is a safe warming range to restore liquid consistency?
Warm water baths or similar methods kept well below 120°F (about 49°C) slowly dissolve crystals while protecting enzymes and flavor. Maintain steady, moderate warmth and check with a thermometer when possible.
What tools do I need for the process?
Use a heatproof glass jar, a pot or bowl for a warm-water bath, a digital thermometer, and a spatula or spoon for gentle stirring. Avoid thin plastic containers when heating; glass withstands gradual warming better.
How should I prepare a jar before warming?
Transfer honey to a clean, heatproof glass jar if it’s in plastic. Tighten the lid loosely to prevent moisture but allow pressure equalization. Inspect for contaminants and remove any wax chunks that could trap cold spots.
How do I set up a warm water bath?
Place the glass jar in a pot or bowl and add warm water until it reaches most of the jar’s height. Keep the water temperature steady—use water between lukewarm and comfortably hot for the hand, and monitor with a thermometer.
How long does the monitoring and warming take?
Expect 20–60 minutes for gradual remixing, depending on crystal size and jar volume. Gently stir occasionally to speed even thawing. Replace very cool bath water with warmer water as needed to maintain consistent warmth.
Can I use a slow cooker to warm a jar?
Yes. Use the lowest setting and place jars in a water bath inside the cooker. Check the temperature frequently and remove jars when the honey reaches a smooth, liquid state. Avoid direct contact with heating elements.
Is it okay to use warm sunny spots for this?
Placing a sealed glass jar in indirect sunlight can slowly soften crystals. This radiant heat method works best in mild climates and takes longer than a water bath. Avoid hot direct sun that could overheat the jar.
Why should I avoid microwaving jars?
Microwaving heats unevenly and can create hot spots that exceed safe levels, damaging enzymes and altering flavor. It also risks melting lids or warping plastic, which may contaminate the product.
What are the risks of overheating honey?
Overheating can darken color, diminish aroma, reduce beneficial enzymes and nutrients, and in extreme cases create off-flavors. Excess heat also accelerates Maillard reactions that degrade quality.
How should I store honey to reduce future crystallization?
Store honey at room temperature in a dry, dark cupboard away from heat sources and direct sunlight. Use glass jars with tight lids. Avoid refrigeration, which promotes faster crystal formation.
Should I use glass or plastic containers?
Glass is preferable for long-term storage and warming because it resists warping and tolerates gentle heat well. Plastic can absorb flavors and may deform when exposed to warm water baths.
What signs indicate honey has been compromised?
Look for fermentation smells, visible foam, off flavors or persistent bubbling—these suggest moisture contamination. If the jar shows mold, an unusual sour odor or separation that won’t remix, discard the product.