This guide shows how to turn thoughtful beekeeping into steady income while keeping control of your hive genetics and honey quality. It’s written for U.S. hobbyists who want to scale with predictable steps.
Expect clear workflows: we preview an Oliver modification starter/finisher system that yields about 40–50 cells per cycle. You’ll learn which gear matters most — swarm board, queen excluder, grafting tool, cell bars, cups, cages, and feeder lids — so your budget targets high-return items.
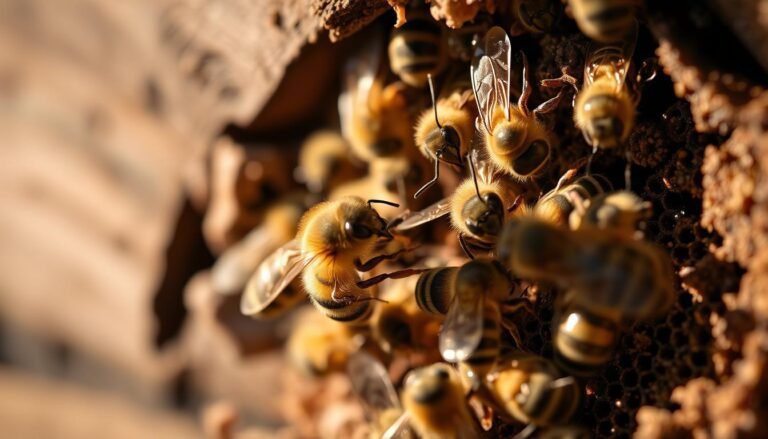
Quality drives success. Start with very young larvae, feed heavily until pupation, and saturate the mating yard with good drones. Keep combs clean of coumaphos and fluvalinate to protect honey and customer outcomes.
Follow a day-by-day cadence from Day 0 setup to Day 30 mite control. The plan fits around a day job, lists hours needed per task, and teaches acceptance metrics like jelly left in cups and capped-cell timing for steady improvement.
Key Takeaways
- Use the Oliver-modified starter/finisher to produce repeatable batches of 40–50 cells.
- Invest in key gear to save time and protect product integrity.
- Prioritize very young larvae, abundant feeding, and drone saturation for stronger queens.
- Follow the day-by-day calendar and log hours to fit queen rearing around your job.
- Measure progress with simple acceptance metrics and maintain pesticide-free combs.
Why Queen Rearing Is a Profitable Side Business in the United States
Local demand and predictable seasonality make queen production a profitable path for many U.S. beekeepers. Hobbyists and commercial outfits need reliable queens to reduce colony downtime and sustain honey yields. Mated queens are especially valuable because they begin laying immediately and improve survival rates.
Low incremental overhead once equipment is set up means repeatable batches in spring and early summer. Producers can diversify revenue by selling mated queens, virgin queens, queen cells, and nucs, each with different margin profiles.
Selection discipline matters. Choose breeder stock from colonies that are gentle, productive, and disease-resistant. Mark top producers during peak flows and cull underperformers to protect reputation and repeat sales.
Efficient use of hive space—dedicating cell builders and finishers—keeps the operation scalable without extra real estate. Cashflows follow a rhythm: pre-orders in late winter, peak sales in spring, then repeat business for splits and replacements.
“Mated queens compress risk and reduce support calls, which builds customer trust and long-term margins.”
- Demand drivers: replacements, commercial pollination needs, and seasonal hobbyist purchases.
- Margin note: mated queens command higher prices; nucs bundle value for local buyers.
- Customer service: transparent genetics, clear aftercare, and clean gear increase repeat orders.
For practical setup and small-scale methods, consult the small-scale queen rearing guide to match timing with regional nectar flows and optimize production.
Define Your Market, Business Model, and Production Goals
Start by mapping local buyers so your product mix fits actual demand and seasonal patterns.
Who buys your queens and cells? Local beekeepers need quick requeening, nuc producers want dependable queens to sell turnkey colonies, and pollination outfits value consistent brood patterns and low swarm pressure.
Decide which products match those buyers. Offer mated queens for reliability, virgin queens for lower-price buyers, queen cells for experienced hobbyists, and nucs when buyers want ready colonies for spring placement.

Use the Oliver modification starter/finisher as a planning baseline: one box can target 40–50 accepted cell starts per cycle. Translate that into mating nucs by counting frames: plan one honey frame, two brood frames, one drawn frame, and at least three frames of bees per nuc.
- Assign dedicated starter/finisher colonies and support boxes for brood and pollen frames.
- Schedule key days (Day 0, Day 6, Day 11, Day 25, Day 30) and budget hours around them.
- Keep buffer frames, extra nurse bees, and spare nucs to manage variability and weather delays.
| Output Unit | Frames per Unit | Bee Requirement | Expected Yield |
|---|---|---|---|
| Starter/Finisher Box | n/a (cell bars) | Strong nurse population | 40–50 cell starts per cycle |
| Mating Nuc (4-frame) | 1 honey, 2 brood, 1 drawn | 3+ frames of bees (often 4) | 1 queen per nuc after mate-out |
| Nuc (5-frame sale) | 2 brood, 1 honey, 1 drawn, 1 bees | 4 frames of bees initially | Turnkey colony for buyers |
| Buffer Inventory | Extra brood & drawn frames | Reserve nurse bees | Cushions acceptance and weather risk |
“Plan capacity by translating frames and nurse bees into how many mating nucs you can form per cycle.”
Finally, set revenue targets by converting expected cell starts into saleable queens, and factor realistic loss rates through emergence and mating. For seasonal task planning, review regional calendars like seasonal beekeeping tasks to align production with nectar and pollen flows.
Essential Equipment and Hive Configurations for Raising Queens
A standardized starter setup reduces variability and helps you hit predictable yields.
Starter/finisher layout
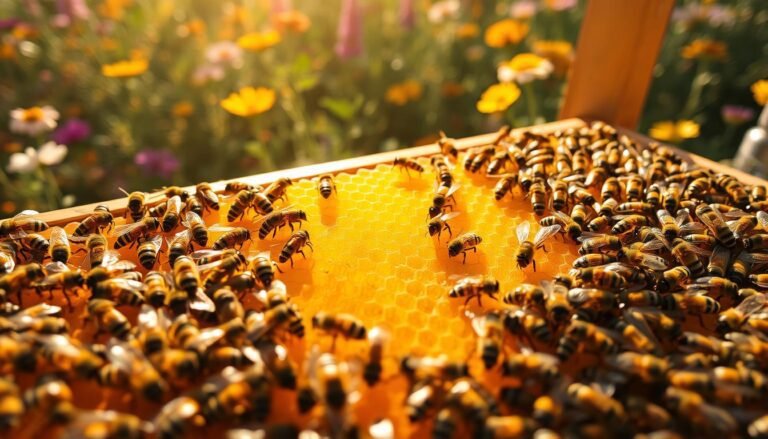
Use the Oliver modification: a horizontal division (swarm board) with a rear upper entrance and the queen below an excluder. Place the starter box above and pack it with nurse bees by shaking brood frames through a sieve box.
Must-have tools
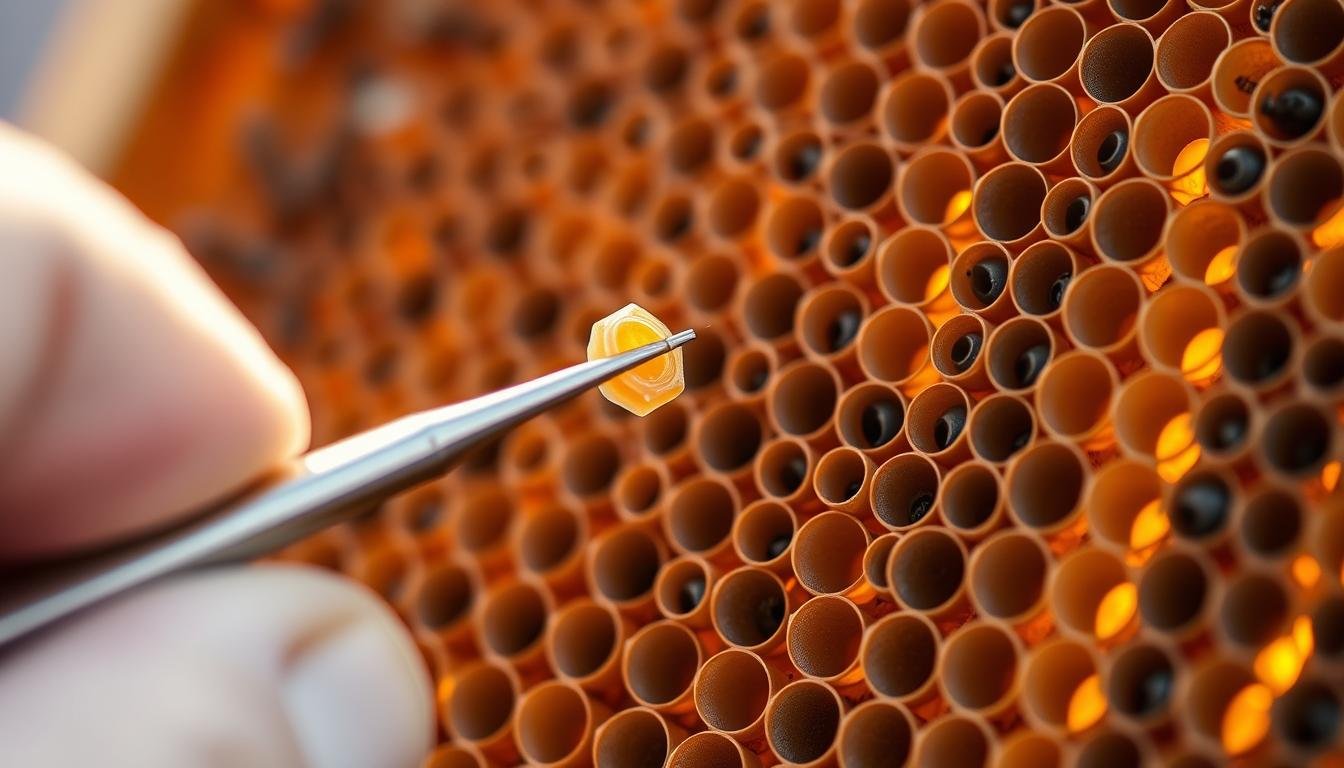
- Grafting needle: Chinese-style for fast larva transfers.
- Cell bars and cups: plastic cups show jelly for checks; wax cups are well accepted.
- Cages and wet towels: protect emerging queens and keep grafts moist.
Support gear and optional upgrades
Feed measured 1:1 syrup with feeder lids and add pollen-rich frames to boost royal jelly. Keep a marked frame of very young brood for grafting and remove emergency cells before using the finisher.
Small upgrades matter: head-mounted magnifiers (3x–4x) with an LED between the eyes improve grafting accuracy. An incubator on Day 9–10 protects sealed cells and reduces losses.
| Item | Purpose | Recommendation | Impact |
|---|---|---|---|
| Swarm board + excluder | Divide hive; control queen movement | Oliver modification | Stronger starter populations |
| Cell bars & cups | Hold grafts | Plastic or wax cups sized to frames | Higher acceptance; easy checks |
| Sieve box | Shake in nurse bees, exclude queens | Medium super with excluder bottom | Right age bees in starter |
| Head magnifier & incubator | Improve graft accuracy; protect sealed cells | 3x–4x LED magnifier; small incubator | Fewer errors; higher survival |
Tip: use minimal smoke, shake only brood frames for nurse bees, and avoid overfeeding to stop burr comb from covering cells.
Step-by-Step Production Workflow: From Larvae to Sale-Ready Queens
A clear, day-by-day workflow turns larvae into sale-ready queens without guesswork.
Day 0: set the starter box with drawn comb, pollen, and very young brood. Shake nurse bees onto frames, feed light syrup, then graft using a Chinese tool and place the cell frame centrally.
Day 1–6: confirm jelly in cups and wall extension, convert to a queenright finisher above a queen excluder, remove emergency cells, and watch for capped cells by Day 6.
Day 9–11: move sealed cells to an incubator if needed, build mating nucs with one honey frame, two brood frames, and one drawn frame, then insert ripe cells vertically into nucs.
Day 25–30: check for eggs and even laying, consolidate non-takes, and use the broodless window on Day 30 for varroa treatment. Follow these steps for repeatable success in small-scale rearing.
FAQ
What basic steps turn brood into sale-ready queens?
Start by selecting strong donor colonies with young larvae on brood frames. Use grafting needles and wax or plastic cups to transfer larvae into a starter colony or cell builder. After cells form, move them to a finisher or mating nuc with ample nurse bees, pollen frames, and syrup feeders. Monitor mating within 7–14 days, then cage and mark mated queens before sale. Proper timing of grafting, adequate nurse bee numbers, and clean equipment are key to consistent success.
Who buys queens, queen cells, and nucs in the U.S. market?
Local beekeepers, commercial pollination operators, and nuc producers are primary buyers. Hobbyists also purchase mated queens and queen cells to requeen hives. Regional demand spikes during spring and early summer. Building relationships with suppliers and beekeeping clubs helps secure repeat customers and bulk orders.
How do I choose between selling mated queens, virgins, or queen cells?
Mated queens command higher prices and suit customers who want immediate laying capacity. Queen cells offer lower cost and appeal to beekeepers experienced with introductions and requeening. Virgin queens are riskier due to unpredictable mating. Your product mix should mirror your capacity for raising nurse bees, availability of mating yards, and customer risk tolerance.
How many colonies and brood frames do I need to meet a revenue target?
Estimate production by calculating cells per colony per cycle and cycles per season. A typical small producer uses several donor colonies plus multiple starter/finisher hives; plan for enough nurse bees to support grafted larvae. Align hive count, availability of brood frames, and grafting frequency with your sales goals. Track success rates to refine capacity planning.
What essential equipment do I need to raise queens reliably?
Core gear includes grafting needles, plastic or wax cups, cell bars, queen cages, and a starter/finisher setup. Use a swarm board or Oliver modification with a queen excluder for controlled rearing. Support items such as nuc boxes, feeders, sugar syrup, pollen frames, and wet towels help maintain colony health and boost acceptance rates.
Are incubators or magnifiers necessary upgrades?
Incubators can stabilize temperature for sensitive operations but are optional if you maintain strong starter colonies. Head-mounted magnifiers with LED lights make grafting easier and reduce larval damage. Treat these as productivity upgrades rather than essentials when starting out.
How long from grafting to a mated, sale-ready queen?
Queen cells form in about 9–10 days after grafting. Virgin queens emerge then require roughly 7–14 days to mate, depending on weather and drone availability. Plan for 3–4 weeks minimum from graft to a confirmed mated queen ready for sale.
What are common causes of low cell acceptance and how do I fix them?
Low acceptance often stems from weak nurse populations, poor timing (old larvae), or stressed starter colonies. Improve results by using strong brood-producing colonies, grafting very young larvae (under 24 hours), and ensuring ample pollen and syrup. Clean, undamaged cups and careful handling during grafting also increase success.
How do I transport queens and queen cells safely to customers?
Use ventilated, secure cages and place cells in padded cell boxes with live nurse attendants or wet towel insulation to maintain humidity. Keep shipments short and avoid extreme temperatures. For mated queens, include a small candy or fondant plug and clear labeling with contact information and care instructions.
What legal or regulatory concerns should small-scale producers watch?
Check state and local regulations on bee movement, pest inspections, and permit requirements. Some states require health certifications or testing for pests like Varroa or American foulbrood for commercial sales. Maintain accurate records of hive health, sources of brood, and treatment histories to comply with buyer expectations and traceability standards.
How can I improve mating success in my area?
Increase local drone density by maintaining drone-producing colonies or coordinating with nearby beekeepers. Choose mating yards with good flight conditions and minimal pesticide exposure. Time production for peak drone availability and monitor weather; calm, warm days yield better mating flights.
What pricing factors should I consider for queens and cells?
Factor in labor (grafting, inspections, marking), materials (cups, cages, feeders), equipment amortization, and success rates. Market demand, regional scarcity, and queen genetics also affect price. Offer tiered pricing for marked, graded, or hygienic-stock queens to capture different buyer segments.
How do I introduce a new queen or cell into an existing hive?
For queen cells, use the “cut-out” or direct cell transfer into a nuc with strong nurse bees and minimal disturbance. For mated queens, use a cage over several days, allowing workers to acclimate before release. Reduce robbing risk by feeding and perform introductions during calm weather with adequate nectar flow.
What record-keeping practices boost long-term success?
Track graft dates, donor colony IDs, acceptance rates, mating yard locations, and treatment histories. Record sales, customer feedback, and genetic traits like honey production or hygienic behavior. Consistent data helps refine cycles, predict capacity, and provide transparency to buyers.
How do I scale production without sacrificing quality?
Standardize grafting techniques, maintain dedicated starter and finisher hives, and train assistants or seasonal help. Invest in efficient tools like cell bars and quality cages, and gradually expand mating yards. Keep quality checks—culling poor performers and monitoring disease—to protect reputation as you grow.