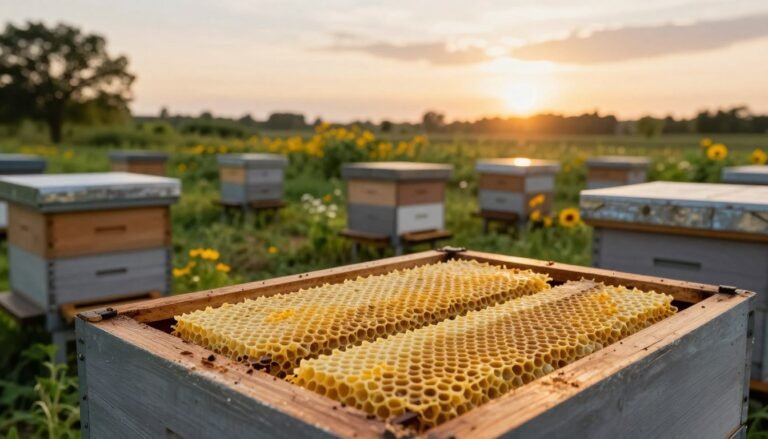
Beekeepers often debate whether adding a second opening helps hives survive the cold months. Questions from Ontario users like JoannaD and tips from experienced hands such as Dawn_SD show this is a common forum topic.
Good airflow and moisture control can make or break fall and spring survival. A thoughtful setup helps protect brood, preserve honey stores, and reduce condensation under the lid.
The main dilemma is trade-offs: extra ventilation can allow cleansing flights when snow blocks the front, but it may also let heat escape and increase food use.
Local climate, insulation choices like a quilt box, and how you manage boxes and frames should guide your decision. For more detailed local advice, read this practical guide on the topic at upper entrance beehive winter.
Key Takeaways
- Climate and region are the top factors when choosing an entrance setup.
- An added top opening can allow cleansing flights if the front gets blocked.
- Insulation, quilt boxes, and moisture control reduce harmful condensation.
- Extra ventilation may increase honey use; monitor food stores closely.
- Consult local forum posts and experienced keepers to refine your approach.
Understanding Hive Dynamics in Cold Weather
Cold months change how a colony uses heat and space. Bees cluster tightly around the brood to keep the queen and young larvae warm. This clustered behavior is the most efficient way a hive preserves energy when temperatures fall.
Temperature control is active work. Workers beat their wings to move air and manage humidity. Good insulation reduces the effort the colony must make and helps conserve honey stores.
Proper ventilation matters: it clears moist air without letting too much heat escape. The top of the hive is a common spot for heat loss, so a solid cover and an insulated roof help retain warmth.
- JeffH notes that better-insulated hives improve survival odds.
- Bees regulate air quality while conserving food reserves.
- Keep an eye on stores so the colony can sustain heat production.
| Factor | Bee Action | Beekeeper Tip |
|---|---|---|
| Temperature drop | Cluster tighter around brood | Increase insulation and check honey levels |
| Moist air | Wings ventilate and condense moisture | Provide controlled vents and a dry quilt box |
| Top heat loss | Heat rises to the roof | Use an insulated cover and secure roof caps |
For a deeper look at how colonies behave and how to prepare hives, see this guide on what happens inside a beehive during and practical steps for winterizing beehives in northern states.
The Debate of Upper Entrance vs Lower Entrance in Winter
A lively forum thread shows how opinions differ about putting a hole at the top or keeping the usual front way.
JeffH prefers a downward-facing bottom opening because wind and snow make a lot of difference. He says a low opening keeps drifting snow out and limits direct wind flow into the hive.
Peter48 warns that a top entrance can let a lot of warmth escape. In cold climate, that heat loss matters for the cluster and the brood.

“A small hole in an inner cover gives a bit of ventilation without a big opening,” some posts note on the forum.
Many beekeepers use a quilt box or specialized boards to control humidity and condensation. Bees will propolize gaps, showing they want a controlled environment. Observe your hives and adjust the cover, hole size, or boxes based on how the bees cope by spring.
| Issue | Forum Opinion | Beekeeper Tip |
|---|---|---|
| Snow blockage | Favor bottom opening | Face opening downward; use boards |
| Heat loss | Top hole may increase loss | Use inner cover with a hole |
| Moisture | Quilt helps condensation | Add quilt box and insulation |
Why Ventilation Matters for Colony Survival
Small changes to how a hive breathes can cut winter losses substantially.
Balancing airflow and warmth is the core reason many beekeepers add a top opening or prop the lid slightly. Proper ventilation removes moist air that drips onto the cluster and causes brood loss.
Too much airflow forces bees to burn extra honey to stay warm. Too little lets condensation form and wet the comb. The goal is steady, gentle air exchange without a large cold draft.
Practical steps to manage airflow
- For hives with a solid floor, MrTF recommends placing matchsticks under the top board to allow air movement.
- Eva 3 notes that propping the cover a little prevents moisture buildup inside the hive.
- Keep the bottom opening clear of snow or debris so bees can get fresh air when needed.
“Even a small top opening can change humidity and help the colony survive,”
For more on managing vents and damp conditions, see this guide on managing hives in wet climates.
Risks of Moisture and Condensation Buildup
Moisture inside a hive can quietly become the biggest threat to a colony’s health. High humidity leads to condensation that drips onto the cluster and chills the bees. Left unchecked, this wetness can cause mold and harm brood.
Peter48 points out that this problem shows up not only during cold months but also in humid summer spells. When water pools on frames or the inner cover, bees must work harder to stay warm and dry.
Monitor hives for signs of moisture: heavy comb wetting, visible mold, or sluggish activity on mild days. Proper ventilation is the most effective defense. Gentle air exchange reduces humidity without forcing the colony to burn extra stores.
- Use a dry quilt or absorptive board to catch excess water.
- Provide a small vent or controlled opening to let damp air escape.
- Check stores and cluster health more often in damp regions.

“When the air inside the hive becomes too damp, the bees may struggle to keep the brood warm and healthy.”
Managing Snow Blockage at the Hive Entrance
When snow piles high, colonies can lose access to fresh air and flights. That risk affects brood, ventilation, and honey use at the end of the season.
Clearing Snow Drifts
Check hives often after heavy weather. Clear packed snow from the front so bees have a safe way out for cleansing flights.
Use a small shovel or broom and remove only enough snow to open one inch or more of airflow. Avoid forcing a large gap that creates a cold draft.
Preventing Entrance Obstructions
Simple changes save time and stress. Fit an inner cover with a cut-out or add a shim with a hole beneath the outer cover to create a protected top entrance that stays clear when the lower opening fills.
Some keepers, like Dawn_SD, prefer that inner cover cut-out for that reason. MrTF has used 3 ft temporary fences to reduce drift buildup around the front of hives.
| Problem | Solution | Benefit |
|---|---|---|
| Blocked front opening | Clear snow; keep a small opening | Restores flights and air flow |
| Frequent drifting | Temporary wind fence or raised stand | Less snow at the entrance |
| No protected opening | Inner cover cut-out or shim hole | Protected exit and reduced condensation |
Placement and climate determine how often you must clear the way. For practical emergency steps and handling extreme weather, review this guide on preparing hives for extreme weather.
The Role of Propolis in Sealing Hive Gaps
Propolis is the colony’s secret tool for shaping a steady microclimate. JeffH noted that his bees seal every gap with this resin to keep the brood at the right temperature.

Bees use propolis to block cold drafts and control air flow. That behavior reduces heat loss and helps colonies conserve honey during winter.
If a beekeeper leaves many small openings, the colony will spend energy and stores gathering and applying propolis. That effort can cost valuable calories the bee population needs for survival.
“A tight, well-sealed hive lets the colony focus on brood care rather than constant repairs.”
- JeffH notes bees quickly close gaps that let cold in.
- An upper entrance or a top entrance may be sealed if the draft feels strong to the colony.
- Respecting this habit means avoid creating needless gaps that waste bee resources.
For ideas on managed openings and fitted reducers that work with bee behavior, see hive entrance reducer alternatives. A well-sealed hive helps bees focus on brood health and overwinter success.
Seasonal Adjustments for Hive Insulation
A few simple spacers let keepers tune insulation and avoid costly heat loss. These seasonal tweaks let the colony keep brood warm while limiting wasted honey.
Using shims and spacers is a low-cost, flexible method. A thin shim lifts the cover a bit to allow gentle air exchange without a large draft.
Practical tips from experienced keepers
Eva 3 uses a shim with a precut hole on the top of the uppermost box to provide controlled ventilation. That hole allows moist air to escape while the bees retain most heat.
Peter48 prefers 1-inch solid timber for hive lids. This thicker cover adds mass and improves insulation so the bee cluster uses less energy to stay warm.
“A spacer is a simple bit of work that pays off in higher survival rates,”
- Shim with hole: gentle ventilation without large heat loss.
- Solid timber cover: better insulation and reduced honey consumption.
- Inner cover tweaks: use a cut-out or small hole to balance air and warmth.
| Adjustment | Effect | Quick tip |
|---|---|---|
| Precut shim hole | Improves air exchange, lowers condensation | Place over inner cover near top entrance for controlled flow |
| 1-inch timber cover | Increases insulation mass, reduces heat loss | Seal edges to prevent drafts and conserve honey |
| Raised spacer under cover | Allows moist air to move out without chilling brood | Use a small gap (about an inch) and monitor hive behavior |
Adjustments should match local climate and hive condition. Watch how the bees respond and change shims or covers as needed. For details on keeping moisture low and protected top exit options, see this discussion about top entrance prep and the practical guide to prevent hive moisture.
Comparing Different Wintering Inner Cover Designs
Not all inner covers are built the same. Design choices affect how a hive handles heat loss and moisture. Picking the right model is a practical step toward better survival.

Dawn_SD recommends an 8-frame wintering inner cover as a solid investment for colder months. That style fits most standard boxes and gives room for insulating material above the cluster.
Many designs pair with an outer cover to form a layered barrier. Some inner covers include built-in access or a molded space for candy boards to simplify winter feeding.
- Choose durability: long-lasting covers cut maintenance and keep insulation consistent.
- Look for features: openings or candy-board slots add convenience for emergency feeding.
- Match your hive: pick a size and fit that snugly sits under the outer cover to prevent drafts.
“A good inner cover controls moisture and keeps the cluster warmer without extra work.”
Compare options against your local climate and handling style. For added protection and insulation ideas, consider pairing the cover with the best hive wrap for cold climates.
Expert Tips for Successful Overwintering
Clear, consistent steps from seasoned keepers make overwintering far less guesswork. JeffH stresses that the single best ventilation the colony needs is the entrance, not lots of extra holes that force bees to work harder.
Watch food and brood. Provide ample honey stores and healthy brood going into the cold months. Check frames and boxes earlier in the season so you can adjust before the cluster shifts.

Manage moisture with a dry quilt and the right inner cover. Gentle air flow reduces condensation and keeps humidity steady under the lid. A small top hole or a properly set shim can help without blowing heat out.
“Learning from experienced keepers on the forum and having a mentor saved me years of trial and error,”
- Keep the front clear: clear snow and debris so bees can fly on mild days.
- Monitor all year: adjust insulation based on your local climate and weather.
- Learn from posts and mentors: practical tips beat perfect theory.
For a practical primer from seasoned users, consider this experienced winter beekeeping guide. Small, steady changes now help your bees emerge strong in spring.
Conclusion
Preparing hive ventilation and insulation now sets the stage for healthy bees next year. Focus on the entrance and a dry quilt to manage humidity and help the colony stay warm without wasting stores.
Watch for signs of condensation and keep your top box setup controlled as you finish the season. Small tweaks at the end of the year prevent water buildup that can harm brood and adults.
Choose the configuration that fits your climate and observe often. For practical reading on managed openings and airflow, see this guide to beehive entrance management and these hive temperature tips. With steady care through the season, your hive has the best chance to thrive come spring.
FAQ
Should I use a top or bottom entrance for my hive in cold months?
Choose the entrance that matches your local climate and hive setup. A higher opening near the inner cover can help vent moist air away from the cluster, while a lower opening allows for easier bee traffic and ventilation at ground level. Many beekeepers use a small top hole plus a reduced lower opening to balance airflow and warmth.
How does temperature affect the hive cluster and brood during cold periods?
Bees form a tight cluster and generate heat by shivering their flight muscles. Maintaining steady internal temperature protects brood and conserves honey. Proper insulation, an effective inner cover, and controlled vents reduce temperature swings that stress the colony.
What steps keep heat inside the hive without causing moisture problems?
Insulate sidewalls and use a quilt box or absorbent material under the outer cover to capture condensation. Provide a small high vent for humid air to escape while keeping main openings minimized. Avoid over-sealing; breathable materials like burlap over the inner cover help balance warmth and airflow.
Why is ventilation critical for colony survival during the cold season?
Ventilation removes excess humidity and carbon dioxide. Too little airflow leads to condensation that drips onto frames and chills bees. Controlled ventilation prevents dampness while retaining enough heat to protect the cluster and the stored honey supply.
How do I balance airflow and warmth effectively?
Use a top vent for moisture escape and a small reduced bottom entrance for limited airflow. Add shims or spacers to create a narrow gap if needed. Monitor weather: on calm cold nights reduce openings; on warmer or wet days increase ventilation slightly to prevent condensation.
What causes moisture and condensation buildup, and how do I prevent it?
Moisture comes from bee respiration and temperature differentials between inside and outside the hive. Prevention includes adding insulation, using a moisture-absorbing quilt, ensuring a high vent, and keeping the outer cover slightly raised to allow humid air to exit without creating drafts through the cluster.
How should I manage snow or drift blockage at the hive entrance?
Keep the lower entrance clear by angling the hive front slightly downward and placing it on a raised platform. After heavy snow, clear a small tunnel to allow for bee traffic and ventilation. Avoid fully exposing the hive face; just open enough to let bees fly and moisture escape.
What’s the best way to clear snow without chilling the colony?
Gently remove snow from the immediate entrance area during warm parts of the day. Use a gloved hand or a soft tool and avoid opening the hive. If possible, leave a small windbreak to prevent quick redeposition of snow and reduce wind chill on the hive face.
How can I prevent entrance obstructions from ice and debris?
Install an entrance reducer, use screened bottom boards or mouse guards, and maintain a slight overhang on the outer cover to deflect rain and ice. Regular checks during mild weather help catch blockages before they become dangerous to the colony.
What role does propolis play in winter hive management?
Bees use propolis to seal gaps and reduce drafts. While excessive sealing can limit needed ventilation, moderate propolizing stabilizes internal conditions and deters pests. Allow natural propolis use and avoid removing heavily sealed joints unless necessary for inspection.
When should I make seasonal adjustments to hive insulation?
Add insulation and a quilt or extra inner cover in late fall before deep freezes. Remove or reduce external insulation and vents gradually in spring as daytime temperatures rise. Monitor colony weight and activity to time changes without stressing the bees.
How do shims and spacers help with winter relief and airflow?
Shims create a controlled gap between boxes or under the outer cover for slight ventilation and to provide comb space when frames are short of honey. Use narrow spacers to allow moist air to escape at the top while keeping the lower entrance small for protection.
Which inner cover designs work best for cold climates?
Inner covers with an inset ventilation hole or small notch allow humid air to rise into a quilt area. Some beekeepers prefer screened inner covers to promote airflow, paired with a quilt box above the cover to trap moisture while permitting heat retention.
What are practical expert tips for successful overwintering?
Feed and ensure adequate honey stores before winter. Use a moisture-absorbing quilt or burlap, reduce the lower opening with a reducer, and provide a small top vent. Place hives in a sheltered location with southern exposure if possible. Inspect only on mild days to avoid chilling the cluster.