Understanding how a new reproductive develops is vital for every beekeeper in the United States. This introduction outlines the steps from egg to emerging female and gives clear reference points for management. Brood nest temperature staying near 33–36°C and proper humidity help ensure healthy development.
The process from egg to adult is swift: workers require about 21 days, drones about 24, and a future egg-laid female finishes development in roughly 16 days. Nurse bees feed royal jelly and other secretions to selected larvae to start rearing a new leader. Within a week after emergence the adult needs 5–6 days to mature for mating flights.
Practical timing matters. Tracking production, using nucs and cups, and managing nectar and honey stores helps prevent an unwanted swarm and supports colony health. For a detailed life-stage chart and further reading, see this life cycle guide.
Key Takeaways
- Temperature control (33–36°C) is critical for healthy development.
- Queen development finishes in about 16 days; workers and drones take longer.
- Use nucs, cups, and careful monitoring to manage rearing and reduce swarm risk.
- Nurse bees, royal jelly, nectar, and honey are essential for successful rearing.
- Allow 5–6 days after emergence before expecting mating flights and egg laying.
- Plan Varroa treatments around broodless windows of roughly seven days.
Understanding the Hive Environment
A hive maintains a narrow thermal window to protect developing brood and preserve colony function. This climate control is active and precise. Workers adjust heating and cooling to keep conditions stable for proper development.
Thermoregulation in the Brood Nest
Temperature in the nest is kept between 33°C and 36°C, with many colonies aiming near 34.5°C. Workers heat combs by contracting flight muscles and cool them by evaporating water when needed.
“Small shifts of only 1°C can alter neuroanatomical growth in the mushroom bodies, affecting behavior later in life.”
Impact of Temperature on Development
Rearing at lower temperatures causes clear deficits. For example, workers raised at 32°C show reduced waggle dance precision compared to those from warmer brood.
| Metric | Optimal | Below Optimal |
|---|---|---|
| Brood temp range | 33–36°C | <32°C causes developmental issues |
| Typical nest target | 34.5°C | Variable; triggers thermoregulation |
| Behavioral impact | Normal waggle & learning | Reduced dance accuracy, altered mushroom bodies |
Practical note: A single frame of brood needs constant attention from workers. If you monitor hive temps, tools like heat mapping for brood assessment can help you spot hot or cold spots and protect development.
The Importance of Queen Cell Timing Day by Day
A well-timed inspection often decides whether a colony swarms or stays productive.

Key milestones matter. Cells are sealed on the ninth day of development, which is the fifth day after the larva hatches from the egg. A colony intent on swarming will often leave with the old queen on the same day that sealing occurs.
From a newly laid egg to a mated, laying new queen takes at least 23 days. That makes each check important. Track the calendar so you can act during windows when the hive is most vulnerable.
- Mastering this schedule helps prevent a swarm and keeps honey stores safe during nectar flow.
- Know the moments when queens are vulnerable and intervene with splits, nucs, or checks.
- Use inspection notes to plan manipulations and protect colony strength.
| Event | Timing | Action point for beekeeper |
|---|---|---|
| Egg laid | Day 0 | Mark frame and start calendar |
| Hatch to larva | Day 4 | Monitor feeding and nutrition |
| Cell sealed | Day 9 (5 days after hatch) | Inspect for swarm signs; prepare splits |
| Minimum to mated laying | ≥23 days from egg | Plan colony support and mating nucs |
Worker Bee Development Cycles
Worker development follows a tight, three-stage schedule that the colony enforces with precise care. This schedule creates steady worker turnover and keeps hive tasks staffed.
The Three Stages of Worker Growth
Workers complete development in about 21 days. That includes three days as an egg, five days as an open larva, and 13 days capped in pupal form.
At hatch the first molt occurs. The final molt takes place at emergence. Nurse bees feed the larva progressively during each instar to build healthy brood.
- The worker larva passes five instars before pupation.
- Nurse bees regulate food and hygiene to protect growth.
- Every cell has a role; workers are central to colony function and to any future swarm.
| Stage | Duration (days) | Key events |
|---|---|---|
| Egg | 3 | Cell capped hatch prep |
| Open larva | 5 | Five instars; nurse feeding |
| Capped pupa | 13 | Final molts; emergence |
The Role of Larval Nutrition in Queen Rearing
What nurse bees feed a young larva in the first 72 hours directs its entire future.
The first three days are critical. Larvae that will develop into a new reproductive and those that will become workers receive the same diet until that point.
After day three a switch to a richer regimen begins. Nurse bees deliver secretions from hypopharyngeal and mandibular glands and increase frequency of visits to the brood.
Nutrition is the deciding factor in whether a larva becomes a high-quality queen. Adequate honey, nectar, and pollen in the hive let nurses keep up the intensive feeding needed for strong development.

“Nurse workers may visit a developing larvae thousands of times, each visit shaping caste outcome.”
- Early diet determines caste fate; change after three days is essential.
- Beekeepers can improve outcomes by ensuring frames stocked with pollen and stores of honey.
- Monitoring brood nutrition and supporting nurse populations helps reduce developmental problems.
| Stage | Feeding pattern | Beekeeper action |
|---|---|---|
| Egg to day 3 | Standard larval diet | Ensure strong nurse population and pollen availability |
| After day 3 | Rich, royal-like secretions | Provide nectar/honey stores and reduce disturbances |
| Capped development | Protected pupation | Maintain stable brood temperatures and space on frames |
For deeper research on how feeding and care affect development, see this detailed study.
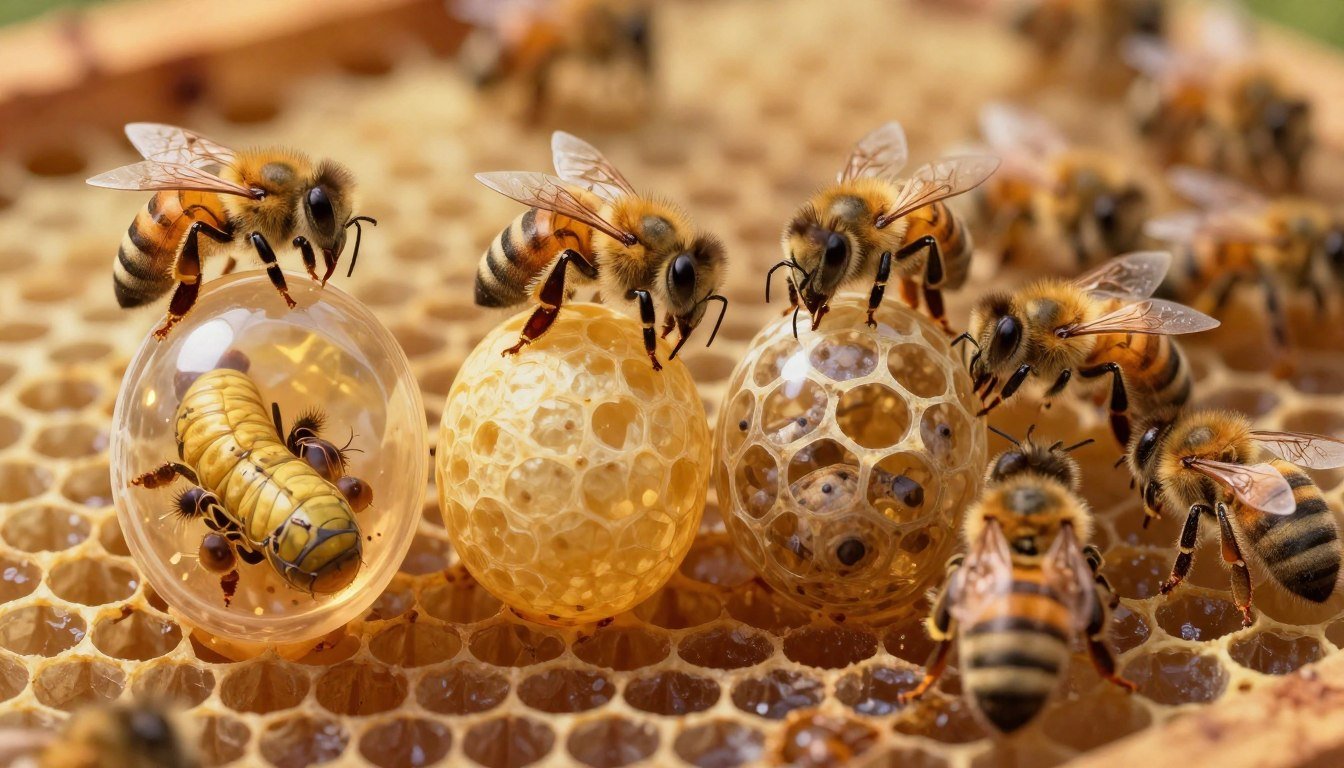
Queen Bee Development Stages
Queen larvae receive a compressed schedule that speeds development compared with worker brood. This faster track begins with identical eggs and early feeding, then shifts to an enriched diet that changes fate.
By the ninth days the queen cell is sealed. Development continues under the cap until emergence on the 16th day. That shorter span exists because nurse workers feed the larva royal-like secretions that accelerate growth.
A new queen is central to colony success. Proper attention during these stages helps ensure robust mating and later laying. A well-cared-for reproductive can live three years or more, supporting hive stability.
- Compressed development: faster than workers due to richer nutrition.
- Key checkpoints: sealed on day nine, emergence on day 16.
- Colony care: nurse bees and stable brood conditions are vital.
| Stage | Timing | Beekeeper action |
|---|---|---|
| Egg to early larva | 0–3 days | Mark frames and ensure nurse strength |
| Special feeding | 3–9 days | Maintain stores of pollen and nectar |
| Sealed to emergence | 9–16 days | Limit disturbances; monitor queen cell health |
“Monitoring development gives beekeepers the best chance to protect a new leader.”
Drone Development and Colony Dynamics
Understanding drone production helps beekeepers predict mating success and seasonal resource needs.
Drone development takes about 24 days from an unfertilized egg to emergence. After emergence, drones need roughly 10–12 days to reach sexual maturity before they can mate.
Summer drones usually live less than a month. Their shorter lifespan means colonies must balance how many males they rear with available stores.

Workers handle drone care, feeding and protecting male brood so mating flights succeed. Healthy production of drones signals a strong colony and supports future queens during mating flights.
- Drone development is the longest caste cycle at 24 days.
- Workers provision and defend drone cells while drones mature.
- Proper drone numbers link directly to mating success and swarm outcomes.
| Metric | Value | Beekeeper action |
|---|---|---|
| Development | 24 days | Monitor frames and space for male brood |
| Maturity | 10–12 days after emergence | Support nurse population and stores |
| Lifespan | ≈1 month in summer | Adjust production to resource availability |
“Drones are essential partners in reproduction; their numbers reflect colony priorities.”
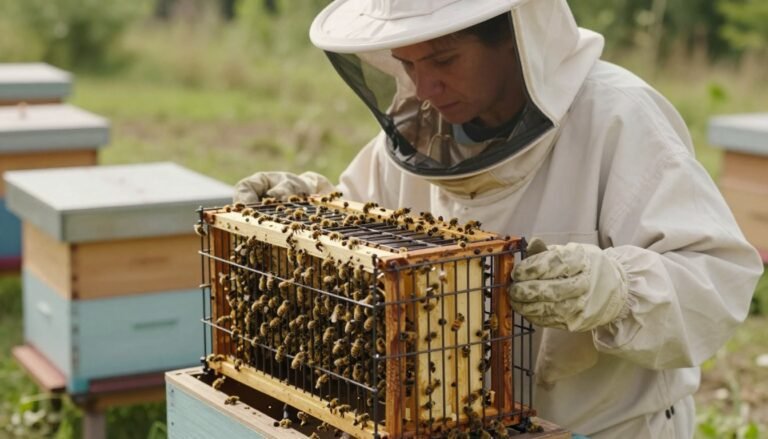
Managing Hive Inspections for Swarm Prevention
Regular inspections give you the best chance to spot reproductive preparations before a swarm forms. A steady routine during peak season cuts surprise losses and protects honey stores.
Identifying Charged Queen Cells
Inspect every frame for enlarged, peanut-shaped structures. Worker-built queen cells often appear along frame edges or under broodcomb.
Look for capped, tapered cells and active nurse visits. If you find charged queen cells, take prompt action: split the hive, create a nuc, or remove excess brood to reduce swarm impulse.
Handling Clipped Queens
Clipping can delay a departure. Colonies with clipped queens sometimes allow a 10-day gap between checks rather than the usual seven.
Still, do not skip frames. Missed hidden cells are the main cause of unexpected swarms. Use careful, systematic inspection and note any brood pattern changes.
“Managing inspections is the most effective way to prevent a swarm and ensure colony health.”
- Inspect weekly in peak months; extend to ten days if the queen is clipped.
- Scan all frames to ensure no hidden charged queen cells exist.
- Understand the swarm cycle to plan splits and protect your bees.
| Action | When | Result |
|---|---|---|
| No charged queen cells found | After full-frame check | Unlikely to swarm within next seven days |
| Charged queen cells present | At inspection | Prepare split or remove excess brood |
| Clipped queen | During peak season | Inspect every 10 days; monitor for late builds |
For deeper methods on swarm control and recognizing pre-swarm signals, see a practical guide on swarm control and tips on how to tell if your hive is preparing to.
Techniques for Successful Queen Rearing
Effective rearing starts with a deliberate plan and proven methods. Use fertilized worker eggs rather than emergency brood for best results. That gives a strong start to development and reduces defects in the new leader.

Common approaches include grafting, cell punching, and Nicot or Cupkit systems. Each method helps charge cups so larvae receive royal-like nutrition in a dedicated rearing unit.
A queenless cell-raising colony or a small nuc usually accepts grafts more readily. These hosts feed larvae intensively and raise high-quality reproductives when nutrition and brood care are ample.
“Careful frame management and reliable methods cut failures and improve mating success.”
Practical tips:
- Select young larvae from good stock and move frames with care.
- Use a dedicated nuc or cell-raising colony to ensure adequate nursing bees and food.
- Monitor frames often so developing cells are well-fed and protected from damage.
With proper method selection and careful frame handling, the time invested in rearing pays off as stronger, productive colonies and fewer losses to swarm impulses.
Selecting Larvae for Optimal Queen Quality
Picking larvae within a tight age window dramatically improves rearing outcomes. For best results choose larvae that hatched within 12–24 hours. These are tiny, slightly curved and not yet in a full “C” shape.

Use gentle grafting technique to move the young larva into sterile cups. A fine brush or specialized tool helps transfer without harm. Place cups into a prepared nuc or cell-raising host that has strong nurse numbers and ample stores.
Selecting the right brood is the single most important step. Small, day‑old larva accept royal-like feeding and support faster development into a strong new queen. Every frame in the hive should be handled carefully to protect nearby eggs and nurse activity.
- Target age: 12–24 hours after hatch.
- Look for: very small, gently curved larva, not C-shaped.
- Tools: fine brush or grafting tool and clean cups.
“The time invested in careful selection pays off with a healthier leader and a more stable colony.”
For practical methods and step‑wise guidance on starting a run, see queen rearing basics.
Preparing Colonies for Cell Raising
Preparing a host colony means creating the right balance of young nurses and an apparent lack of an egg-layer. Aim for many 5–11‑day workers; these nurses provide the feeding intensity young larvae need.
Make the hive appear queenless to prompt rearing behavior. At the same time, ensure frames near the cups hold ample pollen and honey so food is never far from developing brood.
Time matters: the raising and finishing run takes about five days until the structures are sealed. During this window, avoid heavy disturbance and keep nurse access unrestricted.
Frame management is critical. Place brood and stores so nurses can feed frequently. Protect developing units from crushing and excess traffic during inspections.

“The effort you invest in preparation pays off as stronger reproductives and reduced swarm risk.”
- Create apparent queenlessness while keeping the colony well supplied.
- Ensure a strong population of 5–11‑day nurses near larvae and cups.
- Stock frames with pollen and nectar/honey close to the rearing area.
| Requirement | Why it matters | Practical action |
|---|---|---|
| Young nurse population (5–11 days) | Provide frequent feeding and care | Combine frames from strong colonies or use nucs |
| Apparent queenlessness | Stimulates rearing instinct | Remove or isolate the laying queen before introduction |
| Stores near brood | Ensures continuous royal-like feeding | Place pollen and honey frames adjacent to cups |
For finishing techniques and practical details on protecting newly drawn structures, consult finishing methods at cell finishing guidance.
Managing Mating Nucs for Virgin Queens
Setting up a dedicated mating nuc a few days before emergence gives a virgin the best start. Prepare the unit 48–72 hours ahead so nurses, brood, and stores settle in.

Popular choices include the Apidea and the Lyson MiniPlus. These mini hives protect flights and keep drones nearby for mating. Place the nuc in a calm part of the yard, near other hives but sheltered from wind.
Leave nucs undisturbed for 2–3 weeks before opening to check for eggs or laying. That window lets the new queen return from mating and begin brood production.
- Care: Ensure frames have pollen and honey and that nurse bees attend the brood.
- Observation: Watch for drones and healthy activity without heavy inspection.
- Handling: Manage every frame gently so comb and emerging eggs stay intact.
“Managing mating nucs is an art that requires patience and a keen eye for the health of the virgin.”
| Feature | Apidea | Lyson MiniPlus |
|---|---|---|
| Use | Portable, good for single virgins | Robust, easy access for checks |
| Recommended stay | 2–3 weeks | 2–3 weeks |
| Best practice | Prep 2–3 days before emergence | Provide frames with stores and nurses |
The Timeline of Queen Mating and Egg Laying
Weather, drone availability, and the female’s maturation pace together shape mating outcomes. Understanding this brief period helps you support a strong colony.

Factors Influencing Mating Success
Sexual maturity typically arrives about 5–6 days after emergence. During that span the virgin prepares physically and clears mating flights.
Mating flights happen on sunny afternoons when temperatures reach roughly 60°F or higher. Good weather increases flight frequency and mating chances.
Drones matter. A strong drone population near the mating area improves odds. Learn more about the drone role at this drone role.
“A mated female usually begins laying within 2–3 days after her final mating flight.”
- Monitor weather and limit disturbance during mating windows.
- Keep frames stocked with pollen and honey so nurses support the new layer.
- Track drones and nearby colonies to assess mating prospects.
| Stage | Typical span | Beekeeper action |
|---|---|---|
| Maturation | 5–6 days after emergence | Provide calm, fed nucs and avoid moves |
| Mating flights | Sunny afternoons ≥60°F | Limit inspections; check weather forecasts |
| Start of laying | 2–3 days after last flight | Inspect for eggs and steady brood pattern |
Introducing New Queens to Established Colonies
Successful placement of a new leader depends on how the host colony perceives her arrival.
Prepare the hive first. A colony that has been without a laying female for at least eight days will accept a newcomer more readily. Remove or isolate the old layer and give the workers time to register queenlessness.

Place the mated female from a small mating nuc into a standard queen cage. Use a fondant plug so the bees can eat through it when they are calm and nonaggressive. This delay lets workers scent and inspect her without harming the breeder.
Manage frames carefully. Keep food frames and brood close to the cage so attending bees can feed and warm the newcomer. Avoid heavy inspections while acceptance is in progress.
- Patience matters: allow time for social integration.
- Use a queen cage with fondant; open only after workers are peaceful.
- Keep nucs and mating units nearby to supply nurse bees if needed.
“Careful introduction preserves brood, reduces swarm risk, and builds a strong, healthy hive.”
For stepwise methods on introducing a breeder, see a practical guide to queen introduction.
Varroa Management During Broodless Periods
A brief pause in brood production creates a practical seven‑day treatment window for oxalic acid.
Why it matters: when the last eggs laid in a queenless hive finish development and emerge, mites have nowhere to hide inside capped brood. Treating during that span hits phoretic mites on adult bees and gives the highest knockdown.

Good monitoring improves outcomes. Add a Varroa board under the floor to track mite drop before and after treatment.
“A seven‑day broodless interval is the beekeeper’s best chance to reduce Varroa with minimal chemical exposure.”
Practical steps:
- Confirm broodless status after the final emerging brood, then apply oxalic acid following label directions.
- Place a Varroa board to measure natural drop and post‑treatment efficacy.
- Manage every frame carefully; avoid crushing brood or disturbing stores of honey and pollen during treatment.
| Action | When | Expected result |
|---|---|---|
| Confirm broodless | After last emerging brood | Safe window for oxalic treatment |
| Apply oxalic acid | Within 7 days of broodless start | Max mite reduction on adults |
| Install Varroa board | Before and after treatment | Quantify mite drop and treatment success |
| Follow‑up | 2–3 weeks later | Check brood return and repeat monitoring |
Understanding the lifecycle of reproductives and the role of larval feeding helps time interventions. For details on how larval nutrition affects development, see larval feeding cycles.
Troubleshooting Common Queen Rearing Issues
Troubles in rearing often hide in plain sight within the brood area. Spotting them early saves runs and preserves colony strength.

Check nurse activity and food. Poor feeding shows as small or flattened cells and weak larvae. Make sure pollen, nectar, and honey are near the rearing frames so nurses can visit often.
Manage disturbance. Too many inspections or heavy traffic will reduce care and increase failures. Keep movements calm and brief during critical development days.
- Use multiple good quality cells to build nucs if a colony produces extras.
- Protect every frame and avoid crushing brood when moving cups or frames.
- If brood pattern looks patchy, strengthen the nurse population or swap in a frame with fresh stores.
“The time you spend troubleshooting improves outcomes and yields a stronger new leader.”
For tips on boosting colony populations and supporting rearing runs, see how to boost colony population naturally.
Conclusion
Mastering the lifecycle of a reproductive improves every aspect of your apiary work. Know the key checkpoints and keep inspections regular to reduce swarm risk and support a healthy hive.
Patience and careful observation are your best tools. Short, frequent checks and steady support for nurses and stores help protect developing brood and a new queen.
Use practical routines such as seasonal hive checks to stay ahead; see a simple guide to seasonal hive checks for timing and tasks that fit North American yards.
With focused practice, clear notes, and gentle handling, your queens and colonies will be stronger and more productive for years to come.
FAQ
What is the typical lifecycle of a newly raised queen from egg to mated laying female?
A fertilized egg develops into a potential queen when workers feed a selected larva royal jelly. Larval growth lasts about five to six days, followed by a pupal stage in an enlarged cell for roughly eight days. After emergence, the virgin spends several days maturing, then takes mating flights over a period of two to three days if weather and drones permit. Egg-laying usually begins about three days after successful mating. Timing varies with season, colony strength, and weather.
How does brood nest temperature affect development of reproductive females?
Nurse bees maintain brood nest temperature near 95°F (35°C). Deviations slow development and can weaken emerging females. Cooler conditions extend the pupal period and increase mortality; higher heat stresses larvae and can deform wings. Good hive ventilation, adequate worker population, and a balanced forage supply help stabilize nest temperature.
Why is monitoring construction and number of reproductive cells essential during inspections?
Observing the size, orientation, and number of cells helps predict swarming or colony replacement events. Multiple sealed reproductive structures or vertical combs crowded with large cells indicate intent to swarm or supersede. Early detection lets beekeepers split colonies, create nucs, or remove excess cells to reduce swarm loss and protect brood continuity.
What are the three stages of worker development and how do they support rearing?
Workers progress through egg, larva, and pupa stages. Nurse workers feed larvae and maintain the nest; middle-aged bees process pollen and nectar; foragers collect resources. A healthy age structure ensures continuous feeding for selected larvae, efficient comb maintenance, and enough workers to thermoregulate and defend the hive during rearing operations.
How critical is larval nutrition when raising a replacement or supersedure female?
Nutrition is crucial. Larvae chosen for reproductive development receive abundant royal jelly, which triggers endocrine changes that produce a reproductive abdomen and functional ovaries. Insufficient or inconsistent feeding leads to underdeveloped or nonviable females. Ensure plentiful pollen, syrup or nectar flow, and an active nurse population during rearing.
What factors influence the development stages of a new reproductive female?
Genetics, quality of brood comb, nurse bee density, nutrition, hive temperature, and absence of disease shape development. Queen-right colonies may suppress rearing. Varroa and viruses can deform pupae. Selecting genetics from productive, disease-resistant stock and maintaining strong colony conditions improves outcomes.
How do drone populations affect mating success and colony dynamics?
Drone abundance determines mating pool size and genetic diversity. High drone density in the area increases mating chances and reduces inbreeding. Conversely, low drone numbers or poor drone health reduce mating success and delay egg-laying. Drones also consume resources; beekeepers balance drone rearing by timing splits and managing drone comb.
When inspecting hives to prevent swarming, what signs indicate charged reproductive structures?
Signs include multiple vertical or peanut-shaped capped cells along comb edges, increased worker buzzing, and reduced queen sightings. Brood patterns showing gaps where the current laying female reduced egg-laying may also appear. Frequent, light inspections during spring and using swarm-control measures when these signs appear help prevent losses.
How should a beekeeper handle a clipped laying female during inspections and splits?
A clipped laying female may not leave with a prime swarm, but the colony can still attempt to raise replacements. When splitting, locate the clipped individual and decide whether to keep her with a nucleus or replace her to avoid confusion. Marking queens and using queen excluders or screened bottom boards aids management.
What are reliable techniques for raising quality reproductive females at home or commercially?
Common methods include grafting first-instar larvae into artificial cups, using nurse colonies or mating nucs, and timing resource boosts like pollen substitute and sugar syrup. Employ clean comb, strong nurse populations, and isolated mating yards if possible. Record-keeping and genetic selection for temperament and disease resistance improve long-term results.
How do you choose larvae for optimal development into reproductive females?
Use very young larvae, ideally under 24–36 hours old, from productive, disease-free stock. Uniform age and high-quality comb support even feeding. Avoid larvae from queens with poor laying patterns or signs of disease. Many breeders select from queens with desirable traits like hygienic behavior and gentle temperament.
What steps prepare a colony to raise cells successfully when planning a split or replacement?
Build nurse strength by adding frames of open brood and pollen, feed pollen patties or supplements, and provide syrup during nectar dearths. Reduce stressors like pests and ensure good ventilation. Position queenless units or create cell starter colonies with abundant nurse bees to encourage consistent feeding of selected larvae.
How should mating nucs be managed to protect virgin females during mating and initial laying?
Use small, well-provisioned nucs with adequate nurse bees and frames of brood and stores. Place nucs in areas with good drone supply and favorable flight conditions. Monitor for mite levels, provide supplemental feed when needed, and introduce new females carefully using queen cages to avoid rejection.
What is a realistic timeline from mating to consistent egg-laying after a female emerges?
After emergence, a virgin matures for two to four days, then completes mating flights over several days if weather allows. Successful mating and sperm storage are followed by ovary activation; consistent egg-laying typically begins within three to seven days post-mating. Weather, drone availability, and stressors can delay this timeline.
How should a new laying female be introduced to an established colony to minimize rejection?
Use a cage introduction method that allows workers to acclimate to her pheromones over two to four days. Provide candy or a slow-release entrance so workers can gradually free the female. Ensure the hive is queenless or that the old female has been removed. Avoid rough handling and introduce during calm weather.
When is it appropriate to conduct Varroa treatments during broodless or low-brood windows?
Treating during natural or induced broodless periods improves Varroa control because mites have fewer protected cells. Late fall after the last major brood cycle or in early spring before rapid buildup are effective times. Choose treatments labeled for the specific timing and follow resistance-management practices.
What common problems arise in rearing reproductive females and how can they be fixed?
Common issues include poor acceptance of grafts, missed mating flights, deformed wings from mite-borne viruses, and queen failure after introduction. Solutions: improve nurse strength and nutrition, select areas with ample drones, maintain low Varroa loads, use hygienic stock, and employ careful introduction techniques. Record and adjust methods based on outcomes.