This short introduction outlines why understanding wet spots under a comb matters for beekeepers. Honey must reach about 18% water content to stay shelf-stable and avoid fermentation. The colony signals readiness by capping cells, and many experts follow the 90% rule: harvest when most of a honey frame is sealed.
Bees work inside the hive to dehydrate nectar, and a professional beekeeper often uses a honey refractometer to check a honey frame before harvesting uncapped frames. Proper equipment and routine checks at the entrance help protect the brood nest from wax moths and varroa mites.
For deeper observations about wet versus dry capping and how genetics affects cap type, see a practical discussion on wet caps vs dry caps.
Key Takeaways
- Honey must be ~18% or lower to prevent fermentation and ensure long-term quality.
- The 90% capping guideline helps determine the right harvest time for a honey frame.
- Use a honey refractometer to verify water content before extracting comb honey.
- Capping behavior signals the colony’s successful dehydration process for storage.
- Monitor hive entrance and use proper equipment to reduce pests and protect the brood nest.
Understanding Moisture Pockets in Uncapped Cells Explained
Defining the phenomenon
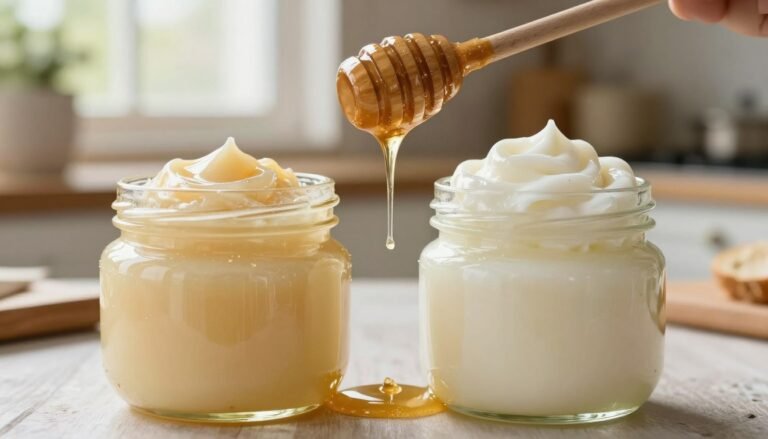
Seeing open comb tells a beekeeper the colony may not have finished drying nectar for storage. Uncapped honey usually holds more water than sealed honey because bees finish dehydration before applying a wax cap.
That wax cover is a practical signal. A fully capped area means the colony judged the product dense enough for long-term storage and minimal fermentation risk.
Visual indicators
Look for shiny, glossy surfaces or darker, sunken areas on the comb. These marks often point to higher water content and softer texture.
Professional beekeepers often rely on capping coverage as a quick check, then confirm with a honey refractometer when precision matters. If too many open spots remain, the wetter honey can dilute the rest of the frame and harm overall quality.
- Tip: Distinguish between capped honey and uncapped honey during inspections to protect your harvest.
- When uncertain, follow a standard test or consult guidance on proper honey levels at honey moisture level.
The Role of Moisture in Honey Stability
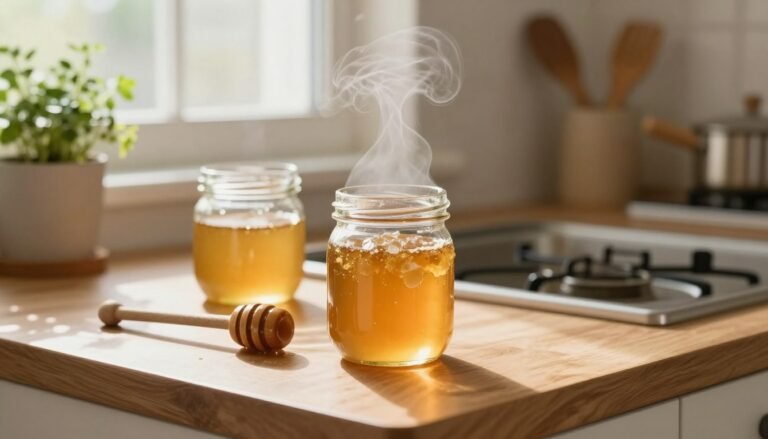
Shelf-stable honey is the result of coordinated dehydration work by the hive’s workforce.
The stability of honey depends on its water content. To prevent natural yeasts from activating and to prevent fermentation, honey must stay at or below 18% water content. Adult bees achieve this by fanning and reducing humidity inside the comb until the product is dense enough to cap.
Beekeepers often spot-check frames during inspections. A quick capping check helps, but a honey refractometer gives an accurate moisture content read and confirms whether uncapped honey needs more drying.

“A healthy colony works together to protect the brood and stored honey by managing internal humidity.”
- Key points: keep water content ≤18% to prevent fermentation and protect quality.
- Monitor adult bee activity and use tools to verify the ready state of capped honey.
- Consistent beekeeping vigilance helps the queen and workers stay productive and secures the harvest.
Why Bees Cap Honeycomb Cells
The act of capping marks the end of the dehydration cycle and the start of storage protection for honey.
Workers cap the comb only after nectar reaches a safe density for long-term storage. The thin wax seal tells the hive that the product behind the seal has low moisture content and is stable enough to resist yeasts and spoilage.
Beekeepers use capped honey as a quick quality cue. If a frame shows large areas sealed, the batch usually needs less testing before extraction. When uncertain, a honey refractometer gives a precise reading for uncapped honey and helps decide whether to wait.
| Action | Signal | Benefit |
|---|---|---|
| Wax cap applied | Cells capped | Protects stores from spoilage |
| Workers finish drying | Low moisture content | Prevents fermentation |
| Beekeeper checks frame | Sealed areas visible | Identifies mature honey for harvest |
“A well-tended colony secures its winter food by sealing and guarding its stores.”
Risks Associated with Harvesting Uncapped Frames
Harvesting frames too early risks turning a good batch of comb honey into fermenting syrup. Even a few open cells can let high water spread into drier areas during extraction.

The fermentation threshold matters for every beekeeper. Honey with more than about 18% water content will sour and bubble, ruining flavor and shelf life.
The Fermentation Threshold
Follow the 90% rule: wait until most of a honey frame shows cells capped before you harvest.
- Harvesting uncapped frames is risky because wet open comb dilutes the batch and can cause fermentation.
- Use a honey refractometer to confirm water content before extracting comb honey.
- When moisture measurements exceed safe levels, hold off and let bees finish drying the nectar.
- Prioritize quality over speed to preserve comb honey across hives and maintain marketable stores.
| Risk | Visual Sign | Recommended Action |
|---|---|---|
| Fermentation of batch | Shiny, wet open cells | Delay harvest; test with refractometer |
| Dilution of drier honey | Mixed capped and open areas on frame | Harvest only when cells capped ≥90% |
| Poor product quality | Sour smell, bubbly texture after extraction | Discard or heat-treat only as last resort |
“A cautious harvest protects the hive’s stores and the beekeeper’s reputation.”
Identifying Sacbrood Disease in the Apiary
Early spring inspections sometimes reveal a spotty brood pattern that points to viral trouble in the hive. Sacbrood disease is a common viral infection that causes larvae to fail to pupate after their cells are capped.
When you inspect frames, look for a poor brood pattern and larvae curled on their backs in a characteristic “canoe” posture.
Infected larvae often turn from gray to light brown and show a small, deformed head before they dry and stick to the cell surface. Adult bees sometimes remove these, but remaining larvae make hygienic work harder for the colony.
Transmission occurs through the food nurse bees feed brood. Because the virus spreads via feeding, a practical control is to cage the queen for two weeks to break the brood cycle.
- Spotty brood pattern and dried larvae that adhere to comb are key signs.
- Replace old foundation and consider requeening to improve genetics.
- Monitor frames; early detection helps protect honey and overall hive health.
“While no cure exists, management and good apiary hygiene let colonies recover and rebuild strength.”
Recognizing American Foulbrood Symptoms
American Foulbrood (AFB) is caused by Paenibacillus larvae and can destroy a hive if left unchecked.
Early clues are visual and olfactory. Look for sunken, perforated cappings and a spotty brood pattern. Dead larvae often look greasy, darken, and dry into hard scales that stick to the bottom of the cells.

The disease gives off a strong, unpleasant odor. That smell plus a poor brood pattern usually signals serious infection.
- Adult bees carry spores that contaminate larval food, even though they do not get sick themselves.
- Spores resist heat and cold and can survive on old equipment for decades; avoid unknown used gear.
- Many jurisdictions require infected hives be destroyed and burned to stop spread.
| Sign | What to check | Recommended action |
|---|---|---|
| Sunken, perforated cappings | Spotty capped brood pattern | Isolate hive; contact local inspector |
| Dark, adherent scales | Cells with dead larvae | Do not reuse frames; follow legal disposal |
| Foul odor | Smell during inspection | Quarantine and arrange testing |
“Prompt detection and decisive action protect other hives and preserve apiary health.”
Diagnostic Techniques for Foulbrood Infections
A quick field test can confirm whether a suspect brood sign points to American Foulbrood. Proper diagnosis protects other hives and preserves quality honey and comb. Start with careful on-frame inspection and follow with a targeted check when you find abnormal brood.
The Ropiness Test
How to perform it: remove a small amount of dead larval material from a cell and insert a clean toothpick.
Stir the tissue gently. If the material strings out up to about 3/4″ (before snapping back), the result strongly suggests American Foulbrood.
- This quick check is a vital diagnostic tool for any beekeeper who suspects AFB.
- If the specimen ropes, contact your state inspector immediately and suspend moving frames between hives.
- Accurate field diagnosis matters because AFB control and legal requirements differ from other brood problems.
“Prompt, accurate testing helps stop spread and protects the rest of the apiary.”
Managing European Foulbrood Outbreaks
When brood patterns fragment in spring, suspect European Foulbrood and act quickly to limit spread.
European Foulbrood (EFB) is caused by Melissococcus plutonius and peaks after winter. The most obvious clue is a spotty brood nest pattern. Infected larvae may look off-white, yellow, or gray.
Early intervention helps. Because EFB does not form resistant spores like AFB, a colony can recover if you remove contaminated comb and ease stress.

- Use the shook swarm: move adult bees onto clean foundation and discard old brood comb.
- Cage or remove the queen for two queen weeks to break the brood cycle.
- Feed heavy syrup so adult bees draw new foundation and replace lost stores of honey.
- Consider requeening to introduce stronger genetics and improved brood pattern.
| Action | Effect | When to use |
|---|---|---|
| Shook swarm onto new foundation | Removes bacterial reservoirs from old comb | At first signs of spotty pattern |
| Cage queen for 2 weeks | Stops new susceptible larvae from hatching | During and after shook swarm |
| Provide heavy syrup | Encourages adult bees to draw fresh foundation | Immediately after re-hiving bees |
“Prompt, managed steps often let a colony recover from EFB without drastic disposal.”
Note: antibiotics now require a veterinarian prescription. For broader hive care during damp seasons, review guidance on managing hives in wet climates.
Understanding Chalkbrood and Fungal Pathogens
When spring stays cool and damp, beekeepers may spot hard, chalky larvae that signal a fungal problem.
Chalkbrood is caused by the fungus Ascosphaera apis, which competes with larvae for food and turns them into dry mummies.
Housecleaning workers often eject these mummies. You may find them on the landing board or near the hive entrance, a sure visual cue for inspection.

A strong colony with many workers keeps the brood nest clean and limits spread. There is no drug cure, so management focuses on hive care.
- Improve ventilation and avoid excess humidity to slow fungal growth.
- Remove and replace old brood comb and renew foundation when spores persist.
- Keep woodenware and equipment clean; sterilize tools after handling affected frames.
Chalkbrood peaks in early spring and usually fades as the queen ramps up laying. Learn how to prevent chalkbrood and protect your hives and honey harvest.
“Good apiary hygiene and proper ventilation are the best defenses against fungal brood diseases.”
Stonebrood and Environmental Stress
Soil-dwelling Aspergillus fungi become a threat when a hive’s defenses falter under environmental strain.
Stonebrood is a rare but serious fungal disease that affects larvae. Infected brood develop a yellow, green, or black spore film and harden into tough mummies that are difficult to crush.
These hardened remains often appear on the bottom board or at the hive entrance, much like chalkbrood. Beekeepers should inspect landing boards and the hive entrance during routine checks.

Because Aspergillus spores can cause respiratory illness in people, handle affected frames with care. Severely infected comb should be destroyed by burning to prevent spread.
Prevention focuses on good colony care: strong nutrition, clean equipment, and reducing stress. Healthy bees resist fungal invasion and protect honey stores and comb.
“Early detection and strict sanitation are the best defenses against stonebrood.”
- Monitor for unusual larval mummification.
- Remove and destroy badly infected comb promptly.
- Support colonies with quality forage to reduce risk.
Black Queen Cell Virus in Breeding Operations
Black Queen Cell Virus (BQCV) can silently undercut a breeding program by killing queens after their cells are sealed.
Signs are distinctive. Infected queen pupae often turn yellow and form a tough skin before dying. The wax of the queen cell becomes dark and oily, a clear visual cue for breeders.

The virus spreads mainly through brood food. Nurse bees with viral particles in their glands concentrate the agent when they feed royal jelly. Workers and drones may carry the virus without showing symptoms.
BQCV often appears with high nosema loads and peaks during early spring when queen production rises. Although varroa mites can carry viral traces, they are not the primary vector for this disease.
Practical steps for breeders:
- Inspect queen cell cups closely and remove darkened or oily cases.
- Manage nurse-bee health and screen for nosema to lower risk.
- Keep breeding stock isolated and replace suspect stock promptly to protect production.
“Vigilant inspection and strong colony hygiene cut losses and protect queen production.”
Distinguishing Bald Brood from Disease
A clear pattern of bare brood often signals pest activity rather than a disease.
Bald brood is a behavioral response to wax moth larvae tunneling through comb. Worker bees will uncap brood in straight rows to reach and remove the caterpillars, leaving pupae exposed but usually able to finish development.

Do not confuse this with hygienic behavior. When bees perform hygienic removal, they chew out diseased or mite-infested brood and often leave irregular, scattered gaps.
- Sign: straight-line strips of exposed brood point to wax moths, not a failing queen.
- Outcome: exposed pupae typically emerge as healthy bees, unlike truly diseased brood.
- Action: the beekeeper should inspect for wax moths and tighten hive seals to prevent entry.
- Prevention: keep colonies strong and follow good sanitation practices such as using a capping scratcher between extractions — see capping and sanitation tips.
“Small patches of bald brood are a clue, not always a crisis — confirm the cause before taking drastic steps.”
The Importance of Hygienic Behavior in Colonies
Strong hygienic behavior helps a colony stop disease before it spreads. Worker bees detect sick or mite‑infested pupae. They open capped brood and remove the damaged young.
This trait is genetic and breeders are selecting queens that pass it on. Queens with hygienic offspring lower infection pressure across the brood nest.
Hygienic workers uncap cells at random and chew out afflicted pupae. That pattern differs from straight-line bald brood caused by wax moths.

Benefits are practical. Colonies with high hygienic expression need fewer chemical treatments and produce better honey and comb quality.
- Watch for: chewed-down pupae and scattered uncapping around capped brood.
- Action: invest in queen stock with tested hygienic scores to strengthen your hive.
“Hygienic colonies act as their own first line of defense, preserving brood health and apiary productivity.”
| Feature | Hygienic Behavior | Bald Brood (Wax Moth) |
|---|---|---|
| Uncapping pattern | Random, scattered | Straight rows |
| Target | Diseased or mite‑infested pupae | Larvae damaged by caterpillars |
| Breeder response | Select queens with high scores | Improve sanitation and exclude pests |
| Apiary benefit | Lower treatment need; healthier brood nest | Reduce reinfestation risk; protect frames |
Managing Parasitic Mite Syndrome
Parasitic Mite Syndrome (PMS) develops when high varroa levels and viral loads overwhelm a colony’s defenses. Early detection saves hives and preserves honey quality.

Impact on Brood Survival
Signs are often dramatic and fast. You may see a spotty brood pattern and larvae that look off‑color or that break down in place. Varroa mites may be visible on adult bees or actively feeding where cells may be open.
Multiple viruses, such as deformed wing virus, frequently accompany heavy mite pressure. A weakened colony can show other problems too, like chalkbrood or European Foulbrood.
Mite Treatment Strategies
Effective response combines monitoring, treatment, and hive management. Break the brood cycle to reduce mite reproduction. Consider consolidating the hive to let workers guard a smaller space and provide supplemental food if stores are low.
- Use approved miticides or organic treatments per label directions and local rules.
- Rotate methods and monitor levels before and after treatment.
- Isolate or requeen heavily affected colonies over time to improve genetics.
| Problem | Quick Check | Recommended Action |
|---|---|---|
| High mite load | Fall sugar roll or sticky board | Treat and recheck levels |
| Spotty brood | Visible dying larvae | Break brood cycle; consolidate hive |
| Colony decline | Many deformed adults | Consider requeening and close monitoring |
“Rigorous monitoring and decisive action protect colonies and the beekeeper’s investment.”
Conclusion
Simple checks and careful handling ensure that your honey stays marketable and your hive remains productive. Regular inspections of the brood nest let you spot threats early and act before disease spreads.
Selecting queens for hygienic traits strengthens colonies and lowers treatment needs. Watch for clear signals that show natural behavior rather than pest damage, and act decisively when problems appear.
Prioritize quality: harvest when most of the cells are sealed and confirm readiness before extraction. Healthy bees and steady apiary routines are the foundation of a sustainable operation.