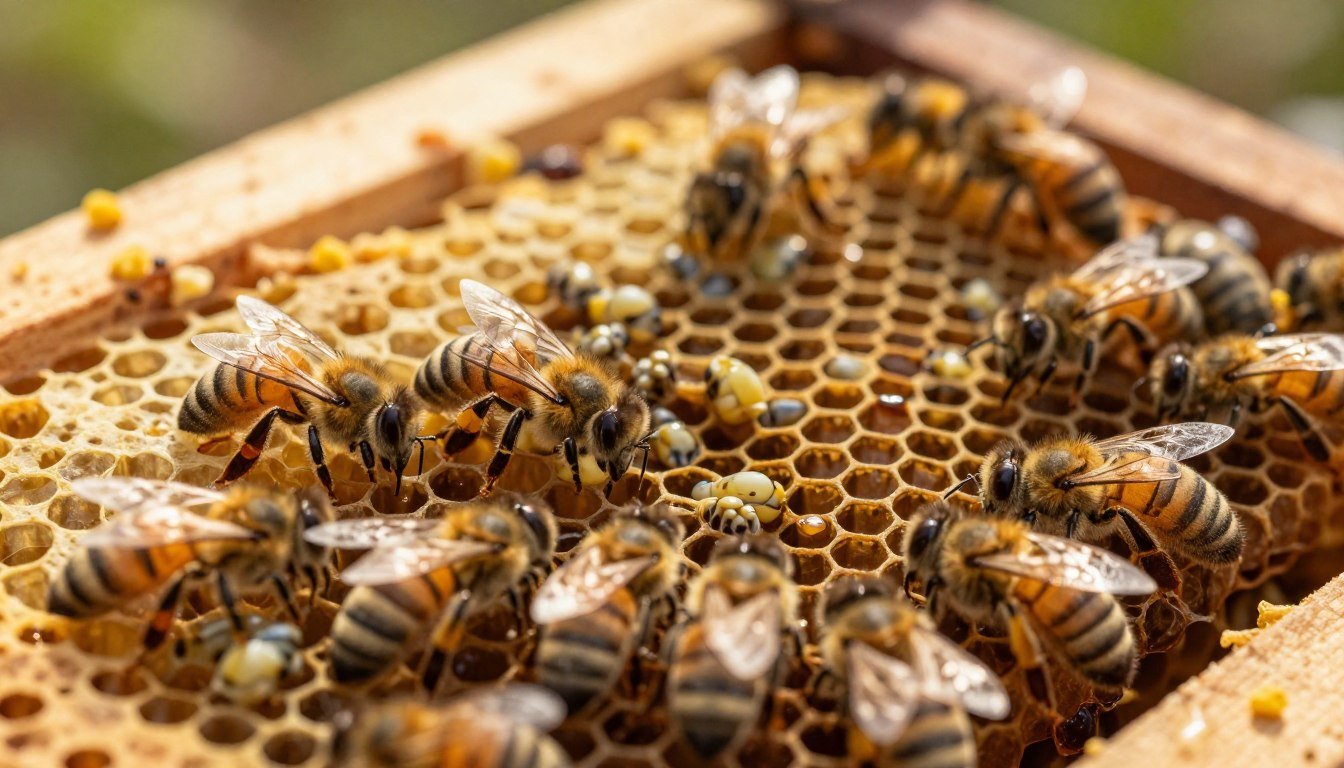
This guide explains how development inside each beeswax cell shapes colony growth and why tracking the nursery area matters. The honey bee life cycle starts as a tiny white egg placed by the queen into a single cell. Eggs hatch in three days and become larvae that grow through five rapid stages of metamorphosis.
The larval period swells the body to about 1,500 times its original size before pupation. Total development spans roughly 21 days for workers, 16 for queens, and 24 for drones. Each comb cell acts as a private nursery where workers supply food and maintain temperature to support healthy growth.
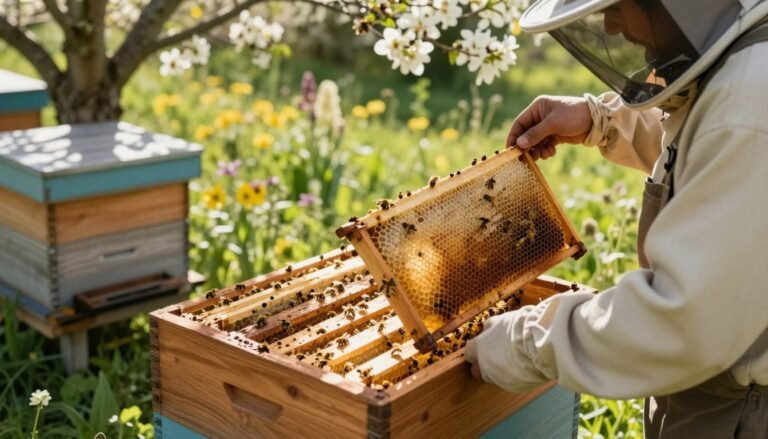
Watch the shape and color of combs for visual cues about wax condition and productivity. Proper management of cells and worker balance helps the colony expand when nectar flows arrive. If frames aren’t developing, consult practical fixes and diagnostics, such as population checks and foundation placement, in this helpful resource: why frames may not draw.
Key Takeaways
- The honey bee develops inside one beeswax cell through egg, larva, and pupa stages.
- Larvae increase dramatically in size during five metamorphosis steps.
- Worker development takes about 21 days; queens and drones follow different timelines.
- Comb color and shape reveal wax condition and hive health.
- Monitor cells, food, and worker balance to support steady colony growth.
Understanding the Brood Comb Age Chart for Beekeepers
Knowing when you last added a frame helps prevent long-term buildup of residues and disease.
Simple tracking saves colony health. Mark the top of each frame with the year it entered service. This makes rotation by years quick during inspections.
Many practitioners report that honey bees perform better when they do not rear young in dark, brittle comb. Old wax often traps pesticides and environmental toxins, so rotation protects your honey stores.
Keep clear records of when frames moved between hives. Accurate logs let you retire suspect frames before they become a biological sink for pests or pathogens.
- Label frames by year at installation.
- Rotate older frames out on a multi-year schedule.
- Inspect for residue and reduce reuse when needed.
Good records and steady rotation are fundamental to professional beekeeping. Use a reliable brood comb age chart for beekeepers to guide decisions and protect hive productivity.
The Biological Development of Honey Bee Brood
A honey bee’s early life unfolds in predictable steps that depend on food, cell size, and temperature. These stages shape colony renewal and guide practical management during spring rearing.
Egg and Larval Stages
The egg hatches in about three days and becomes a larva that grows rapidly. Worker and drone larvae receive royal jelly at first, a protein-rich secretion produced by nurse workers.
After roughly 2.5 to 3 days the diet shifts to pollen and nectar. Apis mellifera larvae are visited almost continuously; nurses inspect and feed them roughly 10,000 times over development.
Typical larval duration: queens ~5.5 days, workers ~6 days, drones ~6.5 days. Cell size and shape influence final body size and the success of worker development.

The Pupal Transformation
The larva is sealed under a wax capping and begins pupation. This is a sensitive period where tissues reorganize into wings, legs, eyes, and other adult structures.
Pupal time differs: queens ~8 days, workers ~12 days, drones ~14.5 days. As the bee matures the eye color shifts from pale to dark, signaling near emergence.
- Key points: nurse workers drive progressive provisioning and ensure adequate food.
- Spring success depends on high-quality pollen and nectar to support rapid growth.
- Further reading: consult a concise honey bee development guide and tips to boost colony population naturally.
How Comb Age Affects Larval Development
Older wax cells physically change over time and that shrinkage can alter larval growth.
Smaller cell diameters in aged comb reduce the space larvae need. Research shows old cells often measure about 4.6 mm versus 4.9 mm in new wax. That reduction can force early pupation and yield smaller adults.
Studies found bees reared in older wax may weigh up to 19% less than those from new frames. Accumulated cocoons and fecal material lower usable volume and change the comb’s structure into a fiber-reinforced composite.
“Old wax acts as a biological sink for toxins and pathogens, which can hamper larval survival and reduce colony productivity.”
Practical steps help protect rearing success:
- Rotate out severely darkened or clogged frames to restore cell volume.
- Replace some foundation each year to improve food quality and worker size.
- Monitor sealed brood area; a shrinking pattern often signals physical constraints.
Further reading: review the cell size study at cell size and development to see experimental data and practical implications.
Identifying the Physical Characteristics of Old Comb
Color, texture, and weight combine into simple cues that tell the experienced eye a frame is past prime.

Visual Indicators of Aging
Dark color: New wax starts white or gold. Over years it darkens to deep brown or near black due to accumulated pollen, propolis, and debris.
Brittle structure: Older wax becomes fragile. Frames snap more easily during inspections and demand gentle handling to protect cells and workers.
Yellow storage comb: Areas used mainly for honey and pollen often take on a yellowish tint from food buildup.
- Increased weight: Frames grow heavier as cocoons and residues fill cell interiors.
- Heavy frames can hide the hive’s natural scent and alter how bees recognize their nest.
- Keeping dated records helps rotate old frames before structural loss harms colony health.
Practical note: For a deeper look at how wax time affects productivity, see a relevant comb age study.
The Role of Pheromones in Wax Substrates
Pheromones trapped in cell walls act like a persistent memory of the colony’s recent history.
The wax substrate stores and releases chemical cues that guide worker behavior and social order. Brood pheromones absorbed into the comb signal the presence, age, and nutritional needs of immatures to nurses.
These signals persist in wax for varying lengths of time, depending on volatility and exposure. That persistence means older comb can hold a dense signature of past activity.
| Signal | Effect on workers | Persistence in wax |
|---|---|---|
| Brood pheromones | Increase feeding and nursing | Days to months |
| Colony odor | Supports nestmate recognition | Long-term |
| Volatile alarm cues | Trigger defense | Short-term |
“Wax acts as a chemical memory, shaping attraction and social responses.”
Be aware that swarms often favor older comb because of these stored cues. Proper management keeps the chemical balance healthy and helps the apis mellifera colony function well.
Assessing Hive Health Through Brood Patterns
A dense, even spread of developing bees across frames is the clearest evidence of strong hive health. Use each inspection to note pattern shape, occupancy, and surrounding stores. A healthy area usually looks rounded or oval and extends over more than one frame.

Signs of a Healthy Pattern
Solid occupancy: Aim for about 95% of cells filled with developing insects of similar stage. This shows the queen lays steadily and workers provide care.
Stage balance: A healthy nest often displays eggs, larvae, and pupae in roughly a 1:2:4 ratio. Pollen and honey bordering the area is a positive sign of food supply.
Diagnosing Irregular Brood
Scattered or spotty capped cells, especially partially opened ones, can indicate parasitic mite syndrome or other serious issues. Chilled cells often sit at the edge of the pattern after temperature drops.
- Use a bright light to check cell bottoms for eggs and tiny larvae that can be missed in low light.
- If the pattern is inconsistent, inspect adults for mites and evaluate nutrition and queen performance.
- Document findings and act early; timely intervention protects colony growth in spring.
“A uniform, well-fed pattern reflects strong brood rearing and a healthy bee community.”
Managing Comb Rotation in Your Apiary
A clear rotation plan keeps wax productive and reduces long-term contamination in the hive. Rotate frames so cells retain usable volume and workers rear healthy young.
The University of Minnesota Bee Squad recommends replacing brood combs every three to four years. Modern hives like Langstroth setups extend wax life compared to wild colonies, which often recycle comb within six years.
Remember that a typical nest needs about 100,000 cells and roughly 1,200 g of wax. Drawing new foundation costs energy—about 7.5 kg of honey—so plan partial replacements rather than full rebuilds.
- Mark frames by year to simplify rotation.
- Replace a portion each season to balance old and new cell space.
- Prioritize frames with heavy residues or poor brood patterns.
| Action | Interval | Benefit |
|---|---|---|
| Mark and record frames | Annually | Easier rotation planning |
| Replace portion of foundation | 3–4 years | Reduced toxins, healthier rearing |
| Full frame replacement (as needed) | When contaminated | Limits disease spread |
A proactive schedule supports apis mellifera health and long-term hive productivity. When disease is suspected, consult guidance such as when to discard comb after disease to act promptly.
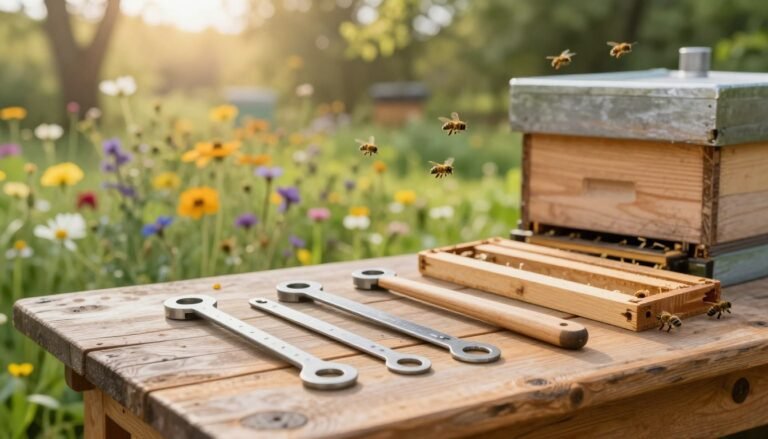
Handling and Storing Drawn Comb Equipment
A secure, dry storage plan preserves drawn cells and makes spring rearing faster and cheaper. Treat frames as an investment of the colony’s time and honey. Clean and inspect each frame before stowing.

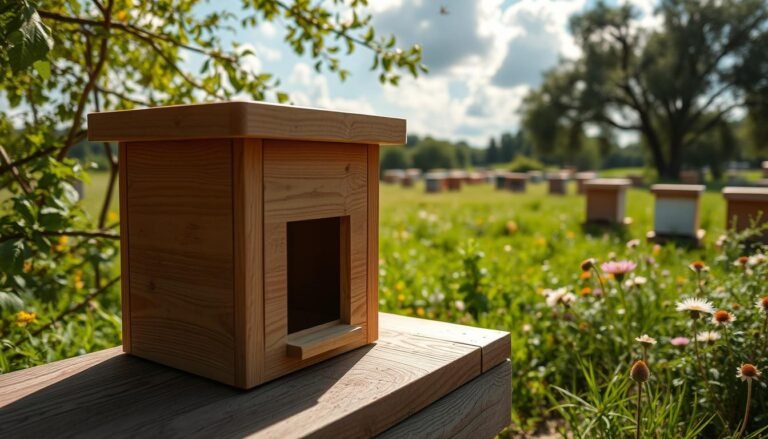
Preventing pest infestations starts with location. Keep frames in a mouse-proof area and away from damp basements. Properly maintained, painted wooden boxes resist rot and pests across years.
Best practices to protect drawn wax
- Freeze frames for 48–72 hours before storage to kill wax moth eggs.
- Store extracted honey supers stacked and sealed to preserve the drawn comb.
- Expose frames briefly to light and air to deter wax moths, but avoid leaving equipment where mice can nest.
- Remove dead-out equipment from the field; it attracts pests and spreads disease.
- Use spring as repair time: scrape, mend, and paint boxes so workers find strong, clean cells when reinstalled.
“Clean, organized storage saves time at startup and keeps drawn wax productive.”
Tip: When in doubt, consult a short guide on how to store frames to prevent pests to refine your routine.
Dealing with Dead-Out Colonies
Not all hive failures require throwing everything away; cause matters most.

First, determine why the colony died. If mites or pesticide exposure caused the loss, discard the brood frames and heavily used cell areas to avoid passing pathogens to other hives.
If the loss was starvation or cold, frames in good condition are usually safe to reuse.
Honey from a dead-out can help other colonies that need stores — but only when you are confident it is free of pesticides.
- Inspect cells for dead larvae, mite frass, or odd residues before keeping frames.
- Never reuse equipment suspected of American Foulbrood; spores persist for decades.
- Clean and seal boxes to prevent mice and pests while you decide what to keep.
“Make informed choices about which frames to keep and which to toss to protect your apiary.”
| Cause | Action | Risk |
|---|---|---|
| Mite-vectored viruses / pesticides | Discard brood frames | High transmission risk |
| Starvation / cold | Salvage good frames | Low if intact |
| Unknown signs (suspicious larvae) | Consult extension, consider disposal | Variable; seek testing |
When in doubt, get local help. For guidance on parasite control that reduces dead-outs, review varroa control methods.
Best Practices for Replacing Old Foundation
A clear plan for swapping old foundation keeps colonies productive and reduces hidden risks. Replace very dark, brittle frames to lower pathogen load and restore usable cell volume. New wax gives workers clean surfaces to build healthy brood cells and store honey.

Economic Considerations
Cost vs. benefit: Drawing new sheets costs energy. A full nest requires roughly 100,000 cells and the work equals about 7.5 kg of honey. Still, cleaner wax often yields larger worker body size and better long-term productivity.
Practical approach: Replace a portion of frames each year rather than all at once. This spreads cost and keeps stores stable during rearing peaks in early spring.
Sterilization Protocols
If frames show contamination, consult a veterinarian or local extension before attempting sterilization. Some pathogens, like American Foulbrood, require strict disposal rules.
“Sterilize only under expert guidance; improper methods can spread spores and harm other colonies.”
Freezing, scorching, and chemical treatments each have pros and cons. Use approved steps and document any treated equipment.
Introducing New Foundation
Install fresh foundation during a nectar flow to encourage fast drawing. Place new sheets next to drawn frames so workers accept them quickly and use available food to produce wax.
- Prioritize frames near the brood nest to expand rearing capacity.
- Ensure adequate honey and pollen are present so workers can make wax.
- Mark the year on new frames to manage rotation over years.
| Action | When | Benefit |
|---|---|---|
| Partial replacement (20–30%) | Annually, early spring | Balances cost and hive expansion |
| Sterilize or discard | When contamination suspected | Limits disease spread |
| Introduce during nectar flow | During local spring/summer flow | Quick drawing and less honey lost |
Conclusion
Simple inspection routines and timely replacements protect young bees and overall colony vigor. Understanding lifecycle stages and routine maintenance is essential to keep a healthy honey bee operation.
Regularly monitoring the age of frames helps limit toxins and pathogens that harm colonies. A steady rotation schedule gives the bee community clean wax for successful rearing.
Manage storage and handle dead-out equipment thoughtfully to protect productivity and longevity. For data on how wax age impacts colony output, review this comb age study.
Prioritize bee health by making informed choices about when to replace foundation and when to discard suspect frames.
FAQ
What is the recommended lifespan of drawn wax in a honey bee colony?
Most beekeepers replace drawn wax every 3–5 years to reduce disease buildup, pesticide residue, and darkening. Monitor colony performance and pathogen levels; replace sooner if you see high chalkbrood, foulbrood risk, or reduced worker emergence.
How does older wax influence larval development and worker size?
Older wax can accumulate residues and pheromones that slightly alter larval nutrition and microbe exposure. This may affect emergence rates and, in some cases, worker body size. Regular rotation and clean foundation help maintain consistent brood rearing and food storage quality.
What visual signs indicate heavily used or contaminated wax?
Look for dark, greasy cells, scattered cocoons, irregular cell shape, and heavy propolis or pollen staining. Small holes, thin cell walls, or a persistent odor suggest long-term use or contamination and warrant replacement or sterilization.
When should I rotate or remove old frames in my apiary?
Rotate frames annually within the hive and remove the oldest frames every 3–5 years. If a frame hosted dead-out colonies, severe disease, or consistent poor brood patterns, remove it immediately to limit pathogen spread.
Can pheromones in wax affect queen pheromone communication?
Yes. Residual pheromones and brood pheromones in older wax influence worker behavior and can slightly modify queen signal perception. Fresh foundation reduces mixed pheromone signals and supports clearer colony communication.
How do I assess brood patterns to determine hive health?
A healthy pattern shows solid, evenly spaced cells with developing workers across the brood nest and minimal empty cells. Spotty, scattered, or ragged patterns, combined with high mortality, indicate stressors like pests, poor nutrition, or disease.
What are the best practices to prevent pest infestations in stored drawn frames?
Store frames in sealed, dry containers or freezers. Use approved fumigants sparingly, freeze frames at -20°C for 48 hours to kill wax moths, and inspect regularly. Keep storage areas clean and rodent-proof to protect wax and comb integrity.
How do I safely sterilize frames after a dead-out to reuse them?
Remove all comb debris, then freeze the frames or heat-treat per extension service guidelines. When using chemical disinfectants, follow label directions for apiary equipment. Destroy frames if foulbrood is confirmed, following state regulations.
What economic factors should guide foundation replacement decisions?
Balance material cost, labor, and colony productivity. If older foundation reduces honey yield or increases disease risk, replacing foundation can be cost-effective. Compare prices from suppliers like Mann Lake or Brushy Mountain and factor in long-term colony health.
How do I introduce new foundation without disrupting the hive?
Introduce new foundation during strong nectar flows or when the colony is expanding. Place it near the brood nest, use starter strips, and avoid heavy manipulation during cold snaps. Monitor acceptance and add pollen or syrup if comb drawing lags.
Does stored honey or pollen attract pests to old frames?
Yes. Residual honey and trapped pollen draw wax moths, small hive beetles, and rodents. Clean frames before storage, remove honey pockets, and store in cool, sealed conditions to reduce pest attraction and preserve wax quality.
How quickly do eggs develop into adult workers in typical conditions?
Under normal spring conditions, an egg becomes an adult worker in about 21 days. Temperature, nutrition, and hive stress can speed or delay development, so maintain strong forage and stable brood nest temperatures for consistent rearing.
Are there visual differences between newly drawn wax and very old foundation?
Newly drawn wax is pale, nearly white to light yellow, and has clean, well-defined cell walls. Very old foundation darkens to brown or black, shows accumulated cocoon remains, and may have misshapen or shallow cells from repeated reuse.