Getting your bees settled is only the beginning. In April 2015, an experienced author noted that real beekeeping work starts once the colony moves into its new hive. Early care sets the tone for growth and honey production.
Spend time observing during the first week to see how the queen and workers adapt to the box. Use a checklist to track brood, food stores, and bee behavior. This habit helps beekeepers catch problems early.
Modern colonies face pests, disease, and stress from the environment. Regular inspections protect the colony and support healthy hives over the season. Proper follow-up after installation turns a simple transfer into a strong, productive unit.
Key Takeaways
- Early attention determines long-term colony success.
- Use a simple checklist during the first week to monitor brood and stores.
- Watch queen behavior and worker activity for normal adjustment.
- Consistent checks help prevent disease and colony loss.
- Good follow-up turns installation into a thriving hive.
Preparing for Your First Inspection
Well-organized gear and a clear plan keep bees calm when you approach the box.
Managing colonies in man-made hives needs steady oversight. Every beekeeper should accept that managed hives require more attention than wild colonies.
Gather tools, smoker, veil, and any records before you walk to the stand. This prevents leaving the hive open while you fetch items. Keep movement slow and confident.
Stay calm and gentle. That tone helps workers remain peaceful and lets the queen stay productive. Preparing in advance also cuts the time the colony is exposed.
- Check gear checklist before you leave the yard.
- Plan the steps you will take at the hive.
- Keep visits short to protect brood and food stores.
| Task | Why it matters | Time saved |
|---|---|---|
| Assemble tools | Reduces open-hive time | 5–10 minutes |
| Light smoker | Calms workers | Immediate |
| Set plan | Lowers stress for colony | Varies |
New beekeepers who want extra guidance can read the getting started guide.
Determining the Ideal Time for Your First Inspection After Installing a Nuc
Knowing when to approach the hive keeps your colony calm and productive. Give new colonies room to settle so the queen can begin laying and workers can orient to the box.
Waiting too long or too soon both carry risks. Package bees commonly need seven to ten days before an opening. By contrast, a nuc can often be checked in four to five days to confirm the queen is laying eggs and brood is present.
Waiting Periods for Nucs vs Packages
- Packages: plan on 7–10 days before any major check.
- Nucs: many beekeepers start a cautious check at 4–5 days, or wait a week for added security.
- Always aim for a warm afternoon; cool weather can chill brood and stress bees.
Resist the urge to open the hive every couple of days. Short, well-timed checks reduce disruption and help colonies feel secure. If you spot eggs during your opening, the queen is likely present and the installation is progressing well.
For community experience and specific timing tips, see this discussion on when to check a nuc: when to check a nuc.
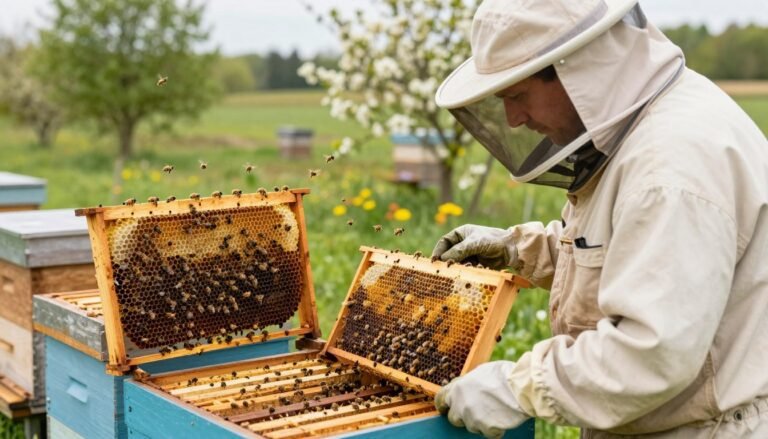
 in a sunny, vibrant bee yard. The beekeeper, dressed in a white protective suit and veil, carefully holds a frame full of bees, examining it with focused attention. In the foreground, the detailed texture of the honeycomb and the busy bees filling it are in sharp focus. The middle ground features several wooden nuc boxes, surrounded by blooming flowers and lush green grass, creating a lively atmosphere. The background showcases a blue sky dotted with fluffy clouds. The light is warm and inviting, casting soft shadows, evoking a sense of serenity and dedication to the art of beekeeping.")
Essential Tools for a Successful Hive Check
Good preparation shortens time at the hive and keeps the colony calm.
Never approach an open box without your gear ready. The smoker and hive tool belong within arm’s reach. Test the smoker before you walk out to prevent surprises.
- Clear your workspace so frames can be moved without crushing comb. Space matters for safe handling.
- Keep tools clean and organized. This saves time and lowers stress on the bees.
- Carry a spare hive tool and an extra lighter or fuel for the smoker.
- Work methodically: remove one frame at a time and set it on the stand for inspection of brood and stores.
- Experienced beekeepers avoid leaving the hive to fetch items. That habit keeps the colony settled.
Tip: If you want a step-by-step guide for a calm, efficient check, read the how to inspect a beehive step-by-step page for clear routines used in practical beekeeping.
Observing External Hive Activity
Watch the entrance carefully; much of hive health shows itself at the doorway.
Quiet observation at the entrance saves time and reduces stress for the colony.

Signs of Robbing
Robbing often plays out right at the entrance. Look for fighting, crushed bees, or bee attackers swarming the threshold.
Warning sign: fifty or more dead bees at the entrance usually means trouble. That count suggests the colony is weak or under attack.
If bees cluster around seams or the lid, robber bees may be probing for gaps. Reduce the entrance size to help defenders hold the line.
| Observation | What it may mean | Action |
|---|---|---|
| 50+ dead bees at entrance | Possible robbing or colony collapse | Close entrance, inspect quickly, feed if needed |
| Bees fighting at threshold | Active robbing from neighbors | Reduce entrance, add entrance reducer, monitor |
| Clustering at seams or lid | Robber probing or humidity issues | Seal gaps, tighten lid, observe traffic |
Interpreting Flight Patterns
Watch traffic to see bees coming and going. Healthy colonies show steady foragers with pollen baskets. You will often see undertaker bees removing corpses, which keeps the entrance tidy.
Flight patterns tell more than frames or comb checks and let you judge hive status without opening the box. Spend a few minutes at the entrance before any close work.
Assessing the Queen and Brood Development
Confirming brood is the clearest sign the queen is active and the colony is healthy. Begin with a calm, brief check of the frames and comb; finding eggs or tiny larvae usually means the queen has begun laying even if you do not see her.
Recognizing Healthy Larvae
Look for a compact brood pattern and all stages of development. Eggs, pearly larvae, and capped cells across adjacent frame cells show a productive queen and steady growth.
- Finding eggs or young larvae is a good sign the queen is present and laying.
- If you see no brood, return in 5 or 6 days to search again for larvae.
- Make sure the queen was released from her cage; this is a primary goal of early checks.
- Do not spend too much time hunting for the queen—disturbance can harm brood development.
| Sign | What it means | Recommended action |
|---|---|---|
| Eggs in cells | Queen laid recently | Monitor frames weekly |
| Compact brood pattern | Good laying and queen health | Limit disturbance, feed if stores low |
| Spotty or no brood | Queen not laying or lost | Recheck in 5–6 days; consider requeening after weeks |
| Brood in all stages | Strong colony growth | Support foragers and protect comb |
For guidance on disease risk when bringing in colonies, see this detailed review for beekeepers: how to inspect purchased nucs for disease.
Monitoring Food Stores and Resource Collection
Resource collection drives colony strength, so track pollen and nectar on the frames.
Bees deposit pollen into cells where it becomes bee bread — the colony’s main protein source. Look at the outermost frames to see if workers store nectar and pollen. Colorful patches of pollen are a good sign of active foraging.
If honey or pollen is low, give the hive temporary support. Use a feeder to supply sugar water until natural nectar arrives. Sugar water can help package bee colonies begin building comb and feeding brood.
Make sure the hive has room to store honey. Crowded comb prompts swarming and weakens the queen’s laying pattern. Check frames for capped honey and empty cells that workers plan to fill.
Quick checklist:
- Scan outer frames for nectar and pollen stores.
- Note colorful pollen in cells as evidence of foraging.
- Add sugar water in a feeder when stores look thin.
- Leave room on frames and comb for honey storage to prevent crowding.

| Item Checked | What to look for | Action |
|---|---|---|
| Outermost frames | Nectar, pollen, stored honey | Record levels; rotate boxes if full |
| Pollen in cells | Colorful granules, processed bee bread | Confirm foraging; no immediate action |
| Honey stores | Capped honey, empty cells | Add frames or supers; provide feeders if low |
| Brood support | Nearby pollen/nectar for larvae | Feed sugar water to bridge gaps |
For detailed guidance on brood-nest stores and where to look, see this note on pollen and nectar stores in the brood.
Identifying Pests and Potential Diseases
A prompt scan for pests prevents small problems from becoming hive-wide crises. Check for beetles, webbing, or odd brood patterns when you open the box. Early action protects comb and future honey stores.
Small Hive Beetle Management
Small hive beetles can multiply fast, but strong colonies usually handle low numbers. Remove obvious beetles and use trapping or screened bottom boards when needed. If you find beetle larvae or many adults, reduce hiding spots and deploy traps quickly.
Squashing lone beetles helps lower pressure. For heavy pressure, consider proven traps or sticky inserts and improve colony strength to deter invaders.
Recognizing Healthy Larvae
Healthy larvae are plump and white in the cells. Brown, twisted larvae or dead brood can signal disease. If you see those signs, act fast to limit spread.
Also watch for wax moth webbing on frames and torn comb. Keep frames tidy, ensure the queen is laying across adjacent cells, and make sure colonies stay populous. For more on disease signs and practical beekeeping steps, read this guide on diagnosing hive symptoms and this resource on buying healthy stock: buying packaged bees and nucs.
- Spot beetles early and remove or trap them.
- Look for white larvae and intact brood pattern.
- Address dead or brown larvae immediately.
Managing Environmental Factors and Hive Temperature
Summer heat can force bees to spend energy cooling the hive instead of rearing brood.
Shade and airflow cut that stress. Place hives where late-morning and afternoon shade reduce direct sun. During heat waves near 37 degrees Celsius, a light shade cloth over the stand helps lower internal box temperature without blocking flight paths.
Ventilation matters. Add screened vents or raise the lid slightly during peak heat so warm air escapes. Good airflow keeps frames stable and reduces the chance that honey or foundation will soften and frames shift.
- Use shade cloth during severe heat to shield colonies cost-effectively.
- Choose a shaded site for hives, especially for hottest hours.
- Monitor hive temperature so bees focus on foraging and brood instead of cooling.

For more on how colonies manage internal climate, read how bees manage temperature and moisture.
Best Practices for Minimizing Colony Stress
Calm, efficient handling of frames protects brood and helps the queen keep laying eggs.
Limit open-box time. Try to spend no more than 15 minutes with the top off the colony during these early weeks. Short visits reduce confusion and let workers return to normal tasks quickly.
Move frames slowly. Gentle handling avoids squashing bees and lowers the chance of damaging comb or the queen. Be mindful of the space you create when you lift a frame; quick, neat placement saves time.
If bees grow agitated, close the hive and return on a warmer, calmer day. Experienced beekeepers know that fewer, focused checks help colonies become strong and productive.
- Keep movements steady and predictable to calm bees.
- Perform brief checks during the first couple of weeks to let the colony settle.
- Be prepared: have tools ready so every second with the box open counts.

| Action | Why it matters | Recommended limit |
|---|---|---|
| Top off open | Limits brood chilling and confusion | ≤ 15 minutes |
| Frame handling | Prevents queen injury and crushed bees | Slow, steady movements |
| Visit frequency | Allows colony to settle into the hive | Brief checks over first couple weeks |
| Abort if agitated | Reduces risk of stings and stress | Close and return later |
For timing tips and what to do one week in, see guidance on settling the colony at early post-install guidance and advice on the best time of day to check hives at best time of day to inspect a.
Conclusion
Closing your first week with a calm, purposeful review sets the tone for steady growth.
Conduct brief, regular checks to monitor the queen and brood health. A focused first inspection helps you catch problems early and keeps the colony on track.
Keep visits short and consistent. Weekly checks let you record progress, adjust feed, and protect stores without stressing the bees.
Prioritize colony health by minimizing disturbance and giving resources when needed. With steady care and growing confidence, you will watch the queen build a strong, productive hive.
FAQ
When should I first open a newly installed nuc to check the colony?
Wait about 7–10 days before gently looking inside. This allows the bees to settle and the queen to resume laying. Short, calm checks during this window limit stress and let you verify the queen is present and laying without disrupting early brood care.
How can I tell if the queen is healthy and laying well?
Look for a consistent pattern of eggs, larvae, and capped brood across several frames. Eggs in cells and small white larvae in U-shaped positions are positive signs. Avoid long inspections; find multiple brood stages to confirm ongoing laying.
What tools should I bring for a proper hive check?
Pack a smoker, hive tool, bee brush, protective veil or suit, spare gloves, and a notebook or phone to record observations. Also carry sugar syrup in a squeeze bottle if feeding becomes necessary. Clean, organized tools speed checks and reduce disturbance.
How do I recognize healthy larvae during an exam?
Healthy larvae appear pearly white, plump, and lie in a clean cell with a smooth, slightly concave bottom. They show a C-shape when viewed from above and lack discoloration or foul odor. Spotting these indicates successful brood care and nutrition.
What external signs show the colony is collecting food effectively?
Active foragers returning with pollen on their legs, a steady stream of bees at the entrance, and visible nectar or honey stores on frames signal good resource collection. Reduced flight or absent pollen suggests foraging stress or poor forage availability.
How can I spot early robbing behavior or high hive stress from outside?
Watch for frantic bees, fighting at the entrance, or a large number of foreign bees lingering near the box. Guard bees clustering and lots of alarmed flight suggest robbing. Narrow the entrance and reduce exposed syrup to lower risk until the colony strengthens.
What should I look for to detect small hive beetles and larvae?
Inspect frame corners, bottom boards, and comb surfaces for adult beetles and creamy larvae. Beetles hide in crevices and produce slimy patches when numerous. Use traps and good sanitation; remove heavily infested comb and consider Entrust or mineral oil traps where appropriate.
How often should I check food stores in a newly placed nuc?
Monitor every 7–14 days during the first month. Ensure there’s adequate nectar or sugar syrup and pollen substitutes if natural forage is limited. Keep an eye on rapid consumption during cool spells when bees can’t forage much.
What environmental factors should I manage to keep the hive comfortable?
Provide wind protection, partial shade in hot climates, and adequate ventilation to prevent moisture buildup. Ensure the hive sits level and on a solid stand to reduce dampness and stabilize internal temperature for brood development.
How can I minimize colony stress during checks and handling?
Move calmly, use light smoke sparingly, work quickly but deliberately, and return frames to their original order. Limit inspections to warm, sunny days with low wind and avoid prolonged exposure of brood comb to cold or direct sun.
What frame handling techniques protect the bees and comb?
Support frames by the ends when lifting, avoid twisting motions, and keep movements smooth. Hold frames over the open hive so any dropped bees fall back in. Replace frames gently and maintain correct spacing to prevent comb damage and aggression.
How do flight patterns inform me about colony health from the entrance?
Calm, steady traffic indicates normal activity. Erratic, circling, or sluggish bees may signal pesticide exposure, disease, or queen issues. Compare activity at similar times on different days to spot trends rather than one-off anomalies.
If I don’t see the queen, how can I confirm she is present?
Look for signs of her work: fresh eggs, multiple brood stages, and a cohesive brood pattern. Queens are often hard to spot; consistent eggs and larvae across frames are reliable proof she is active even if unseen.
When should I worry about spotting multiple queens or queen cells in nucs?
Finding several queen cells or laying workers warrants attention. Supernumerary queen cells often mean the colony plans to swarm or replace the queen. Evaluate brood pattern and consider combining weak nucs or requeening to stabilize the colony.
What immediate actions help control small hive beetles if found early?
Remove and clean affected comb, install beetle traps, and reduce hive entrances to limit beetle movement. Maintain good sanitation and avoid leaving open syrup. In severe cases consult local extension services for approved controls and timing.