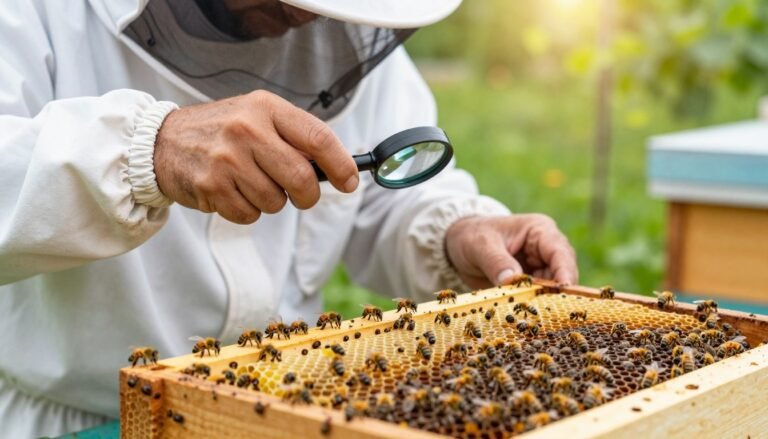
Apiguard and similar organic products use thymol as the active ingredient to help control Varroa mites in colonies. Proper use depends on keeping the right environmental range so the product can vaporize and spread through the brood box.
Beekeepers should watch local weather and hive conditions during the application period. A strong colony and correct gel placement help bees move the active compound across frames and brood.
Following the manufacturer’s instructions ensures the dose is high enough to reduce mite levels without harming bees or honey. This guide explains how area temperatures and the length of the course affect mite reduction and overall hive health.
Key Takeaways
- Apiguard uses thymol as an organic miticide common in the UK and US.
- Maintaining the correct range helps the product volatilize and work well.
- Colony strength and gel placement affect distribution in the brood box.
- Monitor brood cycles and weather to time applications for better control.
- Follow instructions to balance effective dose and honey safety.
Understanding Thymol as a Varroa Control Method
Recognizing the way thymol moves through a brood box makes application more effective. This section explains how the active ingredient works and why many beekeepers favor an organic method.
Mechanism of Action
Thymol acts as a fumigant and contact agent. In Apiguard, the 50g gel tray contains 12.5g of the active compound and releases a steady dose over several weeks.
The slow-release gel sits on top of frames in the brood box. Housekeeping activity by bees helps distribute the vapors and gel particles, affecting phoretic mites and those emerging from brood.
Benefits of Organic Treatment
Apiguard treatment offers a practical, residue-light option that supports colony health and keeps honey clean. There is no strong evidence of mite resistance to this product, which makes it a trusted control method.
Most protocols call for two applications spaced over a full brood cycle. Follow manufacturer instructions and monitor colonies to confirm effectiveness and adjust the number of applications when needed.
Learn more about a new application method in this concise guide: new application method.
Why Temperature Limits for Thymol Treatment Matter
Successful mite control depends on keeping the gel warm enough so it vaporizes steadily during the full application period. The minimum effective threshold is 59°F (15°C), and that level must be held through the entire course.
The gel will not release a therapeutic vapor if ambient heat falls below the threshold. When air cools, vapor concentration stays too low to reach phoretic mites on bees and within the brood box.

Low heat also keeps bees clustered and limits movement across frames. That reduces distribution of the active ingredient and makes any dose ineffective, even with the right product and number of applications.
Beekeepers should check daily highs and lows before starting. A cold snap in the middle of a course often means poor mite reduction, so delay until sustained warmth is likely.
- Rule of thumb: sustain at least 59°F (15°C) for the whole period.
- Monitor hive activity; clustered colonies do not spread vapor well.
- Stay alert to weather swings that can undo weeks of work.
The Science of Thymol Volatilization
The rate at which the gel gives off vapor sets the pace of mite control inside the hive.
Vapor Concentration Requirements
The active ingredient must reach about 5–15 µg/l of hive air to be effective. Volatilization rises sharply as ambient heat increases, so the gel’s output changes with daily conditions.
What this means in practice
The vapor attacks mites’ respiratory systems on contact, so concentration is critical. A slow-release gel is designed to maintain that range over several weeks.
- Monitor each application to confirm the gel is releasing at a tolerable pace for the colony.
- Warmer days speed volatilization and shorten the number of active days; cooler days slow release and lower efficacy.
- Time applications to match peak hive activity and brood exposure.
Resources: See this study on application science and a timing guide to refine your approach: volatilization research and timing recommendations.
Identifying the Ideal Temperature Range for Application
Picking the right multi-week climate window is the single most practical decision before placing gel trays in a hive. The manufacturer recommends a mean daily range between 15°C and 40°C throughout the full application period.
Below 15°C, the gel will not volatilize enough to reach mites on bees and within brood. Above 40°C, vapor concentrations may rise and stress bees or trigger bearding.

Checklist for a successful application:
- Confirm several weeks of steady days in the 15–40°C band before starting.
- Ensure the colony is active and moving across frames to spread the dose.
- Delay if forecasts predict heat spikes above 40°C or cold snaps below 15°C.
- Run mite checks before and after a full four-week course to confirm efficacy.
Use the manufacturer’s guidance on product use and placement and consult a seasonal calendar like the varroa monitoring calendar to pick your window. For product details and official instructions, see the Apiguard product page.
Assessing Hive Activity and Colony Health
Start by checking brood pattern and bee movement. Look for solid brood coverage and regular flight on warm days. These signs show the colony can keep a steady internal environment during a multi-week course.
Brood Rearing Cycles
Brood rearing keeps the hive’s core climate stable and helps the gel vapor release consistently across frames.
A full brood cycle should be covered by any application so that mites inside brood cells are exposed when they emerge. If brood is minimal, delay until laying resumes.
Colony Strength
Strong colonies with many workers distribute the gel dose through housekeeping and foraging activity. Weak or queenless hives often cluster and fail to move across frames.
- Assess adult bee numbers, brood area, and queen presence.
- Avoid applying when the colony is stressed or recovering from winter.
- Monitor weekly during the period to ensure brood remains healthy and mite counts drop.
| Condition | Indicator | Action |
|---|---|---|
| Strong colony | Dense brood, active foragers | Proceed with planned application window |
| Weak colony | Small bee numbers, patchy brood | Delay and rebuild until numbers improve |
| Queen issues | Spotty or no brood | Address queen before starting |
| High mite pressure | Elevated counts on checks | Time application to cover a full brood cycle |
Use resources like the spring beekeeping checklist to prepare colonies before any application period. Regular checks protect brood and help maintain clean honey.
Managing External Weather Variables
Choosing the right period depends on local climate patterns and a clear weather plan. Pick a window with several steady weeks, not just a few warm days.
Sudden drops in night air can push hive cores below the needed range and cut vapor output. That change reduces dose consistency and leaves mites untreated.
High summer heat can also raise hive air above safe levels and stress bees. Monitor hive behavior during hot spells and delay if bees cluster at entrances or show heavy bearding.
Use historical data and recent forecasts to choose dates. Regions with cool nights may see wide swings in vapor concentration across the weeks of a course.
- Track daily highs and lows during the planned period.
- Run quick mite checks before and after the multi-week course.
- Delay if colonies appear inactive or brood is sparse.

| Weather Factor | Risk to Application | Recommended Action |
|---|---|---|
| Cold night swings | Low vapor nights reduce efficacy | Postpone until nights stay steady |
| Prolonged heat | Over-release causes bee stress | Shift window to cooler weeks or apply early morning checks |
| Unstable forecast | Interrupted multi-week course | Choose a different week based on historical patterns |
Plan with local climate in mind and consult regional guides like regional temperature guidance and the monthly mite threshold chart to pick an optimal application window.
Comparing Apiguard and ApiLife VAR Protocols
Comparing gel and tablet protocols helps beekeepers match application style to hive layout and colony strength.
Gel Tray Placement
Apiguard uses a slow‑release gel tray placed above brood frames. Place the tray on top bars so natural housekeeping moves the dose across frames.
Keep checks weekly and follow the multi‑round schedule to reach mites that emerge from brood.
Tablet Distribution
ApiLife VAR comes as tablets you break into pieces and scatter around the brood box perimeter. Even spread helps vapors reach more areas of the hive and boosts contact with phoretic mites.
Product-Specific Guidelines
Both products need a multi‑week application period to cover a full brood cycle and reduce mite numbers. Follow label dosing and placement to avoid under‑ or over‑exposure.
Compare protocols and practical notes in this detailed guide: Apivar vs Apiguard & ApiLife VAR.
The Importance of Proper Hive Ventilation
Controlling airflow at the entrance is a simple but powerful way to influence vapor concentration inside a colony. Good ventilation helps keep the active vapors steady so the dose reaches mites across brood frames.
If the hive is too drafty, vapors escape and the application will fail to reach effective levels. Too little airflow lets vapors build up and can stress bees, especially on warm days.

Adjust the entrance and observe natural fanning. The colony’s own behavior spreads the vapors when vents are balanced. Watch bees at the entrance; heavy fanning or frantic movement signals a need to alter airflow.
Practical tips:
- Reduce a large opening slightly to retain vapor without choking the hive.
- Open extra ventilation only if bees show signs of overheating or stress.
- Check brood coverage and airflow daily during the multi‑week course.
Optimizing ventilation ensures even distribution across the brood nest and improves the success of your thymol treatment while protecting colony health.
Avoiding Common Application Mistakes
Careful staging before inserting product trays saves weeks of rework and protects colonies.
Start by checking hive activity and local highs. If brood and bee movement are low, delay the run. Weak colonies do not spread vapor well and may show poor mite control.
Follow the label on dose and rounds. Skipping or shortening a cycle reduces effectiveness. Use weekly checks to confirm progress and adjust if mites remain high.

Avoiding Over-Exposure
Watch ventilation and placement. Too little airflow raises vapor levels and stresses bees. Too much airflow lets the active compound escape and lowers efficacy.
If bees begin bearding at the entrance, that often signals excess vapor. Move trays slightly, reduce dose per label guidance, or improve airflow to ease stress on the colony.
- Do not apply during unstable weather or wide swings in daily highs and lows.
- Place trays on top bars near active brood so vapors reach all areas.
- Monitor bees daily and stop early if clear signs of distress appear.
| Common Error | How It Shows | Corrective Action |
|---|---|---|
| Starting at wrong ambient levels | Low mite drop; clustered bees | Delay until steady warm days; re-run full cycle |
| Over-exposure | Bearding, frantic fanning | Improve ventilation; reduce dose as label allows |
| Poor placement | Uneven mite reduction across frames | Move tray near brood, center on top bars |
| Skipping checks | Undetected stress or failure | Inspect weekly and log mite counts |
Always follow manufacturer guidance and consult practical notes like Apiguard advice when questions arise. Good prep and steady monitoring keep bees healthy and mites under control.
Monitoring Mite Levels Post-Treatment
After a full course, counting mites is the only sure way to know if your approach worked. Perform a targeted mite count about two weeks after the final application to assess efficacy.

Compare the post-run numbers with your pre-application baseline. This comparison shows how well the colony responded and whether the dose reached brood and adult bees.
If reduction falls short, low daytime or night temperatures during the course may be a cause. Keep notes about weather, placement, and hive activity when you log counts.
- Record counts regularly to build a seasonal picture of mite levels.
- If levels remain high, consider alternative controls or a follow-up plan and investigate possible resistance.
- Use the linked guide to standardize your checks: post-treatment mite count.
Consistent monitoring ensures your control program achieves real mite reduction and keeps colonies healthy over time.
Safety Considerations for Bees and Honey
Keep hive safety at the center of any control plan to protect bees and preserve honey quality.

Do not apply a product during a honey flow. That step prevents possible tainting of stored honey and protects consumers.
Always follow label directions. Proper placement and the correct dose reduce risk to brood and maintain healthy colony behavior.
Manage ambient temperature carefully during an application. Too warm can concentrate vapors and stress bees. Too cool lowers efficacy and leaves mites untreated.
- Check pre-harvest intervals on the label so honey remains safe to sell or eat.
- Note that some options, unlike oxalic acid, leave minimal synthetic residues in wax, which benefits organic operations.
- Run mite checks after a full course to confirm success and avoid repeat applications.
| Safety Concern | Sign | Action |
|---|---|---|
| Honey flow risk | Active nectar coming in | Delay application until after harvest |
| Bee stress | Bearding, frantic fanning | Improve ventilation or pause application |
| Insufficient brood exposure | Clustered bees, low movement | Wait until brood rearing resumes and re-run full cycle |
Prioritize safety at every step. Correct timing and careful application protect bees and keep honey pure, supporting long-term hive health.
For comparisons of acid-based options and practical notes, see the guide on formic pro vs oxalic acid.
Conclusion
Wrap up with a clear inspection, and verify whether your actions lowered mites in the colony. Record hive signs and counts to see what worked.
Effective control hinges on keeping ambient temperatures in the recommended band so vapor reaches all areas of the brood nest. Good timing and steady weather support real mite reduction.
Monitor hive activity, log mite levels, and follow product directions. Proper planning and careful follow‑through mean that well‑managed thymol treatments can provide a safe, organic option to protect bees.
FAQ
What is the ideal temperature range to apply thymol-based mite control like Apiguard or ApiLife VAR?
Successful application requires warm daytime conditions but cool enough nights. Aim for average daytime highs between about 70°F and 85°F with nights not dropping far below 50°F. This range helps the active ingredient volatilize sufficiently to reach mites in brood and on adult bees without overheating the colony or degrading the product.
How does thymol work against Varroa mites?
Thymol is an organic compound that vapors inside the hive, irritating and killing Varroa mites on adult bees and in brood cells. Its vapor concentration disrupts mite respiration and mobility, reducing colony mite loads when applied correctly and combined with good monitoring and hive management.
What are the main benefits of using thymol-based products?
Thymol offers a low-residue, beekeeper-friendly option that fits integrated pest management. It provides an alternative to synthetic acaricides, works in colonies with brood, and can be used during honey flow with careful timing and adherence to label directions for honey safety.
Why does ambient and hive thermal condition matter for thymol effectiveness?
Volatilization rate depends on hive microclimate. If conditions are too cool, vapor levels stay low and mites aren’t exposed enough. If too hot, thymol may dissipate rapidly, reduce contact time, and stress bees. Proper hive ventilation and choosing the right season maximize consistent vapor distribution.
How much vapor concentration is needed to affect mites without harming bees?
Effective vapor concentration falls into a balance: enough to reach mites in brood areas but below levels that cause prolonged bee agitation or queen issues. Follow product guidelines for dose and placement; manufacturers like Vita (Apiguard) and Fumagri (ApiLife VAR) provide application doses and duration to maintain safe concentrations.
How should I time thymol application with brood rearing cycles?
Apply during periods of declining brood rearing or when brood levels are moderate to maximize mite exposure on adult bees. Two consecutive applications spaced per product directions often improve control because they target mites emerging from capped brood across cycles.
Can weak colonies handle thymol applications?
Fragile or poorly populated colonies tolerate thymol less well. Ensure colonies are strong enough — ample worker numbers and food stores — before treating. If colony strength is low, consider supportive measures (feeding, combining nucs) or choose a gentler control timing.
How does weather influence application success and what can I do about it?
Rain, high humidity, or heat waves affect vapor behavior and bee activity. Avoid applying just before storms or extreme heat. Use treatment windows with stable, mild conditions and maintain good hive ventilation to moderate internal humidity and airflow for even thymol dispersal.
What are the differences between Apiguard gel and ApiLife VAR tablets in use and placement?
Apiguard uses a gel tray positioned on top of the frames or crown board; it releases vapors steadily and needs correct gel placement and replacement per label. ApiLife VAR comes as tablets or strips placed between top bars; tablets often require fold or spacing to allow airflow. Follow each product’s specific placement and duration instructions to ensure consistent vapor contact.
Where should gel trays or tablets be placed within the brood box for best effect?
Place gels or tablets centrally above the brood nest but not directly on comb to avoid contact with brood or stored honey. For hive designs with crown boards, place the tray on the inner cover or a dedicated tray to allow vapor to sink through the cluster and reach mites in brood and on bees.
How important is hive ventilation during a thymol cycle?
Proper ventilation prevents hotspots and helps distribute vapors evenly. Ensure entrances are unobstructed and avoid sealing hives completely. Good airflow lowers the risk of bee overheating and maintains a steady thymol concentration that reaches mites throughout the brood area.
What common mistakes reduce thymol efficacy or harm colonies?
Mistakes include applying during extreme heat or cold, overdosing, placing product in direct contact with brood or honey stores, and skipping the second application when required. Also avoid treating very weak colonies and neglecting ventilation; each leads to poor mite control or colony stress.
How should I monitor mite levels after treatment?
Use regular monitoring methods: sugar shake, alcohol wash, or natural mite drop counts on sticky boards. Check before treatment, midway, and 2–4 weeks post-treatment to assess reduction. If mite levels remain high, re-evaluate application timing, dose, and colony conditions.
Are there safety concerns for honey and human consumption after using thymol products?
Most thymol products carry label instructions about timing relative to honey supers. Many allow treatment during non-honey flow or specify removal of supers. Always follow label withdrawal periods to prevent residues and protect honey quality and marketability.
Can I combine thymol use with other control methods like oxalic acid or formic acid?
Thymol can be part of an integrated pest management strategy. Rotate active ingredients and use complementary methods that match seasonal brood patterns. Avoid simultaneous treatments that increase bee stress; sequence interventions per label guidance and mite monitoring results.
How long does a typical thymol application course last and how many treatments are recommended?
Most product protocols run 2–6 weeks per application, often requiring a repeat after a defined interval to cover mite emergence from brood. Follow manufacturer directions — for example, two treatments spaced as directed — and adjust based on colony response and mite counts.
Where can I find product-specific application guidance and dosing?
Consult the product label and manufacturers’ resources such as Vita-Europe for Apiguard or local distributors for ApiLife VAR. Labels provide precise dose, application method, maximum number of treatments, and safety notes for honey and brood.
What precautions should be taken to avoid over-exposure of bees to thymol?
Use only the recommended dose and avoid placing product in direct contact with bees or brood. Monitor colonies for signs of agitation or queen issues, improve ventilation if bees show distress, and remove product earlier than scheduled if negative effects occur.