Welcome to the first week with your new package bees. This brief guide prepares you for the first colony inspection and what matters early on.
Start by knowing a standard package holds about 12,000 workers. That number gives your hive the best chance to build brood and gather nectar and pollen.
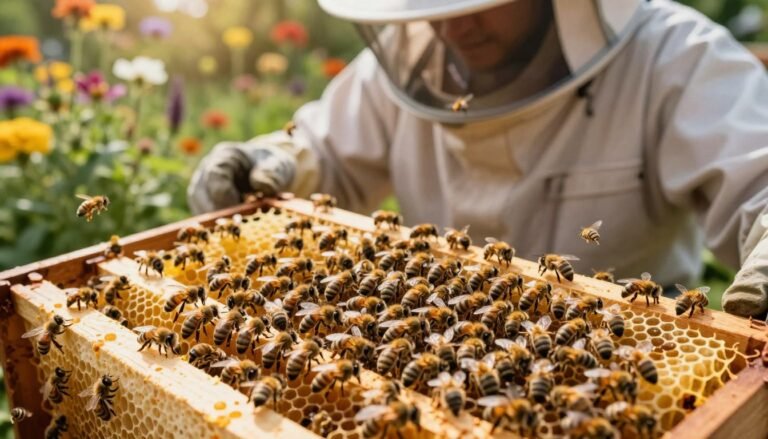
Perform the initial inspection near day seven. Look at the frames for the queen, fresh eggs and young larvae, neat brood patterns, and steady worker activity. Watch the entrance for normal traffic; many dead bees at the door can signal stress.
Temperature control matters. Overheating in transit kills the queen and workers, while chilling below 55°F can harm the queen’s stored sperm. The North Carolina State University Apiculture Program recommends installing packages when temperatures are above 65°F.
Manage foundation, wax, and screened covers to protect the colony through changing weather. Small, regular checks in the first year help track population and honey production.
Key Takeaways
- Expect about 12,000 workers in a standard package.
- Plan the first inspection roughly one week after placement.
- Watch the entrance for heavy dead bee counts as a warning sign.
- Keep shipment and hive temperatures within safe ranges.
- Look for nectar, pollen, brood, and steady worker activity.
- Adjust foundation and screen management for weather and survival.
Preparing for Your First Hive Inspection
Plan your initial hive visit around the moment the colony has settled and workers are active. A brief, calm inspection gives you the best read on queen acceptance and early comb progress.
Timing Your First Visit
Inspect roughly one week after setting the package, then every two weeks for the next couple of months. Pick a mild day and midafternoon when flight is steady. If the weather is cool, bees may cluster on the frames rather than build comb.
Essential Tools for Inspection
Make sure you have a hive tool, a smoker, and a spray bottle filled with sugar syrup. An external feeder helps maintain a steady supply without disturbing the colony.
When you open the hive, look for bees blanketing the tops of most frames. Expect variation — not every frame will be fully covered at first. Handle each frame gently to avoid crushing bees and risking queen harm.
Monitor the external feeder use and watch for more activity at the entrance as workers begin to forage for nectar and pollen. For guidance on setup and placement, see beehive installation.
How to Check for Eggs After Package Installation
A careful frame-by-frame look in the brood area gives the clearest sign the queen is active.
Open the hive gently and focus on the center frames. Look down into cells for tiny, white, rice-shaped objects standing upright. Those are the primary indicator of a healthy, laying queen.
If the queen arrived in a queen cage, place the cage candy-side up between two center frames so workers can release her in one or two days. After release, evidence of eggs or larvae should appear within a few days.

“Eggs look like grains of rice and should stand at the center of each cell.”
- Remove center frames carefully and inspect cells for tiny white eggs.
- Inspect brood area thoroughly; laying often begins in the middle of the frames.
- Continue feeding 1:1 warm sugar and water syrup to help comb building and support the colony.
If no eggs or larvae appear by the end of the second week, contact your supplier about a replacement or a new queen. Early action preserves colony momentum and nectar-gathering potential.
| Check | What to look for | Action |
|---|---|---|
| First week | Queen cage position, worker activity | Leave cage candy-side up; keep feeding sugar syrup |
| Days 7–14 | Eggs or very young larvae in center cells | Mark frames and monitor growth |
| After 14 days | No eggs or capped brood | Contact supplier or order a new queen |
For additional setup tips and transport guidance, see shipment and handling advice and best practices for assessing incoming stock at inspecting purchased nucs.
Assessing Hive Entrance Activity and Mortality
A brief observation at the entrance reveals much about colony health and recent stressors. Stand a few feet away and watch the doorway for several minutes. Note flight patterns, fighting, and any pile of dead bees at the front of the box.
Distinguishing Normal Traffic from Robbing
Normal spring activity shows steady flights, pollen coming in, and workers carrying nectar. Activity often drops on cold or rainy days and as nectar sources wane later in the year.
- Observe the entrance for outbound and inbound flow appropriate for the day and weather.
- If you see 50 or more dead bees at the entrance, that number can signal a struggling colony or active robbing.
- Robbing looks like bees fighting at the doorway, clusters near seams, or many insects at external feeders.
- Reduce the entrance size and keep feeders clean to cut robbery risk.
- During inspections, confirm brood growth; steady larvae and capped brood support higher, healthy traffic.
“A small entrance is easier for workers to guard when robbers arrive.”
Resources: For detailed seasonal advice, consult the CSU bee book and a practical spring beekeeping checklist for timing and setup tips.
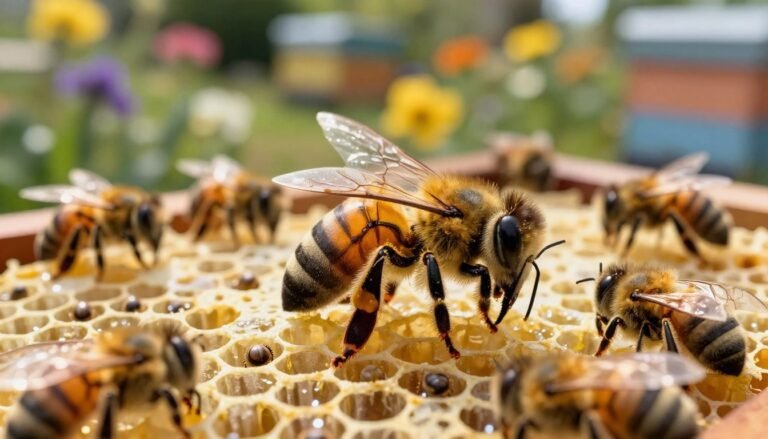
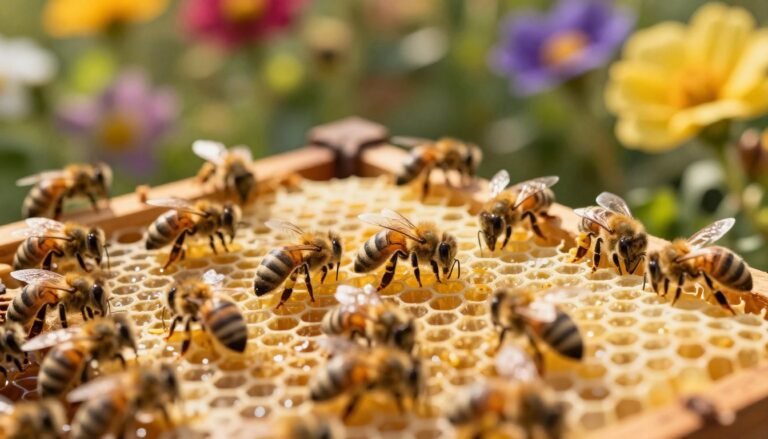
Evaluating Comb Building and Population Density
Observe the tops of each frame—bees should form a blanket that grows thicker on inner frames.
During an inspection, the tops of most frames should be covered. The density usually increases from the outer frames toward the center where the queen favors laying.
Remove a center frame carefully. It should have a higher density of bees, often two times or more than an edge frame.

Wax comb appears as the colony needs it. Workers need ample sugar syrup for wax production. Even with steady feeding, expect several weeks before ten frames are fully drawn.
- Check frames for stored nectar and pollen; these support brood and comb work.
- Expect population swings in the first weeks; look for steady progress, not perfection.
- If cold weather slows progress, keep supplemental feed and give the colony time.
“A high-density center frame and visible cells mean the colony is building momentum.”
| Period | What to inspect | Expected action |
|---|---|---|
| First week | Blanketing on frames, queen location | Keep sugar syrup available; limit disturbance |
| Weeks 2–4 | Comb drawing, stored nectar and pollen | Maintain feeding; mark frames with brood or heavy comb |
| After 4 weeks | Number of drawn frames and brood coverage | Assess population growth; consider adding foundation if comb lags |
For a deeper look at causes when comb is slow, see reasons bees won’t draw comb.
Identifying Signs of a Healthy Queen
A reliable sign of a thriving queen is a compact, even brood pattern across the center frames. This pattern shows the queen is laying consistently and the colony is organized around brood care.
Visualizing Eggs and Larvae
Eggs appear as tiny, rice-like specks standing upright in the center of cells. Within days these become white, curled larvae that workers feed constantly.
Look at several adjacent frames. A tight, uniform patch of eggs and larvae means the queen is mated and active. Marking that frame helps monitor progress over the next week.
Recognizing Drone Brood Patterns
Drone brood is larger and often bulges from the comb surface. A spread of only drone cells can indicate poor mating or depleted sperm stores.
- Replace the queen if the colony shows mainly drone brood; a drone-only colony will collapse.
- Confirm the queen cage was released properly and that workers accepted the new queen.
“Tight brood and a mix of eggs, larvae, and capped cells mean your new colony is on the right track.”
For ongoing hive health guides and brood assessment techniques, see monitor hive health after queen release and heat-mapping for brood pattern assessment.
Troubleshooting Common Queen Acceptance Issues
A swift response when a queen is missing saves a struggling colony. If a queen is not accepted, she may be dead inside the queen cage or absent from the frames altogether. Check the cage first and then the center frames for eggs or larvae.
Immediate steps:
- Inspect the queen cage for a live queen or signs of rejection.
- Watch frames for emergency queen cells — these show the workers are responding.
- If no eggs appear after two weeks, order a new queen from a reliable vendor right away.
Uniting with a strong hive can work well. Place a sheet of newspaper with small holes between the queenless box and an established colony. The slow merge reduces fighting and lets workers accept a new queen gradually.

“Worker lifespan is short; act quickly so the population stays viable.”
If you need help, ask a local beekeeper for a brood frame or consult a focused resource such as the package queen failure guide. When replacing a queen, always introduce the new queen in a cage so workers can adapt over several days.
Managing Environmental Factors and Supplemental Feeding
Protecting a new colony begins with placing hives where wind, sun, and shade balance daily needs.
Site choice matters. Place the hive where it has morning sun and afternoon shade. That reduces thermal stress on the queen and workers and helps comb and brood development.
Consistent sugar syrup keeps developing packages moving. Use internal feeders when space allows; they hold more syrup and cut robbing risk. Clean any external feeder surfaces so sticky spots do not cause drift or attract pests.
Monitor feeders every few days in the first weeks. Refill before syrup runs out. In poor weather, bees rely on your supply for nectar and pollen substitutes. That steady food supports wax production and a growing population.
“A full feeder and a sheltered entrance help a new package find work and grow without excess losses.”
| Factor | Recommended action | Why it matters |
|---|---|---|
| Location | Sheltered, sun/shade mix | Reduces heat stress and chilling |
| Feeder type | Internal preferred; clean externals | Less robbing, more steady syrup supply |
| Monitoring | Check feeders every few days | Prevents starvation and supports comb |
For quarantine and staging advice before adding colonies, see quarantine new bees. Adjust management based on local weather and hive progress.
Conclusion
, Confirming brood presence gives confidence that the queen settled well. Regular inspections and a clear checklist help you spot problems early and act with purpose.
Keep feeding consistently and keep the hive clean. Those steps support wax production and steady comb building. Mark frames with brood so you can track progress each visit.
If signs lag or acceptance stalls, contact a local beekeeping group for practical help. Patience matters; colonies often need weeks to gain momentum.
Final thought: steady care, timely inspections, and community support will grow a robust, productive colony that benefits your yard and local pollination.