Setting the right hive stand height is a small step that pays big dividends for both your bees and your back.
Most beekeepers find a platform about 16 to 18 inches off the ground works well for Langstroth hives. This level keeps the bottom board dry, limits ant access to the entrance, and makes inspections easier.
Consider the load: a full honey super can weigh over 50 pounds, so an ergonomic position reduces strain during harvest and speeds up routine work.
Keep your hive tool and bucket close at hand. Wearing a protective suit helps, but a poorly positioned hive can still cause back fatigue and slow honey production in your apiary.
Key Takeaways
- Aim for about 16–18 inches to protect the bottom board from ground moisture.
- Proper elevation deters ants and improves entrance management.
- Ergonomic access reduces back strain when lifting heavy honey supers.
- Keep tools like your hive tool and a bucket nearby to save time.
- Good setup supports colony health and steady honey production.
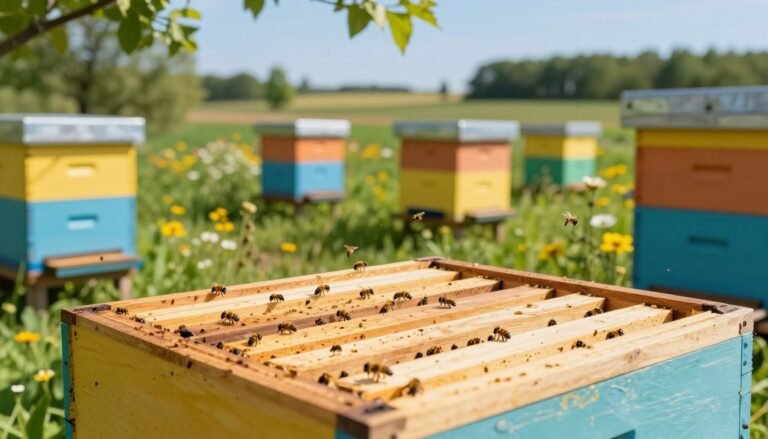
The Importance of Proper Hive Placement
Choosing where to place each colony influences pest pressure, beekeeper comfort, and how well your site weathers seasonal shifts.
Good placement reduces threats from ground-dwelling pests and creates a more stable environment for your bees. That stability often leads to healthier colonies and increased honey production.
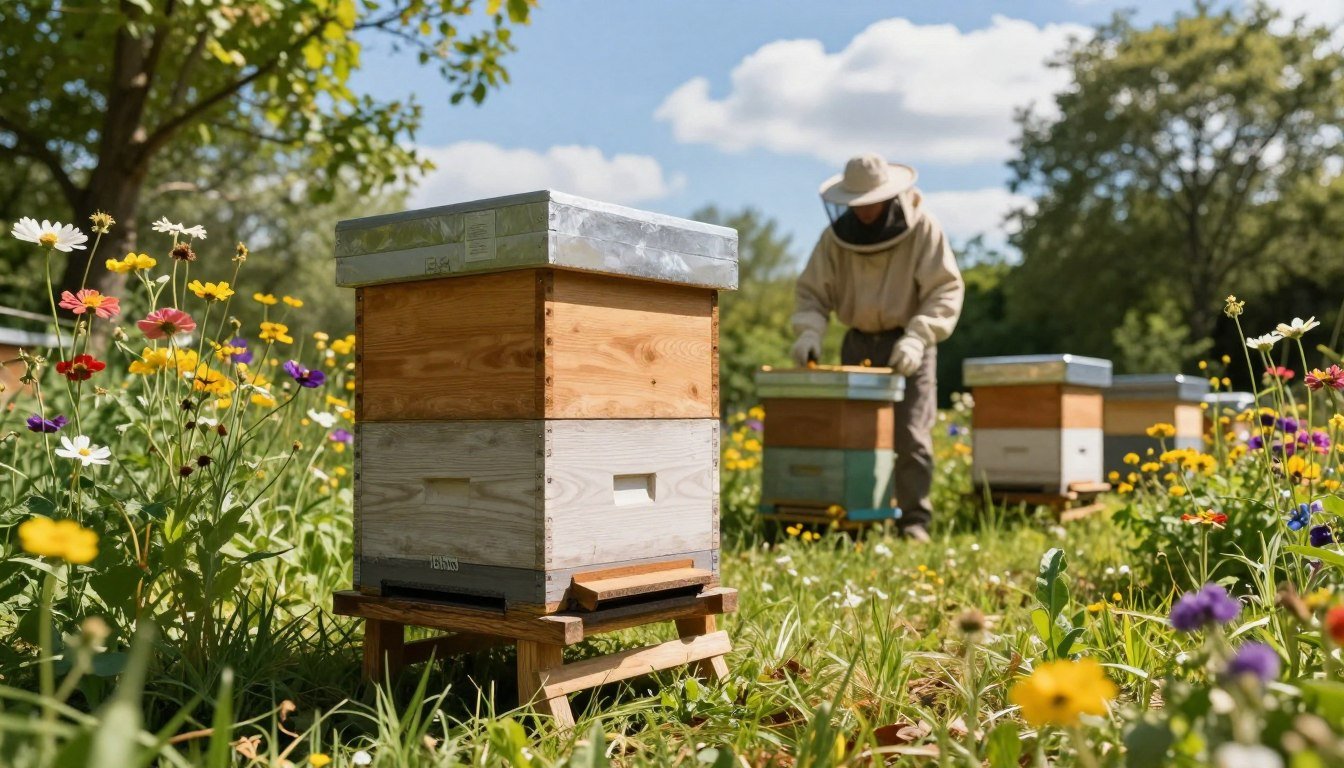
Positioning a hive stand thoughtfully also makes inspections and harvests easier. Ergonomic access lowers the physical toll on the beekeeper during heavy lifts and routine checks.
Wind, drainage, and forage patterns all affect how well colonies perform. Place hives where wind exposure is minimized and drainage keeps bottom boards dry.
“Investing time in site selection pays dividends in reduced stress and smoother collection cycles.”
- Secure locations reduce tipping risk during storms.
- Intentional spacing helps with disease control and flight paths.
- Well-sited hives simplify seasonal maintenance and equipment handling.
For tips on quieter, more stable supports, consider products like noise-reducing hive supports to improve longevity and comfort in your apiary.
Understanding Hive Stand Height Best Practices

The chosen platform level can make inspections quicker and reduce pest access to the entrance. Aim for a consistent range around 16–18 inches; this balances pest deterrence with human ergonomics and fits standard material lengths.
Defining the Ideal Range
Practical reason: An 8-foot board yields six 16-inch cuts with no waste, making construction efficient and repeatable.
Balancing Competing Needs
Use cinder blocks for a low-cost base and add steel components where you need long-term rigidity. Ensure the feet sit on firm ground so the platform stays level under a full Langstroth hive and heavy honey boxes.
“A consistent, level platform saves time and reduces strain during routine inspections.”
| Feature | Benefit | Typical Option |
|---|---|---|
| Elevation range | Deters pests, eases lifting | 16–18 inches |
| Base material | Cost and durability | Cinder blocks or concrete |
| Frame support | Keeps platform level under load | Steel brackets or treated lumber |
| Standardization | Saves time and money | 8-foot boards cut to length |
For more on setup choices, read a detailed guide on hive stand height or explore design ideas at best hive stand design.
Protecting Your Colony from Predators
Raising colonies off the soil cuts direct access for many night-time predators and makes your apiary safer.
A platform of 16 inches or more generally prevents skunks from standing upright to reach the hive entrance. That simple adjustment keeps guard bees from being pulled out and lowers stress on the colony.
Keep the bottom board clear of direct contact with the ground. This helps prevent rot and discourages slugs, small beetles, and other pests from nesting underneath.
Physical barriers add extra protection. Many beekeepers add ant-proof collars or oil traps on supports during peak honey flow to stop invasions.
- Elevate entrances to deter skunks and raccoons.
- Use ant barriers during heavy nectar flows.
- Monitor for predator signs and adjust supports quickly.
- Maintain a strong, level foundation to keep colonies secure year-round.
| Threat | Protective Measure | Expected Result |
|---|---|---|
| Skunks / Raccoons | Raise platform to ≥16 in; add short ramp deterrent | Less scratching at entrance; calmer colonies |
| Ants | Install ant-proof collars or oil moats on supports | Reduced invasions during honey flow |
| Beetles / Slugs | Keep bottom board off ground; improve drainage | Fewer pests under boxes and less wood rot |
| Tipping / Storms | Use robust, tied-down platform and level base | Stable colonies and less equipment damage |
Practical tip: If predator activity appears, raise or reinforce supports and check barriers first. For layout ideas that improve colony security and workflow, see apiary planning guide.
Ergonomic Considerations for Beekeepers
Making inspections less taxing starts with setting your workspace so heavy boxes sit at a comfortable lifting level. This approach reduces repeated bending and protects your lower back during seasonal work.

Reducing Physical Strain During Inspections
Lift with your legs: position the top box so you can bend at the knees, not the waist. That reduces stress when you remove a full super for honey.
Workflow matters: keep a bucket nearby for your hive tool and gloves so you do not reach to the ground between frames. A brood box at waist level lets you move frames with one hand while maintaining a neutral posture.
- Wear a protective suit but minimize stooping by raising the access point.
- Place tools within arm’s reach to save time and reduce strain.
- Adjust your platform to suit your height if back pain starts to appear.
“Simple adjustments to working level improve efficiency during honey production and keep you inspecting more often with less fatigue.”
For compact layouts that prioritize comfortable access, see ideas for minimalist beekeeping setups. Small changes help you keep working safely for years.
Adapting to Local Environmental Conditions
Match your hive elevation to regional conditions to protect colonies from moisture and obstruction.
In snowy regions, raise a platform so the hive entrance stays clear of drifts. Keeping the opening high enough prevents bees from being trapped and allows for normal flight once temperatures rise.
Flood zones need even more care. Elevating the supports protects the bottom board from wicking moisture and rot. Dry interiors help colonies conserve energy and hold honey stores through wet spells.
“Prepare for local extremes now and your colonies will weather winter and spring with fewer losses.”
Observe your landscape: rocky slopes, wet meadows, and shaded hollows call for different approaches. Adjust each hive and base to match the microclimate rather than using one fixed setting for every site.
- Snow: extra clearance for entrances.
- Flood risk: raise supports and add drainage.
- Wet ground: protect the bottom board and use treated materials.
| Condition | Recommended Action | Expected Benefit |
|---|---|---|
| Heavy snow | Increase platform and clear entrance | Unblocked flight and ventilation |
| Seasonal flooding | Elevate and improve drainage | Dry interior; less disease risk |
| Persistently damp ground | Use moisture-resistant base and ventilation | Reduced rot; stable honey stores |
For regional ideas on supports and placement, read a practical guide to bee hive stands and factors like shade versus sun at shade vs sun placement.
Material Selection and Construction Efficiency
Smart construction saves time and reduces wobble when boxes are full. Choosing the right materials balances cost with long-term durability for your hive and workflow.

Cost-Effective DIY Designs
Use an 8-foot board cut into six 16-inch pieces to avoid waste and speed builds. This simple trick makes repeatable tops and legs fast to assemble.
Cinder blocks make a practical base. They are cheap, stable, and easy to source for one stand or many.
Using Durable Materials
Combine treated lumber with a few steel brackets to resist sagging under heavy honey boxes. Steel parts add rigidity where feet and joints carry the load.
Weather resistance matters: choose exterior-grade screws and finishes so wood and metal last through seasons.
- Minimize cuts: plan around standard board lengths to save time and money.
- Align all feet carefully to keep boxes level under load.
- Pick parts that resist moisture and rot for long service life.
| Material | Pros | Cons |
|---|---|---|
| Treated wood | Affordable, easy to work | Needs regular inspection |
| Cinder blocks | Stable, low cost | Heavy to move |
| Steel brackets | Adds long-term rigidity | Higher upfront cost |
Plan once, build many: consistent design across your apiary makes maintenance easier and protects your investment in bees and equipment.
The Risks of Incorrect Stand Height
Too-tall or too-low supports create risks that affect both bee health and beekeeper safety.
A platform set too low offers little protection for the bottom board. Moisture wicks up, wood rots, and pests take advantage.
If the platform is too high, a tall Langstroth hive can become unstable. Strong winds may tip a stack and spill boxes of honey.
Regular checks catch loose supports or leaning posts before a fall damages colonies.
- Low platforms force repeated bending and add strain to your back.
- Entrances near the ground invite predators and can be blocked by weeds.
- Excess elevation raises the risk of tipping in storms.
Balance avoids extremes and preserves structural integrity for your hives. Inspect stands often and level them after weather events.
For durable ideas on a secure base, read the ultimate hive stand.
Achieving a Level and Stable Platform
A level platform keeps boxes true and helps bees draw straight comb. This small detail improves brood placement and reduces broken comb when you handle frames.

Techniques for Leveling on Uneven Ground
Use adjustable feet or scaffold jacks to fine-tune the platform. Scaffold jacks are typically 600 mm tall and rated to 4 tonnes, so they handle heavy loads and offer precise adjustments.
Cinder blocks work well for low-cost bases. Add shims to the blocks to get a perfectly horizontal top for each box.
For sloped sites, pair steel supports with adjustable feet. That combination gives a rigid design and stops wobble when frames and supers are full of honey.
“Level platforms make inspections faster and help colonies keep a steady internal climate.”
- Verify with a spirit level before closing the top box.
- Check feet and joints annually and after storms.
- Use robust materials where heavy loads concentrate at the feet.
| Method | Pros | Cons |
|---|---|---|
| Scaffold jacks | High load capacity; fine adjustment | Higher cost; needs secure base |
| Cinder blocks + shims | Low cost; easy to modify | Less neat; can shift on soft ground |
| Steel supports with adjustable feet | Rigid; durable on slopes | More complex build; higher upfront cost |
For more on appropriate placement and a clear guide to what to use, see what height should a beehive stand. Taking time to level each base pays off in easier work and healthier colonies.
Innovative Solutions for Pest Management
A creative approach to feet and parts reduces ant incursions and keeps colonies calmer.

Retrofitting supports with exhaust pipe reducers filled with grease creates a simple, effective ant-proof cup under each foot. This method is low-cost and easy to refill during the season.
Combine physical and chemical tools when a persistent ant problem appears. Use grease cups plus targeted bait stations near the base to reduce nearby foraging pressure.
- Durable parts: use steel brackets or weatherproof parts at load points to prevent gaps where insects climb.
- Place cinder blocks or concrete blocks under legs for a steady base and to keep the platform off the ground.
- Keep the hive entrance clear and slightly elevated so crawling pests have fewer routes upward.
“Small design changes often solve long-standing pest issues and protect colony health.”
| Solution | Why it works | Maintenance |
|---|---|---|
| Grease-filled reducers on feet | Creates a slippery moat that stops ants | Check and refill every 2–4 weeks |
| Steel brackets and sealed parts | Eliminates crevices and lasts through seasons | Inspect fasteners annually |
| Bait stations near base | Reduces colony-level ant pressure | Replace baits per manufacturer guidance |
Regular monitoring of hive stands helps you catch early signs of infestation. Try new designs cautiously, record results, and adapt to local conditions for long-term success.
Customizing Your Apiary Layout
Designing the layout around how you work saves time and reduces repeated bending. Arrange each hive and stand so you have room to set down boxes and move freely between colonies.

Leave clear lanes for a bucket and hive tool so you can reach them by hand without stepping around equipment. A dedicated spot on the top of a stand to rest a frame or super cuts the risk of dropping gear during inspections.
Tailor each platform to your height so you can lift with your legs while wearing a protective suit. That small change protects your back and speeds routine work.
- Space hives to avoid disturbing neighbors when you open a box.
- Plan access to the entrance of each colony for quick monitoring.
- Set aside room for temporary stacking of boxes during honey production.
“Thoughtful layout turns repetitive tasks into smooth, safe work.”
Conclusion
A clear, well-built stand ties together colony safety and daily work. Choosing an appropriate height protects the entrance from moisture and pests while making inspections easier.
Reduce strain on your back by positioning boxes where you can lift with your legs. A stable platform also prevents tipping and keeps comb intact during handling.
Think of hive stands as essential equipment for a productive apiary. Small design choices at this point return steady rewards in health, safety, and harvest efficiency.
For ideas on robust options and layouts, see a practical guide to bee hive stands and an apiary planning guide.