Maintaining consistent spacing inside a Langstroth-style hive helped many U.S. beekeepers keep colonies healthy and productive in the past. Simple, repeatable setup made inspections easier and kept bees building neat comb that was easy to manage.
During the first few weeks of the season, attention to the wooden box and the arrangement of frames helped prevent a swarm. Monitoring nectar flow and brood growth guided the beekeeper on when to add a super or extra boxes.
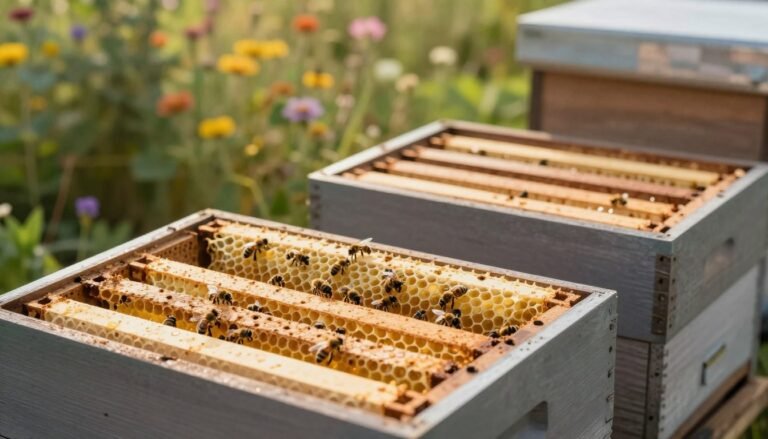
A well-organized hive saves time and reduces surprises. Consistent frame placement lets inspectors check brood, assess colony size, and plan honey harvests with less disruption to the bees.
Key Takeaways
- Consistent setup promotes orderly comb and easier inspections.
- Early season checks in the first weeks reduce swarm risk.
- Watch nectar flow to time adding a super for honey storage.
- Good box management supports brood health and colony growth.
- Simple, repeatable practices help new beekeepers gain confidence.
Understanding the Importance of Bee Space
A small gap discovered by Langstroth guides how bees organize their interior. In the 1800s he identified a narrow range that the colony will naturally respect. This gap, known as bee space, measures between 1/4 inch and 3/8 inch.
When the opening exceeds 3/8 inch, bees tend to fill it with new comb. If the gap is smaller than 1/4 inch, workers seal it with propolis.
Respecting these dimensions helps beekeepers keep drawn comb orderly and reduces surprises during inspections.
“Bee space is the key that made movable comb practical,”
- Langstroth’s finding allowed designers to make hives easier to manage.
- Correct space helps bees move, rear brood, and store honey efficiently.
- Learning these rules prevents unwanted comb that complicates handling.
For practical tools that aid accurate setup, see the best frame spacer guide. Understanding bee space is a cornerstone of modern beekeeping and a must for serious beekeepers.
Preparing Your Hive for Success
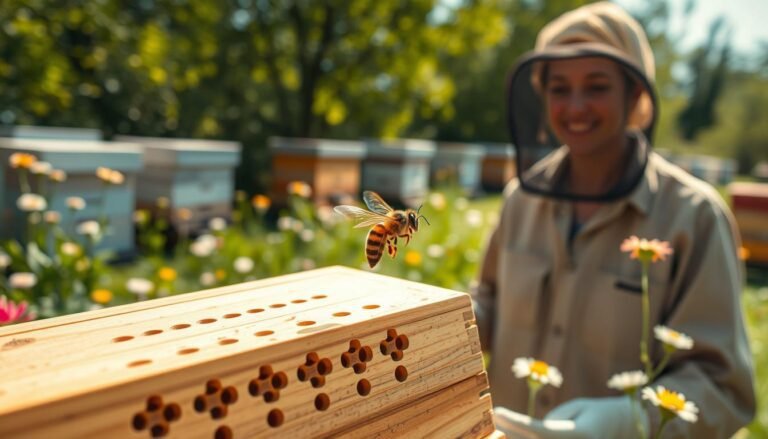
Start the season by confirming your tools are clean and frames are sturdy. A sharp hive tool makes inspections faster and helps separate frames that bees have glued together. Keep one clean tool per apiary to limit disease transfer.

Tools for the Job
Good gear saves a lot of time. A high-quality hive tool is the most important piece of equipment during the busy weeks. It pries, lifts, and helps you avoid crushing brood when moving frames.
Selecting Quality Frames
Choose sturdy frames with a reliable foundation. Wax foundation guides the bees and reduces the chance of cross comb forming between frames. Sturdy frames also protect fresh brood and honey during handling.
- Prepare the box before swarm season so the colony has room to expand.
- Keep an extra box with assembled frames ready if a swarm shows up.
- Clean tools often to prevent disease spread among hives.
- Proper frame choice reduces repairs and lost time during inspections.
Learn more about why bees may resist drawing ideal comb at why bees won’t draw comb.
Achieving Optimal Frame Spacing for Straight Comb Building
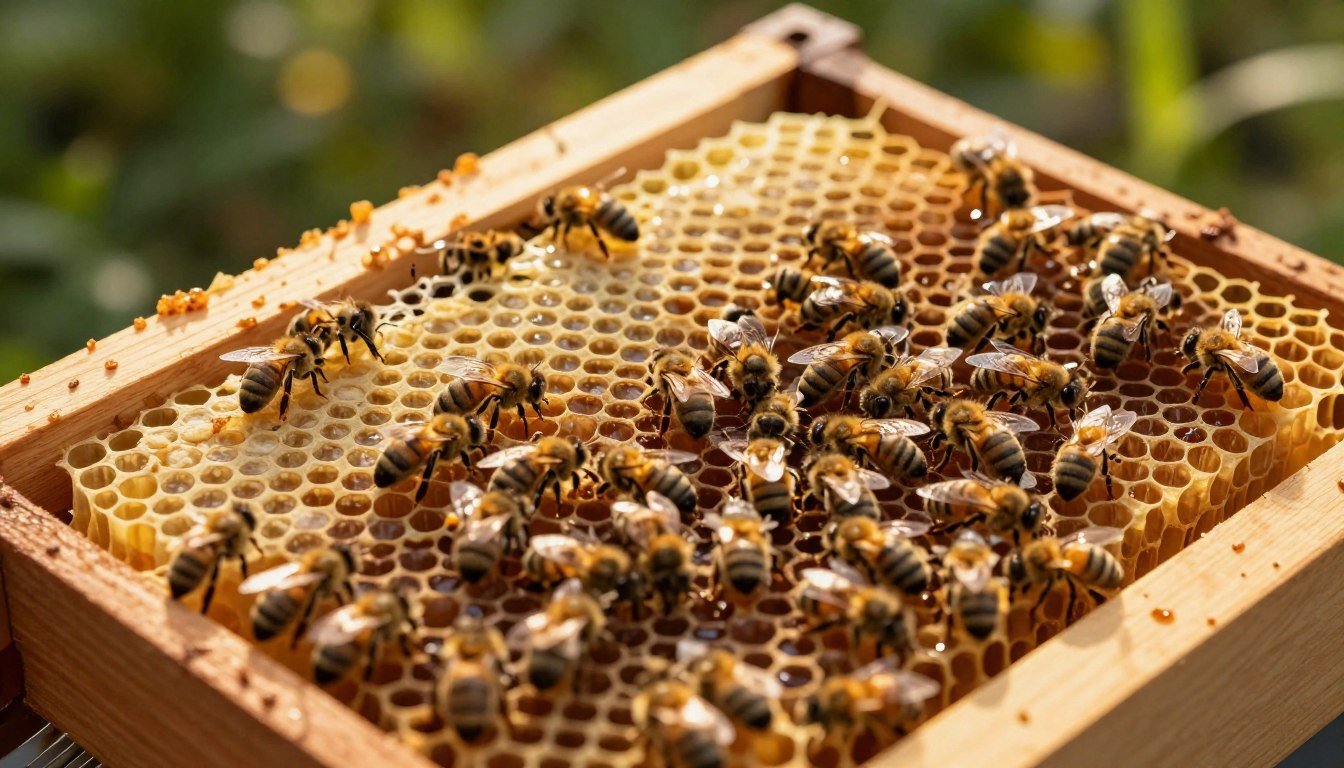
Setting the right gap inside a hive helps bees draw even comb and eases checks. A regular interval gives the queen a stable center to lay eggs and keeps brood near steady temperatures.
Good space lets workers move, store honey, and keep passages open. It also makes it simple for a beekeeper to lift a frame with a tool without tearing fresh wax.
- Correct spacing reduces cross comb and speeds inspections.
- Neat rows protect brood and support colony growth.
- When hives have room, the risk of swarming drops and honey flows improve.
| Condition | What bees do | Beekeeper result |
|---|---|---|
| Tight lanes | Seal gaps with propolis | Frames stick, hard to remove |
| Ideal gap | Draw comb parallel | Easy inspections, healthy brood |
| Wide gap | Builds new comb between | Cross comb, time lost fixing |
| Managed regularly | Consistent growth | Higher honey yield, calmer colony |
To learn practical fixes when comb joins incorrectly, see how to fix cross comb. Regular checks and small adjustments save time and keep colonies productive.
The Role of Foundation in Comb Development
A clear foundation guide helps bees lay out uniform cells and keeps the colony organized.
Foundation gives workers a starting pattern. It speeds cell formation and helps the beekeeper keep rows aligned. A good guide reduces rogue growth and saves time during inspections.

Benefits of Alternating Frames
Alternating frames with and without foundation encourages natural work by the bees while still steering cell placement. The mix lets bees build comb in a more even way and can reduce weak, thin wax sheets.
- Plastic foundation offers a rigid backbone that holds heavy honey.
- Beeswax-coated foundation gives a familiar surface that bees accept quickly.
- Using a queen excluder above the brood box helps keep the super free of brood.
| Option | Advantage | When to use |
|---|---|---|
| All foundation | Uniform cells, easy handling | High honey flow seasons |
| Alternating | Natural comb with guided alignment | Encouraging bees to build comb evenly |
| Foundationless | Most natural wax, flexible comb | Small apiaries, conservation projects |
Providing a solid guide and the right materials helps beekeepers manage growth and maximize honey yield. For safe removal and disease guidance, consult when to discard comb after disease.
Why Bees Build Cross Comb
A sudden surge of nectar or an off-level hive often leads to joined comb between frames. Bees react to available resources and odd angles by filling gaps with wax. This creates cross comb that ties adjacent pieces together.
Cross comb is not harmful to the colony, but it is a problem for the beekeeper during inspections. Joined wax makes removing sections risky and can damage brood or stored honey.
Using the Rubber Band Method
The rubber band method secures loose sheets back into a single frame while the bees rebuild proper attachment. It’s simple, low-cost, and works well early in the season when comb is soft.
Splitting Joined Combs
When combs are already joined, a steady hand and a sharp hive tool are required. Gently separate the wax where it bonds, taking care around brood to avoid crushing larvae.
- Check for cross comb within the first few weeks to prevent big problems.
- A leaning hive or heavy nectar flow often starts the issue.
- Addressing joined comb early saves time and protects brood.
“Early checks and small fixes keep inspections clean and the colony calm.”
For a deeper look at common pitfalls and solutions, see the challenges of cross comb.
Leveling Your Hive to Prevent Irregular Growth
A steady, level stand gives the colony a reliable base to shape parallel comb inside the hive. Gravity plays a simple but powerful role in how bees build inside the box. An uneven setup is a common reason bees will make wax at odd angles and join adjacent sections.

Use a carpenter’s level across each side and diagonally to confirm evenness in all three dimensions. Small adjustments with shims or an adjustable stand solve the issue quickly.
- Ensure the hive is perfectly level to reduce cross growth and inspection problems.
- Check level when you move or add a box; transport and settling can tilt the hive.
- Keep a hive tool handy to nudge supports or shift leg positions during checks.
Beekeepers who keep routine level checks often notice fewer problems with joined wax and easier honey and brood handling. A level hive is a low-effort way to support natural behavior and save time during inspections.
“A single small tilt can change how the colony lays out cells; level hives make inspections predictable.”
Managing Foundationless Frames
Many beekeepers choose foundationless frames to let colonies express natural wax patterns. This style lets bees build cells without plastic or wired guides.
Expect fragile work. Because the wax has no rigid base, the comb can tear during checks. Use a sharp hive tool and lift slowly to protect brood and honey.
Keep the hive level so the colony does not create angled joins or cross comb. A simple wax strip or thin board placed as a guide helps bees build comb in a parallel line.
- Foundationless frames give a natural space for bees to build, but they need steady hands.
- Monitor brood closely; early signs of weak brood patterns call for adjustments.
- Use a hive tool every inspection and handle each frame with care.
“Foundationless work rewards patience — the resulting wax often shows the colony’s best craft.”
| Aspect | Benefit | Care tip |
|---|---|---|
| Natural wax | Pure, chemical-free cells | Inspect gently, avoid sudden pulls |
| No rigid base | Flexible, authentic structure | Provide a guide strip to align comb |
| Skill level | Higher attention required | Practice handling and keep hive level |
Techniques for Fixing Existing Cross Comb
When wax joins between adjacent pieces, swift action keeps inspections safe and the hive orderly.

Start gently. Remove only what you must and keep movements slow. A hive tool helps split joined sections without crushing brood or spilling honey.
Using the Rubber Band Method
Simple and effective. Mark Simmons used size 33 rubber bands (3.5″ x 1/8″) to secure loose wax into frames after a cutout.
Wrap the band to hold the wax to the wooden piece and let the bees reattach it over days. This method limits breakage and keeps the top of the box tidy.
Splitting Joined Combs
When combs have already joined, place the hive on a stable surface and use the hive tool to score the connection gently.
Work near empty cells first, ease the joined section back into the correct plane, and support fragile wax with your hand or a thin board while moving frames.
- Keep a supply of size 33 rubber bands and a sharp tool during inspections.
- Handle wax carefully; it tears easily when warm.
- Fixing joined wax early protects brood and reduces long repairs.
“Fixing cross comb is cleanup that prevents damage during later inspections.”
For practical community tips and experiences on handling joined sections, see the cross-combing discussion.
Handling Fragile Fresh Comb
Fresh wax made by the colony can be shockingly delicate during early inspections. New work often bends and tears if treated roughly. Respect the effort bees build into each sheet and move slowly.
Keep any foundationless frames in a vertical position. Never hold a frame at an angle that lets honey or new cells pull away. Use a thin board to support a weak side when you must lift.

Use your hive tool gently. Pry just enough to separate parts and avoid sudden twists. Plastic foundation coated with beeswax gives more support than raw wax, and over weeks the cells will stiffen.
- Fresh comb is fragile; handle with care to prevent a costly problem.
- Support soft sections with a board or your hand while you work.
- Protect brood by moving slowly and keeping panels upright.
Learn specific management practices to reduce risk when working with delicate work in the box. With patience you keep honey, bees, and brood safe.
Monitoring Hive Growth During Peak Season
Peak season brings fast changes inside the boxes, and frequent checks keep surprises small. Rapid brood growth and heavy nectar flow can fill a hive with wax and honey in just a few weeks.

Watch incoming pollen and nectar closely; these are signs the queen is active and the colony is thriving. Inspect frames often during this busy time and use a clean hive tool to test attachment and detect early joined combs.
Spot problems early. Bees can build comb quickly, and cross comb will complicate later work. A quick check every one to two weeks helps you add space or a new box before storage gets crowded.
- Look for irregular combs or cells that bridge adjacent frames.
- Ensure enough room for honey and brood so food stores build for winter.
- Address any issue fast—small fixes stop big repairs later.
“Regular, short inspections during peak flow save time and protect brood.”
When you need hands-on tips about joined wax, see the guide on handling cross comb.
Best Practices for Adding New Boxes
Introduce extra boxes when drawn comb nears full capacity to keep the queen laying and the colony steady.
Bottom supering mimics how some hives expand naturally. Dawn_SD recommends adding a new brood box beneath the existing one to encourage neat comb and fast use of fresh frames. Warre-style methods also place supers below the brood to match bee behavior and reduce internal disruption.
The Benefits of Bottom Supering
- Less disturbance: adding below lets the queen and workers continue with minimal stress.
- Faster use: bees occupy new frames more quickly than when boxes are added above.
- Lower swarm risk: extra space below often calms expansion pressure.
- Plastic foundation: can speed wax drawing in new boxes during heavy flows.
Wait until the current box is about 80% full of drawn comb before adding another box. Top supers remain the standard when the goal is honey harvest, since they keep stores separate from brood and make extraction easier.

| Method | Impact on colony | When to use |
|---|---|---|
| Bottom supering | Minimal disturbance, faster use of frames | When brood box ~80% full |
| Top supering | Keeps honey separate, easier harvest | When collecting surplus honey |
| Proper alignment | Prevents cross comb and messy wax | Always check alignment when adding a box |
“Add space early and align boxes well to keep inspections simple and colonies calm.”
For a detailed guide on managing joined wax and related steps, consult the comb management guide. Proper box care is a key part of successful beekeeping in the United States.
Conclusion
Small, consistent actions during each inspection make a big difference in colony health and honey yields.
Maintaining correct frames helps bees lay parallel cells and limits messy combs. A steady routine keeps a hive organized and cuts the time needed to fix joined wax.
Check a frame gently, support fragile wax, and act quickly if you spot cross joins. Regular care protects brood and encourages steady stores of honey.
Use quality tools and a simple plan to guide the colony toward neat growth. With routine checks and attention, you will enjoy a productive, healthy apiary all season.
FAQ
What is the ideal frame spacing to encourage bees to build straight comb?
Optimal spacing mimics natural bee space so bees draw comb neatly between supports. Use standard commercial measurements and place frames evenly in the box to maintain consistent gaps. Proper alignment and level boxes reduce the chance of irregular or cross comb.
Why is bee space important inside a hive?
Bee space lets workers move, store honey, and tend brood efficiently. Too little room causes joining of combs; too much leads to excessive burr comb. Keeping consistent bee space across boxes prevents waste of comb and simplifies inspections.
What tools should I have when preparing a hive for straight comb?
A hive tool, level, bee brush, and measuring gauge are essential. Use a square or straightedge to check frames and boxes. A clean, sharp tool set helps separate joined comb without damaging delicate wax.
How do I select quality frames that help bees draw straight comb?
Choose sturdy wooden or trusted-brand plastic frames with consistent dimensions. Frames with straight top bars and compatible foundation or wired supports reduce sagging and improve comb alignment during a heavy nectar flow.
How can I achieve consistent spacing to encourage straight comb building?
Start with uniform frames and check box internals for twists or warps. Level the hive, align frames tight against the end bars, and avoid uneven stacking. Regular inspections during comb draw let you correct misalignments early.
What role does foundation play in comb development?
Foundation gives bees a starting pattern, helping them build straight cells faster. Wax or plastic foundation reduces drifting and odd angles. In foundationless setups, guiding measures and closer monitoring are necessary to prevent cross comb.
Are there benefits to alternating frames with and without foundation?
Alternating frames can encourage natural comb building while maintaining structure. Bees may draw foundationless frames more naturally, but alternating preserves orderly spacing and offers storage flexibility for brood and honey.
Why do bees build cross comb or irregular comb?
Cross comb often results from inconsistent spacing, warped boxes, tilted hives, or loose frames. Strong flows, delayed inspections, and foundationless frames without guidance also increase the risk of irregular construction.
How does the rubber band method help fix joined comb?
The rubber band method stabilizes loose comb to a frame while bees complete drawing. Use non-toxic bands to hold comb near a top bar or starter strip so it draws straight. Remove bands once wax firms and comb aligns with the frame.
What is the best way to split joined combs without harming the colony?
Work during warm daylight, smoke lightly, and support the comb when cutting or prying. Use a warmed hive tool to separate wax cleanly, then secure each piece to a proper frame with wire, pins, or the rubber band method to prevent rejoining.
How important is leveling the hive to prevent irregular comb growth?
Very important. A tilted hive causes comb to hang at angles, encouraging cross comb and uneven cell building. Use a carpenter’s level when placing hive boxes and check the stand periodically after soil shifts or storms.
How do I manage foundationless frames to avoid mess and wasted wax?
Provide starter strips, reduce space between supports, and monitor draws frequently. Insert foundationless frames between fully supported frames and consider using wired top bars or shallow starter sheets to guide bees early on.
What techniques fix existing cross comb in a hive with minimal disruption?
Rebuild by supporting loose sections on new frames, trim and reattach comb to proper supports, and add temporary braces like rubber bands. Move problem combs into nucs if necessary, and re-space frames to prevent recurrence.
Can the rubber band method and splitting joined comb be used together?
Yes. Use rubber bands to stabilize comb after splitting joined sections and secure them to new frames. This combo speeds recovery and reduces the chance bees will rejoin separated combs during repair.
How should I handle fragile, fresh comb during inspections?
Minimize handling, support the comb with your hands or a board, and work slowly during warm weather. If comb is thin, avoid lifting by the top bar only; use a second hand or tool to steady the lower edge while moving frames.
What should I monitor in peak season to ensure healthy comb growth?
Watch for consistent comb orientation, brood pattern, and storage space during flows. Inspect more often during rapid nectar influx to correct early signs of drifting or cross comb and to add boxes when space fills.
When is the right time to add new boxes and what are best practices?
Add boxes during strong nectar flows before stores become cramped. Stack boxes evenly, ensure consistent internal spacing, and avoid sudden large additions. Consider bottom supering where beneficial to brood nest dynamics.
What are the benefits of bottom supering?
Bottom supering encourages natural expansion and easy hive access for workers. It can reduce congestion in the brood area and make inspections less disruptive. Use this method thoughtfully with colony strength and seasonal conditions in mind.