Beekeepers must keep a simple, reliable plan to protect their apiary. Regular inspections help spot four serious threats: American foulbrood, European foulbrood, chalkbrood, and sacbrood.
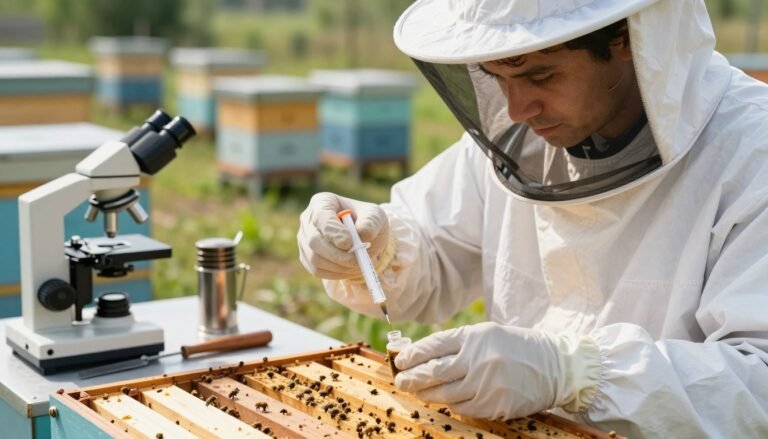
Inspect frames in early spring and again in autumn. Look for sunken caps, discolored larvae, and spotty cells. When signs appear, collect proper samples and arrange laboratory testing to confirm the problem.
Keep tools clean between hives and label suspect equipment. If you need a symptom reference, consult a practical guide like the comprehensive symptom checker or an overview of common threats at Beekeepers Realm.
When in doubt, stop inspections and seek official help. The Customer Service Centre is available at 136 186 for management advice and equipment guidance.
Key Takeaways
- Monitor colonies for the four main brood diseases to protect colony survival.
- Collect and submit proper samples to confirm suspicions through lab testing.
- Inspect hives in spring and autumn and keep photos and notes for records.
- Sanitize equipment between inspections to reduce spread.
- Contact authorities or the Customer Service Centre at 136 186 when serious signs appear.
Understanding Healthy Brood Patterns
A compact area of comb with nearly every cell occupied signals a healthy laying pattern. This regular arrangement shows the queen is laying consistently and the colony is expanding.
Look closely at individual cells. Healthy larvae appear glistening and pearly white, with an orange gut line visible along the back. Inspect perforated caps to confirm the developing bee inside is normal.
Under caps, pupae start white and darken as they mature. Caps over brood cells are usually cream to tan and slightly raised. The absence of dead larvae or sunken caps is a strong positive sign.
“A full, even patch of brood predicts steady honey production and colony strength.”
- Even cell occupancy across a comb area indicates good queen health.
- White, glossy larvae and uniformly convex caps suggest normal development.
- Watch honey and brood placement to confirm a productive layout in the hive.
| Feature | Healthy Sign | What to Check |
|---|---|---|
| Larvae | Pearly white, glossy | See orange gut line; no discoloration |
| Pupae | White → darkening with age | Lift perforated caps to inspect development |
| Cell caps | Cream to tan, slightly convex | Uniform color; no sunken or perforated dead cells |
For a quick reference guide use the comprehensive symptom checker or explore beginner resources to reinforce visual inspection skills.
Field Checklist for Brood Disease Diagnosis
Start each inspection by angling frames so sunlight reveals the lower cell wall. This lighting trick exposes dark scales and sticky remains that are hard to see in shadow.
Visual Inspection Techniques
Hold the frame with the top bar toward your stomach and tilt it slightly. Let sun or a bright torch fall across the lower wall of the cells.
Healthy larvae sit like a small letter C at the cell base before growing to fill the space. Diseased larvae pupae often look discolored or sit oddly low in the cell.

Using the Matchstick Test
The matchstick test is a critical diagnostic test. Gently insert a match into the remains and pull. If the remains rope out 25 mm or more, that indicates a positive test.
Dried scales of American foulbrood cling to the cell wall and resist removal without damage. Look for tongues of scale pointing toward the roof of the cell — a reliable field sign.
- Test both open cells and cell capped comb to protect equipment and colony health.
- If dead larvae do not rope out, inspect the cell wall for an adherent scale.
“When in doubt, collect a sample and use laboratory testing to confirm.“
For a practical guide on similar signs, see identifying chilled brood.
Identifying Bacterial and Fungal Infections
Spotting bacterial or fungal infections early saves colonies and limits spread within the apiary. Use simple visual checks and a matchstick test to separate likely causes before sending samples for testing.
American foulbrood signs
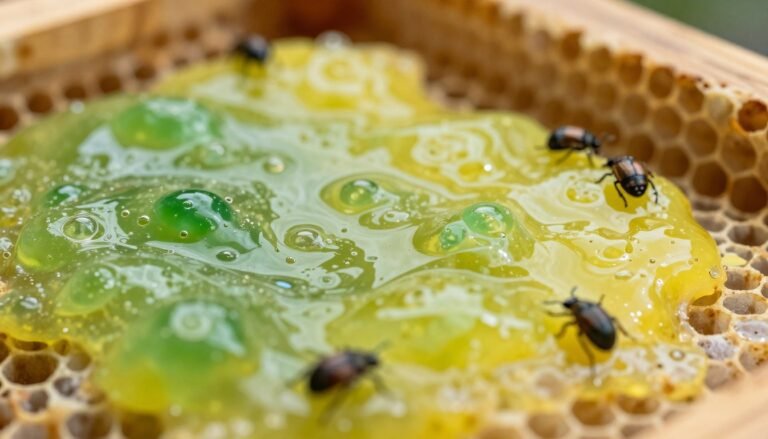
American foulbrood causes larvae to die after the cell capped stage. They darken from dull white to coffee-brown and finally black.
Look for ropy remains that adhere to the cell wall and scales that resist removal. AFB infected larvae often lie stretched on the lower wall, near the 5–7 o’clock position. Bacterial spores can remain in equipment for decades.
European foulbrood characteristics
European foulbrood affects larvae while curled and the remains usually stretch less than 18mm on a matchstick test.
Remains are easier to remove than those killed by american foulbrood, and the colony may show scattered, irregular cells with dead larvae.
Chalkbrood identification
Chalkbrood produces hard, white or blue-grey mummies. These dry, shrivelled larvae may rattle when the comb is shaken.
| Infection | Key sign | Quick test |
|---|---|---|
| American foulbrood | Ropy, coffee-brown remains; scales | Matchstick ropes >25 mm; spores persist |
| European foulbrood | Curled larvae; softer remains | Matchstick ropes |
| Chalkbrood | Dry, chalk-like mummies | Visual inspection; mummies rattle in comb |
When signs match any of these, isolate the hive and consider testing. For guidance to prevent chalkbrood, see prevent chalkbrood.
Viral Brood Diseases and Parasitic Mite Syndrome
Viral infections and mite-related syndromes can mimic multiple brood conditions in a single colony. Sacbrood virus is a common culprit that alters the shape and texture of a larva inside the cell.
In sacbrood, the larva often becomes gondola- or banana-shaped with the head raised toward the top of the cell. Grey, granular fluid collects between skin and body, giving a sac-like look.

The head usually blackens first, and the affected larva moves from glossy white to grey or pale yellow. When dry, the scale formed by sacbrood scales easily out of the comb, unlike the stubborn scale of american foulbrood.
- Sacbrood: watery remains that dry into a gondola-shaped scale; remains remove easily from cells.
- Parasitic Mite Syndrome: shows mixed symptoms across larvae and pupae and lacks the foul odor of foulbrood.
- Treat mites promptly—mitigation often clears the syndrome and stops further infection in the colony.
“Look for the banana shape of sacbrood larvae and compare how scales remove from the cell to separate viral signs from foulbrood.“
| Condition | Key sign | Quick action |
|---|---|---|
| Sacbrood | Banana-shaped larva; head blackens; sac-like fluid | Inspect cells; remove loose scales; send a sample if unsure |
| Parasitic Mite Syndrome | Mixed brood collapse; high mite counts; no foul odor | Treat mites; recheck colony strength; consider integrated pest control |
| American foulbrood (contrast) | Tightly adhering scale; ropy test positive; spores persist | Isolate hive; follow regulatory steps and testing |
For practical management of weak colonies and early care, see how to fix a weak hive and consult guidance on nuc care at first-year nuc care.
Management and Sanitation Protocols
A strict cleaning routine limits the chance that spores will survive in equipment.
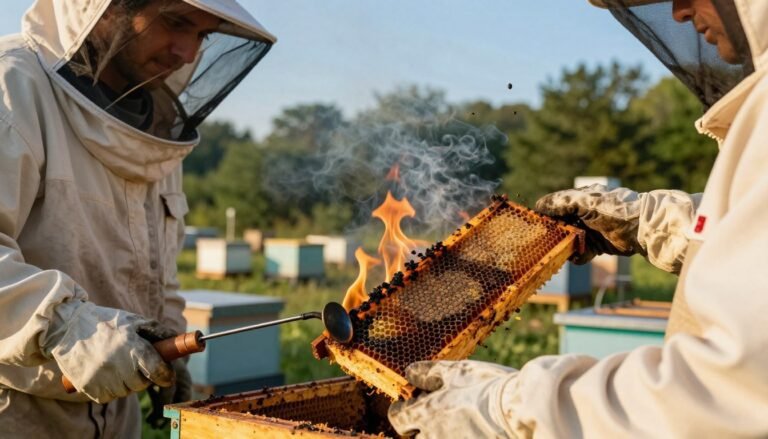
American foulbrood requires decisive action. If you confirm a positive test, destroying all bees and comb is the only reliable way to remove the main reservoirs of bacterial spores.
Disinfecting Equipment and Hive Materials
Woodenware can be disinfected by boiling in lye water (one can of lye in 15 gallons of water) for 20 minutes. Scorching interior surfaces with a propane torch removes wax and propolis that may hold spores.
Note: Chemical antibiotics such as Terramycin and Tylosin may prevent symptoms of European foulbrood but do not kill afb spores. Treating without removing contaminated material can leave spores behind for decades.
“Destruction by fire is the only way to be confident that american foulbrood infection has been eliminated.”
- Isolate any hive with suspicious remains and test before moving frames between colonies.
- Destroy heavily infected comb and bees; disinfect remaining equipment by boiling or scorching.
- Keep detailed records and act fast to protect nearby colonies in the apiary.
| Material | Recommended action | Notes |
|---|---|---|
| Wooden frames | Boil in lye water 20 min or scorch | Removes wax/propolis; spores may still hide in cracks |
| Comb with infected remains | Burn (recommended) | Only reliable way to eliminate spores |
| Plastic foundation | Clean and treat per guidance | Follow specialist steps to avoid damage; see cleaning guide |
| Tools & protective gear | Heat or disinfectant soak | Sanitize between hives to prevent spread |
For a full best-practice manual on honey bee health and sanitation, consult this BMP manual. For methods to clean plastic foundation after colony loss, see this cleaning guide.
Conclusion
Timely notes and consistent visits are the backbone of healthy apiary care. Use a simple routine to record queen status, brood pattern, mite levels, and stores.
Early detection of small symptoms lets you act fast and limits spread. When visual signs are unclear, seek laboratory confirmation as the gold standard for any suspected disease.
Maintain strict sanitation and follow proven management steps to reduce risks from bacterial, fungal, and viral threats. See a practical hive inspection protocol and adopt concise field-note strategies to improve consistency.
Need help? Contact the Customer Service Centre at 136 186 or email honeybee.biosecurity@agriculture.vic.gov.au to report concerns or request guidance on controlling brood diseases.