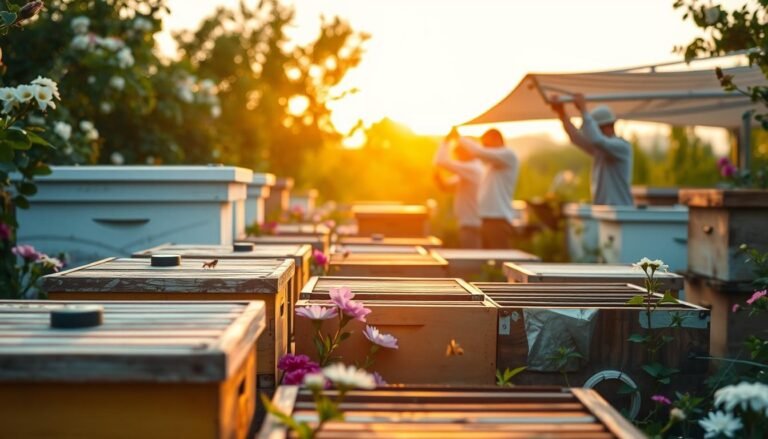
Good hive climate supports stronger colonies. This intro shows a practical way to work with the bees’ own controls, not against them. We aim to complement their heat and humidity, especially during brood rearing.
Beekeepers should favor bottom-driven air exchange paired with insulation to reduce cold drip and protect brood. Small, defensible entrances and solid crown boards help avoid abrupt air swings that force the colony to readjust for days.
Condensation and bearding often signal normal moisture balance, not failure. A solid roof, open mesh floor and slight crown-board cracks let moisture escape without creating a damaging “chimney effect.”
This short guide blends field experience with practical checks. You’ll get specific steps to limit over‑ventilation, reduce moisture risk, and preserve the internal environment the bees work hard to maintain. For further practical tips, see insulation and wind‑barrier ideas and a detailed hive ventilation guide.
Key Takeaways
- Work with the colony: complement bee climate control, don’t override it.
- Favor bottom-driven air exchange with a solid crown board and insulated roof.
- Avoid excessive openings that cause rapid air swings and energy loss.
- Condensation and bearding can indicate normal moisture management.
- Use simple checks and time-tested setups before advanced tweaks.
Why Ventilation Matters: The Science of Air, Moisture, and Heat Inside the Hive
Stable air and moisture inside the hive set the stage for healthy brood and strong colonies. Brood thrives in a narrow band near 89.6–92.6°F, and even a 0.5° slip can slow development.
Bees use endothermic clustering and fanning to hold those temperatures. It can take days for the colony to re‑establish ideal conditions after a disturbance. That slow recovery costs energy and foraging time.
Warm, moisture‑rich air rises through the cluster. When it condenses in safe zones, it becomes a handy water source for nurse bees and cuts trips for water.
Condensation, bearding, and pathogen context
Visible condensation on a viewing window can be normal if there’s no cold drip onto the cluster. Bearding on warm days is often the colony easing internal heat, not an emergency.
Higher heat and humidity can also suppress varroa pressure in some treatments. For that reason, excess openings that force continual drafts may harm brood more than help.
| Factor | Target | Why it matters |
|---|---|---|
| Brood temperature | 89.6–92.6°F | Small slips delay larval development and cost colony time |
| Moisture | Moderate | Provides water for nurses and aids nectar ripening |
| Entrance size | Small, defensible | Reduces drafts and keeps colony secure |
Quick check: solid brood pattern, ripening nectar, and no cold drip usually mean the system is working. For ongoing field tips and simple checks, see our weekly tips.
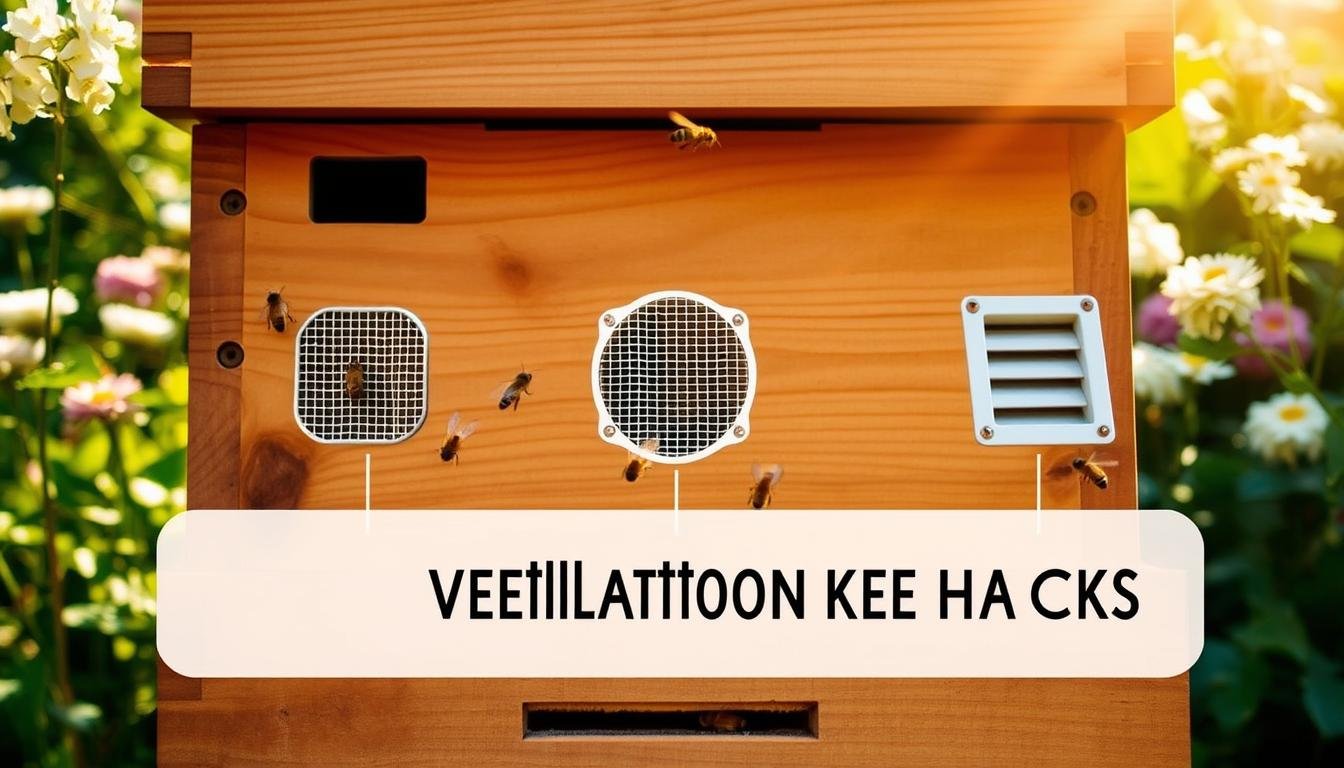
Actionable beehive ventilation hacks for healthier colonies
Prioritize gentle, steady air flow from the base of the hive to preserve heat and limit drip. A bottom-first setup gives predictable exchange that protects brood and reduces moisture problems.
Favor bottom ventilation: open mesh floors with a solid crown board
Use an open mesh floor paired with a solid crown board so warm air leaves slowly through the bottom without creating strong drafts. This bottom approach helps bees keep the cluster warm and stable.

Use roof insulation to prevent drip-back without chilling the cluster
Insulating the roof cuts cold surfaces that cause condensation to form and drip onto frames. A simple insulated cover is often enough to manage moisture while keeping the internal temperature steady.
Avoid the chimney effect unless conditions demand it
The chimney effect — open top and bottom at once — can over‑chill the colony. Reserve that effect for specific situations and avoid making it the default setup.
Match entrances to risk: small, defensible openings most of the year
- Keep entrance size small in most seasons so bees can defend and control air flow.
- Elevate hives to reduce splash‑back and keep floors dry.
- Standardize one tested configuration across the apiary before changing setups.
Winter strategies in the United States: insulation, airflow, and climate-aware choices
Cold alone rarely kills; trapped moisture does, so winter plans must let water escape.
When to add a top vent: solid floors, severe cold, icing, and moisture escape
Prioritize moisture control: ensure the roof sheds rain and place hives on stands to keep floors dry.
If you run solid floors, crack the crown board on laths or matchsticks to give a modest top ventilation path during the coldest months.
In long continental freezes, a small upper exit can stop vapor from condensing on frames or forming horizontal icicles at the top exit.
Regional reality check: temperate vs. continental winters
In maritime or mild temperate zones, bees often propolize top openings. There, good roof insulation and bottom venting usually suffice.
In Midwest or Canadian conditions with many frozen months, add a limited upper outlet on one side to relieve trapped moisture.
| Region | Priority | Recommended addition | Why it helps |
|---|---|---|---|
| Temperate/maritime | Insulation | Insulated roof, quilt box | Reduces cold-surface drip without extra drafts |
| Continental | Moisture escape | Small top ventilation or upper exit | Prevents condensation and icicle buildup |
| All regions | Positioning | Elevate hives, watertight roof | Keeps floors dry and cuts splash dampness |
Validate by observation: no cold drip on the cluster, steady winter behavior, and fewer icing episodes mean your setup works. For more practical guidance, listen to a concise winter care podcast or read a detailed hive ventilation lifeline.
Setups that work: configuring floors, boards, and roofs the right way
A reliable, simple stack gives predictable results for most yards. Start with a bottom-first approach: an open mesh floor on a stand, a snug crown board, and an insulated roof. This arrangement balances gentle exchange with warm, stable conditions inside the hive.

Quick checks to diagnose over‑ventilation vs. damp stress
- Look at the entrance and sides: small entrance openings keep guards effective. Seal stray holes.
- Use a window to tell fog from drip—surface fog is often normal; active dripping over the cluster is a problem.
- Signs of over‑ventilation: chilled brood at edges, stalled nectar ripening, or constant fanning with low humidity.
- Signs of damp stress: mold on peripheral frames, bees high under the roof, or persistently wet cappings.
- Simple fixes: reduce top openings, confirm board fit, add a quilt box or slight top gap on solid floors, and improve roof insulation.
Beekeepers should keep brief records; small setup differences explain why one hive in a lot thrives while another struggles. For a practical how-to on nonstandard layouts, see the horizontal hive guide.
Conclusion
Protect the cluster first, then adjust how air moves through the hive.,
Lean on bottom‑driven exchange with a solid crown board and good roof insulation as your default. Small changes to entrance size, tiny holes, or added insulation often fix problems without disrupting the colony.
Accept that some condensation and bearding can be normal—the bees manage humidity and density. Reserve top ventilation for clear triggers: persistent icing, trapped moisture on solid floors, or long continental freezes.
Track each hive over time and favor setups that yield dry clusters, steady temperatures, and predictable air flow. For seasonal gear and summer tips, see summer beekeeping essentials and our beekeeping resources guide.
FAQ
How does proper airflow affect brood development?
Proper airflow keeps temperatures stable near the brood nest—around 89.6–92.6°F—which supports healthy larval growth and pupation. It also helps maintain acceptable humidity so silk and brood frames don’t become damp. Too much draft at brood level cools the cluster; too little airflow lets moisture condense and drip back onto combs. Aim for gentle circulation, using an open mesh floor with a solid crown board or a small top vent when needed.
Will adding a top vent prevent condensation in winter?
A top vent can help moisture escape and reduce interior dripping, especially in severe cold or when icing occurs. But it can also create a chimney effect that cools the cluster if left large or uncovered. Use a small, controlled top opening and pair it with roof insulation to prevent heat loss while allowing moisture to exit. In milder climates, focus on reducing in-hive humidity with a drift board and proper entrance sizing instead.
What’s the role of an open mesh floor versus a solid floor?
Open mesh floors improve bottom ventilation and aid varroa control when combined with sticky boards or screened inserts. They promote airflow without forcing heat upward through the cluster. Solid floors conserve warmth and work well in very cold regions. A hybrid setup—mesh floor during active months and a solid insert in deep winter—lets you balance moisture control, temperature, and pest management.
How can I prevent drip-back from roof condensation without chilling the hive?
Insulate the inner cover or roof to catch and hold warm, moist air so water does not condense on the lid and drip onto combs. Use materials like foam or reflective insulation under the telescoping cover and add a moisture-absorbing pad or quilt box above the frames if needed. Maintain small, controlled vents to permit moisture escape without creating a strong upward draft through the cluster.
When is the chimney effect useful, and when is it harmful?
The chimney effect—creating a strong top-to-bottom draft—can benefit a very wet or hot hive by rapidly moving humid air out. However, in winter it often chills the bees and forces them to expend extra energy to maintain brood temperatures. Use it sparingly: deploy temporary top vents during wet spells or heat waves, but close or reduce them in cold months and rely on insulation and modest entrances instead.
How should I size the entrance to balance airflow and defense?
Keep entrances small and easily defended for most of the year to reduce robbing, conserve heat, and help bees manage internal humidity. Expand the opening during hot weather to increase passive cooling. Consider using an adjustable entrance reducer or screened port so you can change the opening with minimal disturbance as temperatures and colony strength shift.
Does ventilation affect varroa or other pests?
Indirectly, yes. Screened floors allow debris and fallen mites to drop away, improving varroa monitoring and reduction. Proper airflow also supports colony health by reducing stress from damp or heat—stressed colonies are more vulnerable to pests and disease. Combine air management with proven varroa controls like oxalic acid treatments or integrated pest management for best results.
What quick checks reveal over-ventilation versus damp stress?
Over-ventilation signs include excessive bearding, chilled bees clustered away from frames, or frames that feel cold to the touch near the brood. Damp stress shows as frost or ice forming inside the lid, wet or moldy frames, and visible condensation dripping. Inspect hive weight, cluster location, and comb dryness to decide whether to add insulation, reduce top openings, or open more passive airflow.
How should strategies change between temperate and continental U.S. winters?
In temperate coastal regions, moderate ventilation with small entrances and moisture escape ports often suffices; heavy insulation can cause overheating early in spring. In continental interiors with deep cold, prioritize insulation, solid floors with short-term mesh options, and controlled top vents only when moisture builds. Tailor roof insulation, quilt boxes, and entrance reducers to local freeze-thaw patterns and typical low temperatures.
Can bearding indicate a ventilation problem? When is it normal?
Bearding—clusters of bees hanging outside the hive—can be normal on hot days when they cool the nest. It becomes a ventilation concern if it occurs in cool weather, indicates persistent heat stress, or coincides with heavy fanning at the entrance. Check internal temperatures, ensure adequate shade or roof insulation, and adjust entrance size to help the colony regulate air without prolonged external clustering.