Understanding the difference between emergency queen cells vs supersedure cells helps beekeepers make smart decisions during inspections. This guide explains how colonies produce a new queen, when to act, and when to leave nature to take its course.
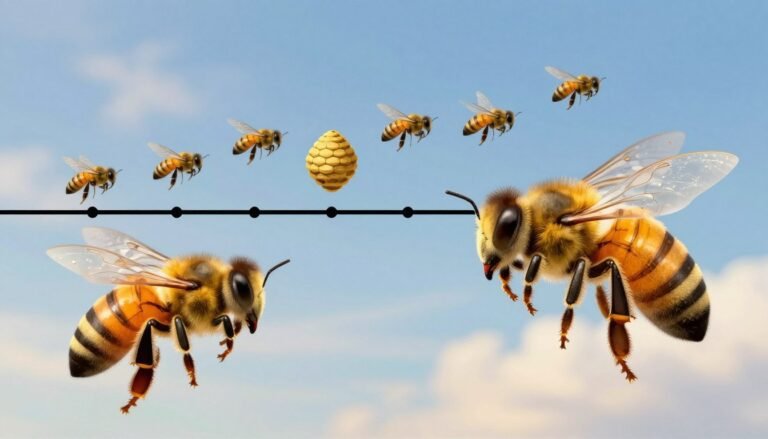
The production of swarm cells often signals a colony preparing to divide. These peanut-shaped structures hang from the comb and can appear during the UK swarm season from late April through July. In contrast, supersedure cells form when workers plan to replace an aging or failing matriarch in place.
For hobbyists and commercial keepers in the United States, spotting the right form on a frame can prevent accidental removal of a vital structure. Learn to spot when a hive needs intervention and when patience is the best strategy for healthy new queens and stable colonies.
Key Takeaways
- Know the signs: swarm cells are peanut-shaped and hang from comb faces.
- Seasonal timing matters: swarm activity peaks in late spring to mid summer in the UK.
- New queens matter: correct ID prevents destroying a developing replacement.
- Inspect carefully: handle frames gently to avoid harming larvae or workers.
- Act with purpose: some situations need intervention; others benefit from leaving the process alone.
Understanding the Importance of Queen Cells
Queen cells are a visible sign that a hive is planning a major change in leadership or population.
The development of these special structures is a natural biological process. Workers build them to raise a replacement when the old queen is failing or when the colony prepares to swarm.
Timing matters: once an egg is moved into a new cell, it takes about 16 days for a new queen to emerge. By contrast, worker brood follows a different schedule and needs about 21 days from egg to adult.
Beekeepers should watch frames for capped cups and the presence of a virgin queen. Monitoring helps decide whether the colony is replacing its leader in place or getting ready to split.
- Natural replacement: allows a colony to stay healthy without intervention.
- Different timelines: 16 days for a new breeder versus 21 for a worker.
- Practical tip: read about queen rearing basics to learn controlled methods and timing — queen rearing basics.
Defining Emergency Queen Cells vs Supersedure Cells
Workers build rearing structures for clear reasons: planned replacement or sudden loss. These two approaches look different and serve distinct roles in colony survival.
Supersedure: planned in-place replacement
Supersedure happens when a hive senses decline in its matriarch’s performance. Workers prepare a small number of rearing cups on the comb to raise a new leader while the old one remains.
These are deliberate, usually fewer in number, and placed where brood is common. Removing them risks leaving the colony without a route to replace an aging matriarch.
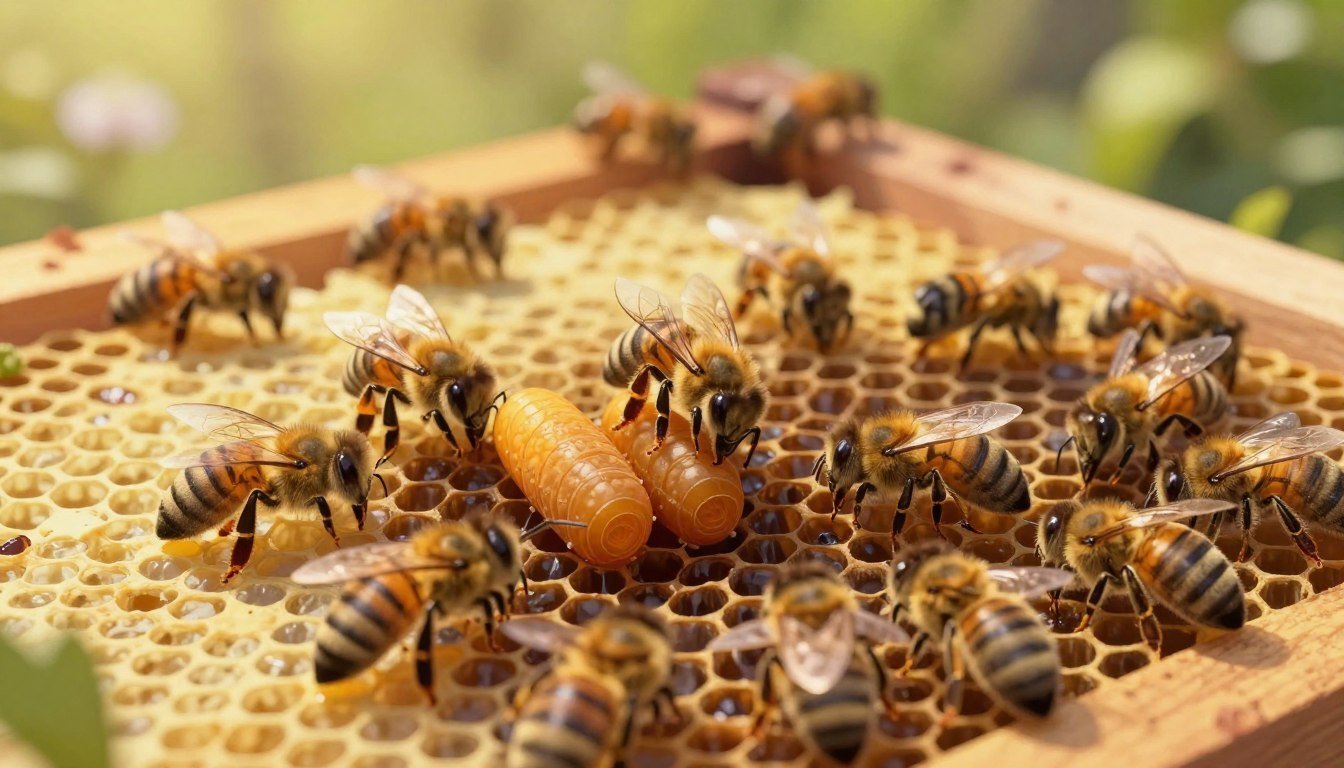
Emergency: rapid response after sudden loss
Emergency rearing occurs when the hive loses its head unexpectedly. Workers pick young larvae and build hurried cups that often bend sharply at about 90 degrees to allow feeding with royal jelly.
These are made fast and appear on comb faces. If a keeper finds them, observe closely before removing any structure.

“If you are unsure whether a structure is for planned replacement or a rapid rearing response, leave it in place and watch for capped development or a virgin emerging.”
| Feature | Planned Replacement | Rapid Response |
|---|---|---|
| Trigger | Declining performance of the matriarch | Sudden loss or damage to the matriarch |
| Location | Within brood areas on comb | On comb faces, often more exposed |
| Structure | Fewer, deliberate cups | Hasty cups with a 90° bend for feeding |
| Worker action | Gradual selection and nurturing | Immediate selection of young larvae |
For guidance on related swarm signs and timing, see a practical guide on preparing to swarm.
The Biological Purpose of Swarm Cells
Before any bees leave, the colony backs up its lineage by raising replacements in dedicated brood structures.
Swarming is the way a colony reproduces. A portion of the workers and the old matriarch depart to find a new home.
To ensure the parent hive survives, workers build swarm cells in advance. These rearing cups hold eggs and young larvae so the parent hive keeps a new queen when the group leaves.
In the UK, this process is timed. Swarm cells are usually started between late April and July. Beekeepers often spot clusters at the bottom of frames — a reliable sign the colony plans to split.
- Purpose: secure a replacement leader for the hive.
- Timing: aligns with spring–summer forage and population peaks.
- Trigger: crowding or high brood and honey stores prompt the work.
For help with identification, consult a detailed swarm identification guide.
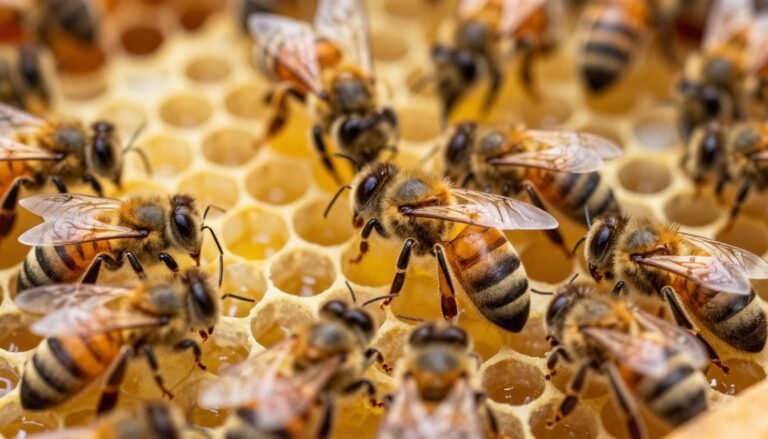
Identifying Supersedure Cells in the Hive
Spotting an in-hive replacement begins with location and count. Supersedure structures usually sit in the middle of the comb or on the face of a frame. They are not commonly found along the bottom edge or outer margins.
One clear sign is a single, neat rearing cup. Finding only one or two suggests the colony plans to replace an underperforming matriarch without preparing to split or swarm.
Location on the Comb
Look carefully at brood frames. The deliberate placement within brood areas helps workers nurse an egg into a new leader while keeping the old matriarch in place.

- Typically on the face or center of the comb, not the bottom.
- Single cup indicates replacement, not a swarm plan.
- Rarely many are produced; a cluster likely means a different process.
| Feature | Supersedure Indicator | Practical Note |
|---|---|---|
| Location | Center or face of brood comb | Check brood frames first |
| Number | Usually 1–2 | Avoid removing these |
| Colony intent | Replace an aging or failing matriarch | Management differs from a swarm response |
“Leave a single rearing cup in place and monitor; hives often complete in-hive replacement without keeper action.”
For guidance on balancing harvest and colony strength while you monitor brood and replacements, see advice on balancing honey harvesting.
Recognizing Emergency Queen Cells
When a hive loses its leader suddenly, workers react fast. You may find irregular rearing on the face of a comb or low on a frame. These structures differ from neat, planned cups made for a swarm or in-hive replacement.
Key signs to watch:
- Hasty, misshapen cups on comb faces rather than tucked into brood areas.
- Multiple hurried constructions after a recent inspection or disturbance.
- Workers selecting very young larvae and feeding them intensively.
Beekeepers sometimes spot these after accidentally killing the old leader during handling. If you find such rearing, pause. Observe colony behavior before introducing a mated replacement. A virgin may emerge in days and stabilize the hive.
“If you are unsure, watch for capped development or the search behavior of workers before intervening.”
| Feature | Rushed Rearing | Planned Replacement |
|---|---|---|
| Shape | Irregular, uneven | Neat, deliberate |
| Placement | On comb face or exposed | Within brood areas |
| Trigger | Sudden loss of leader | Decline in performance |
For a practical reference on similar signs, read this guide on how to tell what you’re seeing.
The Role of Play Cups in Colony Development
Play cups are subtle markers that a colony may be preparing for future change. These small, uncapped structures are made by workers and sit ready on comb and frames until the queen uses them.
Empty Cups
Empty Cups
Empty play cups are essentially unused queen cells or swarm cells that contain no eggs. They are common on healthy hives and often need no action.
Leave them alone during routine inspections. They help workers respond quickly if the hive needs a new leader later.
Charged Cups
Charged Cups
If a cup is charged with royal jelly or shows a tiny larva, treat it as active. Monitor the cup’s location on the frame to decide if it indicates replacement in place or a possible swarm plan.
Watch development over a few days. Workers may cap the cup and a new queen cell can form in 16 days from an egg.

“If play cups become charged, keep a close eye and record changes so you can act if the colony shifts toward swarming.”
- Play cups often pose no immediate risk.
- Charged cups require routine checks in spring.
- Note the position on comb and the number of cups on a frame.
Comparing Physical Characteristics and Locations
Where a rearing cup sits on the comb gives the clearest clue to its purpose.
Orientation matters. Structures that hang vertically from the bottom of a frame usually signal a planned split. These hanging forms are easy to spot when you lift the deep box for a quick check early in the season.
By contrast, rearing built on the face of the comb tends to be a deliberate in-hive replacement. Workers add these on existing wax along the side of a frame so development finishes faster and with less disruption to brood areas.
Both types can resemble small peanut shells, so shape alone misleads. Location on a frame is the best way to tell them apart.
“When in doubt, check the bottom of the frames and watch development over days before intervening.”
| Feature | Hanging from Bottom | On Comb Face |
|---|---|---|
| Typical placement | Vertically from frame bottom | Built into side or face wax |
| Appearance | Peanut-shaped, exposed | Peanut-shaped, tucked into comb |
| Management tip | Lift the box to inspect early season | Leave in place and monitor progress |
Understanding these physical differences helps you manage a hive with minimal stress. For more on prevention and timing, read how to prevent swarming.
Seasonal Timing for Queen Cell Production
Warm days and expanding brood nests drive much of the timing for new rearing structures.
Spring swarm season in the UK runs from late April through July. During this window, workers commonly build swarm cells on lower parts of frames as the hive prepares to split.
Supersedure activity, by contrast, can start at any time. Colonies initiate in-hive replacement when the old queen shows decline, not strictly by calendar.

Perform weekly inspections in spring. Check the brood nest and comb for charged cups or capped growth. Regular checks reduce the risk that a managed hive loses a large group to a swarm.
“The urge to swarm usually drops after the longest day, but crowding or poor space management can still trigger it.”
- Swarm cells typically appear April–July.
- Supersedure can occur any time the colony assesses the matriarch is failing.
- Weekly spring inspections help spot early signs and protect honey and brood.
| Timing | Typical Trigger | Where to Look |
|---|---|---|
| Late April–July | Swarm preparation (population, forage) | Lower frame edges, hanging from box |
| Year-round | Replacement of an aging matriarch | Within brood area on comb faces |
| After longest day | Desire to swarm usually falls but can be re-triggered | Monitor brood nest and overall box space |
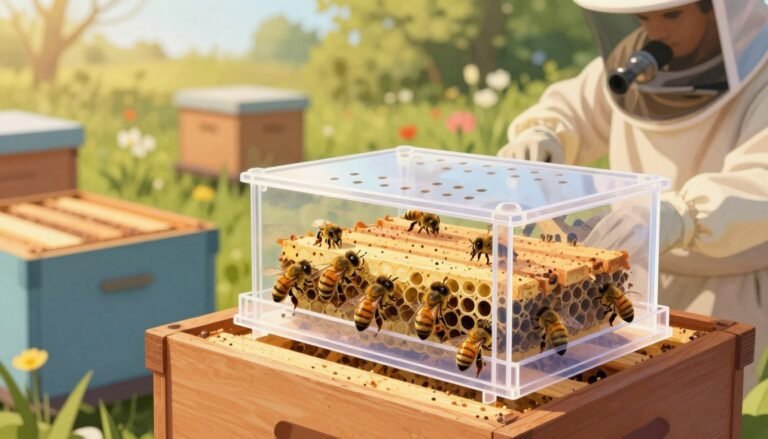
How to Inspect Frames for Queen Cells
A systematic frame-by-frame scan saves time and helps you catch developing problems early.
Start by lifting one side of the deep box. Look at the bottoms of every frame for peanut-like wax that hangs below the comb. If you spot these, the hive may have started the swarm process.
Next, open a few frames and inspect the brood area on the face of each frame. Supersedure structures will not show from beneath, so examine faces carefully for any charged cups or tiny larvae.

“Keep a steady routine: regular checks catch changes before they become urgent.”
- Lift deep boxes on one side and scan frame bottoms for swarm cells.
- Examine the face of frames to find in-hive replacement activity.
- Check the brood nest weekly during active seasons to spot charged cups early.
- Keep notes on what you see so changes over days become clear.
Managing Swarm Cells During Inspection
Noting the state of any rearing structures early saves time and protects colony strength. A quick, calm scan tells you whether to act or to watch the hive for a few days.

Artificial Swarms
If all cups are uncapped and the matriarch is present, an artificial split is a reliable option. Move a third of the bees and some brood to a new box. This reduces crowding and keeps the original colony intact.
Remember the mating period for a virgin takes about 2–3 weeks. Provide the new box with honey and pollen so the bees can feed workers and developing brood during that time.
Capped Cell Removal
If every rearing structure is capped and no matriarch remains, remove all but one cell. Leaving a single capped unit lets the colony requeen itself without competing emergences that can harm brood survival.
Queen Presence
Always verify the matriarch’s presence before making changes. Watch worker behavior and brood patterns for signs of a functioning leader.
“Careful handling during inspections turns potential losses into managed growth.”
- If cups are uncapped and the matriarch is present, consider an artificial swarm.
- If cups are capped and the matriarch is absent, leave one capped unit to let the colony requeen.
- Ensure both boxes have adequate stores while a new mating cycle completes.
For a concise practical guide to notebook-style inspection steps, see the beekeeper inspection booklet.
Best Practices for Supersedure Cell Management
Not every rearing cup demands immediate action; timing and location guide the decision.
If you find a supersedure cell between May and August in the UK, you can usually leave the bees to complete a natural replacement. Monitor the frame and comb over several days to confirm capping and progress.

Watch carefully after introducing a new mated queen. Workers may show false replacement behaviour. In that case, safely remove suspicious cups two or three times to discourage repeat attempts.
“Observe for laying patterns and worker acceptance before making permanent changes.”
- Confirm the new queen begins laying eggs and brood appears within expected days.
- Outside mating season, remove a rearing cup and consider introducing a mated replacement.
- Balance patience with intervention to keep the hive productive and stable.
| Situation | Recommended Action | Why |
|---|---|---|
| Supersedure cell in May–Aug | Leave and monitor | High chance natural rearing succeeds |
| False replacement after adding mated queen | Remove cups 2–3 times | Stops workers from undoing introductions |
| Replacement outside mating season | Remove and introduce mated queen | Reduces risk of unmated virgin and lost brood time |
Handling Unexpected Emergency Queen Cells
A rapid burst of new rearing can signal the colony has just lost its leader. Act carefully and confirm the situation before making changes.
Causes of Sudden Queen Loss
Common triggers include accidental harm during an inspection or a sudden illness that kills the leader.
- Removing a frame too quickly may crush the queen hidden among brood.
- Predation or nearby disturbance can lead workers to build hurried rearing in response.
- Normal decline may look similar, so always verify the queen is absent.
Check thoroughly: look across all frames and under cluster areas. The leader sometimes hides on a different frame after disturbance.
If you find cells capped, best practice is to remove them and introduce a mated replacement. Leaving multiple capped units often creates conflict and delays stable laying.
These rushed constructions pick larvae of the right age to save brood continuity. Still, introducing a mated new queen quickly reduces the risk the hive stays without an accepted laying leader for too long.
“Verify the leader is truly lost before removing cups—she may simply be tucked away on another frame.”

Distinguishing Between Drone Cells and Queen Cells
Drone brood often forms a pebbly, cobblestone-like surface near the edge of a frame. These round, clustered structures sit along margins and are a normal part of the brood pattern in a healthy hive.
By contrast, hanging, peanut-shaped rearing projects vertically and usually appears singly or in small numbers. Their elongated profile and vertical orientation make them easy to tell apart from the flat, bumpy drone area.

Do not confuse the two. Drone production does not signal an imminent swarm or a need for immediate action. Misidentifying these structures can lead to unnecessary destruction of brood and harm the colony.
- Drone formations look pebbly and occur in large clusters at frame edges.
- Hanging, peanut-shaped rearing appears vertical and in much smaller numbers.
- There can be hundreds of drone units on a single frame; hanging rearing is usually only a few per frame.
- Correct ID protects healthy brood and avoids needless interference with colony development.
“Learn the visual cues on frames to protect brood and support timely management.”
| Feature | Drone Brood | Hanging Rearing |
|---|---|---|
| Appearance | Pebbly, cobblestone-like surface | Peanut-shaped, vertical projection |
| Location on frame | Edge or margin of frames | Hangs from comb face or bottom |
| Typical number | Often dozens to hundreds per frame | Usually 1–6 on a frame |
| Management note | Normal; no action required | Monitor; may indicate replacement or swarm intent |
For visual examples and further identification tips, see how to identify different types.
Risks of Removing Active Queen Cells
Removing an active rearing cup from a hive can strip the colony of its only route to recovery.
If a colony lacks a laying female and no eggs are present, destroying active rearing stops any chance of replacement.
When bees have already begun to raise a new leader, taking those structures off a frame can lead to total loss. The brood and larvae inside are the colony’s lifeline. Without them, the hive cannot recover and will decline over days.
- Always confirm the presence of a laying female before scraping any growth from frames.
- Check for eggs across the brood nest; eggs show the hive still has a mother.
- Protect active rearing when the colony is vulnerable and store extra time and attention for monitoring.
“If you cannot find eggs or a laying female, do not remove developing units — observe and verify before acting.”

When to Seek Professional Beekeeping Advice
When signs on a frame confuse you, a quick call to an experienced keeper can save a hive. Early help cuts the risk of poor choices and lost brood.
If you are unsure about the status of your queen or the type of cell present, contact a local pro. Skilled beekeepers can tell if a colony is preparing to swarm or simply replacing its leader. They also assess eggs, larvae, and the pattern of frames to suggest the right action.
Beginners should not hesitate to ask for help. A specialist can advise within days and may visit to inspect the frames or suggest safe steps over the phone.
Local conditions matter: forage, weather, and regional timing change how bees behave. A regional advisor knows when to wait and when to act.

“Don’t guess when the future of your colony is at stake—get expert advice and protect your hive.”
| Situation | Recommended Action | Why |
|---|---|---|
| Unclear structures on frames | Contact an experienced beekeeper | Prevents removing needed brood or cells |
| Multiple capped units and no laying female | Request in-person assessment | Fast intervention can restore laying sooner |
| Beginner facing sudden rearing or swarm signs | Seek local guidance within days | Local pros know timing and best practice |
Conclusion
Recognizing distinct rearing types on a frame lets a keeper act smartly and protect colony strength.
Swarm structures on lower frame edges mean the hive may split, while in-hive replacements are usually few and tucked in the brood nest. Rapid response forms appear oddly on comb faces and need careful checking before you remove anything.
Watch brood, look for eggs, and note placement on frames. Good records and routine checks help you decide whether to let nature finish or to intervene. For a practical refresher on identification and timing, see understanding queen cells.
Stay observant: correct ID and measured action keep your bees productive and your colony healthy all season.
FAQ
What is the main difference between emergency and supersedure queen cells?
The main difference lies in the colony’s trigger. Supersedure cells form when workers gradually replace an aging or failing matriarch; they appear calmly and often on brood frames. Emergency cells appear rapidly after sudden loss or damage to the laying female and are made from recent eggs or young larvae. Location, timing, and the number of cells help distinguish them.
Why do colonies produce special-purpose brood chambers?
Colonies build larger, peanut-shaped replacements to ensure continuity of egg laying and colony cohesion. Workers feed selected larvae royal jelly and reshape comb to protect developing replacements. This repair mechanism keeps the hive productive and limits losses of brood and stores.
How is supersedure defined in practical beekeeping?
Supersedure is the steady replacement of a declining laying female without an overt swarm. Workers create a few well-formed cells, often near the center of the nest. The process preserves brood rearing and usually involves minimal disturbance to colony organization.
How is an emergency replacement defined?
Emergency replacement is a rapid response when the laying female disappears, is killed, or stops laying. Workers select very young larvae or eggs and convert them quickly into potential new layers. These replacements may be numerous and appear in unusual comb locations.
What biological purpose do swarm-producing cells serve?
Swarm-producing cells allow a portion of the colony to leave with a mated female to form a new colony. These cells are part of natural reproduction for Apis mellifera and help populations expand while reducing density and resource pressure in the original nest.
Where are supersedure cells typically located on the comb?
Supersedure cells are usually on the face of brood frames near existing brood and queen pathways. They tend to be guarded and evenly spaced, not clustered along the bottom margins like many swarm replacements.
How can I recognize rapid-response replacement cells?
Rapid-response replacements are often started from very young larvae or eggs and may be placed in odd spots, including empty comb or near the hive entrance. They can be smaller and more numerous than planned supersedure cups and may be capped sooner.
What role do play or starter cups have in colony development?
Starter cups are small, shallow structures where workers deposit royal jelly and test larvae. They serve as a ready pool for future caste decisions. Many remain empty, while some become charged with young brood when the colony decides to rear a new layer.
What are empty play cups and how should I treat them?
Empty play cups are unused miniature cells that indicate potential but not commitment. Leave them alone; they consume little resource and provide flexibility if the hive later needs replacements.
What does a charged play cup indicate?
A charged cup contains a selected egg or tiny larva fed royal jelly. It signals an active decision to rear a new layer. Inspect carefully and avoid disturbing frames with charged cups to prevent accidental damage.
How do physical characteristics and location differ between swarm and replacement cells?
Swarm-type replacements are typically long, peanut-shaped, and hang from the bottom of frames or comb edges; colonies often make many. Supersedure-type replacements are fewer, tucked among central brood, and show deliberate placement. Size and cap texture can also vary by purpose.
When is the peak season for producing swarm-type cells?
In temperate regions, spring is the main season for reproductive preparations. Increasing daylight, rising brood rearing, and nectar flows trigger larger numbers of reproductive cells. Timing varies by local climate and colony health.
How do I inspect frames safely for replacement structures?
Work calmly on warm, sunny days with light smoke. Lift frames slowly and view both faces and the comb bottoms. Focus on brood frames near the hive center and avoid sudden jolts that could break or bruise developing replacements.
What are safe management steps when I find swarm-type structures during inspection?
Options include creating an artificial swarm, rearranging frames to disrupt swarming impulse, or combining boxes to reduce congestion. Avoid hasty removal of many developing replacements; instead, use planned splits or provide more space and ventilation.
How can artificial swarm techniques help control reproductive behavior?
Artificial swarms mimic natural divides by separating a portion of bees and a developing female into a new box. This satisfies the urge to reproduce without losing bees to the environment. It also gives beekeepers control over timing and queen mating opportunities.
Is it safe to remove capped replacement brood from the hive?
Removing capped brood carries risk. If you remove the wrong cells, you may leave the colony without a replacement layer. Only remove capped structures when you understand their purpose and have a management plan, such as introducing a purchased laying female.
How does the presence of a laying adult affect decisions during inspection?
Confirming a laying adult on brood frames usually indicates the colony has a functioning layer and may not need replacement cells. If you see fresh eggs in many cells, the current layer remains active. Base interventions on both cell presence and egg patterns.
What are current best practices for managing planned replacement cells?
Monitor progress, limit disturbance, and avoid killing developing candidates unnecessarily. If you prefer a purchased mated female, manage timing carefully to remove in-progress replacements only when you can reliably introduce the new layer.
What should I do if sudden loss of the laying adult creates unexpected replacements?
Assess brood age and the number of replacement structures. Provide stability by avoiding frame moves and feeding if resources are low. If the colony cannot rear a viable new layer, consider introducing a mated laying adult from a trusted breeder like Mann Lake or Betterbee.
What commonly causes sudden loss of the laying adult?
Causes include predation, pesticide exposure, queen failure from disease, or accidental removal during hive work. Weather and mating losses also reduce laying activity and prompt rapid replacement efforts by workers.
How can I tell the difference between male brood and prospective layer brood?
Male brood in worker-sized cells has domed cappings and a distinct pattern; prospective layer brood is reared in enlarged, peanut-shaped cells and often receives shiny caps. Checking cell shape and cap texture helps differentiate them.
What risks come with removing active replacement structures?
Removing active structures can cause brood loss, trigger more replacements, or provoke absconding. It may leave the colony without a laying adult and reduce honey stores if done during production periods.
When should I consult a professional for help with brood replacement issues?
Contact a local extension agent, master beekeeper, or commercial provider when you see multiple unusual structures, sudden brood decline, or if you plan major interventions. Experts can diagnose disease, advise on requeening, and suggest graded management steps.