Moving a free comb into a managed frame is a key skill for any beekeeper facing a swarm or salvage job. This introduction covers a proven technique that protects the colony, the queen, and the brood while you transfer sections of comb into an empty frame.
Practical preparation matters. Gather a sturdy board, a sharp tool, masking tape or bands, and spare foundation or drawn frames. JeffH’s compost-bin rescue shows that careful planning keeps nurse bees calm and lowers risk when shifting comb.
Start by placing the combed branch or box where you can work safely. Secure cut pieces to bars so the colony can expand into frames over the next weeks. For detailed field tips, see community advice on swarm collection and comb transfer.
Key Takeaways
- Prepare equipment and empty frames before handling free comb.
- Secure comb pieces to bars so bees can build outwards.
- Protect the queen and brood during every step of the move.
- Work calmly with two hands and a clear plan to reduce stress.
- Expect the colony to settle and fill frames with brood and honey in weeks.
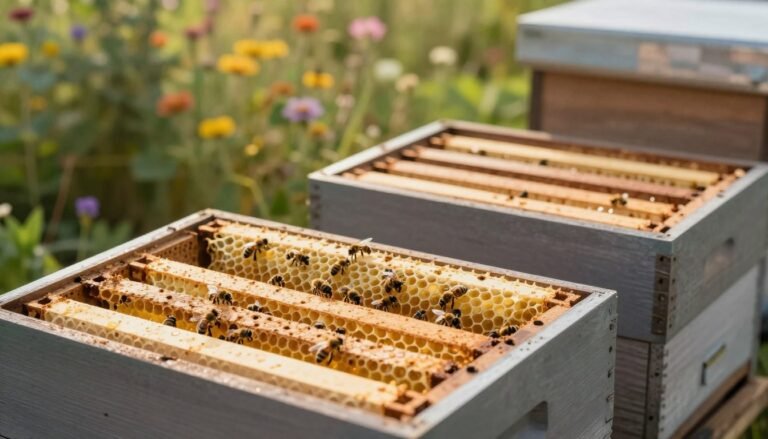
Essential Tools for Beekeeping Salvage
A tidy workspace and a few trusted items make salvage work much safer. Gather gear that protects the colony and preserves honey quality. Good prep shortens handling time and lowers stress for the bees.
Selecting the Right Rubber Bands
Choose soft, strong bands that won’t snap. These rubber bands hold comb against a frame while bees weld it in place. Keep extras on hand; sourced bands from others are commonly used by experienced beekeepers.
“Wired frames give vital support for cut-out work,” — TimG.
Preparing Your Cutting Surface
Use a large, flat chopping board and a long knife as fiftyjon recommends. Clean the board before work so honey stays uncontaminated. A steady surface helps you trim pieces so they fit the frame without shredding wax.
- Use wired frames for extra support.
- Have at least two spare bands per piece.
- Organize tools and equipment for quick access.
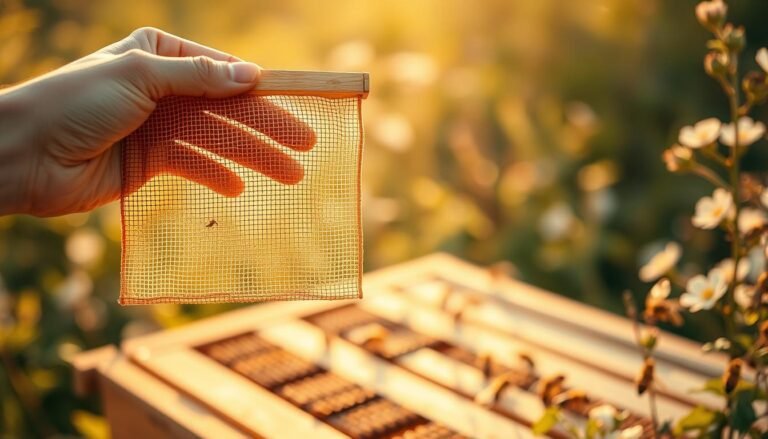
- Refer to guidance on cleaning foundation when needed: cleaning plastic foundation.
How to Cut and Rubber-Band Wild Comb into Frames
Measure each wax panel against a spare frame before any trimming. This simple check helps ensure the piece fits the bars and the foundation that will guide bee building.
Use a sharp tool for clean edges so honey and brood suffer minimal damage. Clean cuts let the colony accept the transfer faster and reduce fuss during the job.

Stretch bands over the frame ends first, as fiftyjon advises. That step speeds placement and keeps pieces steady while you position the comb.
“Wired frames give vital support when moving heavy comb,”
- Align wire and bars so heavy brood gets solid support.
- Place each piece gently and secure with rubber bands until bees attach the wax.
- Check foundation alignment; it provides the stable base the hive needs.
Good beekeeping equipment and tidy technique make this task repeatable. For extra guidance on stubborn burr, see the detailed remove burr comb properly guide.
Preparing the Hive for Transferred Comb
Make the brood box ready before any transfer. Clear space, check brood frames, and position equipment so work is steady and fast. A well-prepared hive protects honey, brood, and the queen.
Positioning Comb for Optimal Bee Space
Maintain correct bee space around each frame. Place each frame with even gaps so bees can move and tend brood without obstruction. If a swarm was left for weeks, you may find wax hung from the roof, as Brock Bee discovered in a national brood box.
Use a board as a temporary cover while you work. This keeps bees calm and helps prevent loss of honey or brood. Ensure the hive entrance is clear so foragers can orient during the change.
- Secure brood frames so the queen can continue laying uninterrupted.
- Organize pieces and tools within reach; effective beekeeping often needs extra hands.
- Handle the queen cage gently when introducing her to the new frame layout.
Well-supported comb and orderly placement let bees focus on honey and brood care. For related repair guidance, see fix cross-comb.
Managing Bee Behavior During the Transfer
A calm transfer reduces risk and helps the colony settle quickly. Use deliberate, slow movements and keep gear organized so the work finishes without extra disturbance.
Using the nurse bee shake method
Using the Nurse Bee Shake Method
Semaphore’s nurse bee shake boosts a weak swarm by placing bees on a board near the entrance. The nurse bees march in and care for brood while foragers return home.
Set the board in front of the hive entrance. Shake gently so nurse bees stay near the comb and find the frame support inside.

Minimizing Colony Stress
Hinterland Bees recommends using rubber bands to fasten comb to a top bar of a frame so pieces stay stable while bees attach wax.
“Secure small sections firmly and check the queen’s location before moving any brood.”
- Protect the queen with a cage if needed.
- Use a nuc for temporary housing when the colony needs time to strengthen.
- Observe the hive after transfer for settling and brood care.
| Action | Benefit | Tool |
|---|---|---|
| Nurse bee shake | Maintains brood care | Board |
| Secure pieces | Reduces comb damage | Rubber bands, frame |
| Queen protection | Preserves colony function | Queen cage, nuc |
For further transfer logistics and hive movement guidance, consult a practical guide on moving beehives and a top-bar handling article on managing cross comb.
Long-Term Maintenance of Repaired Frames
Routine checks help ensure the restored wax bonds firmly to the support bars. Inspect repaired areas in short visits during the first few weeks. This helps confirm the bees weld the comb to the frame and remove any stray bands.
Avoid nylon string when securing pieces. Experienced keepers warn that string can tangle bees and cause damage. Use elastic bands or soft ties briefly; the colony often chews them off after weeks as the comb firms up.
- Check brood frames for queen activity and any sign of damage.
- Remove loose material if bees do not clear it naturally.
- Keep the brood box tidy so honey stores and brood develop evenly.
“Do regular, gentle inspections. Small adjustments with the proper tool save trouble later.”
| Check | Why | Action |
|---|---|---|
| Welded comb | Secures structure | Observe bond; wait for bands to be removed by bees |
| Brood presence | Confirms queen use | Inspect frames; note eggs or larvae |
| Loose material | May trap bees | Clear with care using a clean tool |
For more details on using larger ties safely, see this practical note on rubber bands and transfer technique.
Conclusion
Well-planned transfers return lost stores and brood to a productive home while keeping bees safe. Use proper equipment and steady technique so a rescued frame bonds quickly and honey remains protected.
Prioritize the queen and nurse bees. Their care drives colony recovery, whether you place pieces in a nuc or a full hive. Temporary bands help while the colony secures the comb; the supports are often removed by the bees as they finish the job.
With calm work and a good checklist you will manage frames, brood, and stores for long-term success. For tips on fitting deep frames and reasons bees may delay drawing comb, consult this guide on fit deep frames and this piece on reasons bees won’t draw comb.
FAQ
What protective gear and tools are essential for salvaging wild comb?
Wear a veil, gloves, and a suit from brands like VIVO or Mann Lake. Bring a sharp hive tool, a fine-tooth saw or sharp blade, elastic bands, a clean empty frame, and a small container for nurse bees. Include items such as a smoker, bee brush, and a firm cutting board to protect the comb and your workspace.
Which elastic bands work best for securing loose comb to frames?
Use food-grade rubber bands or frame bands that resist snapping and won’t leave residue. Choose sizes that wrap around frame bars without compressing brood. Avoid cheap thin bands; invest in quality frame straps or strong elastic bands sold by beekeeping suppliers like Betterbee.
How should the cutting surface be prepared before separating comb pieces?
Clean a flat, rigid board and cover it with wax paper. Sanitize tools with alcohol and secure the comb to minimize bending. Work near your hive so nurse bees can be returned quickly. A stable surface protects bees, brood, and honey from crushing or contamination.
What technique preserves brood and honey when removing comb from a wild nest?
Support the comb close to the cutting line, slice with a steady hand, and keep sections small enough for secure attachment to an empty frame. Transfer brood-containing pieces with adjacent nurse bees to maintain warmth. Avoid jagged cuts that damage cells or spill honey.
How do I attach comb sections to a frame without causing collapse?
Fit the comb piece to the frame opening, then gently loop elastic bands over the bars and comb to hold it in place. Use multiple bands spaced evenly along the frame until wax seals. Ensure bands are snug but not tight enough to warp bars or crush brood cells.
What steps prepare the hive to accept transferred comb pieces?
Create space by removing an extra frame or two, place the new comb near the brood nest, and ensure proper bee space. Warm the hive slightly if cold to reduce breakage risk. Position the repaired frame where foragers and nurse bees will find it quickly.
Where in the brood box should repaired comb be placed for best integration?
Place repaired frames adjacent to existing brood and nurse activity, ideally in the center of the brood box. This encourages nurse bees to care for larvae and speeds acceptance. Avoid outer edges where bees focus on honey storage or winter insulation.
How can I move nurse bees with comb pieces to improve survival of brood?
Gently brush or shake nurse bees into a small cage or onto the comb section before transfer. Keep them with the brood during reinstallation so they resume care immediately. Use a queen excluder or temporary divider if needed to keep colony structure stable.
What practices reduce stress on the colony during transfers?
Work during calm weather, use smoke sparingly, and limit exposure time. Make clean, quick cuts and return bees promptly to the hive. Minimize frame reshuffling and avoid handling the queen. Regular, gentle moves reduce aggression and brood abandonment.
How long before repaired frames are fully accepted and functional?
Acceptance can take a few days to several weeks. Nurse bees will clean and repair cell edges, and workers will draw out any lost wax. Expect full integration in one to three brood cycles if placement and handling were correct.
What maintenance keeps repaired frames durable over time?
Inspect frames weekly at first, replace degraded elastics, and reinforce weak spots with fresh wax or strips of foundation if needed. Monitor for pests like wax moths and maintain proper hive ventilation. Swap severely damaged frames into a nuc or cut away unsalvageable comb.
Can repaired comb be used in a nuc or for requeening efforts?
Yes. Strong comb with healthy brood can support a nuc or help establish a new queenright colony. Ensure the comb contains enough nurse bees and stores, and place it centrally in the nuc to encourage brood care and queen acceptance.
What signs indicate a repaired frame should be removed or replaced?
Remove frames with excessive mold, crushed brood, foul odor, or heavy wax moth damage. Also replace if bands break repeatedly or the frame warps. Early removal prevents spread of disease and preserves colony strength.