Storm Agnes exposed how vulnerable hives can be when high winds and intense rain hit the peninsula. As a professional beekeeper, you know that damage to trees and power outages can mean lost honey and stressed colonies.
Securing your apiary is now a core part of modern beekeeping. A practical anchoring solution helps keep the queen and her bees safe through tough weather and the long winter months.
This guide gives a clear view of how to protect equipment and maintain order. We cover simple steps like using hive number tags, a top bee feeder, and correct hive handles beekeepers trust. You will also learn basic hive tool beekeeping checks and ideas for feeder commercial beekeeping setups in ideal commercial apiaries.
Take these measures to reduce toppled hives, protect your colony, and keep honey production steady when weather turns severe.
Key Takeaways
- Storm events can topple hives and harm honey yields; secure anchors matter.
- Use clear organization: number tags beekeeping and round hive number systems help recovery.
- Combine anchoring with gear care: hive handles beekeepers and hive tool beekeeping routines.
- Top bee feeder and feeder commercial beekeeping methods support colony health during stress.
- Focus on protecting the queen and colony to preserve winter survival and future yields.
The Growing Threat of Extreme Weather to Apiaries
Extreme weather events are reshaping how beekeepers plan and protect their hives. Beekeepers across the United States report more frequent storms and shifting seasonal cues that reduce forage and change pest pressures.
The COLOSS survey found natural-disaster losses averaged only 1–2% across 30 northern hemisphere countries, but a single severe event can devastate one apiary. That contrast gives a clear view on why localized protection matters.
Rising global temperature averages are altering bloom times and disease exposure. Unstable temperature swings also stress colonies, which lowers honey yields and colony resilience.
“Gobsmackingly bananas” record months underline climate volatility and its cost.
- Many beekeepers now plan for higher storm frequency and stronger winds.
- Financial losses from billion-dollar events show why securing hives is non-negotiable.
- Adaptation in management will protect hive health, honey production, and long-term success.
For practical steps on preparing sites and equipment, see our guide to batten down the hatches.
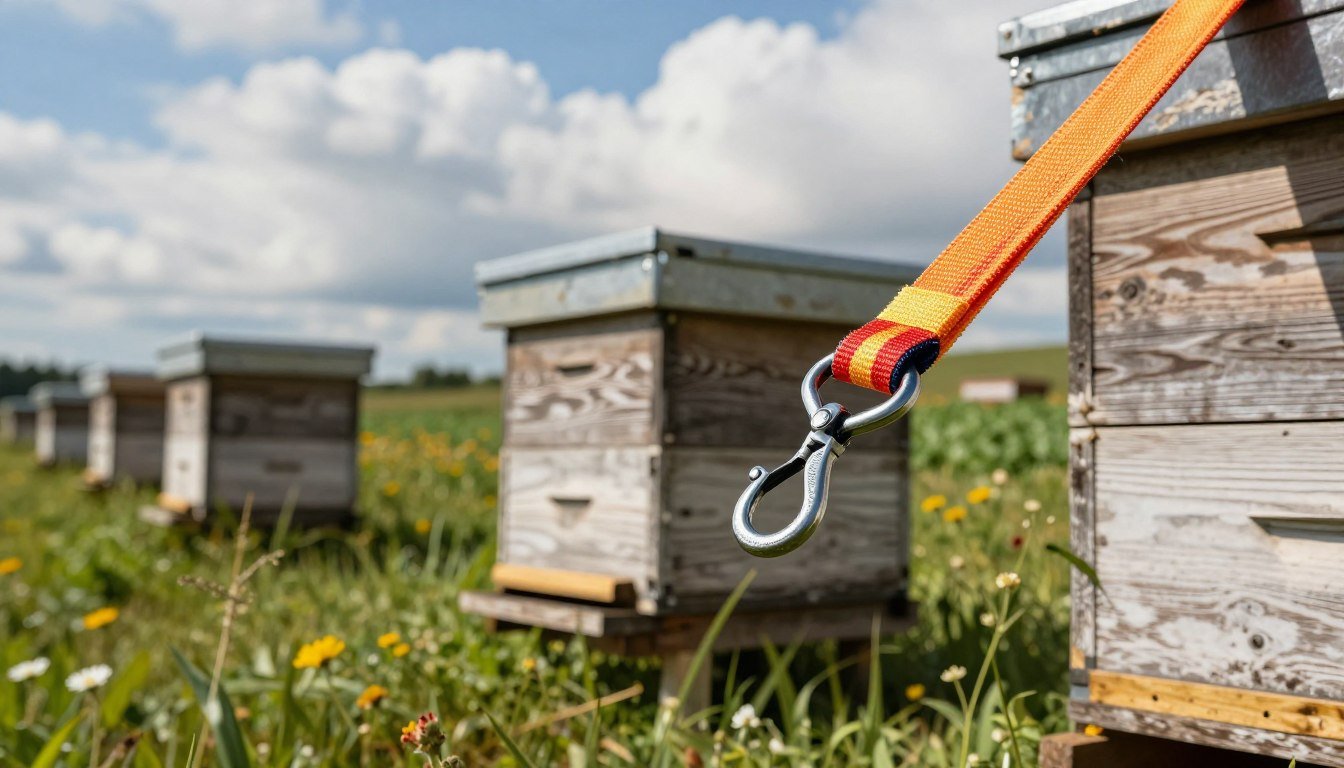
Why Ratchet Straps for Windy Apiaries are Essential
When gusts hit an apiary, mechanical advantage can be the difference between intact colonies and chaos. A good binding method changes a loose stack into a single, stable unit.
The Role of Mechanical Advantage
Mechanical advantage multiplies the force you apply. A ratchet mechanism lets beekeepers apply steady tension with precision. This keeps the hive boxes compressed without crushing frames.
Preventing Structural Deconstruction
A hive is a stack of modular boxes. Without adequate binding, lateral wind can pry seams apart and cause deconstruction. Applying consistent tension turns those boxes into a unified block.
- Protects honey stores and colony health during high wind and winter events.
- Reduces the risk of topple and frame misalignment.
- Precision tightening lets beekeepers adjust pressure to the box and cover type.

| Feature | Benefit | When to Inspect |
|---|---|---|
| Mechanical lock | Holds tension under gusts | After severe weather |
| Webbing material | Resistance to UV and rot | Spring and fall |
| Attachment points | Prevents slippage on box edges | Before winter |
Learn practical selection tips in this why to use straps guide and see options reviewed at best ratchet straps.
Understanding the Mechanics of Hive Stability
A secure hive depends on how forces move through its parts when tightened and sealed. The core of the system is a pawl and gear mechanism that converts handle motion into a one-way pulling force. This lets a user apply steady tension without backslip.
Proper design means the handle gives incremental control so tightening stops at the exact point of security. That mechanical advantage protects frames and avoids crushing comb or harming the colony.
Binding the modular boxes makes the hive behave as a single, solid object under wind or impact. A stable, sealed structure also helps beekeepers manage internal temperature and retain warmth for healthy honey production and bee activity.
| Component | Function | Inspection Point |
|---|---|---|
| Handle and pawl | Provides mechanical advantage; one-way pull | Before heavy season |
| Webbing and attachment | Distributes load across hive parts | Quarterly and after storms |
| Binding layout | Ensures unit reacts as one object | At installation and before winter |
Good design is the difference between a secure colony and one that suffers structural failure in a storm. For site-level shelter and layout tips, consult our guide on windbreak strategies.
Comparing Different Types of Hive Straps
Choosing the right binding method helps protect comb, brood, and stored honey when weather or handling threatens a colony.

Classic Hive Straps
Simple and durable. Classic hive straps have no moving parts. They last longer and need less upkeep.
They suit hobbyists who value low maintenance and steady protection. Use them when the goal is long-term, low-cost security.
Ratchet Straps
High control and load capacity. These give mechanical advantage and hold a tight seal around the hive top.
They are best when you must secure heavy loads or when strong tension is needed quickly.
Cam Buckle Straps
Speed and convenience. Cam buckles let you adjust tension fast during inspections. They save time when managing many hives.
Many beekeepers mix types to match site needs and hive tool beekeeping routines.
| Type | Advantage | Best Use |
|---|---|---|
| Classic | Low maintenance | Small yards, long-term |
| Ratchet | Maximum tension | High wind, heavy loads |
| Cam buckle | Fast adjustments | Frequent inspections |
Consider integration with a top bee feeder and how your hive number tags work. Professionals managing ideal commercial apiaries often use a mix and keep records with a round hive number system.
Learn how to reduce plastic use in apiaries while choosing gear that suits your operation.
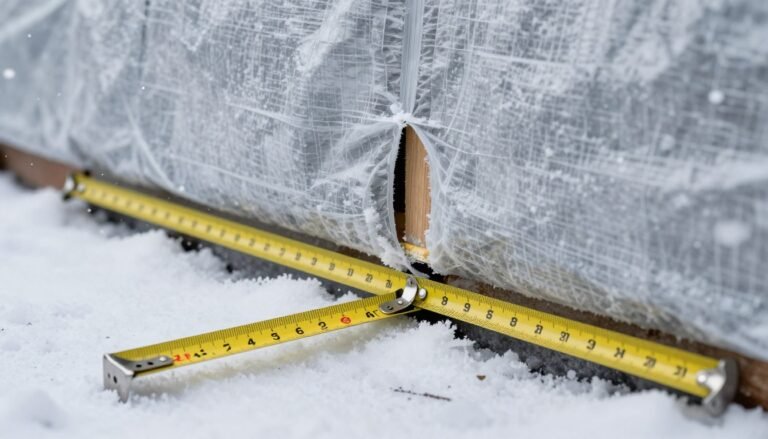
Selecting the Right Strap Length and Material
A well-sized strap and the right webbing extend the life of your gear and protect stored honey.
Measure the total hive height, including supers loaded with honey, before buying hardware. That ensures the strap wraps cleanly around the hive body and the stand.
Choose webbing at least 5 metres long to handle tall stacks. Avoid options shorter than 2.5 metres; they work only on small nucs.
- Material: pick high-quality synthetic fibers that resist UV and moisture.
- Design: ensure attachment points and width spread load without cutting into box edges.
- Slack: allow extra length so you can route the strap and still get firm tension.
| Feature | Why it matters | Minimum spec |
|---|---|---|
| Webbing length | Wraps tall hives and stands | 5 m |
| Fiber type | UV and moisture resistance | Polyester or polypropylene |
| Width and fittings | Distribute load, protect edges | 25–35 mm |
These choices help beekeeping teams and lone beekeepers keep bee colonies steady and protect honey yields through the season.
Step by Step Guide to Securing Your Hives
Start by choosing a stable anchor point on the stand and work outward to lock the hive into place. This keeps the unit steady while you route the strap and check critical openings.
Positioning the Strap for Maximum Tension
Begin by passing the strap around the cross beams of your hive stand. Wrap so the webbing bears on the stand, not on fragile edges. That creates a solid anchor against ground movement.
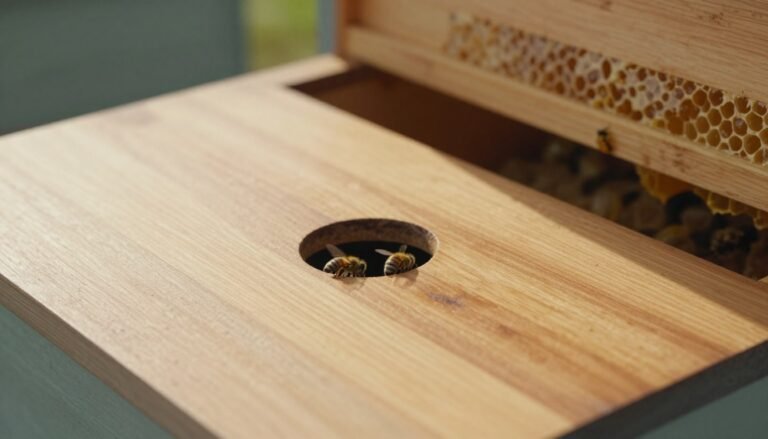
Place the webbing over the hive top but avoid the hive entrance. Leave the opening clear so bees can forage and return without obstruction. Check that hive number tags and any top bee feeder are not blocked.
- Set the ratchet handle beside a recess in the hive wall to avoid catching on hive handles beekeepers use in winter.
- Tighten incrementally, applying small increases in tension to keep the colony calm and the boxes aligned.
- Use a hive tool beekeeping check to confirm the bottom board is aligned before final tensioning.

Proper placement protects the queen and brood and helps preserve honey stores during storms. For more site-level advice see how to manage colonies in windy.
Advanced Anchoring Techniques for High Wind Areas
High-exposure sites demand anchoring that channels gusts safely into the ground rather than through your hive.
Begin by securing the hive stand to the soil with heavy-duty stakes or ground anchors. Fixing the stand reduces the risk the entire unit will tip in a severe gust.
Monitor the hive entrance during strong weather. Keep the opening clear so bees can leave and return without being buffeted. That simple check preserves brood care and foraging.
Create a triangulated anchoring layout by adding high-strength rope or an extra strap to two anchor points. This spreads load into the earth and cuts lateral motion.
- Stake the stand, then run two lines to separate ground anchors to form triangles.
- Leave a clear entrance path and re-check after each storm.
- Prioritize these measures to protect your colony, honey stores, and equipment.
| Technique | Benefit | When to Apply |
|---|---|---|
| Ground stakes | Stops tipping | Before storm season |
| Triangulation | Transfers wind load to earth | Exposed sites |
| Entrance monitoring | Protects bees and brood | During high wind |
Even with a windbreak, freak gusts happen. Make securing steps standard practice and see advice on how to make secure hive stands.
Protecting Your Equipment from Tension Damage
Knowing where pressure concentrates helps you avoid splits, warps, and cracked boxes. Apply tension with intent and stop when the unit feels snug rather than squeezed. A stressed hive responds poorly to crushing, and a damaged box costs time and money to replace.
Use a single handle mechanism such as a ratchet only once you have checked alignment. Over-tightening raises the risk of cracking wood or deforming a telescoping hive top. Poly hives need extra attention; they crush more easily under high pressure.
Place soft padding or corner protectors under the webbing. These distribute loads and stop the strap from digging into edges. A thin board or rubber corner spreads force across a larger area and protects frames inside.
Inspect your straps regularly for frayed fibers and worn fittings. A sudden failure under high tension can topple a stack and increase the risk of lost colonies. Good equipment care keeps hardware serviceable for many seasons.

Best Practices for Storing and Maintaining Straps
Treat your binding hardware like a precision tool. Clean moving parts, lubricate, and store so your hive protection is ready when needed.

Maintenance is simple: spray the spring and cam mechanism with WD40 every six months to prevent corrosion and sticking.
Roll or fold each strap neatly and secure it with a reusable zip tie before winter storage. Avoid dumping gear into a bag; disorganized webbing wastes time and causes tangles.
- Check webbing for frays and weak spots before use.
- Store indoors or under cover to reduce UV damage and moisture exposure.
- Label bundles so you can grab the right strap quickly in spring.
Small routines save hours. Beekeepers who tidy gear during winter find inspections and storm prep go faster.
For neat storage ideas see store hive straps, and learn stand protection at noise-reducing stands.
Common Mistakes to Avoid During Installation
A few simple installation checks stop most common failures that topple hives in high wind.
Always verify the bottom board is aligned before you tighten. Misalignment can create gaps and compromise the hive entrance, letting weather and pests in.
Use corner protectors under tension points. Missing protection digs into wood and harms box edges when you apply heavy tension.
Position the ratchet handle so it does not obstruct inspections or clash with the hive design. A poorly placed handle makes future checks slow and risky.

Replace worn webbing and fittings. Beekeepers who reuse frayed materials invite sudden failures during a storm and risk losing a colony.
Secure the binding around the stand as well as the hive body. Anchoring only the box lets the whole unit tip when gusts hit.
- Protect hive number tags and top bee feeder items when tightening to prevent damage in ideal commercial apiaries.
- Store hive tool beekeeping and other small parts clear of the strap path so tools do not interfere with control or tensioning.
Final rule: perform a quick walkthrough after installation. A short check prevents common mistakes and helps keep your apiary secure.
Final Thoughts on Apiary Security
Secure hives start with a steady, proactive view of risk and a simple physical solution. Regular checks and the right hardware keep problems small and manageable.
Severe weather can hit fast. Prepare early to protect honey stores and reduce the chance of a toppled hive during strong wind.
Protect the queen, brood, and the colony by keeping each hive aligned and supported. Small steps at setup save time and stress later and help your bees stay healthy.
Beekeeping is an ongoing craft. Reliable anchoring and routine maintenance give beekeepers the best chance to safeguard honey and equipment.
Investing in quality gear is a low cost compared with replacing lost hives. Learn gear tips like the best frame grip to handle heavy supers safely and keep your operation steady through the season.
FAQ
What is the recommended way to secure a hive against strong gusts?
Use heavy-duty tensioning gear and wide webbing to anchor the hive to its stand or a ground anchor. Place straps over the hive top and around the brood box, pulling snug but not crushing the frames. Position tie points at the stand or a buried anchor to resist uplift and lateral forces while preserving the hive entrance for bee traffic.
How long should the webbing be for standard Langstroth hives?
Choose webbing that allows a full wrap around the hive and stand plus extra for the tensioning mechanism. For most Langstroth setups, 8 to 12 feet of usable length covers the box and provides enough tail for secure tightening and tying off. Measure your setup before buying to allow room for handles, feeders, or uneven ground.
Which material holds up best to sun, moisture, and cold?
UV-stabilized polyester webbing offers the best balance of strength and weather resistance. It resists stretching, dries quickly, and tolerates temperature swings. Avoid untreated cotton or light polypropylene that degrades faster in sunlight and loses strength when wet.
Can anchoring gear damage the hive or frames if tightened incorrectly?
Yes. Excessive tension can warp sidewalls, compress frames, or block the entrance. Always tension gradually and check internal alignment by opening the hive after initial tightening. Use protective pads or a board under the webbing to distribute pressure across the top and protect the crownboard and feeder.
Are there alternatives to tensioning mechanisms that work in windy locations?
Yes. You can use metal hive bands, wooden battens screwed to the hive body, or ground anchors with steel cables. Each option has benefits: bands are durable and low-profile, battens add rigidity, and ground anchors resist uplift well. Combine methods for added security in exposed sites.
How do I keep the hive entrance clear while using an anchoring system?
Route webbing and fasteners over the top and sides, not across the entrance. If you must run a strap near the front, keep it high on the top box and add a spacer to leave the entrance unobstructed. Monitor bee traffic after installation to ensure normal foraging and ventilation.
What maintenance does anchoring equipment need between seasons?
Inspect webbing for UV fray, chemical damage, or broken stitching before spring. Check metal parts for corrosion and lubricate moving components. Store gear dry and out of direct sun when not in use. Replace any component with visible wear rather than repairing with knots.
How do I prevent theft or tampering of secured hives?
Use tamper-resistant fasteners, lockable bands, or security screws for external hardware. Add number tags and unique hive identifiers to help recovery. Site hives in visible locations or use motion-sensor lights and cameras for extra deterrence in vulnerable apiaries.
Will anchoring interfere with winter management and feeding?
Properly placed gear should not. Design straps to be removable or routed so you can lift the top for winter feed or inspections. For winter wraps and insulation, temporarily loosen or remove tensioning gear, then re-secure after adding feed or insulation.
What common installation mistakes should I avoid?
Avoid over-tightening, using narrow or degraded webbing, routing gear across the entrance, and relying on a single anchor point. Also avoid leaving slack that allows the hive to shift. Use wide webbing, distributed tie points, and periodic checks after storms to ensure continued stability.