Selecting the right set of bits makes frame work faster and more accurate. Whether you bought a power drill at Home Depot or sourced tools elsewhere, the correct sizes and types will save time and reduce damage to wood and metal.
Quality sets include driver heads, screwdriver tips, and specialty bits that handle screws, drilling holes, and light masonry. Look for ratcheting chucks, two-speed controls, and an LED to help in tight, dim spaces.
Contractors and DIY users both value compact, powerful tools that offer torque and a range of speeds. Good storage in a durable case keeps bits organized and protects your investment.
For an in-depth look at multi-purpose models and specs that matter in real projects, see this review of versatile options multi-purpose cordless models.
Key Takeaways
- Choose bit types that match materials: wood, metal, and plastic.
- Two-speed settings and torque matter when driving screws.
- Compact form and LED lighting aid work in tight spots.
- Buy a kit with varied sizes to cover common project needs.
- Store bits in a sturdy case to prolong life and readiness.
Understanding the Role of Drill Bits in Frame Assembly
The small steel rods held by your tool make a big difference in accuracy and finish.
Drill bits are thin, cylindrical cutting tools the chuck grips to bore precise holes in wood, metal, plastic, glass, or concrete. Proper selection lets your power drill create clean holes with less tear-out and faster work.
When putting together a frame, the right drill bit helps screws seat cleanly without splitting the surrounding material. A secure chuck grip keeps the bit steady at high speed and reduces slipping during heavy drilling.
Many DIYers shop at Home Depot for a versatile set that includes multiple sizes and driver heads. A quality set adds value by covering common project types and materials, from light masonry to cabinet-grade wood.
Choose bits that match material and screw sizes, and store them in a durable case. That simple step keeps tools organized, extends life, and keeps projects moving without costly delays.
Essential Features to Look for in the Best Cordless Drill Bit for Frame Assembly
Precision starts at the tip — tiny differences in geometry change outcomes fast.
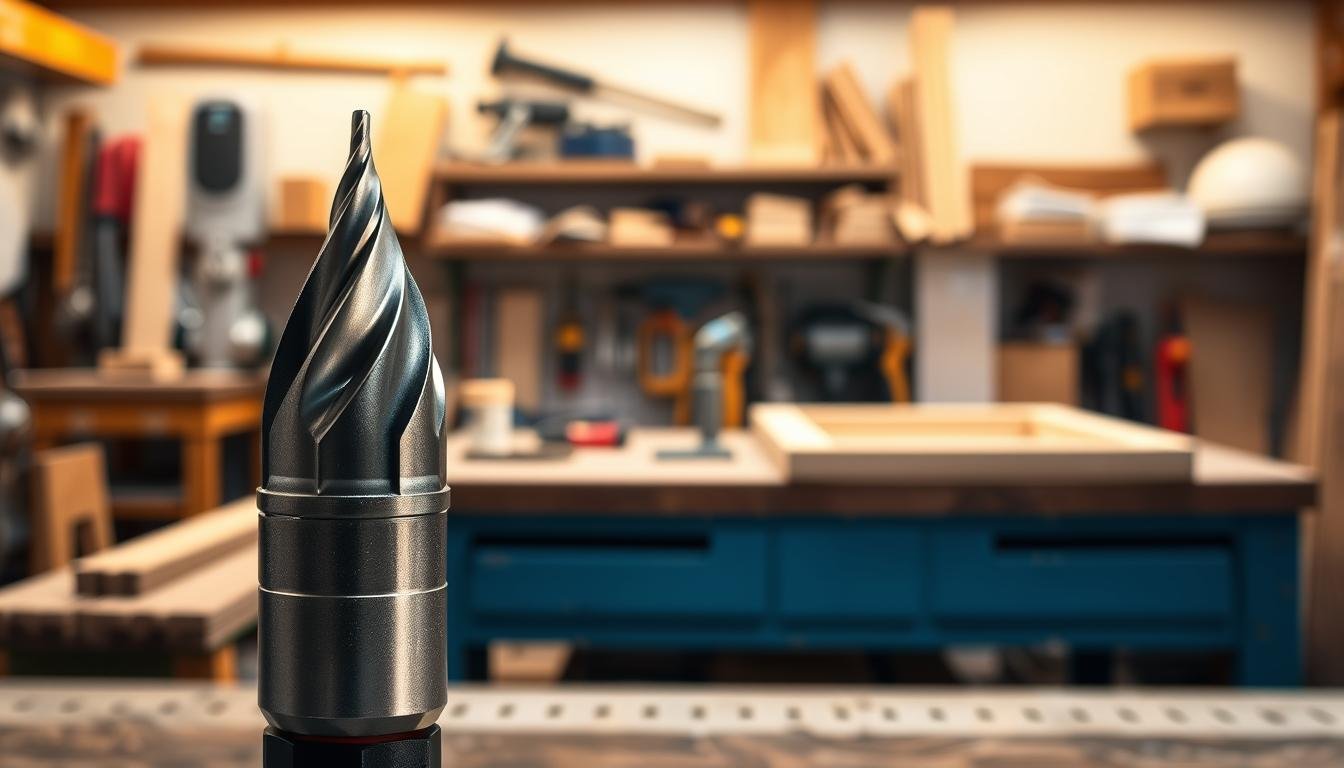
Pilot point design prevents walking when you start a hole in hard material. A good pilot tip centers the cut and reduces tear-out in wood, metal, and plastic. That control helps screws seat cleanly and keeps joints tight during final fit-up.
Split-point or split-tip profiles cut faster and need less force. That means lower heat and less wear. For repeated use across projects, look for hardened grades that resist dulling and maintain a consistent hole size.

Pilot Point Design
A pilot point provides a sharp center that bites immediately. This reduces skating and gives a straighter hole. Faster starts and cleaner holes make work feel more professional and save rework time.
Shank Compatibility
Match shank type to your chuck. Straight, hex, or reduced shanks affect grip and torque transfer. A secure fit prevents slipping under heavy load and protects the chuck and drivers.
- Choose a set with a wide range of sizes to cover common screw and hole needs.
- Check material and coating to resist heat and wear in long runs.
- Confirm chuck size and shank type before purchase to avoid compatibility issues.
For a deeper comparison of quality sets, consult this drill bit set review to see how features translate to real‑world performance.
Comparing Material Compositions for Durability
Durability starts with what each cutting tip is made from and how it is finished.
Material composition is the primary factor determining how long your drill bits last under heavy use. High-speed steel is common and economical. It works well for general-purpose tasks around the home and lighter projects.
For tougher metal or hardwood, choose titanium-coated or cobalt-alloy options. These materials resist heat and keep a sharper edge during extended drilling. A sharper tool means cleaner holes and fewer replacements.
Sets that include specialized pieces for wood, plastic, and metal reduce breakage and improve finish. That targeted design helps each driver and tool perform its best in the right material.
- HSS: cost-effective for general use.
- Titanium coat: better heat resistance.
- Cobalt alloy: excels in hard metal work.
Investing in durable materials pays off. You save time, cut replacement costs, and keep projects moving with reliable performance and a neat case to protect the set.
Selecting the Right Bit Size for Your Project
A precise match between hole size and fastener diameter reduces wobble and improves grip.
Common Fractional Sizes
Selecting the correct bit size is vital. Using the wrong diameter can leave screws loose or split the wood.
Many standard sets cover a wide span of fractional sizes. The Craftsman 60-Piece Set has boring bits from 1/16″ to 1″. The DeWalt 21-Piece Drill Bit Set ranges from 1/16″ to 1/2″.

| Set | Range (inch) | Common Use |
|---|---|---|
| Craftsman 60-Piece | 1/16″ – 1″ | Wood boring, larger holes, versatility |
| DeWalt 21-Piece | 1/16″ – 1/2″ | General fasteners, pilot holes, light metal |
| Recommended Practice | Match screw to hole | Reduce tear-out; check chuck capacity |
Always confirm the chuck capacity on your cordless tool so the chosen bit fits securely. A comprehensive set of fractional sizes lets you drill precise holes for varied fasteners and plastic or wood parts.
For guidance on matching bit shanks and chuck types, see this power drill buying guide.
Evaluating Versatility in Drill Bit Sets
A truly versatile set lets a homeowner switch quickly between wood, metal, and masonry without changing tools.
Versatility means a kit covers common hole sizes and driver types. Look for Phillips, flathead, and star drivers so you can handle varied screws and fasteners.
Count the pieces. A larger set, like the Ryobi 300-Piece Drill and Drive Kit, shows how range reduces trips to the store. More pieces usually mean you have the right size at hand.
Quality matters. A solid case keeps bits organized and speeds retrieval during work. Good layout saves time and protects small drivers during transport.
| Feature | Why it matters | What to check |
|---|---|---|
| Piece count | Wider range for mixed projects | Includes common sizes and driver types |
| Driver variety | Fits screws without adapters | Phillips, flat, star included |
| Case quality | Organization and protection | Rigid shell, labeled slots |
When selecting a set, match parts to your cordless drill and project needs. A well-rounded kit speeds drilling and improves grip and control when you work.
Performance Testing of Top Rated Kits
Real-world trials show how coating, geometry, and flute design change performance under load.

Titanium Coated Options
Milwaukee’s 29-piece Shockwave Red Helix stood out in tests. The variable helix flute design removes chips fast and keeps cutting smooth.
In practical use it excels at clean holes in wood, plastic, and soft metal. Speed and longevity made it a solid choice for everyday projects when paired with a reliable cordless drill.
Cobalt Alloy Performance
Norseman’s M42 115-piece set uses 8% cobalt. Tests showed excellent heat resistance and edge retention when drilling hard metal.
Users will notice fewer dulling cycles and less regrinding. That durability translates to lower replacement cost and steady performance on tough materials.
Carbide Tipped Specialty Bits
Diablo’s 4-piece tile and stone set proved necessary on brittle surfaces like ceramic and glass. The carbide tips cut with control and reduced chipping.
For general home projects, a large Ryobi 300-piece kit at Home Depot still offers unmatched value and range of sizes and drivers. Combine a versatile set with specialty pieces for the right balance of speed, value, and material coverage.
- Testing takeaway: titanium-coated options balance speed and wear for routine drilling.
- Hard-metal work: cobalt alloy keeps a sharper edge longer.
- Specialty jobs: carbide tips protect fragile material and cut cleanly.
Why Coating Matters for Longevity
A thin engineered finish reduces friction and keeps heat from ruining a cutting edge.
Coatings like black oxide and titanium nitride cut friction and slow corrosion. That means the cutting edge stays sharper through long runs of holes in wood, metal, or plastic.
By lowering heat buildup during drilling, coated drill bits last far longer. Professionals choose coated sets when projects demand hundreds of consecutive holes.
When shopping, look for a kit that lists its finish and heat treatment. A quality set often ships in a protective case that keeps the coating intact during storage and transport.
- Reduced friction: smoother cuts and less wear.
- Corrosion resistance: longer shelf life and fewer replacements.
- Better heat control: sustained sharpness on demanding jobs.
For a technical overview of common finishes and their benefits, see this guide on fastener finishes and coatings.
Tips for Preventing Bit Walking and Skating
A small mark before you drill saves time and keeps holes true to layout lines.

Using a Center Punch
Start with a center punch or a short nail to make a shallow dimple where each hole will go. That tiny indentation gives the tip a place to seat and stops the bit from skating on smooth wood or metal.
When you use a cordless driver, hold the tool steady and start at low speed. The dimple helps the drill bit bite instantly so you keep layout marks accurate.
- Precision matters: Preventing bit walking keeps fasteners aligned and reduces surface damage.
- Easy prep: Use a center punch, punch set, or a nail and hammer to make a starter mark before drilling.
- Common practice: Experienced users apply this method with high-speed bits and during repetitive hole work.
- Material tips: Use firmer punches on metal and lighter taps on soft wood to avoid over‑denting.
Final tip: Prepare each point on your layout before you start. A small step like this improves control and makes every drilled hole look professional.
Matching Your Drill Chuck to the Bit Shank
Matching the shank profile to your chuck is a simple step that improves torque transfer and reduces slipping.
A secure connection between the chuck and the shank prevents wobble and keeps holes accurate. Before any drilling, check that the shank fits the chuck capacity and that the jaws close evenly.
Most modern cordless tools use a keyless chuck that accepts round and hex shanks. This makes swapping bits quick and keeps a firm grip during driving and light metal work.

If your shank has three flats, tighten the chuck jaws slowly and evenly. That approach gives better stability and transfers torque from the driver to the cutting edge.
- Verify shank size against chuck specs before you start drilling into wood or metal.
- Use the correct shank type for your set to reduce slipping and wear.
- A steady grip reduces accidents and protects both the tool and the drill bit.
Storage Solutions for Your Tool Collection
Good storage turns a pile of parts into a ready, reliable kit you can grab and go.
Keeping organized protects investment and speeds setup. Use modular cases or wall-mounted racks to sort your drill and bits by size and type. That simple step cuts search time and reduces damage during transport.

A sealed case shields bits from moisture and grit that cause corrosion and dull edges. Many professional sets include molded slots so each bit sits snug and won’t rattle loose.
Investing in a quality case or a dedicated rack saves minutes on every project. A labeled system also keeps your workspace safe and clean, which matters when drilling holes at home or on site.
| Solution | Protection | Best Use |
|---|---|---|
| Modular case | Moisture barrier, molded slots | Portable kits and transport |
| Wall-mounted rack | Easy access, off-floor storage | Garage or shop organization |
| Magnetic strip + tray | Quick grab, visible layout | Everyday tool staging |
Tip: If you need ideas for racks, check recommended storage racks like these storage racks to match your workshop layout.
Safety Practices When Drilling Hard Materials
Drilling hard surfaces demands predictable control and strict safety habits from every operator.
Protect your eyes and skin. Always wear safety glasses and consider a face shield when chips fly from metal or masonry. Tiny fragments can cause serious injury.
Set speed and torque correctly. Match the tool’s setting to the material to avoid overheating and prevent bit breakage. Lower speed often improves control when cutting hard substrates.

Use lubrication on tough work. A drop of cutting oil reduces friction and extends the life of bits and bit edges. Keep a firm grip and steady pressure when pushing through thick sections.
“Safety is not an extra step — it is the base of every successful project.”
| Hazard | Practice | Reason |
|---|---|---|
| Flying chips | Eye protection, face shield | Prevent cuts and eye damage |
| Heat buildup | Reduce speed, use lubricant | Protect tools and maintain sharpness |
| Tool slip | Firm grip, clear workspace | Keep holes accurate and avoid injury |
- Park obstructing items and clamp workpieces to limit movement.
- Check bits for wear before each use and replace dull pieces promptly.
Conclusion
C A short pre-check saves hours of rework and keeps every hole true to layout lines.
Match material, shank, and size before you start. Choose quality drill bits and a stable chuck, set the speed, and use the right driver to protect wood and metal while drilling holes.
Final checklist: use the correct set, store gear in a labeled case, and follow safety steps to extend tool life. When you need guidance on top-rated cordless drills, consult this cordless drills guide to pair the right power and range with your kit.
FAQ
What type of drill bit design helps start holes cleanly and reduces walking?
Pilot point designs, often called split-point or brad-point bits, cut dead center and resist skating. They give cleaner starts in wood and help when drilling near edges, improving accuracy for framing tasks.
How do I match bit shank types to my power tool’s chuck?
Check whether your chuck accepts round, hex, or SDS-style shanks. Standard three-jaw chucks handle round and hex, while impact drivers prefer 1/4-inch hex. For hammer drills and masonry work, use SDS shanks for secure engagement.
Which material composition offers the best durability for wood and occasional metal?
High-speed steel (HSS) with a titanium nitride or black oxide coating balances durability and price for wood and light metal. For frequent metal work, cobalt alloys resist heat and retain hardness longer.
What bit sizes are most useful for common framing and woodworking projects?
Keep a set of fractional sizes from 1/8″ up to 1/2″ for typical tasks. Smaller sizes suit pilot holes for screws; larger sizes fit bolts and through-holes. A range lets you match screw diameters and avoid splitting lumber.
Are coated bits worth the extra cost for home improvement use?
Yes. Coatings like titanium nitride or black oxide reduce wear and friction, extend life, and improve heat dissipation. For heavy use, upgraded coatings deliver better value over time by lasting longer.
How can I prevent bit walking when starting a hole on smooth or finished surfaces?
Use a center punch or brad-point bit, clamp the workpiece, apply light starter pressure and start at low speed. A piece of masking tape over the mark also helps reduce slipping.
What should I test when comparing drill bit kits for performance?
Check cutting speed, heat buildup, edge retention and hole cleanliness in wood, plastic and metal. Also test fit in your drill or impact driver and note shank fit, torque transfer and how often bits need resharpening.
When should I choose cobalt alloy or carbide tipped bits?
Choose cobalt alloy for frequent drilling in stainless steel and hardened metals—cobalt stays hard at high temperatures. Carbide tipped bits are ideal for abrasive materials, masonry and long production runs where tool life is critical.
How do I store bits to keep them sharp and organized?
Use a molded case or magnetic rack to prevent contact damage. Label sizes, keep sets together, and store in a dry place to avoid corrosion. Proper storage prolongs life and speeds up workflow.
What safety steps should I follow when drilling hard materials like masonry or metal?
Wear eye and hearing protection, secure the workpiece, use the correct bit and speed, and apply steady pressure. For masonry, use a hammer drill mode and an appropriate carbide or masonry tip. Keep hands clear and allow cooling breaks to prevent overheating.
Can I use driver bits and twist bits interchangeably in an impact driver?
Use 1/4-inch hex driver bits designed for impact use for screws. Standard twist bits with round shanks can fit some impact drivers with an adapter, but they may not withstand high-impact forces. Choose impact-rated bits for longevity.
How does chuck size influence the maximum hole and shank options I can use?
A 3/8-inch chuck accepts most small to medium shanks up to roughly 3/8″, while a 1/2-inch chuck allows larger bits and masonry sizes. Larger chucks handle heavier tasks and larger hole diameters for framing and structural work.