Start with clear preparation. A standard package carries about 12,000 live workers, and survival hinges on proper equipment, temperature, and timely care. Prepare your hive, box, frames, and syrup supply before the bees arrive.
Listen to the colony. Beekeeping is a partnership; observe the queen, brood cells, and wax comb for signs of problems. Early scans for eggs or a failing queen save weeks of trouble.
Control heat and humidity while the cage and queen settle. Experienced beekeepers wear a veil and check stores, sugar feed, and placement for the best chance at robust honey production. For guidance on swarm behavior and timing, see this guide on whether your hive is preparing to swarm.
Key Takeaways
- Assemble hive equipment and frames before the package arrives.
- Watch the queen and brood early for eggs and healthy cells.
- Keep temperature, heat, and humidity stable for brood development.
- Supply sugar syrup until bees build sufficient honey stores.
- Use proper veil and tools; give the nuc quiet space for the first weeks.
Understanding the Importance of Bee Isolation
Keeping a recent hive separate for a short period protects the rest of your operation. Experts like David R. Tarpy stress that proper installation and queen acceptance are easier to manage when arrivals remain apart. Isolation reduces the chance that pathogens travel from stressed packages into established colonies.
During isolation, beekeepers should watch the cage and the queen closely. Look for worker acceptance, healthy brood pattern, and workable frames. Provide sugar syrup so workers have energy to draw comb and store honey without drifting.
“Never introduce a package directly into a yard without a quarantine period,” — professional standards endorsed by extension services.
- Use clean equipment and ready frames for the isolated hive.
- Monitor for problems like disease or rejection before mixing colonies.
- Adjust placement and shelter based on local weather to lower stress.
For protocols and lab-backed guidance, consult apiary hygiene guidance and reference seasonal checklists at seasonal beekeeping tasks.
How to Quarantine New Bees Before Adding to an Apiary
Begin by placing the boxed colony in a dark, still area set between 50–70°F. Keep the spot quiet and away from other hives to reduce drift and stress.

Physical Separation Requirements
Position the hive out of flight lines and at a distance that prevents workers from returning to established colonies. Manage the bottom board for gentle ventilation while sheltering from direct weather.
Duration of Isolation
Feed a 1:1 sugar syrup supply and check the cage daily. Inspect frames and brood for eggs and healthy cells. Keep the queen cage accessible and confirm the queen is alive before any move.
Maintain isolation until the queen is accepted, brood is consistent, and workers are drawing comb and storing honey.
| Item | Action | Timing |
|---|---|---|
| Location | Dark, quiet, 50–70°F | Immediate |
| Feeding | 1:1 sugar syrup available | Daily during isolation |
| Checks | Queen cage, brood pattern, frames | Every few days |
| Separation | Place away from other hives to prevent drift | Until acceptance |
If problems arise, such as a dead queen or excessive dead workers, contact local beekeepers for assistance. For biosecurity protocols and step-by-step installation tips, see the biosecurity guidance and this hive installation guide.
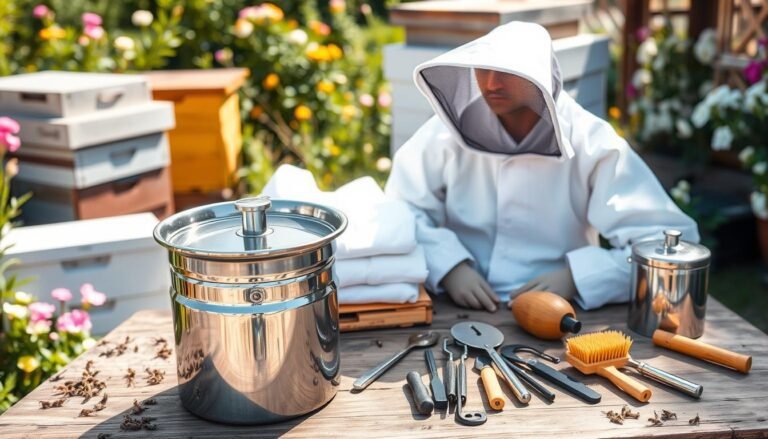
Essential Equipment and Protective Gear
Lay out your suit, veil, and essential tools in a clean, shaded area before interacting with the hive.
Wear a full veil and protective suit whenever you handle a package of bees. Gloves, a hat, and a jacket reduce distractions and let you focus on the colony’s needs.
A sturdy hive tool is crucial for prying frames and separating components of the box. Keep a smoker ready; gentle smoke calms workers and simplifies inspections.
Carry a spray bottle filled with 1:1 sugar syrup to mist the cluster. This keeps activity steady and lowers aggression during transfers.
Handle the queen cage with care and use a sharp tool to remove the cork or candy cap when you are ready.
Keep spare frames and an extra hive box on hand and maintain clean, well-serviced equipment. Good gear supports colony health and the pursuit of quality honey.
- Wear protective gear and a full veil for every installation.
- Use a high-quality hive tool and a functioning smoker.
- Have sugar syrup, spares, and clean equipment ready.
For biosecurity steps and producer standards, see the honey bee producer guide.
Managing Arrival and Environmental Conditions
Arrival day demands close attention to temperature, ventilation, and shelter for a safe first 72 hours. Proper management reduces stress on the queen and workers and cuts the risk of early losses.

Temperature Control
Keep temperatures steady. Avoid any exposure above 100°F, which can kill the entire package and queen.
Install only when ambient temps sit above 65°F so the hive can function. Use shaded placement and a closed bottom board to help the colony regulate brood heat.
Temporary Storage
If weather or timing is poor, store the box in a dark, quiet spot between 50°F and 70°F. This gives the package time to rest and reduces drifting.
Spray workers lightly with sugar syrup before transfer. That immediate energy supply calms activity and aids handling.
Weather Considerations
Avoid installs during high winds, heavy rain, or storms. Environmental stress increases the chance the colony will abscond or the queen will be harmed.
Check the entrance reduction and keep the hive shaded. Regular frame checks ensure the bees draw comb and that the queen finds adequate cells and laying space.
“Good placement and steady temperature are among the simplest, most effective steps in successful beekeeping.”
For practical steps and an installation checklist, see the installation checklist and detailed handling guidance in this package handling guide.
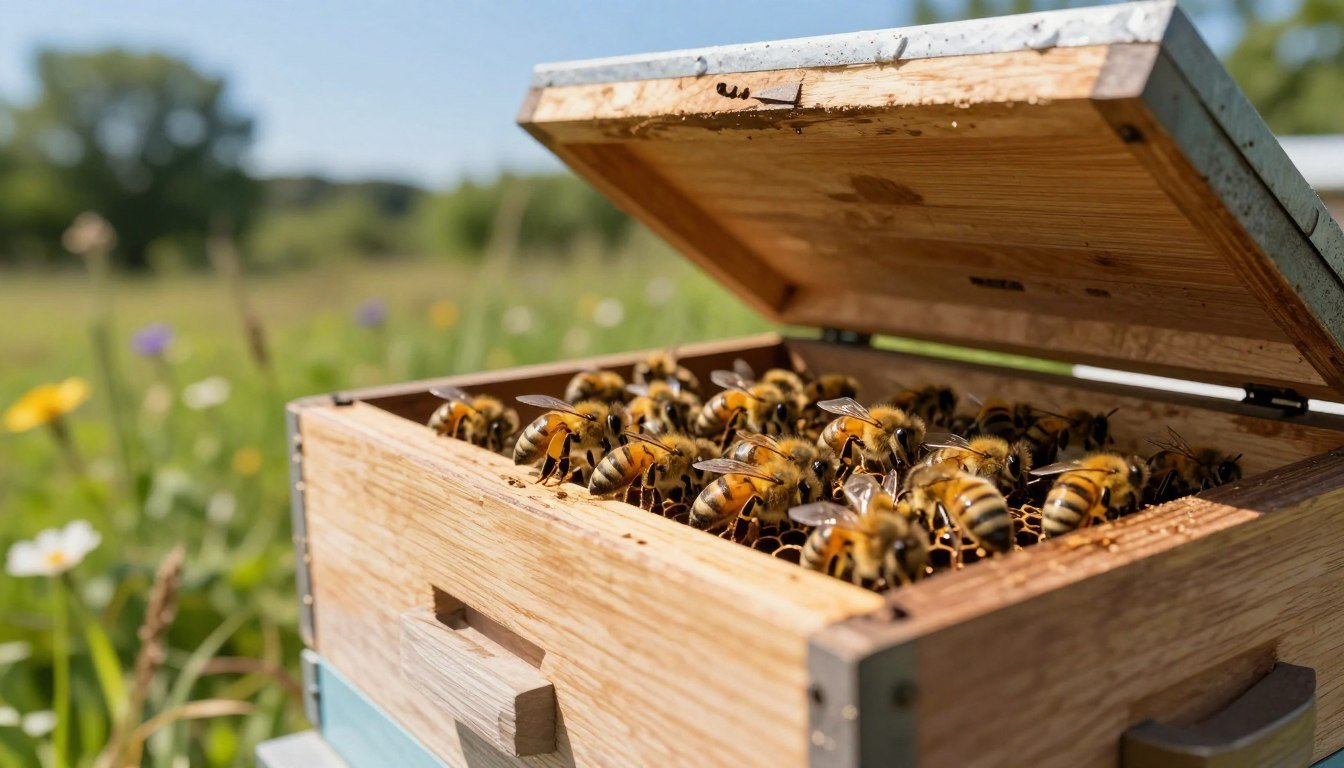
Preparing the Hive for New Arrivals
Prepare the brood chamber by removing three or four frames from the center. This gives workers immediate space for comb, brood, and the queen cage placement.
Assemble the hive box fully and set it in its permanent location before you collect the package. A fixed spot prevents drifting and helps foraging orientation.
Inspect the queen cage and confirm the queen is alive and healthy before inserting her between the center frames. Place the cage low in the gap so workers can access it easily.
Keep the entrance clear and sized for the initial cluster. Provide constant sugar syrup while the colony builds comb and stores honey.
- Watch for burr comb forming between boxes and remove carefully.
- Be ready to add another box as brood and stores expand.
- If a swarm cell appears, contact a mentor immediately; it signals potential swarming.
Create a calm, stable environment so the colony can focus on brood rearing and nectar collection.
The Installation Process
Work deliberately and keep movements calm. Arrange the hive in its final spot and leave a central gap for shaken workers and the queen cage.

Queen Introduction Methods
Start the transfer by firmly knocking the package on the ground so most workers drop toward the screened end. Then invert and vigorously shake the package into the prepared space so the cluster settles on the frames and bottom board.
Place the queen cage candy-side up between two center frames, with the screen facing outward. Remove the cork from the candy end so workers can access the candy and eat through it over the next few days.
- Keep hands away from screened sides of the package while you work.
- Manage frames carefully to avoid crushing any workers when you return them to the box.
- If weather is warm, acceptance rates are usually higher and work is faster.
Inspect the colony five days after installation to confirm the queen has been released and is laying eggs.
For step-by-step basics, see the beekeeping for beginners guide at beekeeping for beginners.
Monitoring Colony Growth and Health
Watch the brood nest closely. A single productive queen can add 1,000–1,500 workers per day once laying starts. Check for eggs, larvae, and capped brood on the center of frames five days after installation.
Inspect frames weekly. Look for a solid pattern of brood and steady comb building. Note any gaps or irregular cells that may signal a failing queen or disease.
“Regular, gentle checks catch problems early and keep the hive strong.”
Key signs to monitor:
- Consistent egg pattern centered in cells.
- Rapid population rise during peak season.
- Sufficient honey stores to support brood expansion.
| Check | Expected Sign | Timing |
|---|---|---|
| Queen activity | Fresh eggs and sealed brood | Inspect at 5 days, then weekly |
| Frames | New comb and drawn cells | Weekly |
| Stores | Honey available for feed gaps | Before nectar breaks |
Patience and steady observation are core skills in beekeeping. Let the work of the bee community proceed, and respond quickly if the hive shows stress.
Troubleshooting Common Colony Problems
A quick, regular check of frames and brood pattern reveals most common colony problems. Start each inspection with a calm approach. Scan the brood for eggs, larvae, and capped cells.

Identifying Queen Issues
Look for missing eggs or a patchy brood layout. A drone-laying queen produces mostly drone brood that bulges from cells. That pattern signals an urgent replacement.
If the queen cage remains unopened after several days, the colony may have rejected her. In that case, consider uniting the weak hive with a stronger one using the newspaper method.
Managing Robbing and Disease
Keep the entrance reducer in place to protect a weak package from robbing by nearby hives. Reduced access lowers theft and stress on stores.
Feed 1:1 sugar syrup when wax comb is slow; sugar gives the energy bees need to draw comb and build cells. If disease appears, contact a mentor or state agriculture office for diagnosis and legal treatment steps.
Record each inspection: note queen signs, frame changes, temperature concerns, and actions taken.
For further biosecurity and inspection checklists, see apiary hygiene guidance and a practical seasonal checklist.
Conclusion
A healthy colony grows from consistent feeding, clean equipment, and calm handling.
Successful beekeeping is a rewarding journey that asks you to work with your bees rather than against them. Observe the hive regularly and adapt care as you learn each colony’s behavior.
Always prioritize food, space, and shelter. Clean tools and proper hygiene protect every hive and reduce disease risk. For best practice guidance, consult the apiary hygiene guidelines
apiary hygiene guidelines for practical cleaning and biosecurity steps that support strong colonies.
FAQ
What is the purpose of isolating incoming colonies before placing them in the apiary?
Isolation protects resident stock from pests, pathogens, and parasites such as Varroa mites and American foulbrood. It also gives new hives time to adjust, build comb, and establish a stable queen–worker relationship without immediate pressure from nearby colonies. This practice supports long‑term apiary health and reduces management problems.
What physical separation should I maintain for a new colony during the initial period?
Keep the new colony at least several yards from established hives, ideally at the edge of the property or in a separate yard. Use a dedicated quarantine box or nuc stand and avoid sharing equipment. Mark the location so you can monitor without disturbing nearby colonies. Physical distance reduces drift and limits disease spread.
How long is the recommended isolation period for incoming stock?
Most beekeepers hold new colonies in isolation for two to four weeks. This window covers brood cycles and reveals signs of disease or queen failure. Extend isolation to six weeks if you suspect pests or if weather and colony strength slow development. Monitor frames and brood regularly during this time.
What essential equipment should I have for holding incoming hives safely?
Prepare a secure nuc box or quarantine hive, spare frames with foundation or drawn comb, a queen cage, feeders, and sealed transport containers. Use a separate set of tools and gloves to prevent cross‑contamination. Keep records of origin, purchase date, and any treatments applied.
Which protective gear is advisable during inspections and transfers?
Wear a certified veil, gloves, and a jacket or full suit as needed. Use a smoker at low intensity to reduce aggression. Proper PPE protects you and reduces stress on the colony, making inspections quicker and safer.
How should I manage temperature for newly arrived colonies?
Keep nucs out of direct sun and sheltered from wind. Maintain ambient temperatures above 50°F (10°C) for active brood rearing. In hot weather provide ventilation and shade; in cool weather insulate or use minimal heating methods. Stable temperature preserves brood and prevents queen loss.
Where should I temporarily store packages or nucs during the observation period?
Place them on a stable, raised stand in a quiet, low‑traffic area with a clear flight path. Avoid low spots where cold air collects. If using a garage or shed for short periods, ensure adequate ventilation and move colonies outside the same day when possible to reduce stress.
How do weather conditions affect holding and integration of colonies?
Rain, high winds, extreme heat, and cold all increase stress and can delay acceptance or queen introduction. Schedule transfers during mild, calm days and avoid storms. Provide shade in heat and windbreaks in cold to keep bees active and able to forage and thermoregulate.
What hive preparations should I complete before combining new stock with residents?
Ensure the receiving hive is strong, disease‑free, and well provisioned with honey or syrup. Inspect frames for brood pattern and stores, repair or replace damaged comb, and space frames to standard width. Have a clear plan for placement of the queen or nuc within the host colony.
What methods are effective for introducing a new queen into a host colony?
Common methods include using a queen cage with a candy plug, the newspaper method for gradual acceptance, or slow introduction via a partitioned split box. Choose the approach based on colony temperament and strength. Monitor the cage for signs of aggression and release only after acceptance signs appear.
How often should I monitor a quarantined colony during the initial weeks?
Inspect every 5–7 days, checking for brood pattern, queen presence, food stores, and mite levels. Keep inspections brief to minimize stress. Record findings to spot trends in population growth, disease symptoms, or queen issues.
What signs indicate a failing queen or queenlessness in a new colony?
Watch for spotty brood patterns, laying workers, excessive drone cells, and a sudden drop in population. Workers may begin emergency queen cells. If these signs appear, consider requeening or merging with a strong host after proper assessment.
How can I prevent and manage robbing and disease during the holding period?
Reduce hive entrances, use robbing screens when necessary, and avoid spilling syrup or honey near hives. Practice strict sanitation: sterilize tools, change gloves, and isolate infected frames. Treat for mites or brood diseases only after diagnosis and following label instructions for medications.
When is it appropriate to move a quarantined colony into the main apiary?
Integrate once the colony shows a healthy brood cycle, consistent queen laying, low parasite loads, and adequate food stores—typically after two to four weeks. Move hives at dusk, reorient entrances, and monitor closely for signs of drifting or aggression after relocation.
What paperwork and record keeping should accompany incoming stock management?
Track vendor details, inspection dates, treatments, queen lineage if known, and any unusual observations. Good records help trace problems like disease outbreaks and inform future purchasing and biosecurity choices. Use a simple logbook or beekeeping app for consistency.