This guide shows a practical, U.S.-focused way to plan an apiary and protect your colony from day one.
You will learn how to choose a place, plan clear work space, and arrange stands so inspections never block flight paths. Give yourself room on both sides of each hive so you can work from either direction.
Design a compact 9×9 ft yard with about two feet clear around fronts, backs, and sides. Keep vegetation low so you do not need to trim at entrances where bees are most defensive.
Tip: tilt the hive slightly forward to shed rain and reduce moisture. Offset any electric fence so workers do not back into it while handling frames.
What this intro sets up is the full process: choosing location, preparing bases, assembling Langstroth hives, and installing bees. Later sections cover pest control, robbing prevention, seasonal feeding, and notes to track what works at your place.
Key Takeaways
- Allow clear access on both sides and behind hives for safer inspections.
- Tilt hives slightly forward to improve drainage and reduce moisture issues.
- Plan vegetation control around entrances to avoid trimming near bees.
- Offset an electric fence from work paths to prevent accidental contact.
- Organize stands, mark lids, and keep notes to scale your apiary over time.
What This How-To Guide Covers and Why Apiary Setup Matters
This how-to walks through everything from selecting a safe site to seasonal hive care so new beekeepers in the U.S. can build reliable habits that serve the bees first.
Scope: the guide explains site selection, legal considerations, safety, equipment choices, installation, and ongoing management through the seasons.
Good planning saves you time and reduces conflicts with people and pets. A thoughtful location makes it easier to carry heavy boxes to and from your home and shortens the time you spend at each hive.
Core beekeeper roles are simple and repeatable: manage space, prevent robbing, control pests, provide food, and confirm a laying queen. Expect to open a hive every one to two weeks during active months for basic checks.
One hive vs. multiple hives: decisions scale as colonies grow. A single hive needs fewer routines; several hives require layout, staging, and more storage for tools and supers.
Pick a quiet, legal, and level or levelable location away from pesticide drift. These choices directly lower stress for your bees, cut down on stings, and make inspections safer and faster over time.
Safety First: Allergies, Protective Gear, and Safe Ways to Work Bees
Before you lift a frame, make safety the habit that protects you and the colony. Confirm sting allergy status with a physician and learn the signs of a severe reaction: heart palpitations, itchy palms or soles, throat tightness, and trouble breathing or swallowing. Get tested if you are unsure before you acquire bees.
Make sure you’re not allergic to honey bee stings
If you develop severe symptoms, seek emergency care right away. Carry a plan and, when advised, an epinephrine auto-injector. Tell family or nearby people where you keep it.
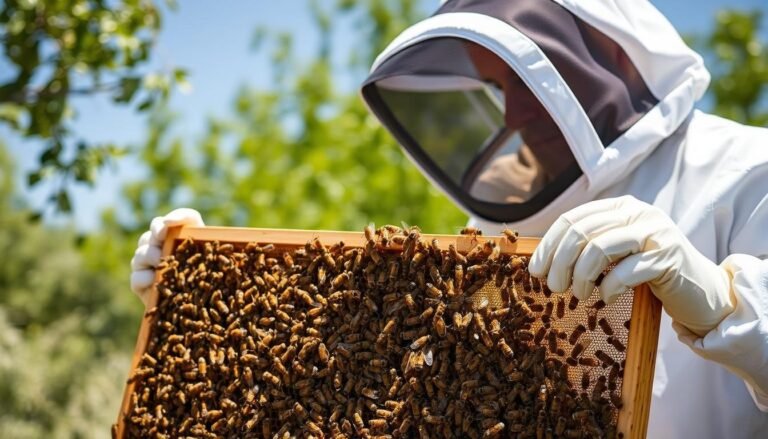
Essential PPE: veil, gloves, suit, and smoker basics
Assemble protective gear early: a veil or veiled jacket, sting-resistant gloves, and a full suit for heavier work. PPE lowers risk but does not stop every sting.
- Use cool, steady smoke to calm a hive; practice lighting and maintaining it before inspections.
- Start inspections from the back or side and stay clear of the flight path to reduce collisions and agitation.
- Keep a pre-inspection checklist for tools, veil, gloves, and smoker so the hive is open for the least amount of time.
Good safety habits shorten inspection time, lower stress for the bees, and make beekeeping more sustainable. For a medical kit and first-aid tips, see a concise first-aid list and safety precautions for beekeepers.
First-aid kit essentials and practical safety precautions help you prepare responsibly.
Choosing the Right Location on Your Property or Partner Sites
Pick a spot that balances sun and shade so colonies stay cool in summer and warm in winter.
Good siting reduces stings, protects neighbors, and shortens the time you spend at each hive.
Sun, shade, and wind
Place hives where afternoon shade tempers summer heat and winter afternoons provide sun to support brood. Avoid north-facing entrances and prevailing winds to keep internal hive temperatures stable.
Distance from people, pets, and high-traffic areas
Keep a respectful setback from neighbors, pools, and walking paths. A privacy hedge or fence can lift flight paths above head height and direct bees away from yards and gardens.
Legal access, pesticide drift, and practical walking distance
Confirm written permission for any site off your property, including community gardens or roofs. Site hives away from treated fields and on the leeward side of common pesticide sources.
- Orient entrances away from prevailing winds and toward nearby nectar and water.
- Setbacks from property lines and pools reduce conflicts with people and neighbors.
- Balance seclusion with practical access—plan for carrying 35+ lb boxes from the house.
- Small yards: split hives to opposite ends and vary orientations to cut drifting and improve forage coverage.
- Animals: install a fence early where bears or livestock roam to protect bees and keep animals out.
Apiary setup: Spacing, Orientation, and Entrance Management
Where you place each hive shapes daily traffic and colony health. Thoughtful spacing and varied entrance directions cut drifting, balance populations, and reduce fights at the landing board.

Hive spacing and entrance direction
Stagger hives and rotate entrance directions so returning foragers can home more accurately. A common practical gap between two hives is about 27 1/4 inches; this gives room for tools and a beekeeper to work.
Varying directions reduces drift and helps weaker colonies keep brood and stores.
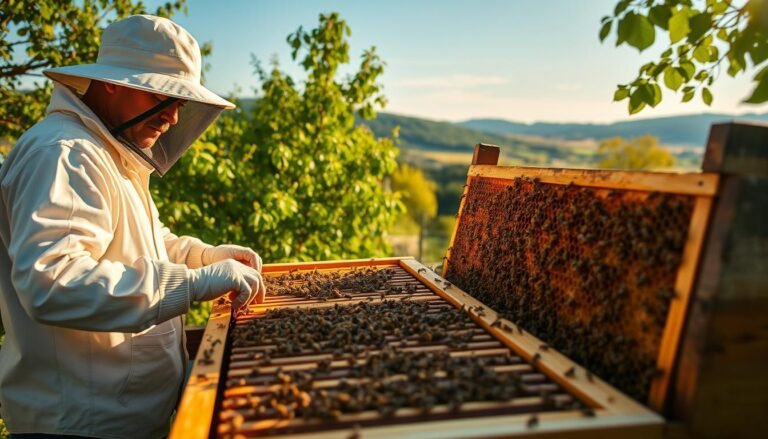
Southeast-facing starts and working from the back
Orient entrances generally southeast for quick warm-up on cool mornings. Adjust for local shade and wind corridors.
When inspecting, work from the back of the hive to stay out of flight paths and keep bees calmer at the entrance.
Marking lids, and lifting flight paths with hedges or fences
Mark lids or entrances with high-contrast colors or simple symbols so bees identify their home quickly. New foragers imprint on these cues.
“Small color or angle changes can have outsized effects on drift reduction.”
Use fences or hedges to lift flight paths above head height and direct traffic away from walkways. Keep a clear flight corridor free of obstructions and avoid placing water sources directly in front of entrances to prevent crowding.
- Plan spacing for smoke to cross entrances without congestion.
- Observe shade shifts and wind before adding more hives.
- Make slight angle and color tweaks as hive numbers grow.
Stands, Platforms, and Pallets: Picking the Best Base for Your Hives
A stable base is the unsung hero that keeps hives level, dry, and easy to work all year.
Single-stand approaches work best for up to roughly ten hives. They preserve access from the back and reduce blocked entrances. Platforms can look tidy but often create a problem as density grows.
When many hives share a platform, smokers, tools, and foot traffic collide. That crowding slows inspections and stresses both bees and beekeepers.
- Material tips: avoid horizontal cement board that can soften over years. Choose treated plywood tops or open framework for airflow and longevity.
- Pallet option: source sturdy pallets, cut them in half, and add short legs for elevation and stability. This low-cost way saves money and space.
- Leveling: use pavers and shims to check side-to-side and front-to-back. Finish with a slight forward tilt for runoff and easier frame removal.
Keep a clear walking lane at the back and sides for tools and frames. Use durable, weather-resistant fasteners and standardize stand heights to ease heavy lifts over time.
“Invest in robust bases early; each additional hive multiplies site interactions.”
Document what works—materials, heights, spacing—so you repeat successes as your apiary grows.
Ground Prep Around Hives: Weed Control, Retaining, and Drainage
Good ground prep keeps rain from pooling, mulch from washing away, and protects footing during inspections.
Start by clearing and stabilizing the ground before placing equipment. For a compact 9×9 ft yard, remove tall weeds and level any holes so lifting boxes is safe.
Landscape fabric, newspaper/cardboard, and mulch choices
Lay premium landscape fabric beneath stands to limit weeds but allow water through. Add damp newspaper or cardboard over the fabric where you want to smother vegetation.
Finish with two to three inches of mulch. Choose a color and texture that matches your garden while resisting wind displacement.
Working on slopes
On inclined sites use single-course retaining wall blocks to hold mulch and gravel in place. Build short, one-level walls to form terraces and prevent washouts.
Grade the area slightly away from the hive line so water flows past stands and does not collect under the hive base.
- Edge the perimeter to keep materials out of walkways and maintain a clear inspection area.
- Minimize vegetation near entrances to avoid string-trimmer hazards and reduce defensive guard behavior.
- Inspect seasonally for washouts, weed breakthroughs, and settled areas.
“Tidy ground cover reduces pests and helps you spot dropped wax, dead bees, or beetles fast.”
| Task | Recommended Material | Benefit | Typical Size |
|---|---|---|---|
| Weed suppression | Premium landscape fabric + cardboard | Low maintenance, allows planting later | 9×9 ft example |
| Mulch layer | Durable wood or stone mulch | Reduces weeds, dampens vibration | 2–3 inches |
| Slope control | Single-course retaining blocks | Prevents washout, stabilizes cover | Short terrace runs |
Core Equipment Checklist for a U.S. Langstroth Hive
A concise gear list keeps you efficient on install day and prevents forgotten parts when bees arrive. Start by choosing one or two box heights and repeat that choice across your hives to simplify work and ordering.
Boxes, frames, and the 8-frame vs 10-frame choice
Deep boxes are best for brood; mediums or shallows make lighter honey supers. Choose 8-frame boxes for lighter lifts and easier handling, or 10-frame boxes for greater capacity and fewer total boxes.
Essential woodenware
- Per colony checklist: 2 deep boxes, 16–20 deep frames, 16–20 medium/shallow frames.
- Bottom board, entrance reducer, mouse guard, inner cover, and telescoping outer cover for weather resilience.
Tools, PPE, and feeders
Pack a smoker, 1–3 hive tools, gloves, and a veil or suit. Choose a feeder that fits your management style and local climate. Label boxes and frames by number to track movement, age, and repairs over time.
“Stage all gear near the stand before bees arrive; it saves time and reduces stress during those first inspections.”
Getting Bees: Nuc vs Package, Marked Queens, and How Many Hives to Start
Your choice between a nuc or a package affects early growth, cost, and management time. Decide with your local nectar calendar in mind so colonies arrive when forage and weather support buildup.
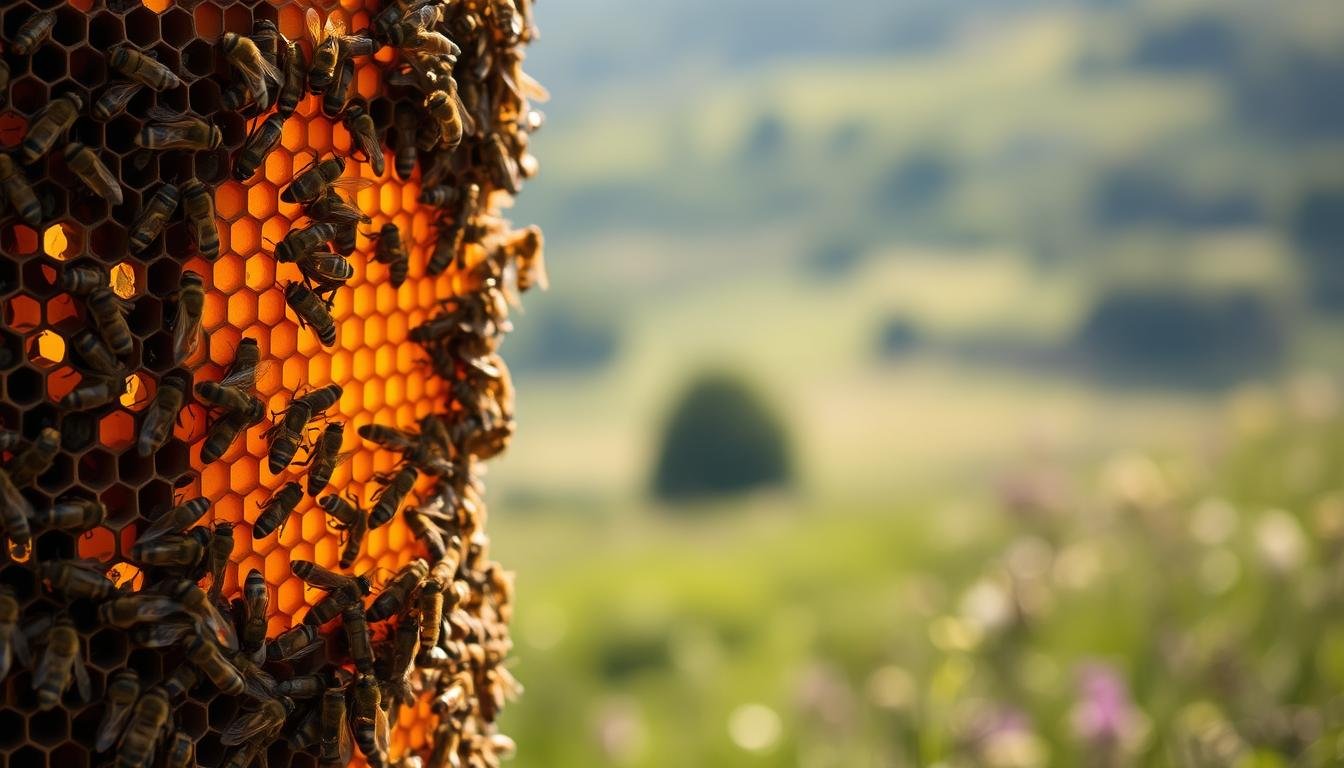
 box, showcasing its intricate design and internal structure. The nuc is positioned in a lush, verdant apiary setting, with blooming flowers and buzzing bees visible in the background. Warm, natural sunlight filters through the scene, creating a serene and inviting atmosphere. The nuc's rectangular frame is meticulously crafted, with precise joints and a smooth, weathered finish. The box's lid is slightly ajar, revealing a glimpse of the carefully arranged frames within, hinting at the thriving colony it contains. The image conveys the importance and care required in establishing a new bee colony, setting the stage for the article's discussion on the advantages of a nuc over a package.")
When to prefer a nuc or a package
Nucs include 4–5 frames of brood, drawn comb, food stores, and a laying queen. They build faster and often produce honey sooner in spring.
Packages are a screened box with a caged queen and loose workers. They cost less but take longer to draw comb and establish a solid colony.
Marked queens and sourcing advice
Ask for a marked queen to make early inspections quicker and to confirm egg-laying. Prefer local sources to match climate and reduce transit stress.
“Avoid shipped bees when possible; pick up locally to lower loss risk and time in transit.”
How many to start and arrival-day checklist
Begin with two to three hives so you can compare performance and lend brood or food if one colony lags. Avoid more than three until you have overwintered successfully.
| Item | Why it matters | Tip |
|---|---|---|
| Feeder | Supports new colonies while stores build | Bring on arrival and check daily |
| Water | Reduces foraging stress nearby | Place a shallow source near the stand |
| Record log | Tracks queen origin and colony progress | Note pickup date and initial population |
Quick checklist for arrival day: protective gear on, feeder ready, leveled stands, water set, and transport cards or boxes staged on your property or partner place.
Step-by-Step: Setting Up the Hive and Installing Your Colony
Begin your install day by confirming stands are level, tools staged, and the weather window is clear. Verify the stand has a slight forward tilt to shed rain and keep the landing board dry. Work from the back of the hive to stay out of the flight path.
Positioning the stand, placing boxes, and setting the entrance
Place the bottom board first, then the first brood box with frames. Set the entrance toward your planned sun and wind direction.
Level carefully—use pavers or shims so the box sits steady but tilts slightly forward for runoff.
Installing a nuc or package, feeding, and first-week checks
For a nuc, transfer frames in order so brood stays centered. Gently shake remaining bees into the box and close with an inner cover.
For a package, suspend the caged queen as instructed, shake bees in, and re-check queen release at the recommended time.
Feed internally with an internal feeder to avoid signaling robbers. Provide a nearby water source for returning foragers.
Preventing robbing: reduce entrances and keep syrup and honey off the yard
Reduce the entrance to help a small colony defend itself, especially during dearth. Never leave syrup, wet frames, or open honey in the yard.
“Exposed sweets trigger robbing that can cascade across multiple hives.”
Keep an installation log: date, weather, feed amounts, queen status, and first-week notes. That record saves time and guides future decisions.
Protecting the Apiary: Electric Fences, Entrance Guards, and Robbing Control
Smart perimeter defenses protect colonies and keep your work area safe for inspections. Use proven equipment and tidy habits to cut losses from wildlife and robbing. Below are practical steps you can apply at home or in a shared garden.
Bear-smart electric barrier
For bear country, choose a Parmak Deluxe Field Solar-Pak 6 (6-volt) charger and 6-foot step-in steel t-posts. Mount the charger on a post with a small board and secure Fi-Shock aluminum wire (15 gauge or larger) with plastic t-post clips.
Grounding matters: drive three 6-foot grounding rods, spaced 10 feet apart, and tie them with 12.5-gauge insulated grounding wire. Poor grounding makes the barrier ineffective.
Fit simple gate handles with conducting aluminum and set the barrier far enough from your work lane so you never brush it while inspecting hives with a lit smoker.
Entrance guards, hive height, and clear access
Install mouse guards as nights cool and raise each hive about 18 inches to deter skunks. Keep entrances unobstructed so you never have to stand directly in front of incoming bees.
Stage tools and water where they do not block flights. A tidy yard with no spilled honey or open syrup prevents robber bees from escalating attacks across colonies.
Robbing season tactics
Recognize dearth as the window when nectar dries up and robbing risk rises. Reduce entrances during these periods, remove leaky feeders, and sweep up dropped comb or honey immediately.
“Exposed sweets or a leaky feeder can trigger robbing that spreads fast between hives.”
Check the barrier regularly: charger output, vegetation touching wires, and tight gate connections. Well-maintained posts and a clean perimeter also help redirect bee traffic up and away from neighbors.
Beekeeper Basics: Managing Space, Pests, Food, and the Queen Over Time
Seasonal rhythm guides most decisions a beekeeper makes from spring buildup to winter consolidation. Add boxes as the colony grows so the brood nest stays compact and warm. Remove empty boxes before cold weather to keep bees able to patrol and hold heat.
Adding and removing boxes; alternatives
Follower boards or inserts can replace a full super in top-bar or modified systems. Use them to guide the brood cluster and avoid too much empty comb near the cluster.
Varroa-first: prevention and common pests
Put varroa monitoring first. Regular counts and timely treatment stop crashes. Keep the yard tidy to limit small hive beetles and wax moths; strong colonies outcompete these pests.
Feeding and queen checks
Feed in early spring and again in fall when stores dip. Choose internal feeders and keep a clean water source to cut robbing risk.
Verify queenrightness by finding eggs, young larvae, and capped brood. Track mite counts, box changes, and feed amounts in a log. Clear, repeatable routines save time and protect honey, brood, and overall hive health.
“Small, consistent checks beat crisis fixes when protecting colonies.”
| Task | When | Why | Action |
|---|---|---|---|
| Add boxes | Spring buildup | Prevent overcrowding | Add one super as needed |
| Remove boxes | Before winter | Conserve heat, reduce pests | Consolidate frames, remove empties |
| Varroa check | Monthly during active season | Early detection | Perform sugar roll or alcohol wash |
| Feeding | Early spring / fall | Support brood and winter stores | Use internal feeders, provide water |
Conclusion
A clear blueprint makes fieldwork predictable and safer. Start with smart location choices, thoughtful orientation and spacing, sturdy stands, careful ground prep, and a complete Langstroth kit ready before bees arrive.
Keep handling steady and calm and open the hive from the back so inspections stay quick and flight paths remain clear. Choose local nucs or packages, prefer marked queens, and begin with two to three colonies to learn and recover from early losses.
Protect goals by keeping entrances clean, reducing openings during dearth, and installing a well-grounded fence if wildlife is a threat. Manage boxes by season, feed strategically, and confirm brood stages so the colony’s needs guide action.
When your yard is tidy, gear standardized, and records up to date, results compound. Apply these steps at home and adapt for microclimate and neighborhood needs. With this plan, your hive work will be safer, queens will be better supported, and honey stores will stay protected across the year.
Learn more practical advice and local examples at Hive House Apiaries.
FAQ
What are the essentials for a thriving bee colony on my property?
A thriving colony needs a proper hive body (Langstroth boxes and frames), a solid stand or pallet, a reliable water source, seasonal food management, and regular health checks for pests like Varroa. Place hives with good drainage and moderate afternoon shade in summer, and ensure easy, legal access for maintenance.
How do I know if this how-to guide is right for me?
This guide covers site selection, safety, hive orientation, basic equipment, and colony choices (nuc vs package). It’s practical for backyard beekeepers, community garden partners, and small-scale producers who want safe, compliant, and productive hives.
How can I tell if I’m allergic to bee stings before keeping bees?
If you’ve never been stung, get tested by an allergist or discuss history of severe reactions with your doctor. Carry an epinephrine auto‑injector if you have a known severe allergy and work with an experienced beekeeper during your first hives.
What protective gear should I use when working bees?
Wear a veil, gloves, and a bee suit or jacket. Use a smoker to calm bees and keep a hive tool, frames, and a feeder handy. Clean and fit PPE correctly to avoid gaps where bees can enter.
Where should I place hives on my property for best results?
Choose a spot with morning sun and afternoon shade, protection from strong winds, and no north-facing entrances if possible. Keep hives a reasonable distance from high-traffic areas, pools, and neighbors, and avoid locations prone to pesticide drift.
How much distance should I keep from neighbors and public areas?
A reasonable buffer depends on your lot size and local rules—typically at least 25–50 feet is preferred. Use fences, hedges, or signage to direct bee flight paths above human height and reduce encounters with neighbors and pets.
How should I orient hive entrances and space multiple hives?
Face hives slightly southeast or toward a safe flight corridor and vary entrance directions to reduce drifting. Space hives with at least a few feet between stands for working room and airflow; increase distance if you have many colonies.
What are low-cost stand options and leveling tips?
Pallets and simple single-stand frames work well for small apiaries. Add short legs or concrete blocks for height and a slight forward tilt to help drainage. Keep stands level and allow room to access each side of the hive.
How do I prepare the ground around hives to reduce weeds and improve drainage?
Use landscape fabric, cardboard, or newspaper under mulch to suppress weeds while allowing water to pass. On slopes, use simple retaining blocks to prevent erosion and keep groundcover in place around stands.
What core equipment do I need for a U.S. Langstroth hive?
Essentials include deep and medium boxes, 8‑ or 10‑frame option frames, bottom board, entrance reducer, mouse guard, inner cover, telescoping outer cover, hive tool, smoker, gloves, and a feeder for early season or dearths.
Should I start with a nuc or a package, and how many hives should I begin with?
A nuc gives faster colony buildup and established comb; a package can cost less but needs more time to build. Beginners often start with two or three colonies for resilience and learning without being overwhelmed.
What are the first steps to set up a hive and install bees?
Position the stand level and slightly tilted forward, assemble boxes and frames, set the entrance, and install a nuc or package following supplier instructions. Provide feed if needed, check weekly the first month, and minimize disturbance.
How do I prevent robbing and limit access when honey stores are exposed?
Reduce entrance size during risky periods, avoid leaving open syrup or honey in the yard, conduct inspections quickly, and work on calm, low-traffic days. Use robbing screens when necessary.
Do I need electric fencing or other protections against wildlife?
In bear country, an electric fence with proper charger, posts, insulators, and grounding is essential. For small predators and rodents, use mouse guards and elevate hives slightly to deter pests without blocking entrances.
How do I manage space and boxes through the seasons?
Add supers during nectar flows and remove or consolidate boxes in late season. Use follower boards or temporary inner covers to manage space when you don’t want full boxes. Monitor brood area and store honey responsibly.
What pest and disease threats should I prioritize?
Treat Varroa mites proactively with integrated pest management, monitor for small hive beetles and wax moths, and practice good sanitation. Regular inspections for eggs, larvae, and capped brood help detect queen or disease issues early.
When should I feed my bees and what feeding options work best?
Feed in early spring to support buildup and in late fall to ensure winter stores if natural forage is low. Use sugar syrup in spring and fondant or dry sugar in fall depending on temperature and colony needs.