Published August 27, 2026
Table of Contents
- What Wax Dipping Is
- Why It Works Better Than Surface Coating
- The Wax Mixture
- Equipment Needed
- Step-by-Step Process
- Temperature and Timing
- Disease Sterilization: A Real Secondary Benefit
- After Dipping: Painting and Use
- Safety Considerations
- Wax Dipping vs. Paint Alone
- Cost: DIY Tank vs. Paying for a Dipping Service
- Maintaining the Dip Tank Over Time
- How Often Does Equipment Need Redipping?
- Does Wood Type Matter?
- Common Mistakes
- FAQ
What Wax Dipping Is
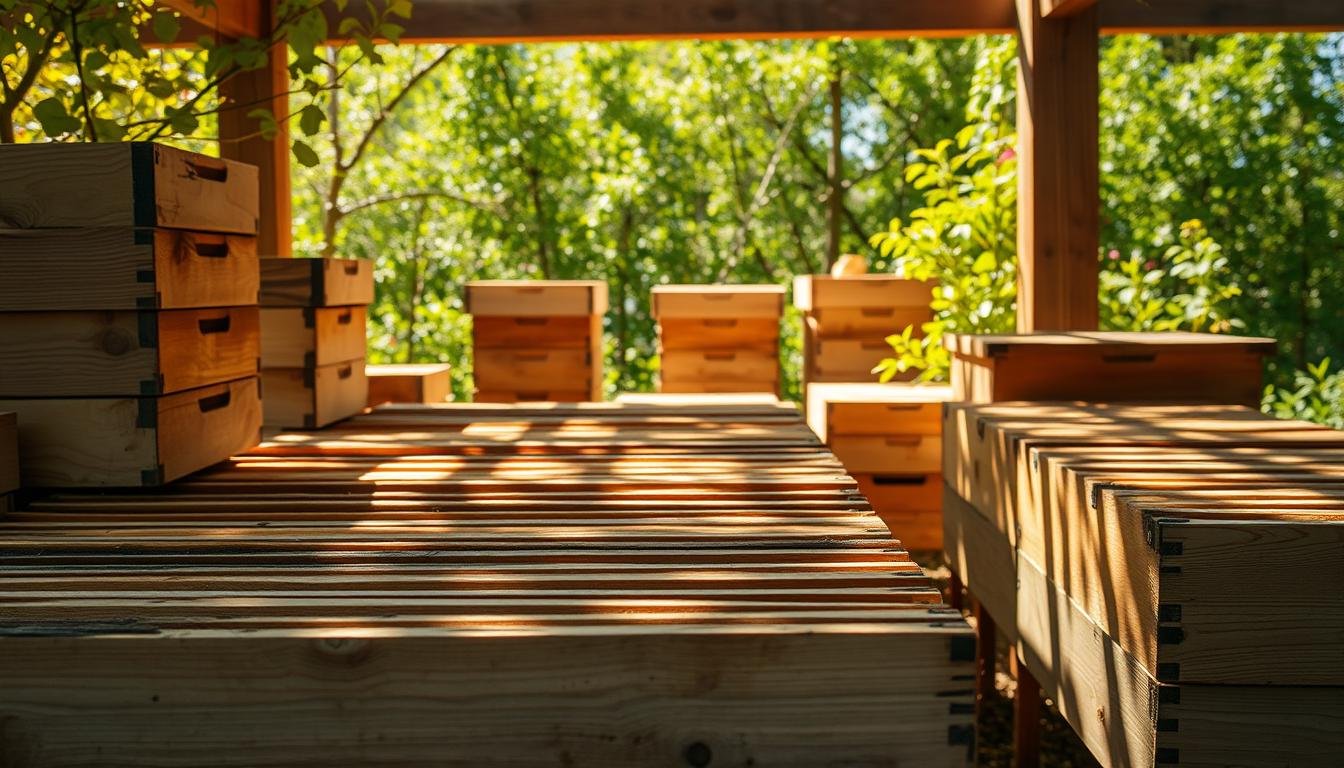
Wax dipping is a wood-preservation process for hive boxes and other wooden beekeeping equipment that involves fully submerging the wood in a tank of hot melted paraffin (often blended with rosin or microcrystalline wax) at a specific high temperature for several minutes, rather than simply brushing or spraying a coating onto the surface the way paint does. Properly dipped boxes are commonly reported to remain in good condition for decades of outdoor use, well beyond what paint alone typically achieves.
Why It Works Better Than Surface Coating
The mechanism behind wax dipping’s effectiveness is genuinely different from painting, not just a thicker version of the same idea. When wood is submerged in wax heated well above water’s boiling point, the moisture inside the wood’s fibers boils off as steam, and as it escapes, it creates a vacuum effect that pulls melted wax in to fill the space the moisture just vacated. Rather than sitting on top of the wood as a surface film (which paint does, and which can crack, chip, or peel over time as the wood beneath continues to expand and contract with weather), the wax becomes physically integrated into the wood’s fiber structure, throughout the piece rather than just at the surface. This is a fundamentally more durable form of protection against the moisture cycling that eventually breaks down untreated or merely painted wood exposed to weather year-round.
The Wax Mixture
Pure paraffin alone works, but many recipes blend it with other components for improved durability or cost efficiency. A common approach uses roughly a 2:1 ratio of paraffin to microcrystalline wax, while other widely used recipes combine roughly one-third pine rosin with two-thirds paraffin, or a three-way split of paraffin, rosin, and beeswax. Rosin in particular is often added because it increases the mixture’s hardness and stickiness once cooled, helping the finish resist chipping better than paraffin alone would.
Equipment Needed
- A dedicated dip tank, sized to fully submerge whatever equipment you’re treating (commercial units exist, though some beekeepers build a DIY version from a large metal container)
- A reliable heat source capable of maintaining the wax at a consistent high temperature, with temperature monitoring (a thermometer rated for the temperature range involved)
- Wax and any additional mixture components (rosin, microcrystalline wax, or beeswax depending on your chosen recipe)
- Heat-resistant gloves and protective clothing, given the temperatures and hot liquid wax involved
- A safe, ventilated outdoor space, well away from anything flammable
Step-by-Step Process
- Prepare the wax mixture in the dip tank according to your chosen recipe, and heat it to the target temperature (see below) before dipping anything.
- Remove any hardware that shouldn’t go through the process — plastic components, in particular, must never be dipped, since they can melt or warp at wax-dipping temperatures.
- Fully submerge the wooden piece in the hot wax, ensuring it’s completely covered.
- Hold it submerged for the appropriate duration, commonly around 10 minutes, allowing the moisture-boiling and wax-penetration process to complete throughout the wood.
- Remove and let excess wax drip off back into the tank while the piece is still hot.
- Set the dipped piece aside to cool briefly before handling or painting it further.
Temperature and Timing
The wax bath is typically maintained around 150-160°C (roughly 302-320°F) — genuinely hot, well above the boiling point of water, which is exactly what’s needed to drive the moisture-boiling mechanism the whole process depends on. Dipping at a lower temperature won’t achieve the same deep penetration, since the moisture inside the wood won’t boil off aggressively enough to pull wax in behind it. A typical full immersion runs around 10 minutes, though exact timing can vary somewhat by wood thickness and how much moisture the piece is holding beforehand — freshly built, greener wood may benefit from slightly longer treatment than well-seasoned, already-dry lumber.
Disease Sterilization: A Real Secondary Benefit
Beyond wood preservation, wax dipping at sufficiently high temperature (specifically around 160°C / 320°F) also functions as a genuine disease-sterilization step, since that temperature is hot enough to destroy American foulbrood spores — notoriously hardy spores that can otherwise remain viable in wood and equipment for decades. This makes wax dipping a legitimate option for salvaging used equipment with an uncertain or concerning disease history, rather than defaulting straight to burning it, provided the dip genuinely reaches and holds the sterilizing temperature throughout the process — a cooler dip intended purely for cosmetic or basic preservation purposes shouldn’t be assumed to also provide this disease-safety benefit. See the shook swarm method for another technique built around addressing AFB-contaminated equipment, in that case by separating bees from contaminated comb rather than treating the woodenware itself.
After Dipping: Painting and Use
Dipped equipment can typically be painted while the wood is still warm from the process, and many beekeepers do exactly this as part of the same work session rather than waiting for a separate day. Left unpainted, properly wax-dipped wood isn’t sticky or unpleasant to handle once cooled — it develops a water-repelling natural finish rather than a tacky wax coating. Equipment is generally usable again within a relatively short window after dipping, often cited as around 15 minutes once it’s cooled enough to handle safely.
Safety Considerations
Hot wax at dipping temperatures is a genuine burn and fire hazard, and this isn’t a process to improvise casually. Work outdoors in a well-ventilated area away from anything flammable, use proper heat-resistant protective gear, and never leave a heated wax tank unattended. As already noted, never dip plastic components — foundation, frames with plastic parts, or plastic feeders — since melting plastic in a shared wax tank creates both an equipment-ruining mess and a genuine safety hazard from the fumes and altered wax properties.
Wax Dipping vs. Paint Alone
| Wax Dipping | Paint Alone | |
|---|---|---|
| Protection mechanism | Wax penetrates into wood fibers throughout the piece | Surface coating only |
| Typical longevity | Often cited around several decades | Requires more frequent repainting/maintenance |
| Disease sterilization benefit | Yes, at sufficient temperature | No inherent sterilization effect |
| Equipment/setup needed | Dedicated tank, heat source, real safety precautions | Standard paint and brushes |
| Can combine both | Yes — paint after dipping while still warm | N/A |
For more on the painting side of hive exterior protection specifically, see hive painting tips for better insulation and metal roof vs. painted wood cover for related equipment-protection comparisons.
Cost: DIY Tank vs. Paying for a Dipping Service
Setting up a proper dip tank represents a real upfront investment — the tank itself, a reliable heat source capable of sustained high temperature, wax and mixture components, and the safety equipment involved — which is why many individual beekeepers with only a handful of hives choose to pay a local dipping service or supplier that offers this as a service rather than building their own setup. For a commercial operation or a beekeeper planning to treat a large volume of equipment across many seasons, building an in-house dip tank can pay for itself over time; for someone treating a small number of boxes occasionally, a paid dipping service is often the more practical choice.
Maintaining the Dip Tank Over Time
A dip tank used regularly needs some ongoing attention beyond just keeping it heated. Wax naturally accumulates debris and residue from repeated dipping sessions — bits of wood, dust, and other material that fall off during the process — and periodically straining or skimming the tank keeps the mixture from degrading in quality over successive uses. The wax mixture itself also gradually depletes as it’s absorbed into wood with each dipping session, so topping up with fresh wax between batches is a normal part of the process, not a sign anything went wrong. Keep a rough log of how many batches a given volume of wax has treated if you’re running a tank regularly, since that’s a more reliable guide to when a top-up is due than guessing by eye. Beekeepers running a dip tank regularly across many seasons generally find it worth periodically checking that the mixture ratio hasn’t drifted too far from the original recipe as fresh wax gets added on top of older, partially-used material, since a badly imbalanced mixture can affect both penetration quality and how brittle or flexible the finish ends up once cooled.
How Often Does Equipment Need Redipping?
Given the multi-decade longevity commonly reported for properly wax-dipped equipment, redipping isn’t something most beekeepers need to think about on any kind of regular schedule — it’s closer to a one-time treatment per piece of equipment than a recurring maintenance task like repainting. That said, equipment that’s shown visible wear, cracking, or water absorption after many years of hard outdoor use can reasonably be redipped rather than replaced outright, extending its service life further at a fraction of the cost of new woodenware. This makes wax dipping a genuinely cost-effective long-term equipment strategy compared to a cycle of frequent repainting and eventual full replacement. There’s no fixed rule for exactly when this makes sense — visual inspection for water absorption, softening, or surface degradation is the practical guide, not a calendar-based schedule.
Common Mistakes
| Mistake | Why it matters |
|---|---|
| Dipping plastic components | Plastic can melt or warp at wax-dipping temperatures, ruining both the component and contaminating the wax tank |
| Not reaching or maintaining sufficient temperature | Insufficient heat means the moisture-boiling/wax-penetration mechanism doesn’t work properly, and any disease-sterilization benefit isn’t achieved |
| Underestimating the fire and burn hazard | Hot wax at these temperatures is genuinely dangerous — treat the whole process with the same caution as any other hot-liquid hazard |
| Assuming any wax dip provides AFB sterilization | Only dips that reach and hold the specific sterilizing temperature (around 160°C/320°F) provide this benefit — a cooler cosmetic dip doesn’t |
Does Wood Type Matter?
Most hive woodenware is built from pine or cedar, and both take wax dipping well, though the two have somewhat different starting characteristics worth knowing. Cedar is naturally more rot- and insect-resistant on its own even before treatment, so wax dipping there is more about extending an already-decent baseline than rescuing a vulnerable material. Pine, more commonly used for cost reasons, benefits more dramatically from wax dipping specifically because it lacks cedar’s natural resistance and would otherwise be considerably more vulnerable to moisture damage and rot over years of outdoor exposure. Either way, the wood should be reasonably dry before dipping — very green, freshly cut lumber with high moisture content won’t take the treatment as effectively as properly seasoned wood, since there’s a practical limit to how much moisture a single dipping session can drive out and replace with wax. Letting new lumber season for a normal drying period before dipping, rather than treating it immediately after purchase, generally produces a better result than rushing straight from the lumber yard to the wax tank.
Sources
Temperature ranges, mixture ratios, and the moisture-displacement mechanism reflect published beekeeping equipment preservation guidance, including established beekeeping publication coverage of wood preservation methods and widely documented commercial wax-dipping service practices.
FAQ
How long do wax-dipped beehive boxes last?
Properly wax-dipped boxes are commonly reported to last several decades of outdoor use, considerably longer than untreated or simply painted wood.
Can I wax dip equipment that has plastic parts?
No — plastic components should never be dipped, since they can melt or warp at the high temperatures wax dipping requires. Remove plastic parts before dipping.
Does wax dipping kill American foulbrood spores?
Yes, if the dip reaches and holds a sufficiently high temperature (around 160°C/320°F) — this can make it a legitimate way to salvage equipment with a concerning disease history, though not every wax dip is done hot enough to guarantee this.
Can I paint a hive box after wax dipping it?
Yes — many beekeepers paint the equipment while it’s still warm from the dipping process, often in the same work session.