This introduction frames a clear, practical triage for U.S. beekeepers who face a hive that ignores feed over more than one day. The goal is diagnostic and actionable. You will learn how to spot the signs and run quick checks before deeper inspection.
What not taking feed looks like: little activity at the feeder, minimal consumption after a full day, and no traffic moving syrup into the hive. This pattern points to a set of likely causes, from temperature and formulation to equipment and internal brood issues.
Follow a logical order: quick external checks first, then targeted tests. Confirm stores and space, inspect feeder access, match sugar concentration to the day temperature, and consider queen or brood status before disturbing frames.
Use this framework with local timing and colony goals in mind. A precise ratio and proper gear help prevent wasted honey and support colony weight gains before cold weather. For expansion tips and related management steps see beekeeping expansion tips.
Key Takeaways
- Identify clear signs of low intake: no feeder traffic and little consumption.
- Run quick checks: stores, space, feeder seal, and access.
- Match concentration to temperature and seasonal goals.
- Sequence triage: external first, then targeted brood checks.
- Consider queen or internal brood issues when external fixes fail.
Understanding the problem: why bees won’t take sugar syrup
Begin with clear observations: record feeder activity and compare it to neighboring colonies. Note volumes added and remaining each day, log ambient temperature, and mark changes over days and weeks. This separates normal fluctuation from a real problem.
User intent and what “not taking syrup” really means
Define low intake as minimal movement at the feeder and little measurable reduction versus adjacent hives. If one hive shows a flat intake curve while others process feed overnight, suspect colony-level causes before swapping equipment.
Quick signs to note over days and weeks
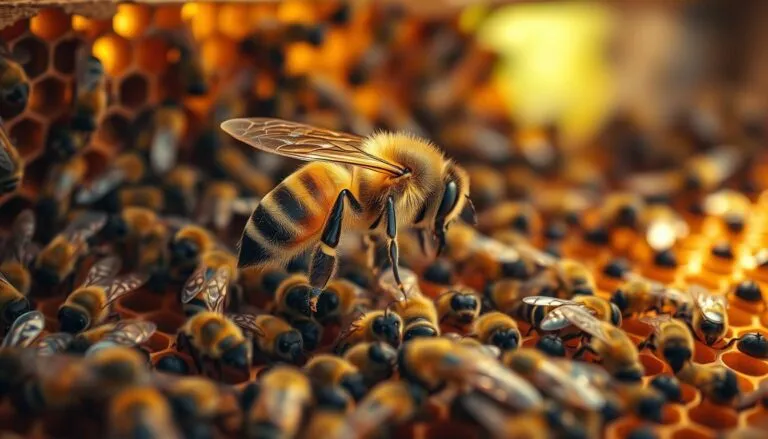
Watch for no rippling at the surface, absent fanning near the feeder, and reduced population on frames. Check brood pattern and colony morale with a quick peek: a queenright colony with a healthy brood pattern usually sustains steady processing.
- Checklist: compare colonies, log volumes, note temps, inspect brood and population.
- If only one hive refuses feed, prioritize brood and queen viability over feeder design.
- Reference your field notes and relevant feeding notes and posts to spot recurring seasonal patterns.
Rapid troubleshooting: what to check first in your hive and feeder
Start with a quick visual and weight check to spot obvious problems. Look for traffic at the entrance, note cluster position, and give the rear of the hive a gentle lift to judge stores.
Confirm stores, space, and brood pattern at a glance
Open only if needed. A solid brood pattern and adequate comb space usually mean the colony will process feed when access is correct.
Lift the back of the boxes to estimate weight. Light hives need feed; heavy ones may ignore added jars or trays.
Feeder placement, seal, and bee access issues
Ensure the feeder sits flush with the cover hole and has no air gaps. With a jar, check lid perforations; with rapid round feeders, confirm alignment and floats.
“A misaligned lid or draft can stop a lot of available feed from being reached.”
Weather window and time of day for offering feed
Offer feed in calm, mild weather and late in the day to reduce robbing. Reduce entrances and place feeders over the cluster or under an insulated cover.

- Track intake: mark a gallon line, log daily volumes, and note water-to-sugar ratios.
- Compare one hive: if only one shows low use over days or weeks, focus on brood and queen checks.
- Choose hardware: Ashforth-style or covered trays capture heat; fondant under an eke works for quick winter checks.
Temperature matters: when weather shuts down syrup intake
Cold nights quickly change colony behavior and can stop daytime syrup processing. Once nighttime lows fall below about 55°F (13°C), the colony’s ability to evaporate excess water declines sharply. That biological limit often ends normal 1:1 feeding.
Below 55°F/13°C: honey bees must fan to reduce water from liquid feed before storage. In cool conditions, fanning drops and dilute mixes add too much water for the short warm window in a day.
Adapt for fall and early winter by switching to thicker feeds—standard autumn ratios are 2:1 (about 1 kg sugar to 600 ml water) or 5:3 for easier mixing. When nights stay cold, consider fondant or dry white granulated sugar instead.
Improve uptake by placing internal feeders near the cluster and adding top insulation so hive heat helps processing. Offer feed during the warmest part of the day and expect slower intake at some times; don’t wait too long to pivot to solid options.
For practical tips on feeding in freezing conditions, see feeding in freezing weather.
Choosing the right mix: 2:1 sugar syrup, 5:3, or sugar water alternatives
Pick a ration that reduces the colony’s work of drying and stores well for cool nights. In cool seasons, thicker mixes cut the time needed to evaporate water and make storage easier.
Autumn ratios explained: 2:1 vs. 5:3 and dilution effects
2:1 is two parts sugar to one part water. It yields a dense feed that needs less fanning before storage.
5:3 gives almost the same final concentration but often dissolves quicker. Many U.S. beekeepers find 5:3 a practical solution when mixing large batches.
- When to avoid thin mixes: 1:1 is great for spring stimulation but slows uptake in cool weather because there is too much water to remove.
- Pivot point: when nights stay below about 55°F/13°C, switch to fondant or dry white granulated sugar to remove evaporation as a requirement.
- Preparation and safety: dissolve sugar fully, avoid overheating, use clean containers, and mark gallon volumes to track feeding goals.
- Handling tip: warm thick mixes slightly before offering so the colony consumes during warmer hours.

For a quick visual on brood condition and related feeding decisions, consult a note on brood frame morphology.
Queen status and colony condition: a hidden reason they won’t feed
When a hive ignores offered feed, check the queen and brood first. Field experience shows a dud or off-lay queen is a common cause of low intake. A colony can be queenright in name but not viable in practice.
Define a viable queen: steady eggs, correct brood stages, and a calm, consistent temperament. Without that, worker interest in bringing in extra stores often falls off.
If intake stays low after fixing feeders and ratios, inspect the brood area during a warm window. Look for irregular patches of brood, mixed stages, or many empty cells—these point to laying problems.
Behavioral cues help diagnose: quieter colonies, fewer workers at the feeder, and patchy comb signal trouble. Colonies allocate feed to support brood; weak brood reduces motivation to collect or process extra food.
- Confirm brood pattern; if poor, consider requeening, combining colonies, or adding frames of emerging brood.
- Minimize disruption: pick a warm day, open briefly, and act quickly to protect larvae.
- For routine timing and steps, integrate this check into your seasonal checks.
Feeders, jars, and placement: getting practical with equipment
Match feeder type to the job: choose a design that fits colony size, season, and how quickly you need to move feed. Large top feeders and rapid round styles hold more liquid and sit over the cluster. A simple jar can work for one hive but needs precise holes and careful placement to avoid drips.
Top feeders, rapid round, and jar feeders: pros, cons, and heat
Ashforth-style top feeders gain warmth from the cluster and extend feeding into cooler weather. Rapid round feeders must align with the cover-board hole to function properly. Jar feeders are low-cost but require correct hole size and positioning.
Reducing entrances, controlling air flow, and preventing robbing
Reduce openings to preserve heat and cut robbing risk. Maintain enough ventilation to avoid moisture build-up, but avoid drafts that chill the cluster or cool the feed.
Working with boxes, crown boards, and ekes for quick winter checks
Use shallow ekes for fondant on top of frames and keep crown boards snug for consistent access. Lift the roof and crown board briefly for fast checks to avoid chilling the cluster. Clean mesh floors without removing brood boxes to keep operations efficient.
- Common failure points: misaligned ports, missing floats, poor seals, and lack of bee ladders can block access.
- Insulate the roof and consider an external wrap to help processing in marginal winter conditions.
- Rinse equipment, discard fermented feed, and clean floors to support steady intake.
For a focused note on placement with entrance-style feeders see entrance feeder placement.
Seasonal timing: spring build-up, summer dearth, fall provisioning, winter survival
Plan feeding around the local calendar so each season supports colony goals. In spring, offer thinner mixes to back brood expansion while natural nectar and pollen are increasing.
Spring focuses on growth: light feed encourages comb building and early honey stores. Keep open space for incoming honey so momentum continues.
Summer dearths need targeted support. Track bloom and offer feed only when flows lag; this avoids wasting feed when natural sources return.
Fall provisioning calls for thicker rations or fondant to bulk up stores before the year’s end. Lift hives periodically to judge weight and adjust amounts.
Winter survival depends on reserves and cluster access. Feed in late afternoon during warm spells to reduce robbing and help bees move stores into the cluster.
“Match feeding to bloom and stores — timing beats volume when protecting hive health.”
- Track local bloom and pollen flows; reduce feed as major nectar begins.
- Ensure space for comb and honey so colonies do not stall in spring.
- Account for regional variation; two hives can need different plans.
For deeper notes on aligning feeding with forage, see foraging for nectar.
Outside feeding stations: when they help and when they harm
Outdoor feeders can form clear foraging corridors that run through yards and past neighbors. These high-traffic lines make service easier but raise real risks for local people and wildlife.
Open-feeding means placing sugar water where many colonies can access it. That draws workers from multiple hives and creates intense flight paths.
- Pros: quick boost of energy, simple to set up, and a short-term solution during emergencies.
- Cons: spreads pathogens between colonies, invites wasps and ants, and may trigger robbing or neighbor complaints.
- Harm-reduction: place feeders away from property lines, refill at sunrise, remove at night, and prefer in-hive feeders when possible.
- Manage competition: reduce hive entrances, use screened feeders, and monitor for pests daily.
“Open feeding can amplify disease transmission if multiple colonies visit the same source.”
Monitor health closely and limit open feeding to short, planned use. Communicate with nearby keepers and link to useful feeding resources before you start.
Conclusion
Start with environment and access: secure insulation, align the feeder, and control air so the cluster can work. Match feed thickness to the season and reduce water during cool times.
Measure and iterate: log gallons, note boxes and space, and compare hives so one hive that lags is obvious. If intake stays low after these fixes, inspect brood and queen viability next.
When problems persist, shift to fondant or thick mixes, refine feeder choice, and schedule a warm-window brood check. With this playbook a beekeeper protects honey and stores, supports brood, and readies colonies for spring.
FAQ
What does it mean when my hive refuses syrup?
A refusal can mean several things: full stores inside the hive, a weak or failing queen, poor brood rearing, wrong feeder setup, or unsuitable weather. Check honey frames, brood pattern, and space before assuming hunger. Often colonies with enough natural nectar or pollen will ignore added liquid feed.
How can I quickly tell if the colony needs feeding over days or weeks?
Inspect frames for capped honey and open stores. Look at brood coverage and bee population: steady or growing clusters usually indicate sufficient food. Note reduced foraging and a shrinking cluster as signs of declining stores. Keep short inspections every 7–14 days during critical seasons.
What should I check first when syrup remains untouched?
Confirm feeder access and proper placement, ensure seals prevent leakage, and verify the mix isn’t fermenting. Check hive space—crowded bees may ignore feeders. Also inspect for signs of disease or queen problems that lower appetite.
How does feeder placement affect acceptance?
Place feeders where bees find them easily: directly above the brood box or at the entrance depending on feeder type. Avoid positions that require strong flights or expose syrup to cold. Secure lids and reduce gaps so wasps and ants can’t access the supply instead of your colony.
Does time of day or weather change feeding success?
Yes. Offer liquid feed during warm, calm hours when foragers are active and temperatures exceed about 55°F (13°C). Cold, rainy, or windy periods discourage intake and raise the risk of fermented syrup and robbing.
Why is temperature important for syrup acceptance?
Bees slow metabolism below roughly 55°F (13°C) and avoid dilute solutions that cost more energy to process than they deliver. Warm conditions help bees evaporate excess water from the syrup and carry it into combs.
How should I handle late fall and winter feeding in the United States?
In late fall switch to thicker mixtures or solid feeds like fondant or dry sugar. Aim to finish liquid feeding well before sustained cold. Use insulation, reduce entrance size, and position feed so clustered bees can reach stores without breaking cluster warmth.
Which syrup mix should I use and when?
Use a 2:1 ratio (two parts granulated sugar to one part water) for autumn and winter stores; use 1:1 for spring build-up and stimulation. For intermediate conditions, a 5:3 mix can work. Thicker syrups suit cold-weather storage; dilute syrups suit quick consumption during nectar flows.
When is it better to offer fondant or dry white granulated sugar?
Offer fondant or dry sugar when temperatures drop, when liquid feeding risks chilling, or when bees show little interest in liquid options. Solid feed reduces fermentation and is accessible without forcing bees to break cluster.
Can a poor queen or colony condition cause refusal?
Yes. A failing queen or low brood rearing reduces worker urgency to collect and store food. Inspect for consistent egg-laying and healthy brood; replace or requeen if you find patchy brood patterns or signs of queen loss.
Which feeder types work best in cold weather?
Top feeders and inner-cover feeders insulated against cold tend to perform better. Jar feeders can be useful but may freeze or drip. Choose feeders that keep syrup warm, minimize evaporation, and sit where the cluster can access them without excessive travel.
How do I reduce robbing and airflow problems around feeders?
Reduce entrance size, use entrance reducers, and place feeders inside or on top of hives rather than exposed. Maintain tight covers and seal cracks. Feed during calm, cool hours and remove open feeders quickly if robbing starts.
How should I use boxes, crown boards, and ekes for winter checks?
Use crown boards and ekes to create a small gap for limited inspections and add insulation. Lift lightly to check cluster location and top-up solid feed if needed. Avoid frequent, deep inspections that force the cluster to break.
How do I match feeding to seasonal nectar flows and bloom?
Offer stimulation feed during early spring before major blooms to boost population. Reduce or stop feeding during heavy nectar flows to avoid robbing and honey contamination. In late summer and fall focus on storage for winter with thicker feeds or solids.
When are outside feeding stations helpful or harmful?
Stations help in emergencies where many colonies need quick access, but they can attract wasps, increase disease spread, and upset neighbors. If you use them, place stations away from hives, rotate feeders, and keep them clean to lower risk.
What best practices reduce disease risk with open feeding?
Clean feeders frequently, avoid sharing syrup among unfamiliar colonies, dispose of spoiled mixes, and use screened or closed systems when possible. Close-feed quickly when weather or robbing becomes an issue.