Managing brood boxes well keeps a colony healthy and productive. Good timing for frame changes helps prevent disease and lowers chemical buildup in wax. This practice is essential for beekeepers who want strong bees and clean comb.
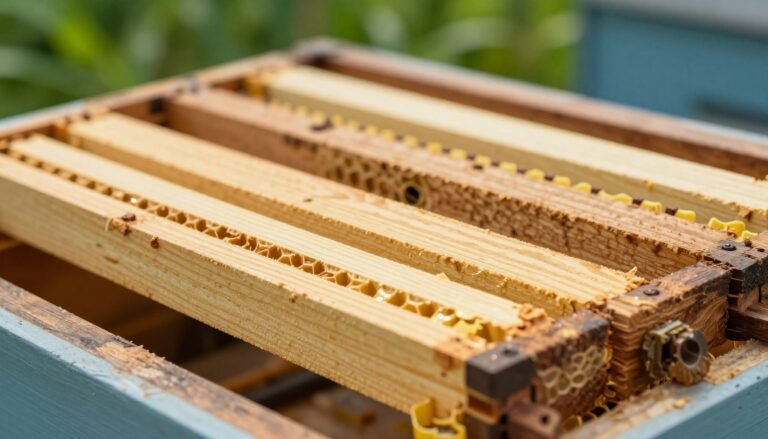
Seasonal checks let you spot dark, older comb and decide which frame to replace. A simple rotation method moves outer comb inward, creating fresh space near the brood nest. Do this in stages so the queen can keep laying without major disruption.
Many professional beekeepers retire old comb after a few years, or when frames show large drone cells or holes. For a practical read on reusing brood gear, see this guide on reusing brood frames.
Key Takeaways
- Inspect annually: check brood boxes each year for dark, worn comb.
- Rotate gradually: move outer comb inward in stages to protect the brood nest.
- Replace old comb: retire frames that are several years old or damaged.
- Watch for residues: old wax can hold chemicals and pests.
- Plan by season: spring and summer are best for staged changes.
The Importance of Frame Management
Smart management of comb and frame gear makes a big difference in colony vitality.
Regular inspections keep the brood nest clear and give the queen room for eggs. Careful handling limits wax buildup and preserves foundation for brood and honey storage.
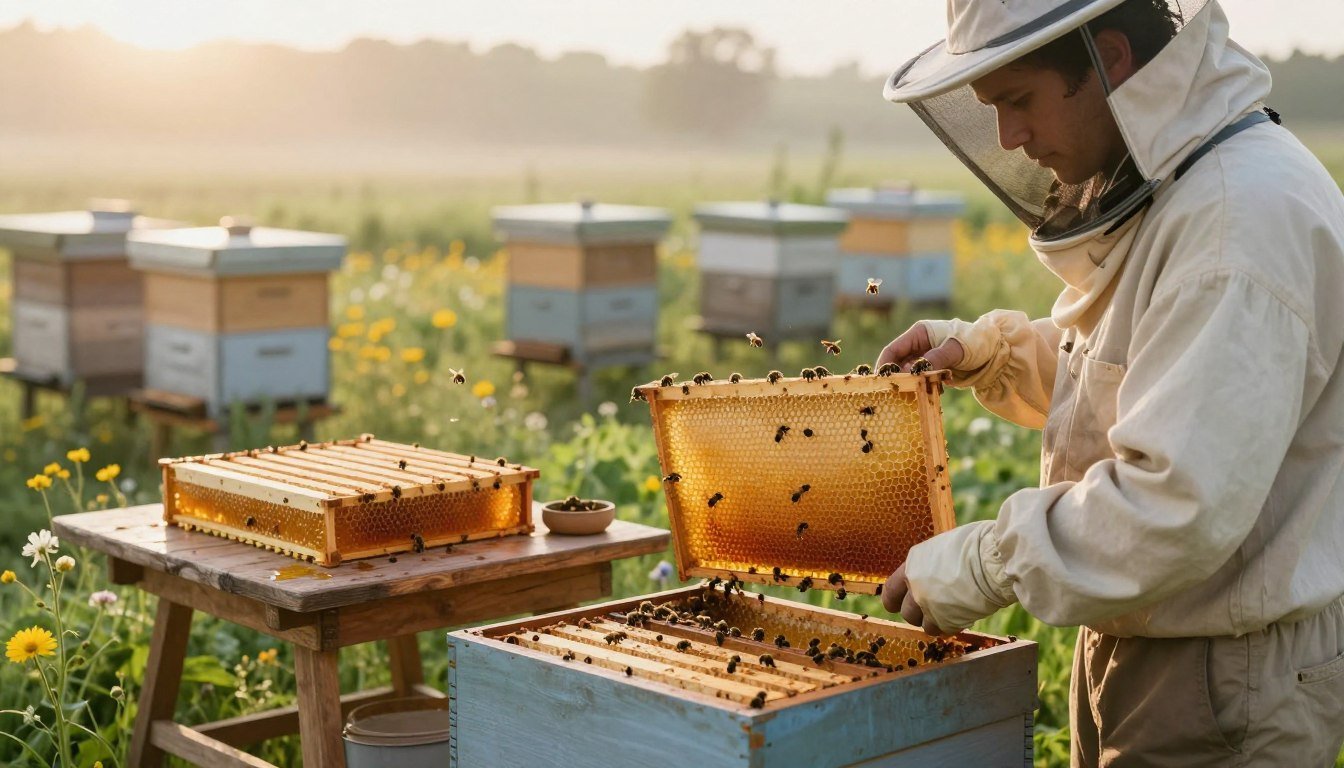
Experienced beekeepers spend time checking hives each spring and through the season. A simple, staged method helps maintain space and reduces swarm pressure.
“Inspect early, act gently, and your colony will repay careful gear care with steady flow.”
Use an inspection schedule that flags old comb and damaged boxes. For guidance on cleaning and inspection timing, see this inspection schedule. For advice about discarding contaminated comb, consult this discard comb guidance.
| Frame Age | Signs | Recommended Action | Best Season |
|---|---|---|---|
| 1 year | Light comb, active brood | Keep in use | Spring |
| 2–4 years | Darker wax, some repairs | Inspect, rotate inward | Spring/Summer |
| 5+ years | Heavy residue, holes | Replace or recycle wax | Spring |
When to Rotate Honey Frames Out of Service
Old comb age and visible wear often guide the decision to retire a frame. Dark, thin comb or brittle wax signals that the foundation no longer supports brood well.
Inspect the brood box each season for uneven brood patterns and queen-laying gaps. Move suspect frames inward and replace a portion each year rather than swapping everything at once. This staged approach protects the brood nest and keeps bees steady during changes.
Many beekeepers follow a set schedule and retire one or two frames per box every year. That practice lowers chemical buildup and reduces disease risk. Check for large drone cells, holes, or heavy residue as clear signs the frame needs replacement.

Keep records of frame age and condition. For guidance on cleaning and reusing foundation after colony loss, see clean plastic foundation. Regular checks make the hive healthier and extend productive years for your equipment.
“Inspect small, act regularly, and your colony will reward careful gear care.”
Identifying Signs of Disease and Contamination
Small changes in brood pattern or unusual larval remains can point toward a serious pathogen. Early detection protects neighboring hives and preserves equipment.
American Foulbrood Risks
American Foulbrood (AFB) is caused by Paenibacillus larvae and destroys brood quickly. AFB spores remain viable for decades, so any sign demands swift action.
- Infected comb must be removed from brood boxes and destroyed per local rules.
- Burning or approved disposal stops spread; contaminated gear can reintroduce spores years later.
Detecting Pathogens
Look for brown, ropey larvae and sunken, perforated cappings during inspections. These are classic AFB indicators.
Wax can also hold pesticide and miticide residues. Over the years contamination may weaken the queen and lower colony productivity.
“Detect early, remove affected gear, and follow disposal rules to protect your apiary.”
For safe treatment guidance and legal options, consult local resources such as treatment options for pests and practical cleaning advice like encouraging bees to clean old comb.
Assessing Physical Damage to Comb
A quick structural check can reveal warped comb and broken slats before they harm brood production.
Structural Integrity Issues
Start each inspection by pressing gently along the top bar and checking for sag, cracks, or loose nails. Warped or split frames reduce usable space and force the colony to expend energy on repair.
Frames damaged by wax moth larvae or small hive beetles should be removed from brood boxes promptly. Removing affected gear stops pests from spreading and helps protect the queen and brood.
Broken comb often leads to excess drone comb. This wastes colony resources and lowers honey stores during peak flow.
- Inspect for soft wax, holes, and collapsed cells.
- Log any damaged frame and its year of service.
- Repair or replace the frame using trusted guidance like repair damaged hive boxes.

“A small defect found early saves the colony months of stress.”
| Issue | Sign | Action |
|---|---|---|
| Warped frame | Sagging comb, uneven brood | Rotate inward and monitor |
| Pest damage | Webbing, beetle larvae | Remove from brood boxes and clean |
| Broken top bar | Loose comb, collapsed cells | Replace or rebuild frame |
The Impact of Old Comb on Colony Health
Aging comb can subtly change larval development, producing smaller worker bees over time.
Old comb often becomes a reservoir for pathogens and debris. Shed cocoons and built-up propolis reduce each cell’s internal volume. Over several years, that shrinkage can limit how well the queen fills the brood nest.
Less space in cells can mean smaller larvae and weaker adult bees. Subtle pathogens that linger in old brood may raise risks like Chalkbrood and lower overall hive vigor.
Keeping a record of frame age and condition helps. Replace a small number of tired frames each spring to keep brood boxes productive and the colony strong.
“Replace worn gear early; a small seasonal change protects long-term colony performance.”
- Benefit: fresher comb supports larger, healthier worker bees.
- Risk: old wax may harbor residues that stress the queen and brood.
| Issue | Sign | Recommended action |
|---|---|---|
| Old comb buildup | Dark cells, reduced cell volume | Retire some frames each year |
| Low-grade pathogens | Poor brood pattern, Chalkbrood signs | Inspect brood boxes and replace comb |
| Residue accumulation | Sticky wax, odd smells | Clean or recycle wax; limit reuse |
For tips about cleaning and reuse after colony loss, read this guide on reusing frames after a colony loss.
Strategies for Effective Frame Rotation
Aim for a conservative frame turnover that supports strong brood patterns without shocking the colony. A 3–5 year rotation cycle gives a clear goal for replacing old frames and limiting wax residue.
Spring Rotation Techniques
Spring is prime time for staged changes. Move older comb to the box edges so bees finish any remaining brood before removal.
Replace at least two frames per year. This keeps the colony busy and lowers swarm risk during peak flow.
Seasonal Planning
Plan replacements around nectar flows and inspections. Staggering work across several visits prevents crowded brood nests and lost productivity.
Moving Frames Above the Excluder
Placing a tired frame above the queen excluder ensures any old brood emerges safely. After emergence, reclaim that comb for cleaning or recycling.
- Cycle: 3–5 years for brood frames and foundation.
- Spring method: move old comb to outer positions, then remove after brood clears.
- Excluder use: shift old brood above the queen excluder before permanent removal.
“Small, regular changes keep hives productive and reduce long-term risks.”

For extra guidance on spotting pre-swarm signals and timing your work, see this pre-swarm checks.
Utilizing Solar Wax Melters for Frame Cleaning
Solar wax melters offer a low-cost way to clean and sanitize wooden frame gear using only sunlight.
A melter that reaches about 100°C melts wax and propolis, leaving the wood clean. High heat helps kill many common pests and most eggs that threaten brood and bee health.
After melting, many beekeepers rinse or soak the wood in a weak bleach mix — about 1/2 cup bleach in a bucket of water — for extra sanitation. This step adds protection against wax moth eggs and small hive beetle eggs.
Investing a little time with this method saves money and extends the life of old frames and comb. Clean equipment supports strong brood, healthier bee colonies, and better honey stores.
“Use heat first, then a gentle sanitizer, and your gear will be safe for the next season.”
- Benefit: reclaims wax and reduces contamination.
- Safety: heat plus a mild bleach rinse targets pests and residues.
- Practical tip: after treatment, inspect wood for cracks before reuse.
For step-by-step cleaning after a dead colony, see this guide on how to clean a deadout before.
Managing Brood Frames in Different Hive Types
A horizontal layout changes how you balance brood and storage; proper frame placement keeps the colony calm.
Keep the brood nest compact. In horizontal hives the queen prefers a steady, central area for laying. Move comb that holds only stores toward the box edges so the queen and nurse bees have uninterrupted space for brood.
Use a clear pattern: brood in the center, stores outside. This helps maintain strong brood boxes and reduces comb mixing during peak flow.
Horizontal Hive Considerations
Queen movement matters. If using a queen excluder, make sure bees can travel freely between brood and storage areas. Restricted traffic raises stress and can slow foraging.
- Place comb with active brood near the middle of the box.
- Shift surplus stores toward the ends so the queen keeps laying without interruption.
- Watch bee activity daily during nectar flows and adjust placement as needed.
“A tidy brood nest in a horizontal hive makes for steady laying and better stores.”

For practical tips on managing brood in non‑standard designs, read how experienced keepers manage the frames in a top-bar.
Balancing Costs and Hive Productivity
Replacing old gear often feels costly, but cheap short-term fixes can harm your colony long-term.
Investing in new frames reduces disease risk and keeps brood boxes productive. Clean foundation helps the queen lay in healthy cells and gives bees space for stores.
Maintain a simple budget that tracks replacement expense against yield. Small, regular purchases can raise honey and brood output over a few seasons.
Proactive culling of worn frame materials is an investment. Retiring a couple of tired frames each spring helps limit residues and pest buildup.

“A modest, steady spend on quality gear protects colonies and improves long‑term returns.”
| Cost Item | Benefit | When to Act |
|---|---|---|
| New wooden frames | Stable comb, lower residue | Spring replacement |
| Reconditioned frame parts | Lower price, moderate risk | Use sparingly; monitor |
| Full foundation swap | Improved brood quality | Every 3–5 years |
For practical guidance on discarding worn gear, see when should I throw away my bee. A steady rotation schedule keeps brood boxes healthy and your hive productive for years.
Best Practices for Biosecurity
Biosecurity begins with clear rules about gear movement and sanitation at every apiary gate. Treat each hive visit as a potential risk and use basic steps that protect all colonies.
Always inspect the brood nest for odd brood patterns, ropey larvae, or unusual smells. Early checks make it easier for a beekeeper to act before a problem spreads.
Limit sharing tools and avoid swapping old frames between boxes without cleaning. Clean wood and melted wax reduce pesticide buildup and lower pathogen load.
- Handle equipment carefully: move a frame only with clean gloves and separate tools per hive when possible.
- Sanitize basics: heat, mild bleach rinse, or solar melters are effective for used wood and wax.
- Log observations: record any suspect eggs, pest signs, or unusual brood so you can track trends by season and weather.
“Small, consistent biosecurity steps protect many hives and preserve long‑term productivity.”

| Action | Benefit | When |
|---|---|---|
| Separate tools | Limits spread | Every visit |
| Clean old frames | Reduces residues | Spring checks |
| Record logs | Tracks outbreaks | All season |
Conclusion
Small, regular swaps of worn comb help keep brood strong and reduce hidden contamination.
Rotating gear on a steady schedule protects colony health and cuts buildup of pathogens and residues. A planned program of gradual change lets the queen keep laying while you remove tired material. Aim to retire a few pieces each season and log age and condition for every box.
Use practical tools like solar wax melters and careful cleaning to reclaim wax and sanitize wood. For field tips on extraction and handling that can help your routine, see this extraction guide. Proactive management saves money and builds a resilient apiary that thrives for years.