Starting a new colony alone is doable. With careful prep and the right method, a single beekeeper can add a healthy group to their hive. A standard bundle often holds about 10,000 buzzing insects inside a screened wooden box, so planning matters.
Gather simple tools: a spray bottle with sugar water, 1:1 syrup for feeding, a hive tool, and the queen cage. Prepare the hive by removing center frames to make room and set the queen cage between frames with the candy end accessible. Use calm, steady motions to reduce stress and let workers orient to their new home.
Follow proven steps and schedule a gentle check after several days. For a gentler release method and step-by-step guidance, see this gentler installation guide and practical tips on beehive setup.
Key Takeaways
- Prepare the hive by clearing center frames and staging tools.
- Use sugar spray and 1:1 syrup to calm and feed the colony.
- Handle the queen cage gently and position candy end accessibly.
- Choose a slow, gentle release to lower stress and swarm risk.
- Plan a calm checkup after several days to confirm progress.
Understanding the Package Bee Installation Process
Understanding how the bees organize around their queen helps you plan the move with confidence.
The shipment arrives as a wooden box with two screened sides that protects the colony during transport. This container keeps workers together and gives the queen a secure center point.
Worker insects naturally remain close to their queen. That devotion simplifies transfer because moving the queen into the new hive encourages most of the colony to follow.
For a new hive, start with one box of frames. Letting the colony work within that single box helps them build comb and manage space without confusion.
Quick checklist:
- Recognize the shipment as a living unit centered on the queen.
- Place the queen where you want the colony to settle.
- Provide one box of frames for the new hive to grow into.
For step-by-step guidance on moving a colony into its first home, consult this installation and nuc guide.
Essential Tools for Installing Package Bees Without a Helper
A calm, well-prepared approach with essential gear keeps the colony steady during the move.
Protective Gear
Wear a veil and gloves to reduce sting risk while you work. A light jacket or suit helps you move confidently and keep the cover clear.
Sugar Syrup and Feeders
Use a spray bottle filled with a calming mix: two parts water to one part sugar, boiled and cooled. This spray soothes and hydrates the bees during transfer.
For feeder syrup, mix sugar and water at a 1:1 ratio. Provide a simple feeder so the colony has energy to draw comb and tend brood.
- Keep a hive tool to open the box and set the queen cage between frames.
- Handle the queen cage with care; ensure the candy plug is accessible so workers can release the queen on their schedule.
- Place feeders at the top or bottom depending on weather and hive setup.
“Good preparation is the best protection for both you and the colony.”

For practical quarantine and setup tips, see this quarantine guide and this installing package bees reference.
Preparing Your Hive Site for Success
Choose a sunny, elevated spot that gives your new colony a clear flight path each morning.
Make sure the hive sits on a stand to keep insects and predators like lizards, ants, and slugs away from the entrance. Elevation also prevents rising damp and helps the colony feel secure, like wild colonies that rarely nest on the ground.
Pick a location with morning sun and part-shade in the afternoon. In the southern hemisphere aim east or north-facing placement so the bees orient well at first light.
Stability matters. Secure the stand so it cannot wobble in wind. Prepare frames and the hive body before the colony arrives to allow a quick, calm transfer on the day you add the new group.
“A well-chosen site reduces stress and lowers the chance of early swarm behavior.”
| Feature | Why it matters | Action |
|---|---|---|
| Elevation | Keeps colony off the ground and deters predators | Use a sturdy stand, 12–24 inches high |
| Sun/Shade | Aids orientation and temperature control | Place for morning sun, afternoon shade |
| Stability | Prevents disturbance and reduces swarm risk | Level the base and fasten the hive body |
| Prep frames | Speeds settling and reduces stress on bees | Install frames and feeders before arrival |
For detailed steps on how to prepare your yard and gear, see this guide to prepare for installing my bees and a practical apiary setup reference.
Inspecting Your Bees Upon Arrival
Begin by checking temperature and the condition of the box before opening the cage. Overheating above 100°F kills workers and the queen, while chilling below 55°F can damage the queen’s sperm stores. Make sure the delivery sat in a warm, ventilated spot during transit.

Temperature Control and Safety
Keep the bees package in a secure, warm location. Wait to install the colony until ambient temperatures reach at least 65°F.
It is normal to see about one inch of dead bees at the bottom of a box from commercial shipping. If you find far more dead insects, contact your supplier immediately and document the condition.
Hydration matters. A light mist of sugar syrup or sugar water calms and helps rehydrate workers before transfer.
“Temperature and quick inspection protect the queen and the future colony.”
- Scan the exterior for damage and crushed screen areas.
- Verify the queen cage is intact and centered in the box.
- Keep the bees warm, then proceed when it’s at least 65°F.
For further disease checks and arrival protocols, see this guide to inspect purchased nucs for disease risk.
Executing the Installation Method
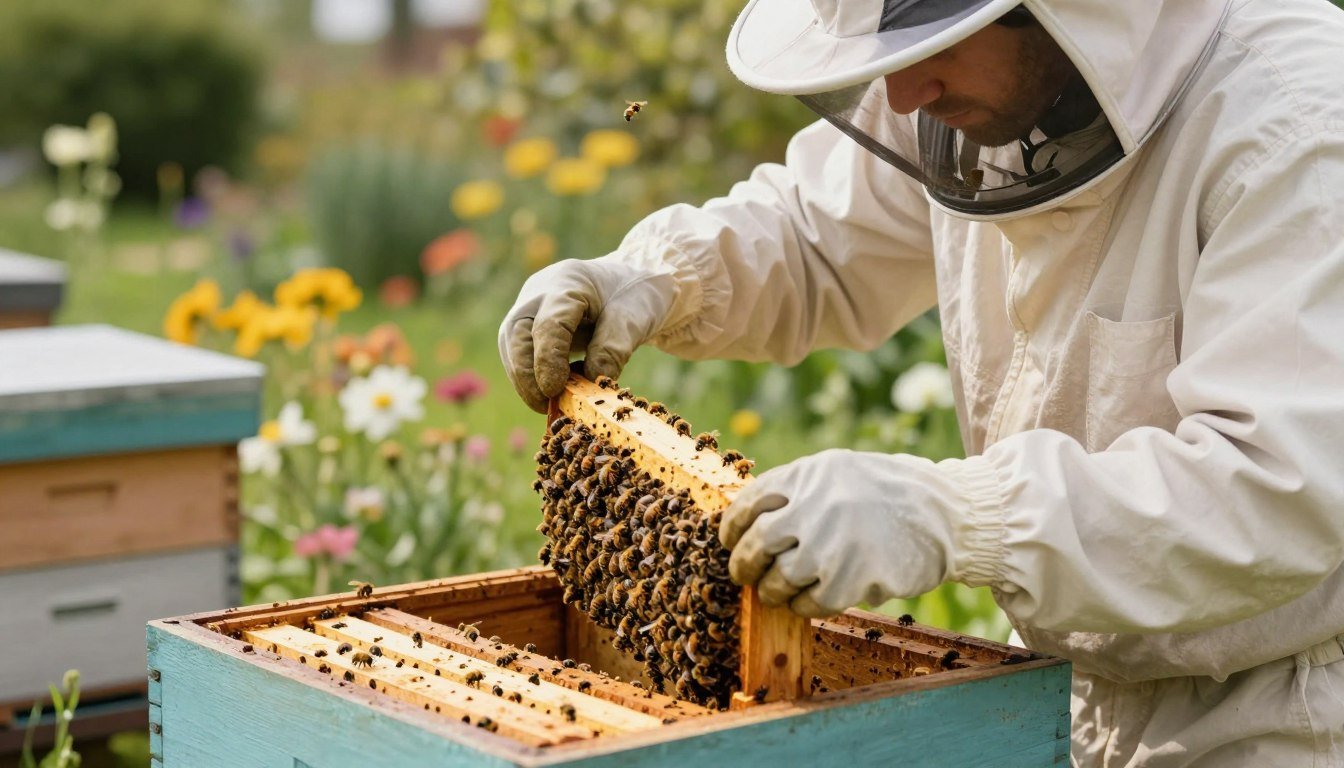
Before handling the box, clear three or four center frames to make a welcoming cavity. This gives the incoming colony space to settle and build comb near the brood.
Removing Frames for Space
Use your hive tool to lift out three or four frames from the center of the brood chamber. Set them aside in order so you can return them if needed.
Clearing central frames reduces crowding and makes room for the new group to move in freely.
Placing the Package
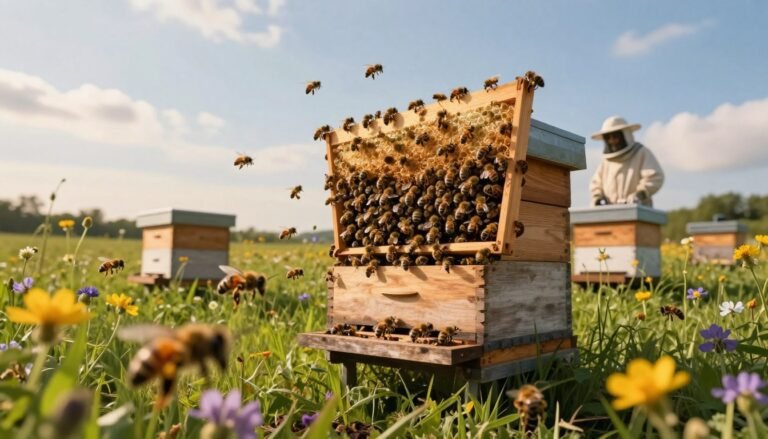
Firmly knock the box on the ground once to drop most workers to the bottom. Then, quickly invert and shake bees into the hive body over the cleared space.
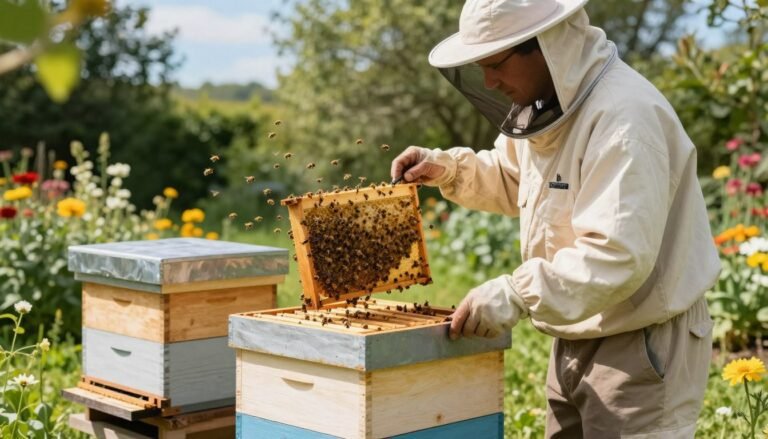
Secure the queen cage between two center frames with the candy end facing up. This allows the colony to release the queen on their schedule.
Minimizing Bee Stress
Cover the entrance with a screen for the first day or two to keep orienting workers close while guards form. Provide light syrup in a feeder near the top to support brood rearing.
“A calm, steady transfer lowers agitation and reduces the chance of early swarm behavior.”
| Step | Why it matters | Quick tip |
|---|---|---|
| Remove frames | Creates space for comb and movement | Keep frames in order at your side |
| Shake bees | Moves workers into the hive quickly | Tap the box firmly, then shake |
| Place queen cage | Controls queen release and protects her | Candy end up between center frames |
| Screen entrance | Helps settling and lowers swarm risk | Leave for 24–48 hours |
Managing the Queen Release
Control of the queen’s release sets the tone for the new colony’s acceptance.

Remove the cork from the candy end of the queen cage before you secure it. This creates a slow, edible path so workers can eat through the candy and free the queen on their schedule.
Place the queen cage candy-side up between two center frames. That position keeps the screen accessible so workers can feed and groom her through the mesh.
The time-release method usually takes one to two days. During this period the colony learns the queen’s scent. Slow release lowers the chance of rejection and helps brood and comb development.
- Check after 48 hours to confirm the candy was eaten and the queen is free.
- If the queen remains caged, inspect the cage end and remove any leftover cork or hardened candy.
- Keep light sugar feed available at the top to support the colony while they adjust.
“A patient, timed release gives the hive the best chance to accept its leader.”
| Action | Why it matters | When |
|---|---|---|
| Remove cork | Allows gradual release through candy | Before placing cage |
| Candy-side up between frames | Screen access for feeding and scent transfer | Immediately on placement |
| Inspect after two days | Confirm queen freedom and colony response | 24–48 hours |
For choosing the best queen cage options, review this guide to the best queen cages.
Monitoring Hive Progress and Troubleshooting
Track hive behavior closely in the first two weeks to catch small problems early.
Inspect the colony five days after installing the package to confirm the queen has been released from her queen cage and is alive.
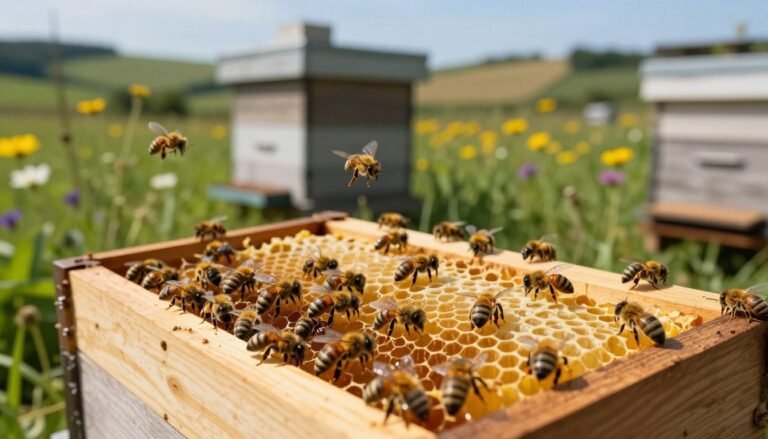
Perform a second check five days later. Look for tiny, rice-like eggs on frames. Those eggs show the queen has begun laying and the brood cycle is underway.
If you find only drone brood, cells will bulge from comb. This pattern often means the queen is failing and needs replacement.
- Feed light syrup when wax comb is sparse; sugar helps workers secrete wax and draw comb.
- Remove the empty box and feeder can once the colony fully occupies the hive and foraging starts.
- If the queen is missing or dead, consider uniting the colony with an established hive using the newspaper method to save workers.
“Early, calm checks protect brood and lower swarm risk.”
| Check | When | What to look for |
|---|---|---|
| Queen release | Day 5 | Cage opened; queen present |
| Egg laying | Day 10 | Fresh eggs on frames |
| Comb building | First 2 weeks | Wax drawn; feed syrup if weak |
| Uniting option | If queen absent | Newspaper method with established hive |
For further seasonal care and timing, consult this seasonal tasks guide and this step-by-step guide.
Conclusion
A calm final step can turn careful prep into long-term success for your new hive.
Successfully adding package bees is one of the most rewarding parts of modern beekeeping. Plan each move, work steadily, and use the right gear to keep stress low for the colony.
Monitor the hive regularly, especially during the first two weeks. Offer light sugar syrup to support comb building and brood rearing while the workers settle in.
Be patient as the queen is released and the colony draws wax. For a practical refresher, review obtaining and installing a package of for clear steps and tips.